Chapter 04 · Vim Editor, Shell Scripting & Cron Jobs
Chapter Overview
This chapter begins by introducing how to use the Vim editor to write and modify documents. Through step-by-step configuration of files like hostnames, system network interfaces, and software repositories, it helps deepen your understanding of various commands, shortcuts, and modes within the Vim editor. Next, the chapter revisits key concepts from Chapters 2 and 3, demonstrating the flexible integration of Linux commands, logical operators, and Shell scripts.
It also guides readers in receiving user input through multiple methods within Shell scripts, while evaluating and comparing input values as files, numbers, or strings. Building upon mastery of the three logical operators (AND, OR, NOT), readers will learn conditional statements like if, for, while, and case. Through practice with over ten real-world scripts, they will achieve proficiency in applying these skills in professional settings.
Finally, this chapter demonstrates how to use the at command and the crond scheduling service to set up one-time and recurring system tasks. You'll learn to configure automated tasks based on minute, hour, day, month, and year time dimensions, making daily work more efficient so you can leave the office earlier to spend time with family.
4.1 Vim Text Editor
Vim's release dates back to 1991, with its full name being Vi Improved (see its logo in Figure 4-1). As an enhanced version of the Vi editor, its most significant improvement is the addition of syntax highlighting, which alerts users to promptly correct erroneous code.
During lectures, whenever I needed students to remember key points, I would suddenly raise my voice to keep them alert. One phrase they remember particularly well is: "In Linux, everything is a file, and configuring a service means modifying the parameters in its configuration file." In daily work, document writing is inevitable, and such tasks are completed using text editors. Instructor Liu Chuan wrote this book to help readers truly master Linux system administration methods, not merely achieve a superficial "ability to use an operating system." Therefore, we chose the Vim text editor, which comes pre-installed on all Linux operating systems and is an exceptionally powerful text editor.

Figure 4-1 Vim Logo
Vim's widespread adoption by both vendors and users stems from its three distinct modes—Command Mode, Insert Mode, and Last Line Mode. Each mode supports multiple command shortcuts, significantly boosting productivity. Once users become accustomed to these modes, they find them highly intuitive. To efficiently manipulate text, one must first understand the operational differences between these three modes and how to switch between them (see Figure 4-2).
Command Mode: Controls cursor movement and enables operations like copying, pasting, deleting, and searching text.
Insert Mode: Normal text input.
Last Line Mode: Used for saving or exiting documents, as well as configuring the editing environment.
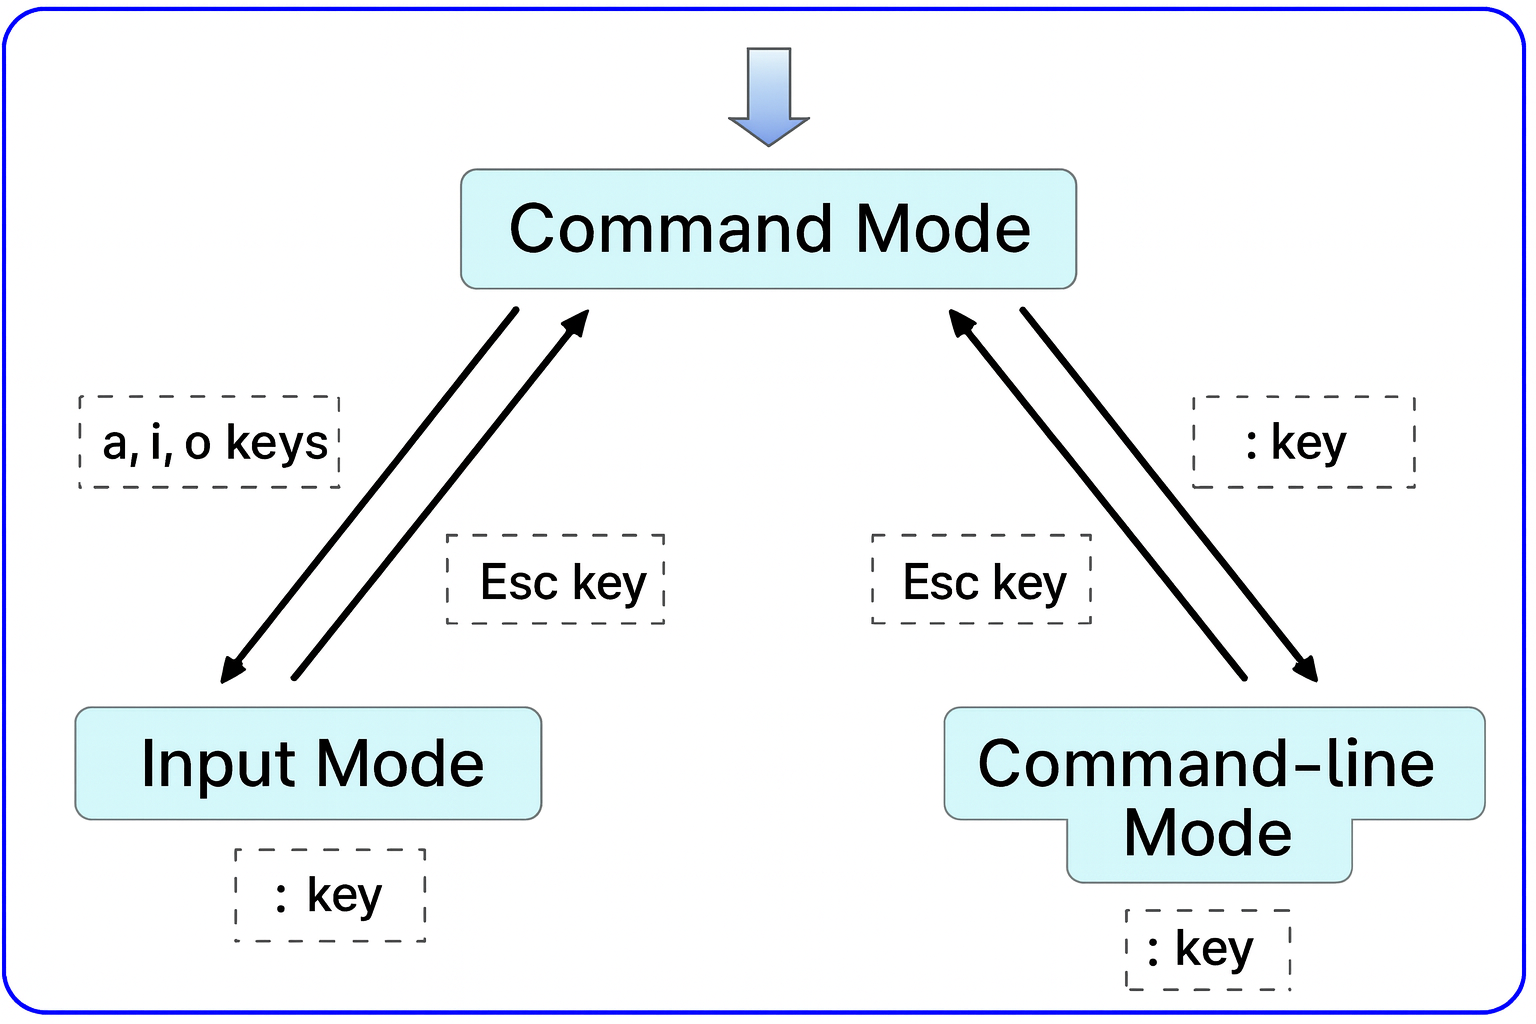
Figure 4-2 Vim Editor Mode Switching Methods
Each time Vim is launched, it defaults to command mode. To edit documents, you must first switch to insert mode. After editing, return to command mode before entering last line mode to save or exit the document. In Vim, you cannot switch directly from insert mode to last-line mode; you must first return to command mode. Vim incorporates hundreds of built-in commands. To help readers master Vim more quickly, Table 4-1 summarizes the most frequently used commands in command mode.
Table 4-1 Most Common Commands in Command Mode
| Command | Function |
|---|---|
| dd | Delete (cut) the entire line at the cursor position |
| 5dd | Delete (cut) 5 lines starting from the cursor position |
| yy | Copy the entire line at the cursor position |
| 5yy | Copy 5 lines starting from the cursor position |
| n | Display the next occurrence of the search string |
| N | Display the previous occurrence of the search string |
| u | Undo the previous operation |
| p | Paste previously deleted (dd) or copied (yy) data after the cursor |
The command-line mode is primarily used for saving or exiting files, configuring the Vim editor's environment, executing external Linux commands, or jumping to specific line numbers within documents. To switch to command-line mode, simply type a colon (:) in command mode. Common commands in command-line mode are listed in Table 4-2.
Table 4-2 Most Common Commands in Last Line Mode
| Command | Function |
|---|---|
| :w | Save |
| :q | Quit |
| :q! | Force quit (discard changes) |
| :wq! | Save and exit forcefully |
| :set nu | Display line numbers |
| :set nonu | Hide line numbers |
| :command | Execute the specified command |
| :integer | Jump to the specified line |
| :s/one/two | Replace the first occurrence of "one" on the current line with "two" |
| :s/one/two/g | Replace all occurrences of one with two on the current line |
| :%s/one/two/g | Replace all occurrences of one with two throughout the entire file |
| ?string | Search for the string starting from the bottom of the text |
| /string | Search for the string starting from the top of the text |
Everyone should make a habit of using the Vim editor daily. Once you master its various commands, editing configuration files becomes significantly more efficient. In 2011, a geek named Aleksandr Levchuk pursued ultimate efficiency by launching an experimental project called Vim Clutch (see Figure 4-3). He purchased a pair of clutch pedals resembling car accelerator and brake pedals, modified them, and connected them to his computer via USB. Pressing the brake pedal with his left foot entered insert mode (i), while pressing the accelerator pedal with his right foot saved the file (wq!). His passion for Linux and Vim was truly remarkable!

Figure 4-3 Actual photo of the Vim Clutch device
4.1.1 Writing a Simple Document
By now, you've acquired the theoretical foundation for writing documents in Linux. Next, let's create a simple script document together. Instructor Liu Chuan will annotate every step and keystroke. If you forget the function of any shortcut commands, you can revisit the previous sections for review.
The first step in creating a text document is naming it. Here, we'll name it practice.txt. If the document already exists, it will be opened; if not, a temporary input file will be created, as shown in Figure 4-4.
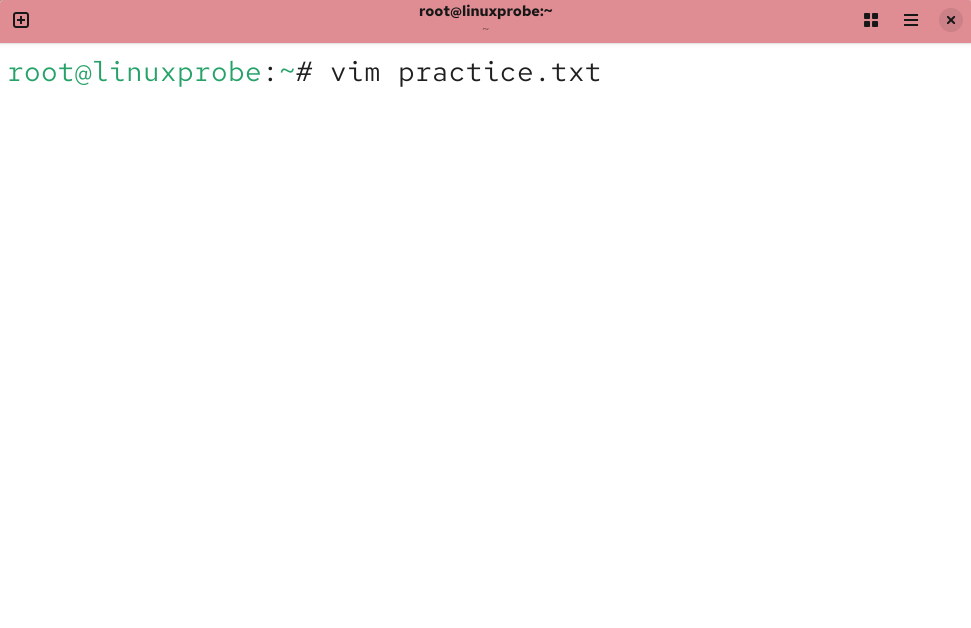
Figure 4-4 Attempting to write a text document
After opening the practice.txt file, Vim defaults to command mode. At this stage, only commands can be executed; text input is restricted. To compose the document, we must switch to insert mode.
As mentioned in Figure 4-2, you can use the a, i, or o keys to switch from command mode to insert mode. The a key inserts text after the cursor, the i key inserts text at the cursor position, and the o key creates a new blank line below the cursor. Press the i key to enter insert mode, as shown in Figure 4-5.
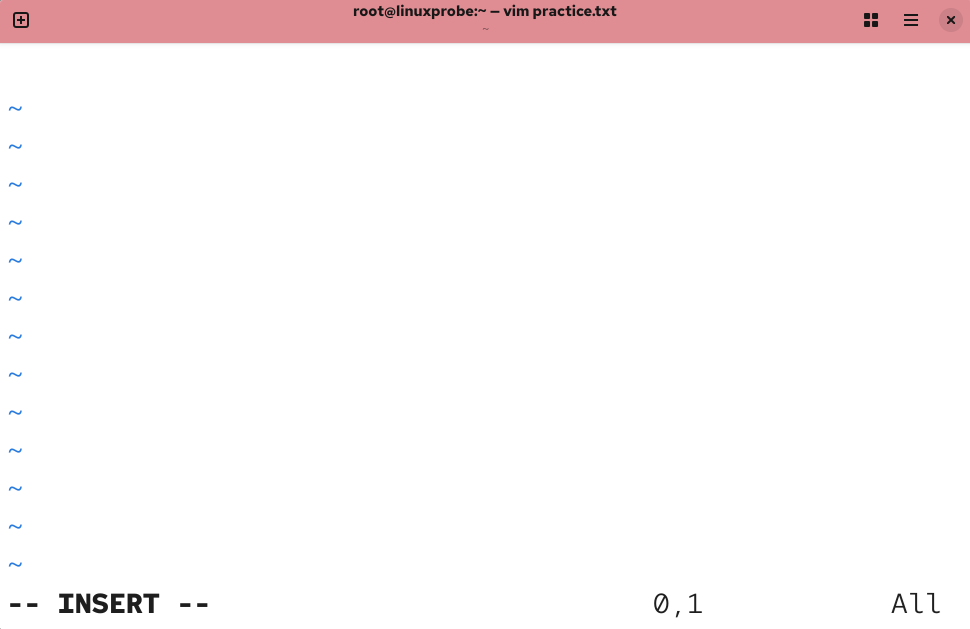
Figure 4-5 Switching to the editor's insert mode
Once in insert mode, you can freely type text content. The Vim editor will not interpret your input as commands, as shown in Figure 4-6.
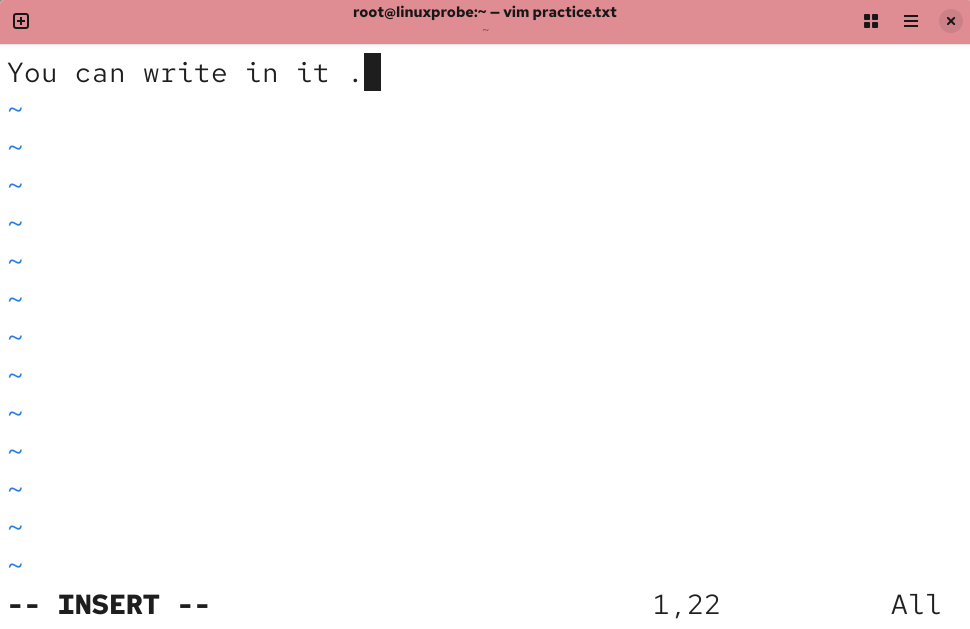
Figure 4-6 Entering text content in the editor
After writing your text, to save and exit, you must first press the Esc key on your keyboard to return from input mode to command mode, as shown in Figure 4-7. Then enter :wq! to switch to last line mode, where you can complete the save and exit operation, as shown in Figure 4-8.
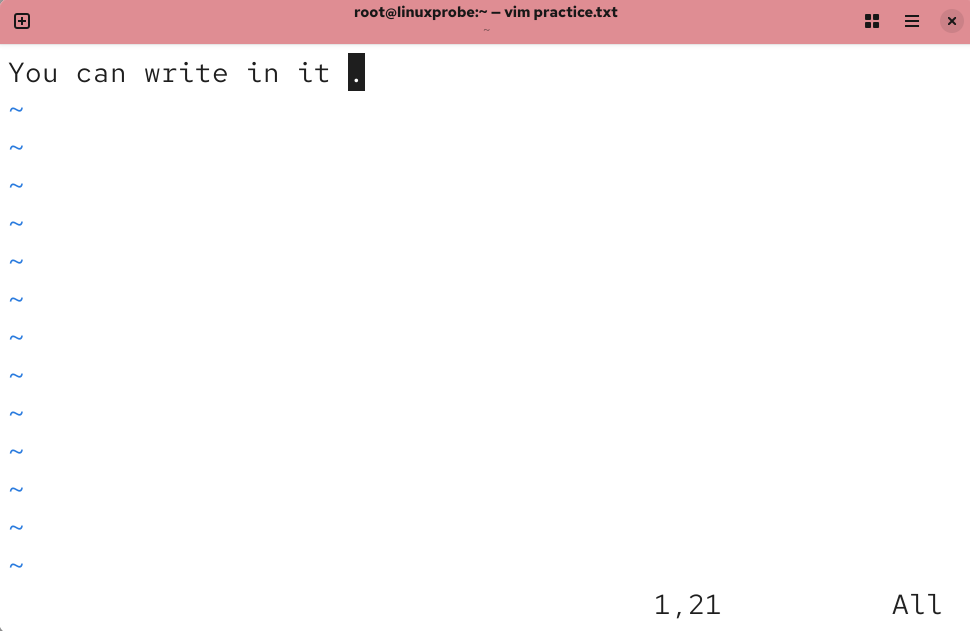
Figure 4-7 Switching to command mode in the editor
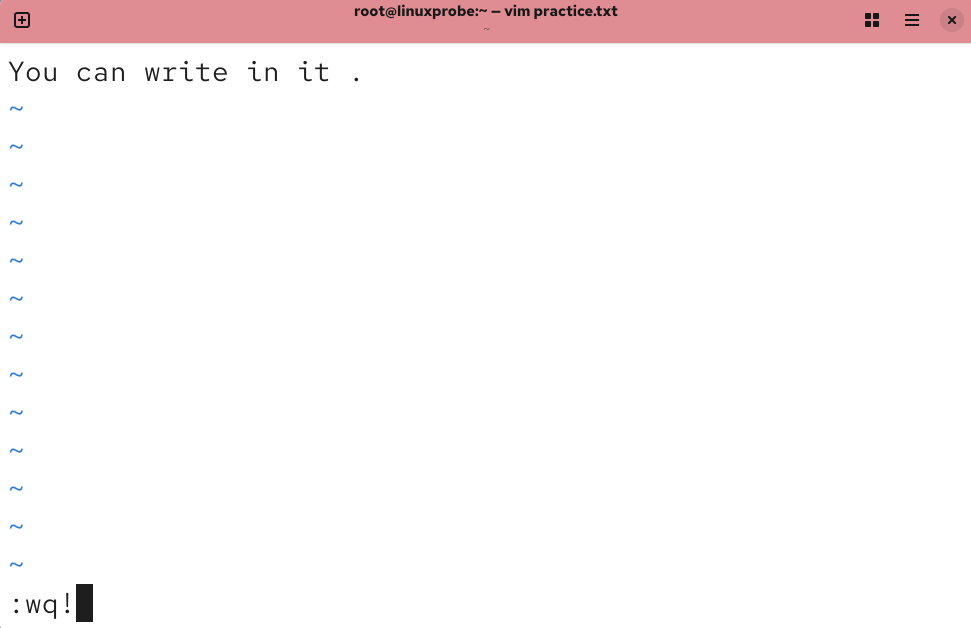
Figure 4-8 Switching to last line mode in the editor
Tips:
Please carefully observe the prompt messages in the lower-left corner of Figures 4-6 through 4-8. Different prompts appear in different modes.
Entering the command :wq! in last line mode forces saving and exiting the document. You can then use the cat command to view the saved content, as shown in Figure 4-9.

Figure 4-9 Viewing Document Content
Pretty simple, right?! Let's continue editing this document. Since we need to append content below the existing text, pressing the o key in command mode to enter insert mode is more efficient. The operation is shown in Figures 4-10 to 4-12.
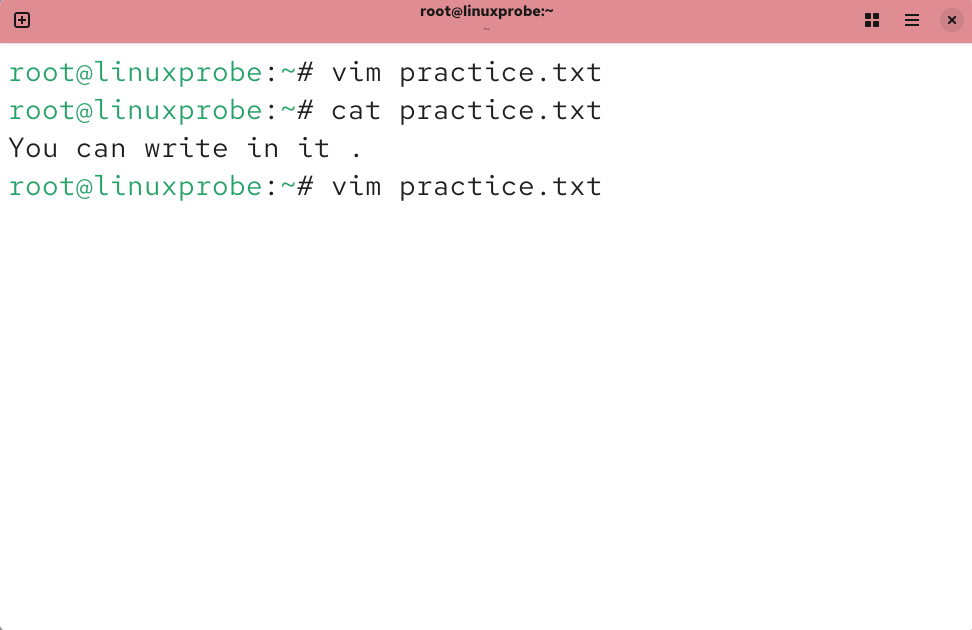
Figure 4-10 Editing the document again with the Vim editor
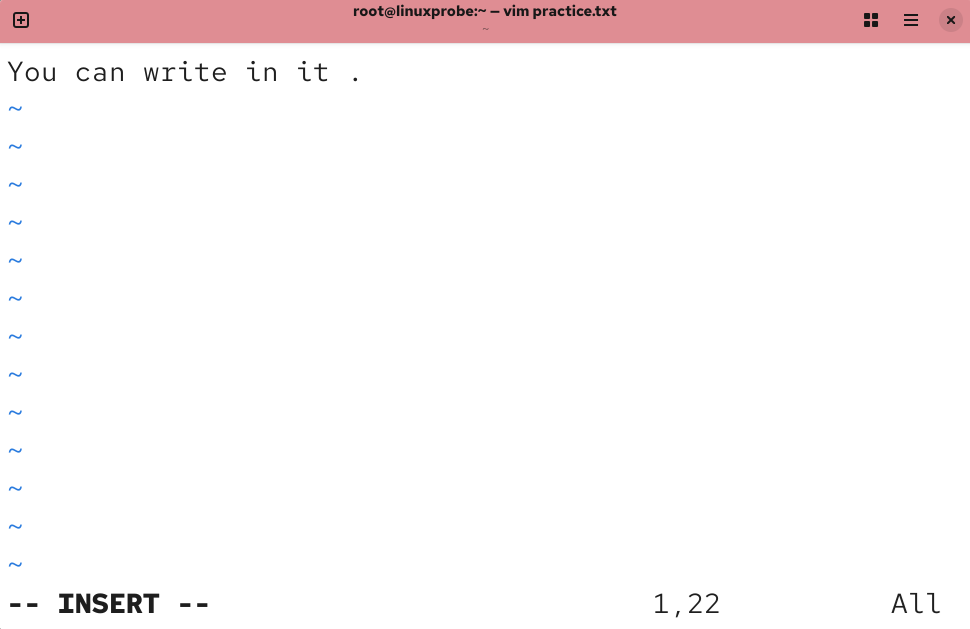
Figure 4-11: Entering input mode in the Vim editor
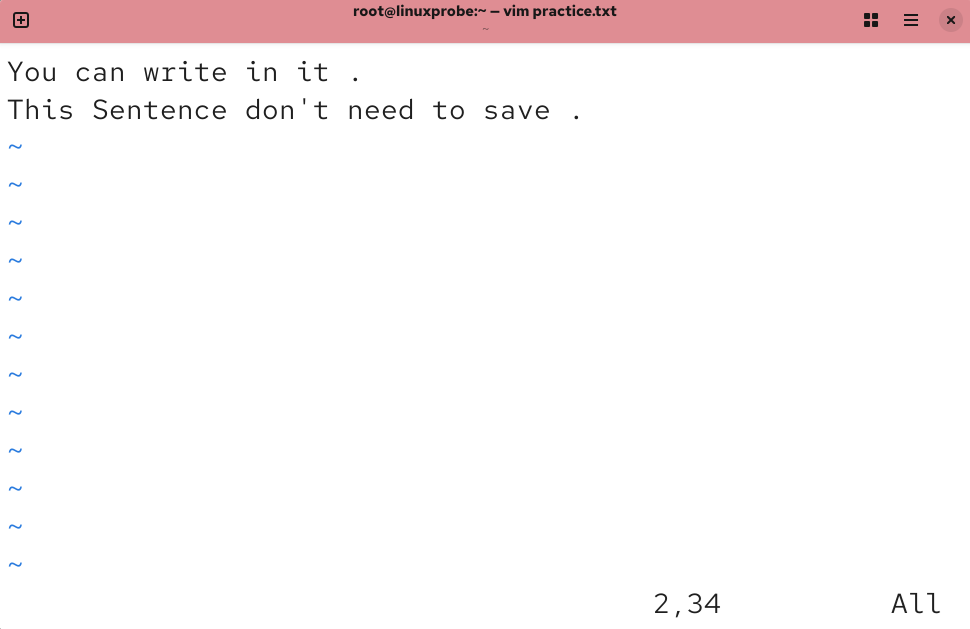
Figure 4-12: Appending a line of text
Since text content has been modified, Vim will refuse to exit the document without saving. Only a forced exit can terminate the input session, as shown in Figures 4-13 to 4-15.
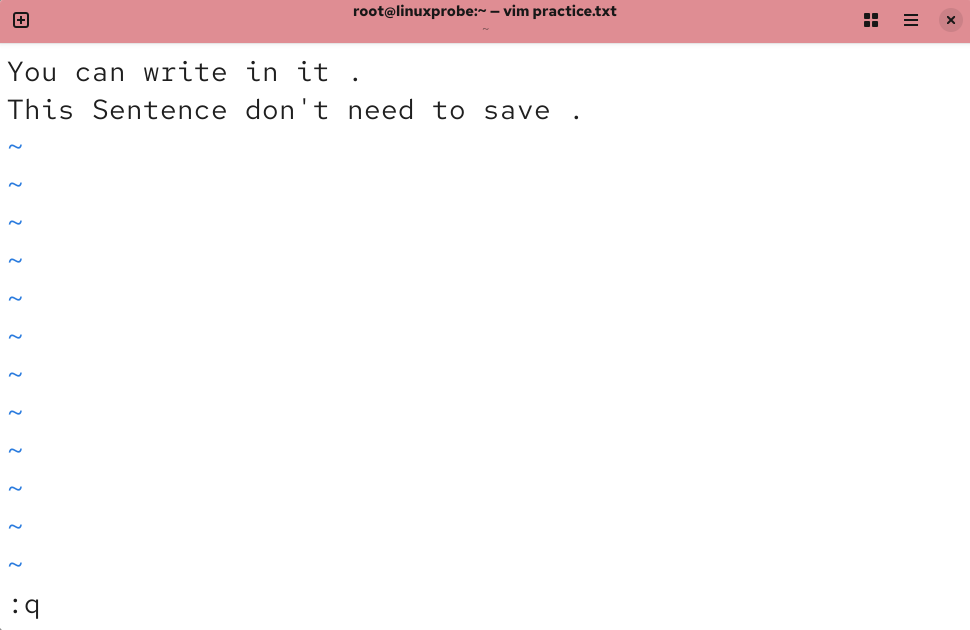
Figure 4-13 Exiting the text editor
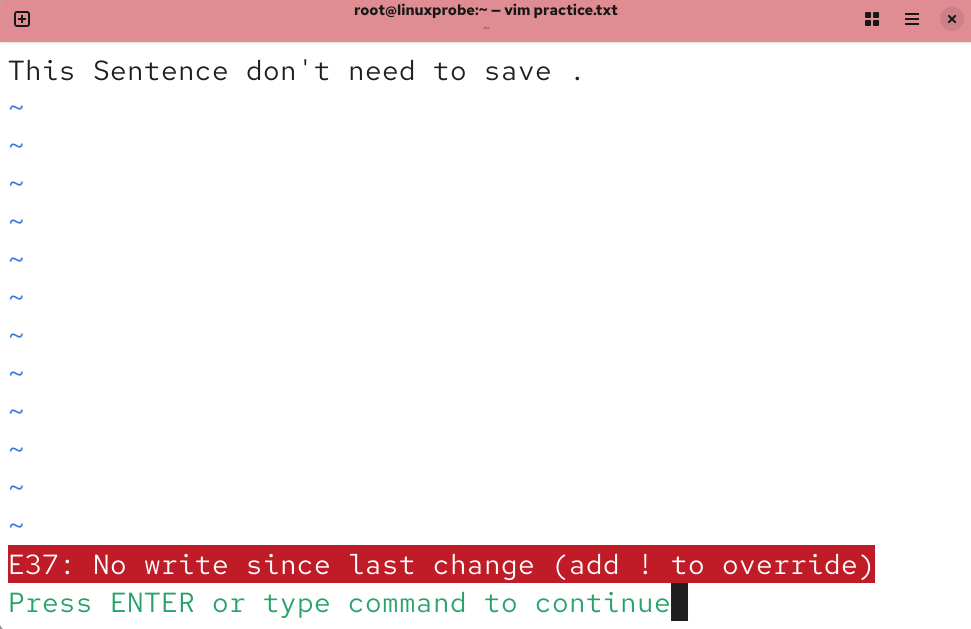
Figure 4-14 Exit operation denied due to modified file
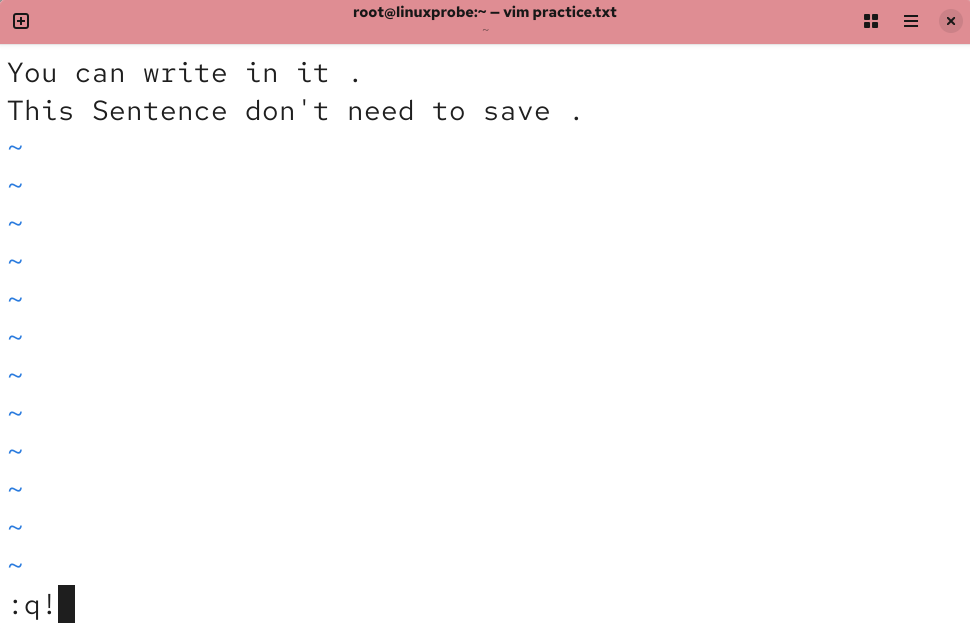
Figure 4-15 Forcing Exit from Text Editor
By now, you've gained some hands-on experience with the Vim editor and should realize it's not as daunting as imagined. Upon reviewing the text content, you'll notice that the appended input hasn't been saved, as shown in Figure 4-16.
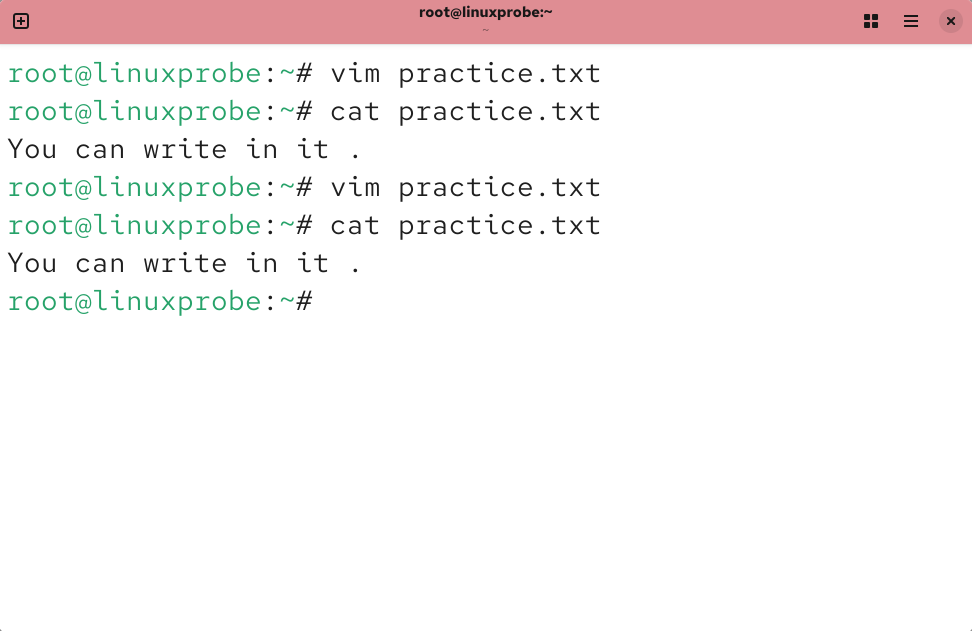
Figure 4-16 Viewing the final edited text content
After learning the theory and writing your own text, aren't you feeling a sense of accomplishment? Next, we'll guide you through three progressively challenging tasks. To truly master Vim, complete each one thoroughly—no shortcuts allowed. If you forget any commands during these tasks, feel free to revisit earlier sections for review.
Tips:
It's perfectly normal if the following experiments don't succeed. Focus your efforts on the Vim editor itself—successfully modifying configuration files is already a great achievement!
4.1.2 Configuring the Hostname
To facilitate locating specific hosts or distinguishing them within a local area network, besides an IP address, you must configure a hostname for the host. Hosts can then access each other using this hostname, similar to using a domain name. In Linux systems, the hostname is typically stored in the /etc/hostname file. Next, modify the contents of the /etc/hostname configuration file to linuxprobe.com. Follow these steps:
Step 1: Open and edit the hostname in the /etc/hostname file using the Vim editor.
Step 2: Delete the original hostname and add linuxprobe.com. Note: After modifying the hostname file with Vim, execute the command
:wq!in last line mode to save and exit the document.Step 3: Use the
hostnamecommand to verify the modification succeeded.
root@linuxprobe:~# vim /etc/hostname
linuxprobe.com
The hostname command displays the current hostname. However, changes may not take effect immediately. If the original hostname persists after modification, restart the virtual machine and verify:
root@linuxprobe:~# hostname
linuxprobe.com
4.1.3 Configuring Network Interface Information
Correctly configured IP addresses for network interfaces are essential for communication between hosts. In Linux, everything is a file, so configuring network services essentially involves editing network interface configuration files. This task not only helps you practice using the Vim editor but also lays a solid foundation for learning various service configurations in Linux later on.Upon thoroughly studying this book, you will feel a strong sense of accomplishment. The foundational sections provide a solid grounding, while subsequent content maintains nearly consistent network interface IP addresses and operating environments. This ensures you can fully focus on learning various service programs without worrying about system environment issues.
If you possess some operational experience or are familiar with earlier Linux systems, you may encounter some differences that take some getting used to while learning this book. In RHEL 5 and RHEL 6, the network interface configuration file prefix is eth, with the first interface named eth0, the second eth1, and so on.In RHEL 7, the prefix for network interface configuration files changed to ifcfg, combined with the interface name to form the full filename, e.g., ifcfg-eno16777736. In RHEL 8, RHEL 9, and RHEL 10, interface names were further modified to a format like ens160. Fortunately, aside from the filename change, there are no significant differences in the network interface parameters.
Assuming we have a network interface named ens160, the steps to configure it for automatic startup at boot and manually specify its IP address, subnet, gateway, and other details are as follows.
Step 1: First, navigate to the /etc/NetworkManager/system-connections directory, where all network interface configuration files are stored.
Step 2: Use the Vim editor to modify the ens160.nmconnection file. Enter the following configuration parameters one by one, then save and exit (the Chinese text is for reference only—do not include it in the file). Since hardware and architecture vary per device, use the ifconfig command to verify your network interface's default name.
[connection]
Network Interface ID: id=ens160Device Type: type=ethernet
Interface Name: interface-name=ens160
Autostart: autoconnect=true
[ipv4]
IP Address and Subnet Mask: address1=192.168.10.10/24
Address Assignment Method: method=manual
Gateway Address: gateway=192.168.10.10
DNS Address: dns=192.168.10.10
Step 3: Restart network services and test network connectivity.
Let's get started!
Navigate to the directory containing the network interface configuration file, then edit the interface configuration file and enter the following information:
root@linuxprobe:~# cd /etc/NetworkManager/system-connections
root@linuxprobe:/etc/NetworkManager/system-connections# vim ens160.nmconnection
[connection]
id=ens160
type=ethernet
interface-name=ens160
autoconnect=true
[ipv4]
address1=192.168.10.10/24
method=manual
gateway=192.168.10.10
dns=192.168.10.10
Execute the command to restart the network interface device, then use the ping command to test network connectivity.Since the ping command does not terminate automatically in Linux systems, manually press Ctrl+C to force the process to stop.
root@linuxprobe:/etc/NetworkManager/system-connections# nmcli connection up ens160
Connection successfully activated (D-Bus active path: /org/freedesktop/NetworkManager/ActiveConnection/8)
root@linuxprobe:/etc/NetworkManager/system-connections# nmcli connection reload
root@linuxprobe:/etc/NetworkManager/system-connections# ping 192.168.10.10
PING 192.168.10.10 (192.168.10.10) 56(84) bytes of data.
64 bytes from 192.168.10.10: icmp_seq=1 ttl=64 time=0.079 ms
64 bytes from 192.168.10.10: icmp_seq=2 ttl=64 time=0.050 ms
64 bytes from 192.168.10.10: icmp_seq=3 ttl=64 time=0.083 ms
64 bytes from 192.168.10.10: icmp_seq=4 ttl=64 time=0.038 ms
^C
--- 192.168.10.10 ping statistics ---
4 packets transmitted, 4 received, 0% packet loss, time 3092ms
rtt min/avg/max/mdev = 0.038/0.062/0.083/0.019 ms
root@linuxprobe:/etc/NetworkManager/system-connections#
Pretty cool, huh?! Of course, if this experiment fails, don't get discouraged—later chapters will cover it in detail. For now, just keep your focus on the Vim editor.
4.1.4 Configuring Software Repositories
As mentioned earlier, software repositories simplify RPM package management and automatically analyze required packages and dependencies. Think of YUM or DNF as massive software warehouses storing nearly every common tool. Simply specify the package name, and the system handles the rest.
To utilize software repositories, you must first set them up and define their configuration rules. Since Chapter 6 covers Linux storage structures and device mounting operations, we'll keep the focus on learning the Vim editor for now. Don't worry if you encounter unfamiliar parameters; they will be explained in detail later.
The configuration files used by YUM and DNF are compatible with each other. This means that once you fill in the configuration file information, commands for both repositories will work correctly. It is recommended to use dnf as the software installation command in RHEL 10, as it offers higher efficiency and supports multithreaded simultaneous software installation.
The general steps for setting up and configuring software repositories are as follows.
Step 1: Navigate to the /etc/yum.repos.d directory, where all repository configuration files are stored.
Step 2: Use the Vim editor to create a new configuration file named rhel10.repo (the filename can be arbitrary, but the suffix must be .repo). Enter the following configuration parameters one by one, then save and exit.
Repository Name: A unique identifier that must not conflict with other software repositories.
Description (name): Descriptive text indicating the repository's purpose.
Repository Location (baseurl): Specifies how packages are retrieved. Can use FTP or HTTP downloads, or point to a local file (requires adding the
fileparameter).Enabled (enabled): Determines whether this source is accessible; 1 enables it, 0 disables it.
Verify (gpgcheck): Configures whether files from this source are verified; 1 enables verification, 0 disables it.
Public Key Location (gpgkey): If verification is enabled via the above parameter, specify the location of the public key file here. Omit if verification is disabled.
Step 3: Mount the CD at the location specified in the configuration parameters and add the mount entry to the /etc/fstab file.
Step 4: Verify the repository is accessible by running dnf install httpd -y. Let's get started!
Navigate to the /etc/yum.repos.d directory and create the repository configuration file:
root@linuxprobe:~# cd /etc/yum.repos.d
root@linuxprobe:/etc/yum.repos.d# vim rhel10.repo
[BaseOS]
name=BaseOS
baseurl=file:///media/cdrom/BaseOS
enabled=1
gpgcheck=0
[AppStream]
name=AppStream
baseurl=file:///media/cdrom/AppStream
enabled=1
gpgcheck=0
After creating the mount point, perform the mount operation and configure it for automatic mounting at boot (see Chapter 6 for details):
root@linuxprobe:/etc/yum.repos.d# mkdir -p /media/cdrom
root@linuxprobe:/etc/yum.repos.d# mount /dev/cdrom /media/cdrom
mount: /media/cdrom: WARNING: device write-protected, mounted read-only.
root@linuxprobe:/etc/yum.repos.d# vim /etc/fstab
[... output omitted ...]
/dev/cdrom /media/cdrom iso9660 defaults 0 0
Attempt to install the web service using the dnf command from the software repository. The package name is httpd. If "Complete!" appears after installation, it indicates the configuration is correct:
root@linuxprobe:/etc/yum.repos.d# dnf install httpd -y
Updating Subscription Management repositories.
BaseOS                                                18 MB/s | 1.7 MB     00:00
AppStream                                             80 MB/s | 6.3 MB     00:00
Dependencies resolved.
[... output omitted ...]
Installed:
  apr-1.7.0-11.el9.x86_64                     apr-util-1.6.1-20.el9.x86_64
  apr-util-bdb-1.6.1-20.el9.x86_64            apr-util-openssl-1.6.1-20.el9.x86_64
  httpd-2.4.53-11.el9_2.4.x86_64              httpd-core-2.4.53-11.el9_2.4.x86_64
  httpd-filesystem-2.4.53-11.el9_2.4.noarch   httpd-tools-2.4.53-11.el9_2.4.x86_64
  mod_http2-1.15.19-4.el9_2.4.x86_64          mod_lua-2.4.53-11.el9_2.4.x86_64
  redhat-logos-httpd-90.4-1.el9.noarch

Complete!
For those accustomed to using the yum command to install software, there's no need to feel stressed. You can still use the yum install httpd command to install software, simply replacing dnf with yum. This demonstrates that RHEL 10 maintains excellent compatibility with user habits.
4.2 Writing Shell Scripts
The Shell terminal interpreter acts as an "interpreter" between humans and computer hardware. Serving as the communication bridge between users and the Linux system's internals, it supports various variables and parameters while also providing control structures like loops and branches—features typically found in high-level programming languages. To utilize these Shell functionalities correctly, precise command execution is crucial. Shell script commands operate in two primary modes:
Interactive: The system executes each command immediately as the user inputs it.
Batch: The user writes a complete Shell script beforehand, and the Shell executes all commands within the script at once.
Shell scripts not only utilize many Linux commands covered earlier but also involve syntax rules like regular expressions, pipe symbols, and data stream redirection. We also need to modularize internal functions and process them through logical statements to ultimately form the Shell scripts we encounter daily.
By examining the SHELL variable, we find the current system defaults to Bash as its command-line terminal interpreter:
root@linuxprobe:~# echo $SHELL
/bin/bash
4.2.1 Writing Simple Scripts
After reading the complex description of Shell scripts above, you might feel overwhelmed. However, that section outlined principles for advanced Shell scripting. In reality, simply writing Linux commands sequentially into a file using the Vim editor already constitutes a basic script.
For example, to display the current working directory and list all files with their attributes, a script might look like this:
root@linuxprobe:~# vim example.sh
#!/bin/bash
#For Example by linuxprobe.com
pwd
ls -al
Shell script filenames can be arbitrary, but to avoid confusion with regular files, it's recommended to include the .sh suffix to indicate it's a script file.
The example.sh script above actually contains three distinct elements:
- The first line (
#!) declares which shell interpreter to use. - The second line (
#) is a comment that describes the script's purpose. - The third and fourth lines are executable statements—the Linux commands we normally run.
You don't believe a script program can be written this simply?! Run it and see the results:
root@linuxprobe:~# bash example.sh
/root
total 44
dr-xr-x---. 14 root root 4096 Mar 12 23:53 .
dr-xr-xr-x. 18 root root  235 Mar 10 02:32 ..
-rw-------.  1 root root 1019 Mar 10 02:37 anaconda-ks.cfg
-rw-------.  1 root root   52 Mar 10 10:51 .bash_history
-rw-r--r--.  1 root root   18 Jun 24  2024 .bash_logout
-rw-r--r--.  1 root root  141 Jun 24  2024 .bash_profile
-rw-r--r--.  1 root root  429 Jun 24  2024 .bashrc
………………Partial output omitted………………
Besides using the Bash interpreter command to run shell scripts directly as shown above, the second method involves executing scripts by entering their full path. By default, this will trigger an error due to insufficient permissions. Simply grant the script executable permissions (see Chapter 5 for details). New Linux learners needn't rush—you can perform this experiment after covering user identities and permissions in the next chapter.
root@linuxprobe:~# ./example.sh
bash: ./example.sh: Permission denied
root@linuxprobe:~# chmod u+x example.sh
root@linuxprobe:~# ./example.sh
/root
total 44
dr-xr-x---. 14 root root 4096 Mar 12 23:53 .
dr-xr-xr-x. 18 root root  235 Mar 10 02:32 ..
-rw-------.  1 root root 1019 Mar 10 02:37 anaconda-ks.cfg
-rw-------.  1 root root   52 Mar 10 10:51 .bash_history
-rw-r--r--.  1 root root   18 Jun 24  2024 .bash_logout
-rw-r--r--.  1 root root  141 Jun 24  2024 .bash_profile
-rw-r--r--.  1 root root  429 Jun 24  2024 .bashrc
………………Partial output omitted………………
4.2.2 Receiving User Parameters
However, scripts like the one above can only execute predefined functions, which is rather rigid. To better meet users' real-time needs and enable flexible task completion, shell scripts must be able to receive user-input parameters, just like when executing commands previously.
For example, when executing a command, the output differs depending on whether parameters are provided:
root@linuxprobe:~# wc -l anaconda-ks.cfg
40 anaconda-ks.cfg
root@linuxprobe:~# wc -c anaconda-ks.cfg
1019 anaconda-ks.cfg
root@linuxprobe:~# wc -w anaconda-ks.cfg
92 anaconda-ks.cfg
This means commands must not only accept user input but also discern between different inputs to invoke corresponding functionalities.
In fact, the shell scripting language in Linux systems has long addressed these needs by providing built-in variables for receiving arguments, separated by spaces.For example, $0 corresponds to the name of the current shell script program, $# indicates the total number of arguments, $* represents all argument values, $? displays the exit status of the last command executed, while $1, $2, $3, etc., correspond to the Nth argument value, as shown in Figure 4-17.

Figure 4-17 Parameter Position Variables in Shell Scripts
After the theory, let's practice. Try writing a script example to see the actual effect by referencing the variables above:
root@linuxprobe:~# vim Example.sh
#!/bin/bash
echo "The current script name is $0"
echo "There are $# parameters in total: $*."
echo "The first argument is $1, the fifth is $5."
root@linuxprobe:~# bash Example.sh one two three four five six
The current script name is Example.sh
There are 6 arguments in total: one two three four five six.
The first argument is one, the fifth is five.
4.2.3 Validating User Input
Learning is a journey of progression, moving from the basics to more advanced concepts. After mastering Linux commands, understanding Shell script syntax and variables, and learning how to receive user input, it's time to advance to the next level—further processing the received user parameters.
As discussed earlier in this book, when executing the mkdir command, the system evaluates user input—specifically, whether the specified directory name already exists. If it does, an error is displayed; otherwise, the directory is automatically created. Shell script conditional testing syntax determines whether an expression holds true. If the condition is true, it returns the number 0; otherwise, it returns a non-zero value. The execution format for conditional testing syntax is shown in Figure 4-18.Remember: Both sides of the conditional expression must have a space.
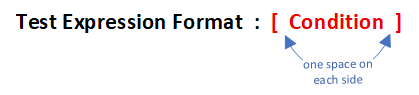
Figure 4-18 Execution Format of Conditional Test Statements
Based on the test object, conditional test statements are commonly categorized into four types: file test statements, logical test statements, integer comparison statements, and string comparison statements.
- File Test Statements
File test statements are structures that use specified conditions to determine whether a file exists or if permissions are met. The operators used and their functions are shown in Table 4-3.
Table 4-3 Operators Used in File Test Statements and Their Functions
| Operator | Function |
|---|---|
| -d | Tests if file is a directory type |
| -e | Tests if file exists |
| -f | Determines if it is a regular file |
| -r | Tests if current user has read permission |
| -w | Tests if current user has write permission |
| -x | Tests if current user has execute permission |
Below, we use the file test statement to determine if /etc/fstab is a directory-type file. Then, we display the return value of the last command executed via the shell interpreter's built-in $? variable. If the return value is 0, the directory exists; if the return value is non-zero, it means it is not a directory or the directory does not exist:
root@linuxprobe:~# [ -d /etc/fstab ]
root@linuxprobe:~# echo $?
1
Next, use the file test statement to determine if /etc/fstab is a regular file. A return value of 0 indicates the file exists and is a regular file:
root@linuxprobe:~# [ -f /etc/fstab ]
root@linuxprobe:~# echo $?
0
- Logical Test Statements
Do you have to type two commands for checks and queries? Actually, you can handle it in one go.
Logical test statements perform logical analysis on test results, enabling different outcomes based on the outcome. For example, the logical "AND" operator in the Shell terminal is &&. This means the command following the operator executes only if the preceding command succeeds. Thus, we can use it to check if the /dev/cdrom file exists and output "Exist" if it does.
root@linuxprobe:~# [ -e /dev/cdrom ] && echo "Exist"
Exist
Beyond logical AND, there is also logical OR. In Linux systems, its operator is ||, meaning the command following the operator will only execute if the preceding command fails. This can be used with the system environment variable USER to determine if the currently logged-in user is non-administrator:
root@linuxprobe:~# echo $USER
root
root@linuxprobe:~# [ $USER = root ] || echo "user"
root@linuxprobe:~# su - linuxprobe
linuxprobe@linuxprobe:~$ [ $USER = root ] || echo "user"
user
The third logical operator is the "not" operator, represented by an exclamation mark (!) in Linux systems. It inverts the result of a conditional test. That is, if the original test result was true, it becomes false; if the original test result was false, it becomes true.
Now, let's switch back to the root administrator account and check if the current user is a non-administrator. Due to the double negation, the result becomes true, and the predefined message is output normally:
linuxprobe@linuxprobe:~$ exit
root@linuxprobe:~# [ ! $USER = root ] || echo "administrator"
administrator
The exclamation mark should precede the conditional statement to negate the entire logical expression. Avoid writing it as $USER != root, as != denotes the inequality operator (≠). While the execution outcome is identical, this omits the logical relationship—a point requiring careful attention.
Tips:
&& is logical "AND"—the subsequent statement executes only if the preceding one succeeds.
|| is logical "OR"—the subsequent statement executes only if the preceding one fails.
! is logical "NOT"—it inverts the logical test result; true becomes false, and false becomes true.
When it comes to writing technical books, there are generally two approaches: either help readers truly grasp the technology, or make readers feel like they understand it. This is why many accessible books on the market give readers a sense of rapid progress after finishing them. This is largely intentional on the author's part, aiming to make you feel that "the book is packed with valuable content and I've gained a lot." However, once you enter the workplace, these shortcomings become apparent and can lead to significant setbacks.Therefore, the author has decided to increase the difficulty level by providing readers with a comprehensive example. This serves two purposes: to summarize the preceding knowledge and to help readers solidify their foundation, enabling them to use logical operators more flexibly in future work.
We are currently logged in as the root administrator.The execution sequence of the following example is as follows: First, it checks whether the USER variable name of the currently logged-in user equals root. Then, it uses the logical NOT operator to invert the result, effectively determining whether the logged-in user is a non-administrator. Finally, if the condition is met, the logical AND operator outputs "user"; if not, the logical OR operator outputs "root".
root@linuxprobe:~# [ ! $USER = root ] && echo "user" || echo "root"
root
In this shell script's logical operations,
&&and||follow short-circuit evaluation rules. The subsequent||operator only executes if the preceding condition on the left side of&&evaluates to false.
- Integer Comparison Statements
Integer comparison statements in Shell scripts determine the relationship between two integer values. Using specific comparison operators, they assess numerical magnitude and equality to execute different operational logic based on the outcome.It is crucial to note: Integer comparison operators are exclusively for numerical operations. They cannot be used with strings, files, or other non-numeric content. Additionally, everyday symbols like equals, greater-than, or less-than should not be assumed to work for comparison. The equals sign conflicts with the assignment command, while greater-than and less-than conflict with output and input redirection commands, respectively. Therefore, standardized integer comparison operators must always be used.The available integer comparison operators for integer value comparison statements are shown in Table 4-4.
Table 4-4 Available Integer Comparison Operators
| Operator | Function |
|---|---|
| -eq | Equal to |
| -ne | Not equal to |
| -gt | Greater than |
| -lt | Less than |
| -le | Less than or equal to |
| -ge | Greater than or equal to |
Let's try it out. First, test whether 10 is greater than 10 and whether 10 is equal to 10 (judge by the output return value):
root@linuxprobe:~# [ 10 -gt 10 ]
root@linuxprobe:~# echo $?
1
root@linuxprobe:~# [ 10 -eq 10 ]
root@linuxprobe:~# echo $?
0
Section 2.4 previously covered the free command, which retrieves information about currently used and available memory.Next, we'll first use the free -m command to view memory usage (in MB), then filter lines related to available memory using grep Mem:, and finally retain only the fourth column with awk \'\{print \$4\}\'. This demonstration is somewhat challenging, but once understood, it proves quite interesting and may even prove useful in system administration work.
root@linuxprobe:~# free -m
               total        used        free      shared  buff/cache   available
Mem:            3879        1370        2008          14         746        2509
Swap:           2047           0        2047
root@linuxprobe:~# free -m | grep Mem:
Mem:            3879        1371        2006          14         746        2508
root@linuxprobe:~# free -m | grep Mem: | awk '{print $4}'
2006
To incorporate this command into a shell script, assign the output to a variable for easy reuse by other commands:
root@linuxprobe:~# FreeMem=`free -m | grep Mem: | awk '{print $4}'`
root@linuxprobe:~# echo $FreeMem
2006
The commands and steps above for obtaining available memory might be a bit advanced. Don't worry if you don't fully grasp them yet—the real focus comes next.Use the logical NOT operator to check if the available memory value is less than 2024. If so, it will display "Insufficient Memory":
root@linuxprobe:~# [ $FreeMem -lt 2024 ] && echo "Insufficient Memory"
Insufficient Memory
- String Comparison Statements
String comparison statements determine whether a string is null or if two strings are identical. They are frequently used to check if a variable is undefined (i.e., contains null values) and are relatively straightforward to understand. Common operators in string comparisons are shown in Table 4-5.
Table 4-5 Common String Comparison Operators
| Operator | Functionality |
|---|---|
| = | Compares if string contents are identical |
| != | Compares if string contents are different |
| -z | Determines if string content is null |
Next, we check whether the String variable is null to determine if it has been defined:
root@linuxprobe:~# [ -z $String ]
root@linuxprobe:~# echo $?
0
Now let's incorporate logical operators. When the environment variable LANG (storing the current locale) is not English (en_US), the logical test succeeds and outputs "Not en_US":
root@linuxprobe:~# echo $LANG
en_US.UTF-8
root@linuxprobe:~# [ ! $LANG = "en_US" ] && echo "Not en_US"
Not en_US
4.3 Flow Control Statements
Although we've learned how to use Linux commands, pipes, redirection, and conditional statements to write basic shell scripts, these scripts aren't suitable for real production environments. The reason is their lack of flexibility—they can't adjust command execution based on actual work requirements or automatically loop based on certain conditions. In other words, they can't adapt to changing circumstances.
Typically, Shell scripts execute sequentially from top to bottom. While this approach is highly efficient, if one command fails, subsequent commands are affected. Suppose one day you meet someone special and silently plan the following in your mind (see Figure 4-19).

Figure 4-19 Mental Blueprint
After meeting and chatting, you realize it's not a good fit. Subsequent steps like "ask for their phone number," "have dinner together," and "watch a movie together" must be canceled, requiring you to switch to other activities. This is where conditional statements come in to help adjust subsequent decisions.
Next, we'll explore how to write more complex and powerful Shell scripts using four flow control statements: if, for, while, and case.To enhance practicality and engagement—making learning enjoyable—I'll focus on diverse, functional script examples rather than repeatedly tweaking a single template. While patchwork examples convey theory, they hinder creative thinking and real-world application.
4.3.1 if Conditional Statements
if conditional statements enable scripts to automatically execute commands based on actual circumstances. Technically, if statements are categorized into single-branch, double-branch, and multi-branch structures, with complexity increasing incrementally alongside flexibility.
A single-branch if statement consists of the keywords if, then, and fi, executing predefined commands only when the condition is met—equivalent to the colloquial "if... then...". This simplest conditional structure follows the syntax format shown in Figure 4-20.

Figure 4-20 Single-Branch if Conditional Statement
Below, a single-branch if conditional statement checks whether the /media/cdrom directory exists. If it does not exist, the directory is created; otherwise, the conditional check and the entire Shell script execution terminate.
root@linuxprobe:~# vim mkcdrom.sh
#!/bin/bash
DIR="/media/cdrom"
if [ ! -d $DIR ]
then
        mkdir -p $DIR
fi
Since user identity and permissions are covered in Chapter 5, we continue using the "bash script name" method to execute scripts here. Under normal circumstances, the script completes successfully without any output. However, you can use the ls command to verify whether the /media/cdrom directory has been successfully created:
root@linuxprobe:~# bash mkcdrom.sh
root@linuxprobe:~# ls -ld /media/cdrom
drwxr-xr-x. 2 root root 6 Mar 13 00:00 /media/cdrom
A two-branch if statement consists of the keywords if, then, else, and fi. It evaluates a condition; if matched, executes the corresponding command; otherwise, executes another command. This mirrors the spoken pattern "if... then... else...".The syntax format for a two-branch if conditional statement is shown in Figure 4-21.

Figure 4-21 Two-branch if conditional statement
The following uses a double-branch if conditional statement to verify whether a host is online. Based on the returned result, it either displays the host's online status or indicates the host is offline.This script primarily uses the ping command to test network connectivity with the target host. Unlike Windows, the ping command in Linux does not terminate after 4 attempts. To prevent excessive user wait time, the -c parameter specifies the number of attempts, the -i parameter defines the interval between each packet transmission, and the -W parameter sets the wait timeout.
root@linuxprobe:~# vim chkhost.sh
#!/bin/bash
ping -c 3 -i 0.2 -W 3 $1 &> /dev/null
if [ $? -eq 0 ]
then
        echo "Host $1 is On-line."
else
        echo "Host $1 is Off-line."
fi
We used the $? variable in Section 4.2.3 to display the return value of the last executed command. If the preceding statement succeeds, $? displays 0; otherwise, it shows a non-zero value (possibly 1 or 2, depending on the system version).Therefore, we can use integer comparison operators to check if $? equals 0, thereby determining the final outcome of that statement. Here, the server IP address is 192.168.10.10. Let's verify the script's functionality:
root@linuxprobe:~# bash chkhost.sh 192.168.10.10
Host 192.168.10.10 is On-line.
root@linuxprobe:~# bash chkhost.sh 192.168.10.20
Host 192.168.10.20 is Off-line.
Multi-branch if statements consist of the keywords if, then, else, elif, and fi. They perform multiple conditional checks, executing the corresponding command whenever any condition matches. This mirrors the spoken pattern "if... then... if... then...". The multi-branch structure of if conditional statements is the most commonly used conditional structure in practical work. Though relatively complex, it offers greater flexibility. Its syntax format is shown in Figure 4-22.
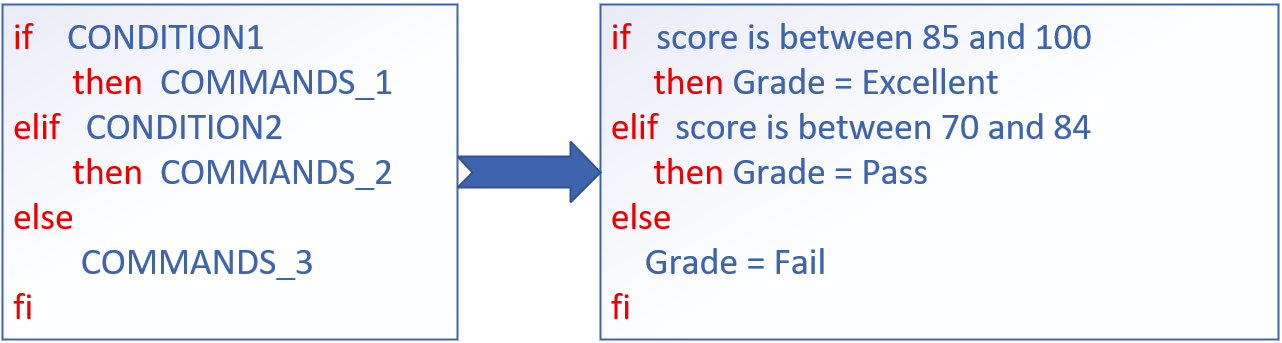
Figure 4-22 Multi-branch if conditional statement
The following example uses a multi-branch if statement to determine which performance range a user's input score falls into, then outputs prompts like "Excellent," "Pass," or "Fail." In Linux systems, the read command is used to capture user input, assigning the received data to a specified variable. The -p parameter displays prompts to the user.
In the following script example, the message "Excellent" is output only when the user's score is greater than or equal to 85 and less than or equal to 100. If the score does not meet this condition (i.e., the match fails), the script continues to check whether the score is greater than or equal to 70 and less than or equal to 84. If so, the message "Pass" is output.If both attempts fail (i.e., both matching operations fail), the script outputs "Fail":
root@linuxprobe:~# vim chkscore.sh
#!/bin/bash
read -p "Enter your score(0-100):" GRADE
if [ $GRADE -ge 85 ] && [ $GRADE -le 100 ] ; then
        echo "$GRADE is Excellent"
elif [ $GRADE -ge 70 ] && [ $GRADE -le 84 ] ; then
        echo "$GRADE is Pass"
else
        echo "$GRADE is Fail"
fi
root@linuxprobe:~# bash chkscore.sh
Enter your score(0-100):88
88 is Excellent
root@linuxprobe:~# bash chkscore.sh
Enter your score(0-100):80
80 is Pass
Execute the script. When the user inputs scores of 30 and 200 respectively, the results are as follows:
root@linuxprobe:~# bash chkscore.sh
Enter your score(0-100):30
30 is Fail
root@linuxprobe:~# bash chkscore.sh
Enter your score(0-100):200
200 is Fail
Why does it still display "Fail" when the input score is 200? The reason is simple: neither of the two conditional statements in the script was successfully matched, so the final fallback rule was automatically executed. This shows the script isn't quite perfect yet. Readers are encouraged to enhance this script themselves, adding an "Error" message prompt when users input scores greater than 100 or less than 0.
4.3.2 for Loop Statement
The for loop statement enables scripts to read multiple pieces of information at once and process each one sequentially. When handling data within a defined range, the for loop is the ideal choice. Its syntax format is shown in Figure 4-23.

Figure 4-23 for Loop Statement
Below, we use a for loop to read multiple usernames from a list file, then create user accounts and set passwords for each one. First, create the username list file users.txt, with each username on a separate line. Readers can decide the specific usernames and number of entries:
root@linuxprobe:~# vim users.txt
andy
barry
carl
duke
eric
george
winston
Next, write the Shell script addusers.sh. Within the script, use the read command to capture the password entered by the user, assign it to the PASSWD variable, and display a prompt via the -p parameter. This informs the user that the input will serve as the account password.After executing this script, it will automatically retrieve all usernames from the list file users.txt. It then checks each username using the id username command to view user information. The $? is used to determine if the command executed successfully, meaning whether the user already exists.
root@linuxprobe:~# vim addusers.sh
#!/bin/bash
read -p "Enter the password for these users:" PASSWD
for UNAME in `cat users.txt`
do
        id $UNAME &> /dev/null
        if [ $? -eq 0 ]
        then
                echo "$UNAME , Already exists"
        else
                useradd $UNAME
                echo "$PASSWD" | passwd --stdin $UNAME &> /dev/null
                echo "$UNAME , Create success"
        fi
done
Tips:
/dev/null is a file known as the Linux black hole. Redirecting output to this file is equivalent to deleting data (similar to a trash bin without a recycle function), keeping the user's screen window clean.
Execute the batch user creation shell script addusers.sh. After entering account passwords, the script automatically checks and creates these accounts. Since redundant information is redirected to the /dev/null black hole file via the output redirection symbol, the screen window will typically display only the "Create success" prompt under normal circumstances.
In Linux systems, /etc/passwd is the file that stores user information. To verify whether the script successfully created user accounts, you can open this file and check for newly created user entries.
root@linuxprobe:~# bash addusers.sh
Enter the password for these users:linuxprobe
andy , Create success
barry , Create success
carl , Create success
duke , Create success
eric , Create success
george , Create success
winston , Create success
root@linuxprobe:~# tail -6 /etc/passwd
andy:x:1001:1001::/home/andy:/bin/bash
barry:x:1002:1002::/home/barry:/bin/bash
carl:x:1003:1003::/home/carl:/bin/bash
duke:x:1004:1004::/home/duke:/bin/bash
eric:x:1005:1005::/home/eric:/bin/bash
george:x:1006:1006::/home/george:/bin/bash
winston:x:1007:1007::/home/winston:/bin/bash
Remember that script we used to check if hosts were online when learning about the double-branch if conditional statement? Now that we've mastered the for loop, let's do something cooler—like having the script automatically read a host list from text and test each host for connectivity.
First, create a host list file named ipaddrs.txt, with one IP address per line:
root@linuxprobe:~# vim ipaddrs.txt
192.168.10.10
192.168.10.11
192.168.10.12
Then combine the preceding double-branch if conditional statement with a for loop. This allows the script to automatically read IP addresses (representing hosts) from the host list file ipaddrs.txt and assign them to the HLIST variable. It then tests each host for connectivity by evaluating the return value of the ping command.The "$ (command)" syntax in the script is a shell operator identical to the backtick command escape character from Chapter 3. It executes the command enclosed within parentheses or double quotes. Learning several such new methods while scripting can prove highly useful in your work:
root@linuxprobe:~# vim CheckHosts.sh
#!/bin/bash
HLIST=$(cat ~/ipaddrs.txt)
for IP in $HLIST
do
        ping -c 3 -i 0.2 -W 3 $IP &> /dev/null
        if [ $? -eq 0 ]
        then
                echo "Host $IP is On-line."
        else
                echo "Host $IP is Off-line."
        fi
done
root@linuxprobe:~# bash CheckHosts.sh
Host 192.168.10.10 is On-line.
Host 192.168.10.11 is Off-line.
Host 192.168.10.12 is Off-line.
Attentive readers may have noticed that the indentation format in the Shell script changes depending on the statement. This is automatically handled by the Vim editor, requiring no additional user action. However, if you are using RHEL 7 or earlier versions, this auto-indentation feature is unavailable. While functionality remains unaffected, it may impact readability.
4.3.3 while Loop Statement
The while conditional loop statement enables a script to repeatedly execute commands based on certain conditions. Its loop structure typically does not determine the final number of executions beforehand, differing entirely from the for loop statement's use cases with defined targets and ranges. The while loop statement decides whether to continue executing commands by evaluating the truthfulness of a condition test. If the condition is true, execution continues; if false, the loop terminates.The syntax format of the while statement is shown in Figure 4-24.

Figure 4-24 while conditional loop statement
Next, we'll combine multi-branch if conditional statements with the while conditional loop to write a script named Guess.sh for guessing numerical values.This script uses the $RANDOM variable to generate a random number (range 0–32767). It then performs modulo 1000 on this random number, uses the expr command to obtain the result, and compares this value with the number entered by the user via the read command.This comparison evaluates three scenarios: whether the user's input equals, exceeds, or falls below the value obtained via expr. However, the focus here isn't on these conditions. Instead, note that the condition within the while loop remains perpetually true. Consequently, the comparison statement loops indefinitely until the user's input equals the expr result, triggering the exit 0 command to terminate the script.
root@linuxprobe:~# vim Guess.sh
#!/bin/bash
PRICE=$(expr $RANDOM % 1000)
TIMES=0
echo "The actual price is between 0 and 999. Guess how much it is?"
while true
do
        read -p "Enter your guess: " INT
        let TIMES++
        if [ $INT -eq $PRICE ] ; then
                echo "Congratulations! The correct price is $PRICE"
                echo "Total guesses: $TIMES"
                exit 0
        elif [ $INT -gt $PRICE ] ; then
                echo "Too high!"
        else
                echo "Too low!"
        fi
done
In this Guess.sh script, we've added interactive prompts to enhance user engagement with the system. Each time the loop reaches the let TIMES++ command, the value in the TIMES variable increments by 1, tracking the total number of loop iterations. This allows users to see how many guesses it took to correctly guess the price.
root@linuxprobe:~# bash Guess.sh
The actual price is between 0 and 999. Guess how much it is?
Enter your guess: 500
Too low!
Enter your guess: 800
Too high!
Enter your guess: 650
Too low!
Enter your guess: 720
Too high!
Enter your guess: 690
Too low!
Enter your guess: 700
Too high!
Enter your guess: 695
Too high!
Enter your guess: 692
Too high!
Enter your guess: 691
Congratulations! The correct price is 691.
Total guesses: 9
When the condition is true, the while statement will loop indefinitely until it encounters exit. So remember to include exit.
4.3.4 case conditional statement
If you've studied C before, you'll recognize this section's title with a smile: It's just a switch statement! Indeed, the case conditional statement functions very similarly to a switch statement! The case statement matches data across multiple ranges. If a match is found, it executes the corresponding command and ends the entire conditional test;If the data doesn't fall within the listed ranges, it executes the default command defined by the asterisk (*). The syntax structure of the case statement is shown in Figure 4-25.
Figure 4-25 case conditional statement
The Guess.sh script introduced earlier has a critical flaw—it only accepts numbers! Attempting to input a letter causes the script to crash immediately. This occurs because letters cannot be compared numerically; for instance, the statement "Is 'a' greater than or equal to 3?" is fundamentally incorrect. Therefore, measures must be implemented to validate user input. When non-numeric input is received, the script should prompt the user, preventing crashes.
By combining the case conditional statement with wildcards (detailed in Chapter 3), we can fully address this requirement. Next, we'll write the script Checkkeys.sh. It prompts the user to enter a character, assigns it to the variable KEY, and then displays whether the value of KEY is a letter, a number, or another character.
root@linuxprobe:~# vim Checkkeys.sh
#!/bin/bash
read -p "Please enter a character and press Enter to confirm:" KEY
case "$KEY" in
        [a-z]|[A-Z])
                echo "You entered a letter."
                ;;
        [0-9])
        echo "You entered a digit."
                ;;
        *)
                echo "You entered a space, function key, or other control character."
esac
root@linuxprobe:~# bash Checkkeys.sh
Please enter a character and press Enter to confirm: 6
You entered a digit.
root@linuxprobe:~# bash Checkkeys.sh
Please enter a character and press Enter to confirm: p
You entered a letter.
root@linuxprobe:~# bash Checkkeys.sh
Please enter a character and press Enter to confirm: ^[[15~
You entered a space, function key, or other control character.
4.4 Scheduled Task Services
Experienced system administrators can automate operations by enabling or disabling specific services or commands at designated times without manual intervention.Although we now have powerful scripts to handle batch processing tasks, manually pressing Enter at 2 AM daily to run these scripts remains cumbersome (though you could train your cat to press Enter at midnight). Next, we'll cover setting up scheduled tasks on servers to automate periodic, routine operations.
Scheduled tasks fall into two categories: one-time tasks and recurring tasks. Here's how to understand them:
One-time scheduled task: Restart the website service tonight at 11:30 PM.
Recurring scheduled task: Every Monday at 3:25 AM, back up the /home/wwwroot directory as backup.tar.gz.
As the name implies, one-time tasks execute only once and are typically used for temporary needs. The at command implements this functionality—simply format it as at time. To view scheduled but not yet executed one-time tasks, use at -l; to delete them, use atrm job_number. Parameters and their functions for the at command are shown in Table 4-6.
Table 4-6 at Command Parameters and Their Functions
| Parameter | Function |
|---|---|
| -f | Specifies the task file containing commands |
| -q | Specifies the new job name |
| -l | Displays the list of pending jobs |
| -d | Deletes the specified pending job |
| -m | Sends an email to the user after job execution |
When using the at command to set one-time scheduled tasks, the interactive method is used by default. For example, the following command configures the system to automatically restart the web service tonight at 23:30.
root@linuxprobe:~# at 23:30
warning: commands will be executed using /bin/sh
at Thu Mar 13 23:30:00 2025
at> systemctl restart httpd
at> Press <Ctrl>+<d> simultaneously to finish writing the scheduled task
job 1 at Thu Mar 13 23:30:00 2025
root@linuxprobe:~# at -l
1    Thu Mar 13 23:30:00 2025 a root
Don't panic if you see a warning message. The at command is simply informing us that the upcoming task will be executed by the sh interpreter. This is essentially the same as the Bash interpreter we learned earlier, requiring no additional actions.
Additionally, if you'd like to try a more challenging yet streamlined approach, you can place the pipe symbol (the "anydoor") between two commands. This allows the at command to receive the output from the preceding echo command, enabling you to create a one-time scheduled task non-interactively.
root@linuxprobe:~# echo "systemctl restart httpd" | at 23:30
warning: commands will be executed using /bin/sh
job 2 at Thu Mar 13 23:30:00 2025
root@linuxprobe:~# at -l
1	Thu Mar 13 23:30:00 2025 a root
2	Thu Mar 13 23:30:00 2025 a root
The above sets two identical scheduled tasks. You can easily delete one using the atrm command:
root@linuxprobe:~# atrm 2
root@linuxprobe:~# at -l
1	Thu Mar 13 23:30:00 2025 a root
Here's another special scenario—writing a scheduled task into a Shell script. When the user activates the script, it starts a countdown execution instead of running at a fixed time (like the "at 23:30" command above). How can this be achieved?
Typically, we use the "at now +2 MINUTE" format. This means the task will run 2 minutes (MINUTE) from now. You can also substitute this with hours (HOUR), days (DAY), months (MONTH), etc.:
root@linuxprobe:~# at now +2 MINUTE
warning: commands will be executed using /bin/sh
at Thu Mar 13 00:08:00 2025
at> systemctl restart httpd
at> Press <Ctrl>+<d> simultaneously to finish writing the scheduled task
job 3 at Thu Mar 13 00:08:00 2025
Sometimes, we want the Linux system to execute specific tasks periodically and regularly. In such cases, the crond service enabled by default in Linux is perfectly suited for the job.The command to create or edit scheduled tasks is crontab -e. To view current scheduled tasks, use crontab -l. To delete a specific scheduled task, use crontab -r. Additionally, if logged in as an administrator, you can add the -u parameter to the crontab command to edit another user's scheduled tasks. The parameters of the crontab command and their functions are shown in Table 4-7.
Table 4-7 crontab Command Parameters and Their Functions
| Parameter | Function |
|---|---|
| -e | Edit scheduled tasks |
| -u | Specify user name |
| -l | List task entries |
| -r | Remove scheduled tasks |
Before formally deploying scheduled tasks, please review the mnemonic with Instructor Liu Chuan: "Minute, Hour, Day, Month, Weekday, Command." This represents the parameter format for configuring tasks using the crond service (see Table 4-8 for the format). Note that if certain fields are not set, an asterisk (*) should be used as a placeholder, as shown in Figure 4-26.

Figure 4-26 Parameter Format for Setting Tasks with crond
Table 4-8 Parameter Field Descriptions for Setting Tasks Using crond
| Field | Description |
|---|---|
| Minute | Integer value between 0 and 59 |
| Hour | Integer value between 0 and 23 |
| Day | Any integer from 1 to 31 |
| Month | Any integer from 1 to 12 |
| Day of Week | Any integer from 0 to 7, where 0 and 7 both represent Sunday |
| Command | The command or program script to execute |
Suppose you need to use the tar command to archive a website's data directory every Monday, Wednesday, and Friday at 3:25 AM, creating a backup file. You can use the crontab -e command to create a scheduled task. When creating a task for yourself, the -u parameter is unnecessary. The specific implementation effect of the crontab -e command and the output of the crontab -l command are shown below.
root@linuxprobe:~# crontab -e
root@linuxprobe:~# crontab -l
25 3 * * 1,3,5 /usr/bin/tar -czvf backup.tar.gz /home/wwwroot
Note that besides using commas (,) to separate multiple time periods (e.g., "8,9,12" denotes August, September, and December), you can also use hyphens (-) to represent a continuous time range. For instance, a "day" field value like "12-15" signifies the 12th to 15th of each month.Additionally, the division symbol (/) can denote task execution intervals (e.g., "*/2" means the task runs every 2 minutes).
When including multiple scheduled task commands in the crond service, each command should occupy a separate line.For example, let's add another scheduled task that automatically clears all files in the /tmp directory at 1:00 AM every Monday through Friday. It is particularly important to note that all commands in crond service parameters must be written using absolute paths. If you do not know the absolute path, use the whereis command to query it. The path for the rm command is the bolded portion in the output below.
root@linuxprobe:~# whereis rm
rm: /usr/bin/rm /usr/share/man/man1/rm.1.gz
root@linuxprobe:~# crontab -e
root@linuxprobe:~# crontab -l
25 3 * * 1,3,5 /usr/bin/tar -czvf backup.tar.gz /home/wwwroot
0  1 * * 1-5   /usr/bin/rm -rf /tmp/*
Here are key considerations when using the cron service:
-
In crond configuration parameters, comments are typically written like Shell scripts, starting with a # symbol. This allows quick understanding of the command's function, requirements, and author when reviewing the code later.
-
The "minute" field in scheduled tasks must contain a numerical value; it absolutely cannot be empty or use an asterisk (*). The "day" and "weekday" fields cannot be used simultaneously, as this will cause conflicts.
-
Deleting crond scheduled tasks is straightforward: use
crontab -eto enter edit mode and remove the relevant text entries. Alternatively,crontab -rclears all scheduled tasks, with the system backing up the original configuration to/rootbeforehand:
root@linuxprobe:~# crontab -r
Backup of root's previous crontab saved to /root/.cache/crontab/crontab.bak
root@linuxprobe:~# crontab -l
no crontab for root
One final note: As readers may have noticed, many services like crond default to using the Vim editor. By now, you should appreciate the benefits of mastering Vim in Linux environments. Please ensure you thoroughly understand Vim before proceeding to the next chapter.
Review Questions
- What are the three modes of the Vim editor?
Answer: Command mode, last line mode, and input mode (also called edit mode or insert mode).
- How do you switch from Insert mode to Last line mode?
Answer: First press the Esc key to return to command mode, then press the colon (:) key to enter command line mode.
- What should a complete shell script contain?
Answer: It should include a script declaration, comment information, and executable statements (i.e., commands).
- Explain the functions of the $0 and $3 variables in a Shell script.
Answer: In a shell script, $0 represents the name of the script file, while $3 represents the third argument passed to the script during execution.
- How many structures does the if conditional statement have? Which structure is the most flexible and complex?
Answer: The if conditional statement has three structures: single-branch, double-branch, and multi-branch. The multi-branch structure is the most flexible and complex, following the pattern if...then...elif...then...else...fi.
- What is the loop structure of a for conditional loop statement?
Answer: The structure of a for conditional loop statement is "for variable_name in value_list do command_sequence done", as shown in Figure 4-23.
- What happens if true is used as the loop condition in a while conditional loop statement?
Answer: Since the condition evaluation will always be true, the loop section in the script will repeat indefinitely until an exit command is encountered.
- What is the most convenient conditional statement for executing different operations based on user input parameters?
Answer: The case conditional statement.
- What service program is used for long-term scheduled tasks in Linux systems, and what is its parameter format?
Answer: Long-term scheduled tasks use the crond service program. The parameter format is "minute hour day month weekday command".
- When executing a script using the path plus filename method, the system displays the error "Permission denied." How can this be resolved?
Answer: This indicates insufficient user permissions for the script file, causing the system to deny execution. Use the chmod command to add executable permissions to the script file.