Chapter 02 · Must-Know Linux Commands for Beginners
Chapter Overview
Experienced system administrators effortlessly meet work demands by skillfully combining appropriate commands and parameters, achieving objectives swiftly while conserving system resources. This chapter first explains the interaction between the system kernel and the Shell terminal, then elucidates the four core strengths of the Bash interpreter. It delves into the format and application techniques of commands, parameters, and objects, enabling every reader to execute Linux commands accurately.
This chapter meticulously selects over 50 Linux commands essential for beginners, covering critical topics such as system operation, status monitoring, directory management, file processing, data compression, and search. We organize these commands into distinct sections, enabling readers to systematically master these foundational commands one by one. This approach builds the necessary knowledge foundation for tackling more complex commands and services in the future.
2.1 The Powerful and Versatile Shell
A complete computer consists of multiple hardware components such as the arithmetic unit, control unit, memory, and input/output devices. The element that enables these components to perform their respective functions while operating in coordination is the system kernel. The Linux kernel manages hardware resources, safeguards system security, controls process execution, administers memory, and handles critical tasks like system calls, playing an indispensable role in the system's proper functioning.
Similar to editing the Windows registry, directly modifying Linux kernel parameters requires advanced technical expertise and risks causing system crashes. Therefore, directly editing kernel parameters is not recommended. Instead, use programs or services developed based on system call interfaces to manage your computer for daily tasks.
As illustrated in Figure 2-1, humans cannot directly control hardware (imagine the absurd scene of someone holding a disk and talking to themselves). Hardware devices are managed directly by the system kernel. However, due to the kernel's complexity, accessing it carries significant risks, so users cannot directly interact with the kernel. Although calling system-provided APIs can achieve specific functions, even simple tasks like "sending a message to someone over the internet" would require manually invoking dozens of APIs—making this approach impractical. The outermost layer consists of service programs closest to the user end. These are complete software packages integrating numerous APIs; examples include WeChat and QQ.
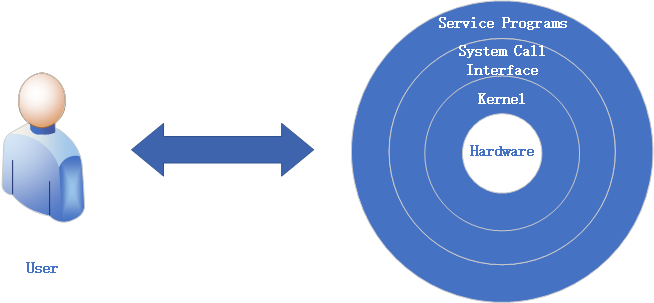
Figure 2-1 User and Hardware
By now, you should understand the vital role service programs play between users and hardware. If we liken an entire computer to human society, service programs act as translators. They translate user requests into instruction codes hardware can understand, then feed back processing results in formats users can comprehend. This back-and-forth enables users to utilize hardware resources.

These layers wrapped around the hardware are reminiscent of a snail's shell—hence the term "shell". The industry also refers to the user terminal program as the Shell for ease of recall.
Shell is a generic term for terminal programs. It acts as an interpreter between users and the kernel (hardware). When users "tell" the terminal program certain commands, it invokes the corresponding program services to perform specific tasks. Most mainstream Linux distributions, including Red Hat's RHEL, use Bash (Bourne-Again Shell) as the default terminal interpreter. Bash not only supports basic command execution but also offers scripting capabilities, enabling users to write complex batch scripts for automating tasks. Additionally, Bash supports command history tracking, job control, and robust environment variable management, making it one of the most popular shells in the Linux environment. In summary, Bash's widespread adoption stems primarily from its four core strengths:
Access previously executed Linux commands via the up/down arrow keys;
Auto-complete commands or parameters by typing just the first few characters and pressing Tab;
Powerful batch scripting capabilities;
Robust environment variable management support.
Looking back at Linux's development history, in the 1970s, AT&T commercialized the UNIX system, which included the widely used sh (Bourne Shell) command interpreter. As the GNU Project championed open-source principles and opposed copyright restrictions, there was an urgent need for an open-source alternative. Consequently, the Bash interpreter emerged in 1989.Bash not only implemented all the functionality of the Bourne Shell but also introduced numerous enhancements, quickly winning the favor of operations engineers and system administrators. In your future studies and work, you can fully appreciate the power and elegance of the Linux command line and truly grow to love it from the bottom of your heart.
Tips:
"Shell" is a general term, while Bash is one specific type of shell. For instance, "translator" is a profession that includes many practitioners, and Bash is just one outstanding member within the broader family of shell terminal programs.
It's undeniable that some graphical tools in Linux systems (like the Logical Volume Manager [LVM]) are exceptionally user-friendly, significantly reducing the error rate for operations personnel—a commendable feature. However, many graphical tools actually achieve their functions by invoking command scripts or are often designed solely for specific tasks, lacking the inherent flexibility and controllability of native Linux commands. Furthermore, graphical tools consume more system resources compared to the Linux command-line interface. Consequently, experienced system administrators often avoid installing graphical tools on Linux systems altogether, instead connecting remotely via command-line mode for operational tasks. It must be said that this approach is indeed highly efficient.
2.2 Essential Knowledge for Executing Commands
Since Linux already has such a capable "interpreter" as Bash, it's essential to learn how to communicate effectively with it. To accomplish tasks accurately and efficiently, relying solely on the commands themselves is insufficient; you must also flexibly adjust various command parameters based on actual circumstances.
For instance, while some generic tools or commands in Linux can handle certain tasks, they may lack efficiency or precision. It's akin to using a kitchen knife to cut sushi—though it gets the job done, rice grains scatter everywhere, failing to meet the specific requirements. A specialized sushi knife, however, features unique design elements like ventilation holes, serving as carefully tailored "parameters" optimized for slicing sushi.Similarly, Linux offers numerous commands and tools akin to sushi knives—each engineered for specific tasks with distinct parameters and capabilities. After mastering this book and gaining practical experience, you will grasp the essence of Linux commands, learning to select the most suitable command and parameters for each task scenario to achieve maximum efficiency.
The common format for executing Linux commands is as follows:
command_name [command_options(Arguments)] [command_object]
Command Name: The "verb" in the syntax, expressing the desired action—such as creating a user, viewing a file, or rebooting the system.
Command Arguments: These adjust the command to better fit your needs, achieving more with less effort. Think of it like buying clothes—sizes often feel too big or too small. You can either make do or alter them. Adding arguments is like tailoring a command.
For instance, creating a user with a specific UID of 888 or viewing only the first 20 lines of a file. Command parameters can be specified using either the long format (full option name) or the short format (single-letter abbreviation), prefixed with "--" or "-", respectively, as shown in Table 2-1.
Table 2-1 Examples of long and short formats for Linux command arguments
| Format Type | Example |
|---|---|
| Long Format | man --help |
| Short Format | man -h |
Command Object: Typically refers to the resource name (e.g., file, directory, user) to be processed—the "target" of the command execution. Examples include creating a user named Xiaoming, viewing a file named "payroll", or rebooting a system with IP address 192.168.10.10.
Tips:
Command names, parameters, and objects must be separated by spaces, and letters are case-sensitive.
In Linux-related literature, it is customary to enclose optional, non-mandatory parameters within square brackets, e.g., "ls [command object]". Required parameters or object values are written without brackets. This convention helps readers better understand subsequent commands.
When first learning Linux, command execution often stalls due to complex parameters that vary across commands and real-world scenarios. Readers may now wonder: "With so many commands in Linux, how do I know what a specific command does?When encountering an unfamiliar Linux command during daily work, how can I determine its available parameters?" Next, we introduce the man command as the first Linux command covered in this book. For readers with absolutely no prior experience, Figures 2-2 through 2-5 demonstrate how to execute Linux commands in the RHEL 10 system.
As shown in Figure 2-2, select the Super User option (root administrator account) during login, then enter your configured password. If forgotten, refer back to Figure 1-40.
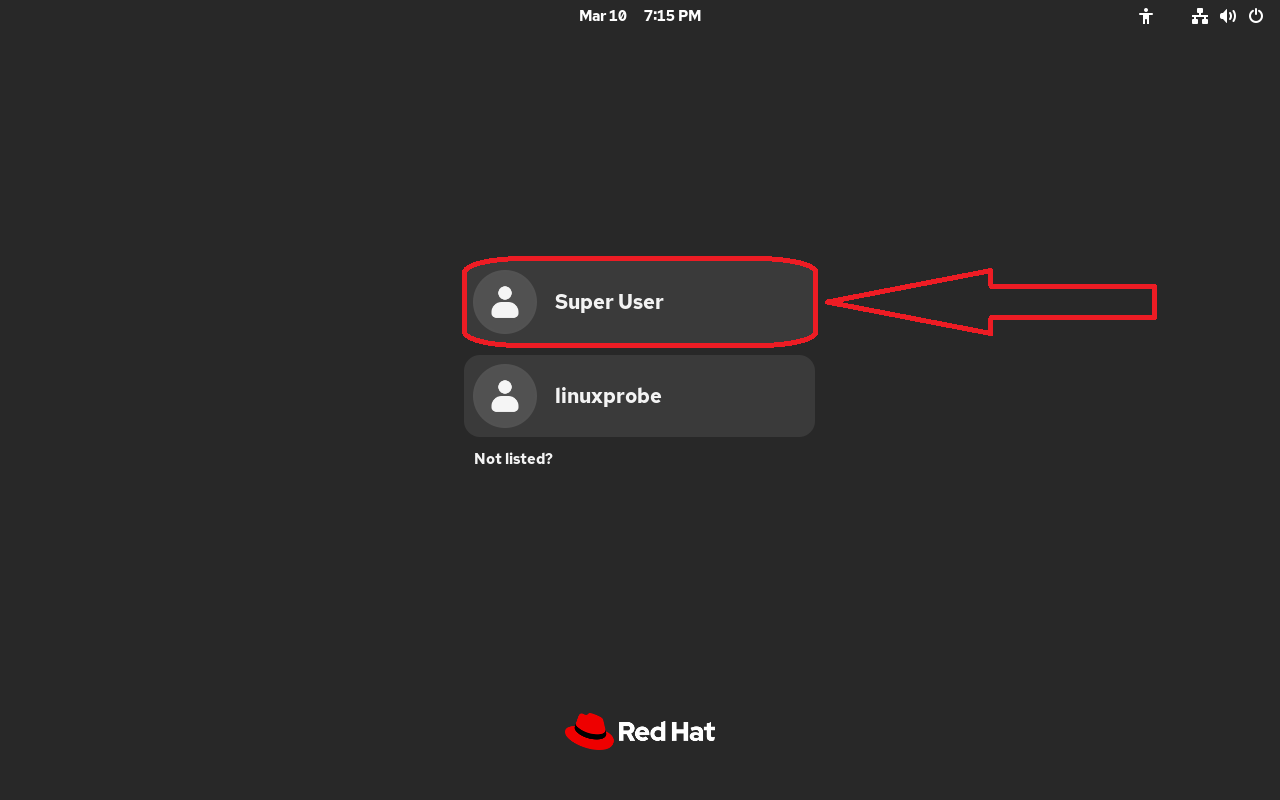
Figure 2-2 Switching to root administrator identity
If you log in using the linuxprobe user, some commands later in this chapter may fail due to insufficient privileges. We need sufficient permissions to complete the upcoming experiments. Regarding the common question, "What's the difference between root administrators and regular users, and how should one choose in production environments?"—we'll cover this in detail in Chapter 5.
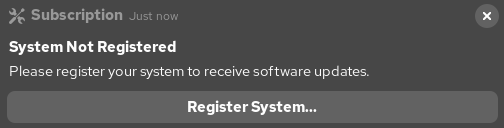
Tips:
After successful login, if prompted that you are not subscribed, simply click the × button in the upper-right corner to close it. Unless you wish to purchase a Red Hat subscription for the latest software or technical support, you need not concern yourself with this. Later, we will build a local software repository to ensure all experiments run smoothly without any impact.
Click the Red Hat icon in the top-left corner of the desktop. From the pop-up menu, select Command Line Terminal to open the Bash interpreter, as shown in Figure 2-3.

Figure 2-3 Opening the Command Line Terminal
In the command line terminal, enter the command man man to view the man command's own help information. Remember to include a space between the words, as shown in Figure 2-4.
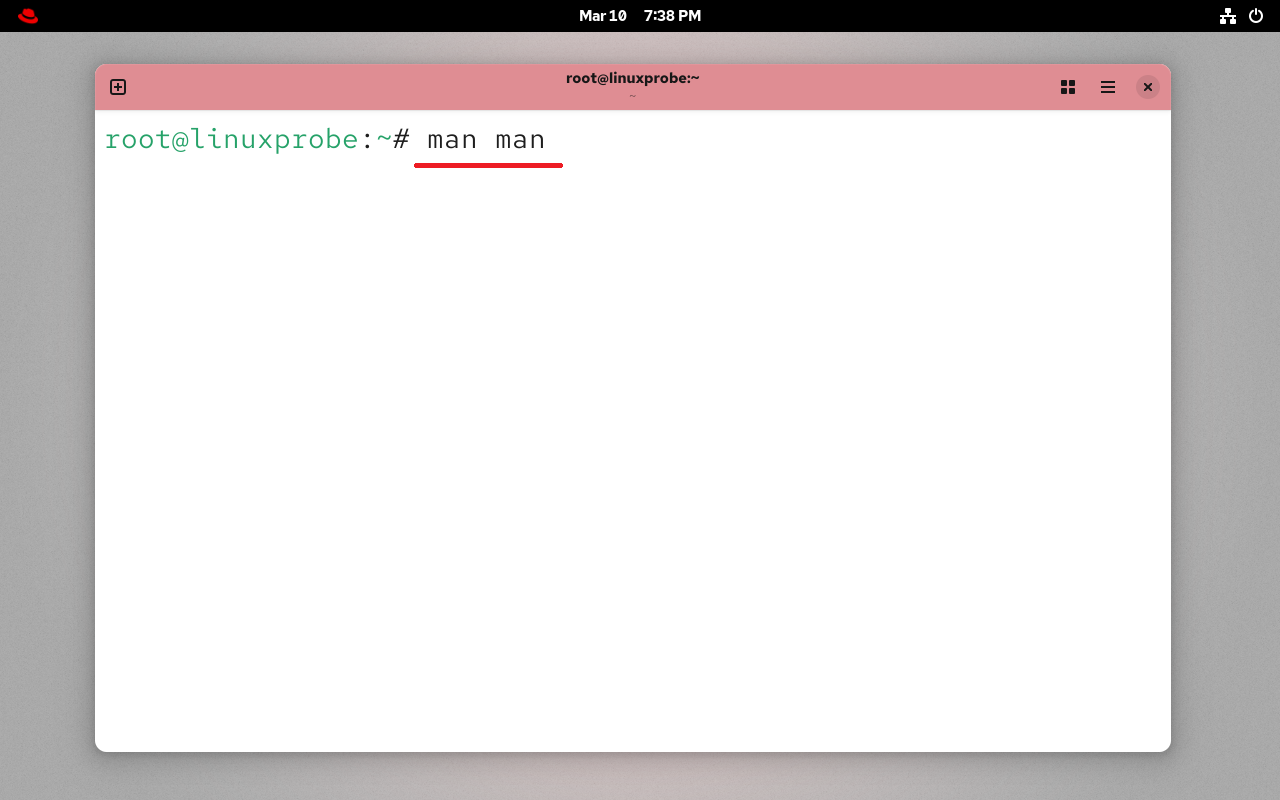
Figure 2-4: Viewing the man command's help information
Pressing Enter will display the help information shown in Figure 2-5. To exit, simply press the q key on your keyboard.
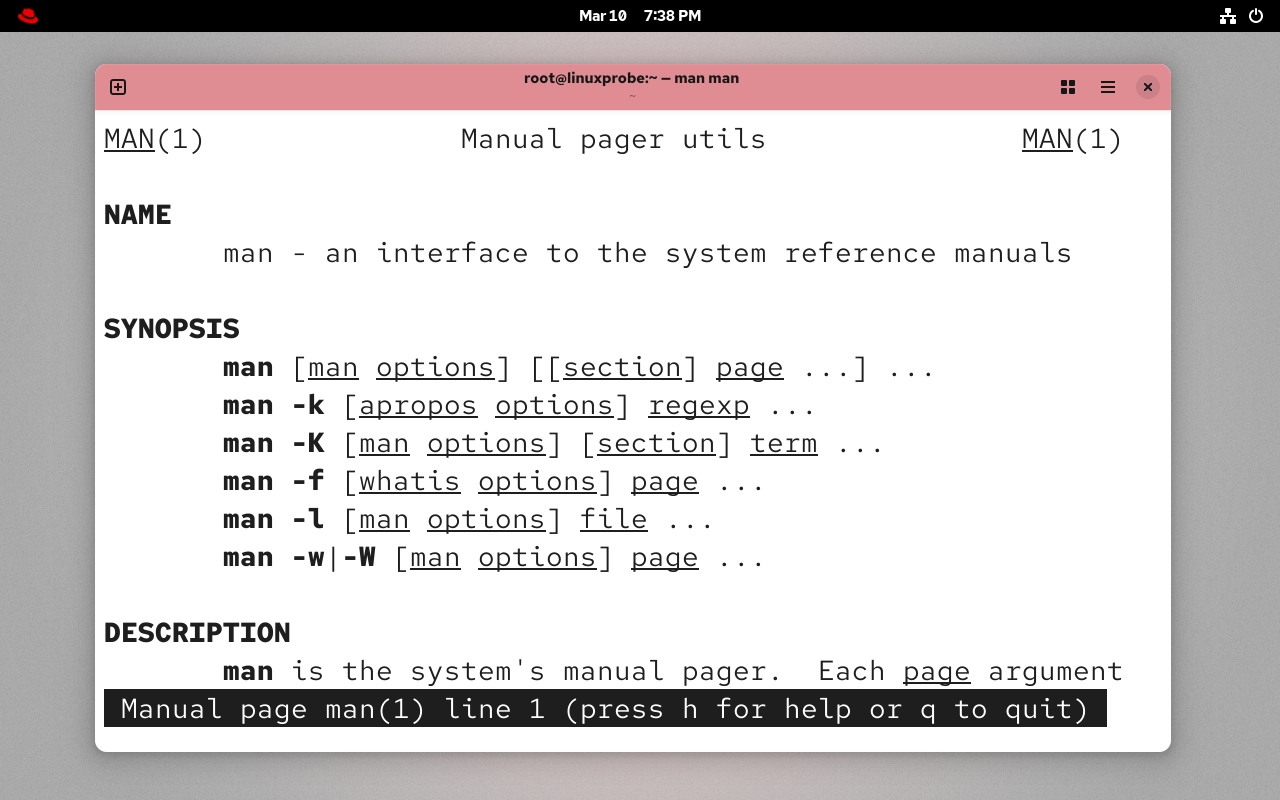
Figure 2-5: Help information for the man command
A successful first attempt! Feeling more enthusiastic now? But remember: Linux commands, parameters, and objects are case-sensitive. For example, run the man command several times. Can you tell which command is correct?
root@linuxprobe:~# Man
bash: Man: command not found...
Similar command is: 'man'
root@linuxprobe:~# MAN
bash: MAN: command not found...
Similar command is: 'man'
root@linuxprobe:~# man
What manual page do you want?
For example, try 'man man'.
The commonly used keys and their functions displayed after executing the man command are shown in Table 2-2.
Table 2-2 Common Keys and Their Functions
| Key | Function |
|---|---|
| Spacebar | Scroll down one page |
| Page Down | Scroll down one page |
| Page Up | Scroll up one page |
| Home | Go directly to the first page |
| End | Go directly to the last page |
| / | Search for a keyword from top to bottom, e.g., /linux |
| ? | Search for a keyword from bottom to top, e.g., ?linux |
| n | Move to the next occurrence of the keyword |
| N | Move to the previous keyword found |
| b | Scroll up one page |
| g | Jump to the first page |
| h | Display the help interface |
| u | Scroll up half a page |
| d | Scroll down half a page |
| q | Exit the help documentation |
Generally, the help information displayed by the man command can be quite lengthy. If readers are unfamiliar with the structure and operation methods of the help documentation, they may initially feel quite confused upon seeing so much information. The structure and meaning of the man command's help information are shown in Table 2-3.
Table 2-3 Structure and Meaning of man Command Help Information
| Structure Name | Meaning |
|---|---|
| NAME | Command name |
| SYNOPSIS | General usage of parameters |
| DESCRIPTION | Detailed description |
| EXAMPLES | Examples (with brief explanations) |
| OVERVIEW | Overview |
| DEFAULTS | Default behavior |
| OPTIONS | Available options (with descriptions) |
| ENVIRONMENT | Environment variables |
| FILES | Files used |
| SEE ALSO | Related documentation |
| HISTORY | Maintenance history and contact information |
It's worth noting that the "root@linuxprobe:~#" prompt displayed before entering commands is the terminal prompt. It shows users basic information: the current login username is root, the abbreviated hostname is linuxprobe, the current directory is ~ (here, ~ refers to the user's home directory, explained in Chapter 6), and the # symbol indicates administrator privileges. A $ symbol signifies a regular user with limited permissions.As shown in Figure 2-6.

Figure 2-6 Terminal Prompt Diagram
Four Additional Keyboard Shortcut/Key Combination Tips
Mastering practical shortcut keys and key combinations during Linux operations can significantly boost efficiency, making command-line tasks smoother and more convenient. Below are four highly useful shortcut/key combination tips. Proficiency with these will help you navigate the Linux command-line environment with ease.
Tab Key
Among Bash interpreter shortcuts, the Tab key is undoubtedly the most frequently used. It enables autocompletion for commands, parameters, or file contents. For example, if you want to execute the reboot command but can't recall its full spelling, type:
root@linuxprobe:~# re<Tab key><Tab key>
read                recode-sr-latin     resizecons
readarray           red                 resizepart
readelf             rename              resolvectl
readlink            renew-dummy-cert    restorecon
readonly            renice              restorecon_xattr
readprofile         repquota            return
realm               rescan-scsi-bus.sh  rev
realpath            reset
reboot              resize2fs
root@linuxprobe:~# reb<Tab key>
root@linuxprobe:~# reboot
In the above experiment, we first typed the two letters "re" followed by two presses of the Tab key. Since multiple commands begin with "re", the system displayed all commands starting with "re". When we then typed "reb" and pressed Tab again, no other commands beginning with "reb" existed, so the system displayed the full "reboot" command.
The same principle applies to filenames—simply enter the initial portion of the name. If no other filenames begin with that prefix, the system will automatically complete it. This not only speeds up the process but also prevents potential errors from manual input.
Ctrl+c Key Combination
Pressing the Ctrl and C keys simultaneously signals the termination of the current process. If you execute an erroneous command or encounter a command that fails to complete, calmly press Ctrl+C. This immediately returns control of the command line terminal to you.
The following command refreshes system load every 1 second (ignore its function for now) and continues running until Ctrl+C is pressed to stop it.
root@linuxprobe:~# watch -n 1 uptime
Every 1.0s: uptime                       linuxprobe.com: Mon Mar 10 20:05:39 2025
 20:05:10 up 46 min,  2 users,  load average: 0.06, 0.05, 0.01
<Ctrl>+<c>
root@linuxprobe:~#
Ctrl+d Key Combination
Pressing the Ctrl and D keys simultaneously on the keyboard indicates the end of keyboard input.
Ctrl+l Key Combination
Pressing the Ctrl and L keys simultaneously clears the current terminal's contents (equivalent to a screen clear operation).
From this point onward, the amount of content in this book will increase substantially. This book will guide readers through mastering approximately 200 commonly used Linux commands, selected based on query and viewing data from www.linuxcool.com.Naturally, covering all these commands in Chapter 2 alone is impractical. Therefore, based on over a decade of operations experience, Instructor Liu Chuan has prioritized over 50 frequently used foundational commands. Since these commands will be repeatedly referenced in subsequent chapters, it's essential to thoroughly learn and master them to navigate future studies with ease. Keep up the great work!
2.3 Common System Operations Commands
This book is the culmination of Instructor Liu Chuan's insights from dozens of training sessions. You may not find every command you've encountered before in this section. But don't worry—this approach is intentional. We're focused on integrating Linux commands with real-world scenarios, helping you truly grasp the technology through hands-on practice rather than just memorizing a list of commands.
1. echo command
The echo command outputs strings or variable values to the terminal. Its syntax is "echo [string] [$variable]".
This is one of the most frequently used commands in Linux systems. Its operation is straightforward: simply execute "echo string" or "echo $variable". The $ symbol signifies extracting the variable's actual value for subsequent output operations.
For example, to output the string "LinuxProbe.com" to the terminal screen:
root@linuxprobe:~# echo LinuxProbe.com
This command displays the following on the terminal screen:
LinuxProbe.com
Next, use "$variable" to extract the value of the SHELL variable and output it to the screen:
root@linuxprobe:~# echo $SHELL
/bin/bash
2. date command
The date command displays or sets the system time and date. Its syntax is date [options] [+specified format] [time].
Users simply need to enter parameters starting with a "+" sign after the powerful date command to output the system time or date in a specified format. This allows combining backup commands with time information in a specific format during daily operations.For example, to automatically package files in the "year-month-day" format as backup-2025-05-18.tar.gz, users can quickly grasp each file's backup time just by glancing at the filename. Common parameters and their functions in the date command are shown in Table 2-4.
Table 2-4 Common Parameters and Their Functions in the date Command
| Parameter | Function |
|---|---|
| %S | Seconds (00~59) |
| %M | Minutes (00~59) |
| %H | Hours (00~23) |
| %I | Hours (00~12) |
| %m | Month (1~12) |
| %p | Display AM or PM |
| %a | Abbreviated weekday name (e.g., Sun) |
| %A | Full weekday name (e.g., Sunday) |
| %b | Abbreviated month name (e.g., Jan) |
| %B | Full month name (e.g., January) |
| %y | Abbreviated year (e.g., 25) |
| %Y | Full year (e.g., 2025) |
| %d | Day of the month |
| %j | Day of the year |
| %n | Newline character (equivalent to pressing Enter) |
| %t | Tab character (equivalent to pressing Tab) |
The date command displays the current system time in the default format as follows:
root@linuxprobe:~# date
Mon Mar 10 08:36:57 PM CST 2025
The date command displays the current system time in "Year-Month-Day Hour:Minute:Second" format as follows:
root@linuxprobe:~# date "+%Y-%m-%d %H:%M:%S"
2025-03-10 20:37:09
The date command to set the system time to May 18, 2025, 8:30 AM is shown below:
root@linuxprobe:~# date -s "20250518 8:30:00"
Sun May 18 08:30:00 AM CST 2025
The %j parameter in the date command displays the day of the year. This parameter effectively distinguishes the relative timing of backups—higher numbers indicate times closer to the present. Its usage and output are shown below:
root@linuxprobe:~# date "+%j"
138
3. timedatectl Command
The timedatectl command is used to configure the system time. Its full name is "time date control," and its syntax is timedatectl [options].
Notice your computer time doesn't match the actual time? If it's only off by a few minutes, you can adjust it directly. However, if it's off by several hours, besides adjusting the current time, you should also check the time zone. Common parameters and their functions in the timedatectl command are shown in Table 2-5.
Table 2-5 Common Parameters and Functions in the timedatectl Command
| Parameter | Function |
|---|---|
| status | Display status information |
| list-timezones | List known time zones |
| set-time | Set system time |
| set-timezone | Set active time zone |
| set-ntp | Configure NTP service |
To view the system time and time zone, use the following command:
root@linuxprobe:~# timedatectl status
               Local time: Sun 2025-05-18 08:32:23 CST
           Universal time: Sun 2025-05-18 00:32:23 UTC
                 RTC time: Mon 2025-03-10 12:39:43
                Time zone: Asia/Shanghai (CST, +0800)
System clock synchronized: no
              NTP service: active
          RTC in local TZ: no
If the detected time zone is not Shanghai (Asia/Shanghai), you can manually set it:
root@linuxprobe:~# timedatectl set-timezone Asia/Shanghai
If the time remains incorrect, you can manually adjust the system date. However, remember to disable NTP synchronization first, otherwise the manually set time may be automatically reset to the original time:
root@linuxprobe:~# timedatectl set-ntp false
root@linuxprobe:~# timedatectl set-time 2025-05-18
To modify the time, simply execute:
root@linuxprobe:~# timedatectl set-time 9:30
root@linuxprobe:~# date
Sun May 18 09:30:02 AM CST 2025
4. reboot command
The reboot command is used to restart the system. Simply enter the command and press Enter to execute it.
Since restarting the computer involves managing hardware resources, regular users may be denied permission to execute this command. Therefore, it is best to perform the reboot as the root administrator. The reboot command is as follows:
root@linuxprobe:~# reboot
5. poweroff command
The poweroff command is used to shut down the system. Enter the command and press Enter to execute it.
Similar to the above, this command also requires hardware resource management privileges. Therefore, it is best to shut down the computer as the root administrator. The command is as follows:
root@linuxprobe:~# poweroff
6. wget Command
The wget command downloads network files via the terminal command line. Its full name is "World Wide Web get," and its syntax is wget [options] URL.
Using the wget command allows you to download files directly from the command line interface without opening a browser. If you lack Linux system administration experience, it's sufficient for now to understand the parameters and functions of the wget command and review the demonstration experiment below. Remember not to rush. Subsequent chapters will progressively explain Linux system configuration management methods. You can perform this experiment after mastering network interface configuration. Table 2-6 lists the parameters of the wget command and their functions.
Table 2-6 Parameters and Functions of the wget Command
| Parameter | Function |
|---|---|
| -b | Run in background download mode |
| -P | Download files into the specified directory |
| -t | Set the maximum number of retry attempts |
| -c | Resume interrupted downloads |
| -p | Download all resources required for page rendering (CSS, JS, images) |
Tips:
Since this experiment requires downloading files from external networks, but virtual machines cannot connect to the internet by default, you will encounter response timeout errors during execution. Therefore, you may skip this step for now.
Attempt to download the latest PDF version of this book from its companion website using the wget command. The download outcome after executing the command is as follows:
root@linuxprobe:~# wget https://www.linuxprobe.com/docs/LinuxProbe.pdf
--2025-05-18 09:36:47--  https://www.linuxprobe.com/docs/LinuxProbe.pdf

Resolving www.linuxprobe.com (www.linuxprobe.com)... 117.72.45.242
Connecting to www.linuxprobe.com (www.linuxprobe.com)|117.72.45.242|:443... connected.
HTTP request sent, awaiting response... 200 OK
Length: 23335661 (22M) [application/pdf]
Saving to: ‘LinuxProbe.pdf’

LinuxProbe.pdf      100%[===================>]  22.25M  1.54MB/s    in 14s

2025-05-18 09:37:02 (1.54 MB/s) - ‘LinuxProbe.pdf’ saved [23335661/23335661]
Next, use the wget command to recursively download all page data and files from the www.linuxprobe.com website. Upon completion, the data will be automatically saved into a directory named www.linuxprobe.com within the current path. The command execution results are as follows:
root@linuxprobe:~# wget -r -p https://www.linuxprobe.com
--2025-05-18 09:37:29--  https://www.linuxprobe.com/
Resolving www.linuxprobe.com (www.linuxprobe.com)... 117.72.45.242
Connecting to www.linuxprobe.com (www.linuxprobe.com)|117.72.45.242|:443... connected.
HTTP request sent, awaiting response... 200 OK
Length: unspecified [text/html]
Saving to: ‘www.linuxprobe.com/index.html’

www.linuxprobe.com/     [ <=>                ]  67.40K  --.-KB/s    in 0.008s
[... output omitted ...]
7. ps Command
The ps command displays system process status, short for "process status." Its syntax is ps [options].
Readers are likely stunned the first time they run this command—how can there be so much output? How can one possibly review it all? In practice, experts often combine the ps command with the pipe symbol technique from Chapter 3 to capture the PID corresponding to a specific service process. Common parameters and their functions in the ps command are shown in Table 2-7.
Table 2-7 Common Parameters and Functions in the ps Command
| Parameter | Function |
|---|---|
| -a | Display all processes (including other users' processes) |
| -u | Display user and other detailed information |
| -x | Display processes without a controlling terminal |
Numerous processes run continuously in Linux systems. Properly managing them can optimize system performance. Linux systems have five common process states: running, suspended, non-suspendable, zombie, and stopped. Their meanings are as follows:
R (Running): The process is executing or waiting in the run queue.
S (Suspended): The process is dormant. It exits this state when a condition is met or a signal is received.
D (Uninterruptible): The process is in an uninterruptible sleep state, typically waiting for an I/O resource to become available.
Z (Zombie): The process has terminated, but its descriptor persists until the parent process releases it via the wait4() system function.
T (Terminated): The process has stopped running after receiving a stop signal.
Beyond these five common process states, a process may also exhibit supplementary forms: high priority (H), normal priority (N), locked in memory (L), containing child processes (s), and multi-threaded (l).
Running the ps aux command typically displays process states as shown in Table 2-8.
Table 2-8 Process Status
| USER | PID | %CPU | %MEM | VSZ | RSS | TTY | STAT | START | TIME | COMMAND |
|---|---|---|---|---|---|---|---|---|---|---|
| root | 1 | 0.3 | 0.6 | 52272 | 24944 | ? | Ss | 09:32 | 0:01 | /usr/lib/systemd/systemd --switched-root --system --deserialize=44 rhgb |
| root | 2 | 0.0 | 0.0 | 0 | 0 | ? | S | 09:32 | 0:00 | [kthreadd] |
| root | 3 | 0.0 | 0.0 | 0 | 0 | ? | S | 09:32 | 0:00 | [pool_workqueue_release] |
| root | 4 | 0.0 | 0.0 | 0 | 0 | ? | I | 09:32 | 0:00 | [kworker/R-rcu_gp] |
| root | 5 | 0.0 | 0.0 | 0 | 0 | ? | I | 09:32 | 0:00 | [kworker/R-sync_wq] |
| root | 6 | 0.0 | 0.0 | 0 | 0 | ? | I | 09:32 | 0:00 | [kworker/R-slub_flushwq] |
| root | 9 | 0.0 | 0.0 | 0 | 0 | ? | I | 09:32 | 0:00 | [kworker/0:0H-events_highpri] |
| root | 10 | 0.0 | 0.0 | 0 | 0 | ? | I | 09:32 | 0:00 | [kworker/0:1-events] |
Tips:
As mentioned earlier, command parameters in Linux systems have long and short formats. Long formats cannot be combined with other long formats, nor can they be combined with short formats. However, short formats can be combined with other short formats, retaining only a single hyphen (-) after merging. Additionally, the ps command allows parameters without a hyphen (-), so it can be written directly as ps aux.
8. pstree Command
The pstree command displays process relationships in a tree diagram format, derived from the full English term "process tree." Simply enter the command and press Enter to execute.
As mentioned earlier, the output from the ps command is often overwhelming and disorganized, making it difficult to review. To display process relationships in a hierarchical tree structure, use the pstree command:
root@linuxprobe:~# pstree
systemd─┬─ModemManager───3*[{ModemManager}]
        ├─NetworkManager───3*[{NetworkManager}]
        ├─VGAuthService
        ├─accounts-daemon───3*[{accounts-daemon}]
        ├─atd
        ├─auditd─┬─sedispatch
        │        └─2*[{auditd}]
        ├─avahi-daemon───avahi-daemon
        ├─colord───3*[{colord}]
[... output omitted ...]
9. top Command
The top command dynamically monitors process activity and system load information. Simply enter the command and press Enter to execute. Previously introduced commands statically display system status without real-time updates, whereas top dynamically tracks system conditions. Thus, it can be considered Linux's "enhanced Windows Task Manager."
top is an exceptionally useful real-time process monitoring tool. Its operational interface is shown in Figure 2-7.
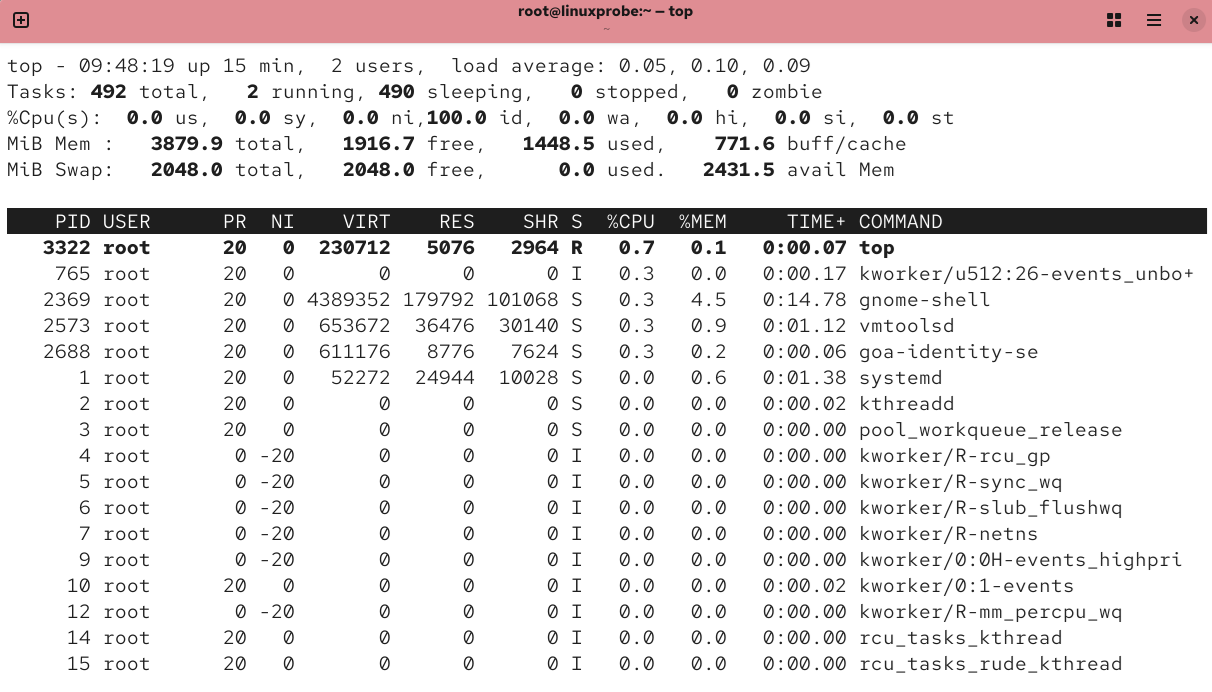
Figure 2-7 top command interface
In Figure 2-7, the top five lines of the top command output represent overall system statistics, with the following meanings:
Line 1: System time, uptime, number of logged-in terminals, system load (three values representing the average over 1 minute, 5 minutes, and 15 minutes; lower values indicate lower load).
Line 2: Total processes, running processes, sleeping processes, stopped processes, zombie processes.
Line 3: User resource utilization percentage, kernel resource utilization percentage, resource share of processes with adjusted priorities, idle resource percentage, etc. All data represents CPU metrics displayed as percentages. For example, "99.9 id" indicates 99.9% of CPU resources are idle.
Line 4: Total physical memory, free memory, used memory, memory allocated for kernel cache.
Line 5: Total virtual memory, free virtual memory, used virtual memory, preloaded memory.
10. nice command
The nice command adjusts process priority. Syntax: nice -n priority_number service_name.
In the output of the top command, the PR and NI values represent the process priority. Lower numbers (range: -20 to 19) indicate higher priority. In daily production work, you can lower the priority of non-critical processes to allow urgent services to utilize more CPU and memory resources, achieving a reasonable allocation of system resources. For example, to set the bash service to the highest priority:
root@linuxprobe:~# nice -n -20 bash
11. pidof Command
The pidof command queries the PID of a specified service process. Its syntax is "pidof [options] service_name".
Each process has a unique process ID (PID) throughout its lifecycle, enabling identification of running processes. For example, execute the following command to query the PID of the sshd service on the local machine:
root@linuxprobe:~# pidof sshd
1340
12. kill command
The kill command is used to terminate a service process with a specified PID. Its syntax is kill [options] process PID.
Next, use the kill command to terminate the process represented by the PID obtained from the pidof command. The command is shown below. This operation is equivalent to forcibly stopping the sshd service.
root@linuxprobe:~# kill 1340
However, the system may sometimes indicate that the process cannot be terminated. In such cases, add the -9 parameter (SIGKILL signal). This signal represents the highest-level command for forcibly terminating a process in the system, and the process cannot resist it:
root@linuxprobe:~# kill -9 1340
13. killall Command
The killall command terminates all processes associated with a specified service name. Its syntax is killall [options] service_name.
Typically, complex service programs involve multiple processes working together to provide services to users. Terminating these processes individually with the kill command can be cumbersome. In such cases, the killall command can be used to batch-terminate all processes associated with a specific service program.
Below, we demonstrate terminating all processes of the httpd service program. Since RHEL 10 does not install the httpd service program by default, observe the operation process and output results for now. Practice this after learning the relevant content.
root@linuxprobe:~# pidof httpd
13581 13580 13579 13578 13577 13576
root@linuxprobe:~# killall httpd
root@linuxprobe:~# pidof httpd
root@linuxprobe:~#
If you wish to stop a command running in the system terminal, press Ctrl+C simultaneously to send a SIGINT signal, which will immediately terminate the command's process. Alternatively, if certain commands continuously output information to the screen during execution, interfering with subsequent command input, you can append an & symbol at the end of the command. This will send the command to run in the system background.
2.4 System Status Monitoring Commands
As a competent system administrator, mastering quick methods to assess Linux server status is essential for efficient troubleshooting. The following sections will detail commands related to: network interfaces/networking, kernel status, system load, memory usage, active terminal count, login history, command execution logs, and rescue diagnostics. These commands are highly practical—please study them carefully to gain proficiency.
1. ifconfig Command
The ifconfig command retrieves network interface configurations and network status information. Its full English name is "interface configurator," with the syntax format being ifconfig [options] [network device].
When using ifconfig to view the current network interface configuration and network status on your local machine, the primary information to examine includes: the interface name, the IP address following the inet parameter, the physical address (also known as the MAC address) following the ether parameter, the number of received packets (RX), the number of transmitted packets (TX), and the cumulative traffic.
root@linuxprobe:~# ifconfig
ens160: flags=4163<UP,BROADCAST,RUNNING,MULTICAST>  mtu 1500
        inet 192.168.10.10  netmask 255.255.255.0  broadcast 192.168.10.255
        inet6 fe80::20c:29ff:fee5:e733  prefixlen 64  scopeid 0x20<link>
        ether 00:0c:29:e5:e7:33  txqueuelen 1000  (Ethernet)
        RX packets 27660  bytes 27151953 (25.8 MiB)
        RX errors 0  dropped 0  overruns 0  frame 0
        TX packets 9449  bytes 652999 (637.6 KiB)
        TX errors 0  dropped 0 overruns 0  carrier 0  collisions 0

lo: flags=73<UP,LOOPBACK,RUNNING>  mtu 65536
        inet 127.0.0.1  netmask 255.0.0.0
        inet6 ::1  prefixlen 128  scopeid 0x10<host>
        loop  txqueuelen 1000  (Local Loopback)
        RX packets 120  bytes 10704 (10.4 KiB)
        RX errors 0  dropped 0  overruns 0  frame 0
        TX packets 120  bytes 10704 (10.4 KiB)
        TX errors 0  dropped 0 overruns 0  carrier 0  collisions 0
In RHEL 5, RHEL 6, and most other early Linux systems, network interface names were consistently eth0, eth1, eth2, and so on. In RHEL 7, they changed to names like eno16777736, while in RHEL 8, 9, and 10, the newer network interface names resemble ens160, ens192, and so on. Thus, experienced system administrators can roughly guess the system version just by looking at the network interface names.
2. uname Command
The uname command displays system kernel version and architecture information. Its full name is UNIX Name, with the syntax "uname [options]".
When using uname, the -a parameter is typically required to display comprehensive system details including kernel name, hostname, kernel release version, node name, build time, hardware name, hardware platform, processor type, and operating system name:
root@linuxprobe:~# uname -a
Linux linuxprobe.com 6.12.0-55.9.1.el10….x86_64 #1 SMP PREEMPT_DYNAMIC Mon Sep 23 04:19:12 EDT 2025 x86_64 GNU/Linux
Incidentally, to view detailed information about the current system version, you need to examine the redhat-release file. The command and corresponding output are as follows:
root@linuxprobe:~# cat /etc/redhat-release
Red Hat Enterprise Linux release 10.0
3. uptime Command
The uptime command displays system load information. Simply enter the command and press Enter to execute it.
The uptime command is truly excellent. It displays the current system time, the system's uptime, the number of active terminals, and average load values. The average load values represent the system's workload over the past 1 minute, 5 minutes, and 15 minutes (the bolded sections below). Lower load values are better:
root@linuxprobe:~# uptime
 09:55:09 up 22 min,  2 users,  load average: 0.06, 0.05, 0.06
Of course, "lower load values are better" applies to system administrators—lower values indicate greater stability and peace of mind. However, if company-purchased hardware remains idle for extended periods, it clearly represents wasted resources, which won't please management. Therefore, it's advisable to maintain load values around 1, and in production environments, keep them below 5.
Note that the above refers to single-core CPU load. If your CPU has 4 cores, a load value of 4.00 indicates full utilization. Generally, keep the load value below twice the number of cores.
4. free command
The free command displays current system memory usage information. Its syntax is free [options].
To prevent Linux systems from crashing due to resource exhaustion, administrators must constantly monitor memory usage. When using the free command, combine it with the -h parameter to display real-time memory usage in a more user-friendly format.Table 2-9 shows the output after executing the free -h command on Liu Chuan's computer. Note that the Chinese annotations in the output are added by the author and do not correspond to actual parameter explanations in the actual output.
root@linuxprobe:~# free -h
Table 2-9 Output after executing the free -h command
| | total | used | free | shared | buff/cache | available | | Mem: | 3.8Gi | 1.5Gi | 1.8Gi | 14Mi | 773Mi | 2.3Gi | | Swap: | 2.0Gi | 0B | 2.0Gi | | | |
If you don't use the -h (human-readable) option to view memory usage, the default unit is KB. This means that if a server has several hundred GB of memory, the output will be a long string of numbers, which is very hard to read.
5. who command
The who command displays information about users currently logged into the host. Simply type the command and press Enter to execute it.
These three simple letters quickly display all currently logged-in users' names and their active terminal information. If there are remote users, their IP addresses are also shown. Table 2-10 shows the results after executing the who command.
root@linuxprobe:~# who
Table 2-10 Results of Executing the who Command
| Username | Terminal | Login Time |
|---|---|---|
| root | seat0 | 2025-05-18 09:36(login screen) |
| root | tty2 | 2025-05-18 09:36(tty2) |
6. last command
The last command displays historical login records on the host. Simply enter the command and press Enter to execute.
The Linux system logs each login session into a log file. If you ever need to review past entries, simply execute this command:
root@linuxprobe:~# last
root     tty2         tty2             Sun May 18 09:36   still logged in
root     seat0        login screen     Sun May 18 09:36   still logged in
reboot   system boot  6.11.0-0.rc5.23. Sun May 18 09:32   still running
root     tty2         tty2             Sun May 18 09:31 - down   (00:01)
root     seat0        login screen     Sun May 18 09:31 - down   (00:01)

wtmp begins Sun Mar  9 02:33:32 2025
7. ping command
The ping command tests network connectivity between hosts. Its syntax is "ping [options] host_address".
Even if you haven't studied Linux systems, you've likely seen others use the ping command. When executed, the system sends an ICMP request for a response to the remote host. If the network connection to the remote host is functioning properly, the remote host will respond to this message. Thus, the ping command can be used to determine whether a remote host is online and whether the network is functioning normally. Common parameters and their functions for the ping command are shown in Table 2-11.
Table 2-11 Common Parameters and Functions of the ping Command
| Parameter | Function |
|---|---|
| -c | Total number of pings sent |
| -i | Interval time between pings (seconds) |
| -W | Maximum wait time per ping (seconds) |
Using the ping command to test an online host (with IP address 192.168.10.10) yields the following response:
root@linuxprobe:~# ping -c 4 192.168.10.10
PING 192.168.10.10 (192.168.10.10) 56(84) bytes of data.
64 bytes from 192.168.10.10: icmp_seq=1 ttl=64 time=0.054 ms
64 bytes from 192.168.10.10: icmp_seq=2 ttl=64 time=0.053 ms
64 bytes from 192.168.10.10: icmp_seq=3 ttl=64 time=0.052 ms
64 bytes from 192.168.10.10: icmp_seq=4 ttl=64 time=0.042 ms

--- 192.168.10.10 ping statistics ---
4 packets transmitted, 4 received, 0% packet loss, time 3090ms
rtt min/avg/max/mdev = 0.042/0.050/0.054/0.004 ms
Testing an offline host (IP address 192.168.10.20) yields the following response:
root@linuxprobe:~# ping -c 4 192.168.10.20
PING 192.168.10.20 (192.168.10.20) 56(84) bytes of data.
From 192.168.10.10 icmp_seq=1 Destination Host Unreachable
From 192.168.10.10 icmp_seq=2 Destination Host Unreachable
From 192.168.10.10 icmp_seq=3 Destination Host Unreachable
From 192.168.10.10 icmp_seq=4 Destination Host Unreachable

--- 192.168.10.20 ping statistics ---
4 packets transmitted, 0 received, +4 errors, 100% packet loss, time 3051ms
pipe 3
Observant students will have noticed the -c parameter. This is because the ping command on Windows systems defaults to sending only 4 packets, whereas the ping command on Linux systems runs indefinitely, requiring manual limiting by system administrators.
8. tracepath command
The tracepath command displays all routing information traversed by packets en route to the destination host. Its syntax is tracepath [options] IP address or domain name.
When two hosts fail to ping each other normally, consider whether incorrect routing information between them causes data to be mistakenly discarded by a device. The tracepath command can then trace all routing information along the path to the destination host, helping identify the problematic device. The following scenario illustrates this clearly:
root@linuxprobe:~# tracepath www.linuxprobe.com
 1?: [LOCALHOST]                                          pmtu 1500
 1:  no reply
 2:  11.223.0.189                                          5.954ms asymm  1
 3:  11.223.0.14                                           6.256ms asymm  2
 4:  11.220.159.62                                         3.313ms asymm  3
 5:  116.251.107.13                                        1.841ms
 6:  140.205.50.237                                        2.416ms asymm  5
 7:  101.95.211.117                                        2.772ms
 8:  101.95.208.45                                        40.839ms
 9:  101.95.218.217                                       13.898ms asymm  8
10:  202.97.81.162                                         8.113ms asymm  9
11:  221.229.193.238                                      15.693ms asymm 10
12:  no reply
13:  no reply
14:  no reply
15:  no reply
16:  no reply
[... output omitted ...]
9. netstat Command
The netstat command displays network-related information such as network connections, routing tables, and interface statuses. Its full English name is "network status," and its syntax is "netstat [options]".
When used appropriately, the netstat command can reveal comprehensive details about network status. We've compiled some commonly used parameters for reference, as shown in Table 2-12.
Table 2-12 Common netstat command parameters and their functions
| Parameter | Function |
|---|---|
| -a | Display all open sockets |
| -p | Display sockets currently in use |
| -t | Display TCP connection status |
| -u | Display UDP connection status |
| -n | Use IP addresses instead of hostnames |
| -l | List only listening service states |
| -i | Display network interface list |
| -r | Display routing table information |
Use the netstat command to display detailed network status:
root@linuxprobe:~# netstat -a
Active Internet connections (servers and established)
Proto Recv-Q Send-Q Local Address           Foreign Address         State
tcp        0      0 localhost:ipp           0.0.0.0:*               LISTEN
tcp       0      0 localhost:ipp           [::]:*                  LISTEN
tcp       0      0 [::]:websm              [::]:*                  LISTEN
udp        0      0 linuxprobe.com:bootpc   _gateway:bootps         ESTABLISHED
udp        0      0 0.0.0.0:39400           0.0.0.0:*
udp        0      0 0.0.0.0:mdns            0.0.0.0:*
udp6       0      0 [::]:47721              [::]:*
udp6       0      0 [::]:mdns               [::]:*
[... output omitted ...]
Use the netstat command to display the network interface list:
root@linuxprobe:~# netstat -i
Kernel Interface table
Iface             MTU    RX-OK RX-ERR RX-DRP RX-OVR    TX-OK TX-ERR TX-DRP TX-OVR Flg
ens160           1500    32543      0      0 0          9508      0      0      0 BMRU
lo              65536      126      0      0 0           126      0      0      0 LRU
10. history command
The history command displays the history of executed commands. Its syntax is "history [options]".
The history command is likely one of the most beloved commands among system administrators. Executing history displays the most recent 1000 command records executed by the current user on the local machine. If 1000 entries are insufficient, you can customize the value of the HISTSIZE variable in the /etc/profile file.When using history, the -c parameter can clear all command history. You can also repeat a specific command using the "!command_number" syntax. In short, the history command offers many interesting features waiting to be explored.
root@linuxprobe:~# history
1 ifconfig
2 uname -a
3 cat /etc/redhat-release
4 uptime
5 free -h
6 who
7 last
8 ping -c 192.168.10.10
9 ping -c 192.168.10.20
10 tracepath www.linuxprobe.com
11 netstat -a
12 netstat -i
13 history
root@linuxprobe:~# !3
cat /etc/redhat-release
Red Hat Enterprise Linux release 10
History commands are stored in the .bash_history file within the user's home directory.In Linux systems, files beginning with a period (.) are hidden files. Most of these are system service files, and their contents can be viewed using the cat command:
root@linuxprobe:~# cat ~/.bash_history
To clear the Linux command history for the current user on this machine, execute the following command:
root@linuxprobe:~# history -c
11. sos Command
The sos command collects system configuration and architecture information to generate diagnostic documentation. Its syntax is sos [options].
When encountering Linux system issues requiring technical support, this command is often used first to gather basic system status and service configuration information. This enables support personnel to remotely resolve minor issues or gain preliminary insight into complex problems. Common sos parameters and their functions are listed in Table 2-13.
Table 2-13 Common Parameters and Functions of the sos Command
| Parameter | Function |
|---|---|
| report | Collect, organize, and output a report |
| clean | Obfuscate sensitive information in the report |
| help | Display detailed help information |
| collect | Collect reports from multiple nodes simultaneously |
root@linuxprobe:~# sos report
sosreport (version 4.8.2)

This command will collect diagnostic and configuration information from
this Red Hat Enterprise Linux system and installed applications.

An archive containing the collected information will be generated in
/var/tmp/sos.4p3s8647 and may be provided to a Red Hat support
representative.

Any information provided to Red Hat will be treated in accordance with
the published support policies at:

        Distribution Website : https://www.redhat.com/
        Commercial Support   : https://access.redhat.com/

The generated archive may contain data considered sensitive and its
content should be reviewed by the originating organization before being
passed to any third party.

No changes will be made to system configuration.

Press ENTER to continue, or CTRL-C to quit.Press Enter here

Optionally, please enter the case id that you are generating this report for []:  Press ENTER again here
 Setting up archive ...
 Setting up plugins ...
[... output omitted ...]
Creating compressed archive...

Your sosreport has been generated and saved in:
	/var/tmp/sosreport-linuxprobe-2025-05-18-xqbxbhp.tar.xz

 Size	18.45MiB
 Owner	root
 sha256	16cfa2860460de92daa5923a84e60b4889afe15522fa5c81ee18606e5fd512b0

Please send this file to your support representative.
Tips: The
soscommand is somewhat like a remote medical consultation. Suppose you're feeling unwell today with a cough and fever. You can first search online for the causes of related symptoms. If it's just a cold, you can simply drink more water, saving you the hassle of going to the hospital. If you suspect a serious issue, it's still not too late to seek professional help.
2.5 Commands for Locating Files
In daily Linux operations, locating files is a fundamental and crucial task. Before searching for files, understanding the concept of the working directory is essential.The working directory refers to the user's current location within the system. Since working directories involve knowledge of the system's storage structure, Chapter 6 will cover this topic in detail. Readers need only grasp the practical exercises here; it's perfectly fine not to fully master everything, as the Linux knowledge base is vast, and every beginner goes through this learning phase.
1. pwd Command
The pwd command displays the user's current working directory. Its full name is "print working directory." Simply type this command and press Enter to execute it.
Using the pwd command to view the current working directory:
root@linuxprobe:~# pwd
/root
2. cd Command
The cd command is used to change the current working directory. Its full English name is "change directory." The syntax format is cd [options] [directory].
This is arguably the most frequently used Linux command. It allows quick and flexible navigation between different working directories. Beyond standard directory changes, you can use cd - to return to the previous directory, cd .. to move up a directory level, cd ~ to switch to the current user's home directory, or cd ~username to navigate to another user's home directory (similar to using a "return to town" skill in a game).For example, use the following cd command to switch to the /etc directory:
root@linuxprobe:~# cd /etc
Similarly, use the following command to switch to the /bin directory:
root@linuxprobe:/etc# cd /bin
To return to the previous directory (/etc), execute:
root@linuxprobe:/bin# cd -
/etc
root@linuxprobe:/etc#
You can also quickly switch to the user's home directory with this command:
root@linuxprobe:/etc# cd ~
root@linuxprobe:~#
Tips:
The command prompt changes with directory navigation. For example,root@linuxprobe:/etc#indicates the current location is/etc.
3. ls Command
The ls command displays file information within a directory. Its full English name is "list," with the syntax format ls [options] [filename]. The files displayed will vary depending on the current working directory. Using the -a option with ls shows all files (including hidden ones). Combining this with the -l option displays detailed file attributes and sizes. Executing ls -l -a in the current directory will list all files and output their attribute information:
files (including hidden ones). The -l parameter displays detailed file attributes and sizes. Combining both parameters with ls shows all files in the current directory along with their attributes:
root@linuxprobe:~# ls -al
total 40
dr-xr-x---. 15 root root     4096 May 18 09:37 .
dr-xr-xr-x. 18 root root      235 Mar  8 20:02 ..
-rw-r--r--.  1 root root      769 Mar 10 20:04 1.txt
-rw-------.  1 root root     1019 Mar  8 20:06 anaconda-ks.cfg
-rw-------.  1 root root      652 May 18 09:32 .bash_history
-rw-r--r--.  1 root root       18 Jun 24  2024 .bash_logout
-rw-r--r--.  1 root root      141 Jun 24  2024 .bash_profile
-rw-r--r--.  1 root root      429 Jun 24  2024 .bashrc
drwx------.  8 root root      117 Mar 10 20:01 .cache
drwx------. 11 root root     4096 May 18 09:47 .config
[... output omitted ...]
To view directory attributes, add the -d parameter. For example, use the following command to inspect permissions and attributes of the /etc directory:
root@linuxprobe:~# ls -ld /etc
drwxr-xr-x. 134 root root 8192 May 18 09:33 /etc
4. tree command
The tree command displays directory contents and structure in a tree diagram format. Simply enter the command and press Enter to execute.
While the ls command conveniently shows files within a directory, it doesn't visually display the hierarchical structure. For example, if directory A contains B, and B contains C, ls only shows the outermost A directory—which is insufficient in some scenarios. The tree command, however, displays the entire file structure as a tree diagram. Let's compare their differences.
Using the ls command to view files in a directory:
root@linuxprobe:~# ls
A                Desktop    Downloads  Pictures  Templates
anaconda-ks.cfg  Documents  Music      Public    Videos
Using the tree command to view files and structure within a directory:
root@linuxprobe:~# tree
.
├── A
│   └── B
│       └── C
├── anaconda-ks.cfg
├── Desktop
├── Documents
├── Downloads
├── Music
├── Pictures
├── Public
├── Templates
└── Videos

12 directories, 1 file
5. find Command
The find command locates files and directories based on specified criteria, following the syntax find [search scope] search criteria.
This book has repeatedly mentioned that "everything in Linux is a file." Now we'll see the weight of that statement. In Linux systems, search tasks are typically accomplished using the find command. It can use various file attributes as search criteria (such as filename, size, modification time, permissions, etc.). Upon a successful match, the information is displayed on the screen by default. The parameters and functions of the find command are shown in Table 2-14.
Table 2-14 find command parameters and their functions
| Parameter | Function |
|---|---|
| -name | Match filename |
| -perm mode | Match files whose permissions exactly match mode |
| -perm -mode | Match files that have all of the permission bits in mode set |
| -perm /mode | Match files that have any of the permission bits in mode set (GNU) |
| -user | Match owner |
| -group | Matches group ownership |
| -mtime -n +n | Matches modification time (-n: within n days, +n: n days ago) |
| -atime -n +n | Matches access time (-n: within n days, +n: n days ago) |
| -ctime -n +n | Matches modification time of file permissions (-n means within n days, +n means n days ago) |
| -nouser | Matches files with no owner |
| -nogroup | Matches files with no group |
| -newer f1 !f2 | Match files newer than f1 but older than f2 |
| -type b/d/c/p/l/f | Match file types (letters represent block devices, directories, character devices, pipes, links, regular files) |
| -size | Matches file size (e.g., +50k finds files larger than 50KB, -50k finds files smaller than 50KB) |
| -prune | Ignores a specific directory |
| -exec …… ; | Followed by commands to further process search results (demonstrated below) |
The crucial role of the -exec parameter warrants special attention. This parameter passes the results found by the find command to the subsequent command for further processing. It closely resembles the pipe symbol technique covered in Chapter 3. Due to find's specific parameter requirements, even though exec is in long format, it still only requires a hyphen (-) preceding it.
According to the Filesystem Hierarchy Standard, configuration files in Linux systems are stored in the /etc directory (detailed in Chapter 6). To list all files starting with "host" in this directory, execute the following command:
root@linuxprobe:~# find /etc -name "host*"
/etc/nvme/hostnqn
/etc/nvme/hostid
/etc/host.conf
/etc/hosts
/etc/avahi/hosts
/etc/hostname
To search for all files with SUID permissions system-wide (see Chapter 5 for details), simply use the -4000 option:
root@linuxprobe:~# find / -perm -4000
/usr/bin/umount
/usr/bin/chage
/usr/bin/gpasswd
/usr/bin/newgrp
/usr/bin/passwd
/usr/bin/mount
/usr/bin/fusermount3
[... output omitted ...]
Tips:
Advanced ExperimentLocate all files belonging to the linuxprobe user across the entire filesystem and copy them to the /root/findresults directory.
The key focus of this experiment is the
-exec {} \;parameter. Here,{}represents each file found by thefindcommand, and the command must end with\;.The specific command to complete this experiment is as follows:
root@linuxprobe:~# mkdir /root/findresults
root@linuxprobe:~# find / -user linuxprobe -exec cp -a {} /root/findresults \;
6. locate Command
The locate command is used to quickly search for the location of files by name. Its syntax is locate [options] object.
While the find command offers more precise full-disk searches, it can be somewhat inefficient. If you're simply looking for common files with a general idea of their names, try the locate command instead. Before using locate, run the updatedb command to generate an index database file named /var/lib/locate/locate.db. Subsequent locate searches will query this database, significantly speeding up the process.
Before using locate for the first time, remember to run updatedb to build the index database, then proceed with your search:
root@linuxprobe:~# updatedb
root@linuxprobe:~# ls -l /var/lib/plocate/plocate.db
-rw-r-----. 1 root plocate 2527288 May 18 10:25 /var/lib/plocate/plocate.db
Use the locate command to find all files containing the name "whereis":
root@linuxprobe:~# locate whereis
/usr/bin/whereis
/usr/share/bash-completion/completions/whereis
/usr/share/man/man1/whereis.1.gz
7. whereis Command
The whereis command quickly locates the positions of binary programs (commands), source code, and corresponding help files by name. Its syntax is whereis command_name.
Simply put, the whereis command also relies on prebuilt index databases instead of scanning the entire filesystem each time. Unlike locate, it focuses on locating the binary, its man page, and related files for a given command name.
Below, we use the whereis command to locate the positions of the ls and pwd commands:
root@linuxprobe:~# whereis ls
ls: /usr/bin/ls /usr/share/man/man1/ls.1.gz
root@linuxprobe:~# whereis pwd
pwd: /usr/bin/pwd /usr/share/man/man1/pwd.1.gz
8. which Command
The which command is used to quickly locate the binary program (command) corresponding to a specified name. Its syntax is which command_name.
The which command searches for the command's path within the directories specified by the PATH variable, based on the given criteria. In other words, if you are not concerned with files of the same name (as with find or locate), nor with the command's source code or help files (as with whereis), and simply want to find the path where the command itself resides, then the which command is perfectly suited for the task. Below, we locate the paths corresponding to the locate and whereis commands:
root@linuxprobe:~# which locate
/usr/bin/locate
root@linuxprobe:~# which whereis
/usr/bin/whereis
2.6 Text File Editing Commands
After studying the previous sections, you should now be familiar with changing working directories and managing files. In Linux, everything is a file, so configuring services naturally involves editing their configuration files. If you can't proficiently examine system or service configuration files, you'll face real difficulties later on.This section introduces several commands for viewing text file contents. More complex text editor tools will be covered in Chapter 4 alongside Shell scripting.
1. cat Command
The cat command is used to view plain text files (files with relatively little content). Its full English name is "concatenate," and its syntax is cat [options] filename.
Linux systems offer multiple commands for viewing text content, each with distinct features. For instance, the cat command is specifically designed for viewing small plain text files. The name "cat" is also easy to remember, as it means "cat" in English. Doesn't the image of a kitten evoke a sense of smallness and cuteness?
If you wish to display line numbers while viewing text content, simply append the -n parameter to the cat command:
root@linuxprobe:~# cat -n anaconda-ks.cfg
     1	# Generated by Anaconda 40.22.3.12
     2	# Generated by pykickstart v3.52.5
     3	#version=RHEL10
     4	# Use graphical install
     5	graphical
     6
     7	%addon com_redhat_kdump --disable
     8
     9	%end
[... output omitted ...]
2. more Command
The more command is used to view plain text files (especially lengthy ones). Its syntax is more [options] filename. When reading novels or very long configuration files, cat becomes impractical.
When using the cat command to read lengthy text, the information scrolls rapidly across the screen, causing content to disappear before you can fully view it. Therefore, for extensive text content, the more command is recommended. It displays a percentage indicator at the bottom of the screen showing how much content has been read. You can also use the spacebar or Enter key to scroll down:
root@linuxprobe:~# more anaconda-ks.cfg
# Generated by Anaconda 40.22.3.12
# Generated by pykickstart v3.52.5
#version=RHEL10
# Use graphical install
graphical

%addon com_redhat_kdump --disable

%end

# Keyboard layouts
keyboard --vckeymap=us --xlayouts='us'
# System language
lang en_US.UTF-8

# Network information
network  --bootproto=dhcp --device=ens160 --ipv6=auto --activate
network  --hostname=linuxprobe.com

repo --name="AppStream" --baseurl=file:///run/install/repo/AppStream

%packages
@^graphical-server-environment
--More--(48%)
3. head command
The head command displays the first N lines of a plain text file. Its syntax is head [options] filename.
When reading text content, it's rare to review an entire file from start to finish. What if you only need to view the first 10 lines? That's where the head command comes in handy:
root@linuxprobe:~# head -n 10 anaconda-ks.cfg
# Generated by Anaconda 40.22.3.12
# Generated by pykickstart v3.52.5
#version=RHEL10
# Use graphical install
graphical

%addon com_redhat_kdump --disable

%end
4. tail Command
The tail command displays the last N lines of a plain text file or continuously refreshes the latest content of a file. Its syntax is tail [options] filename.
We may also encounter scenarios where we need to view the last 10 lines of text content. This is where the tail command comes in handy. Its operation is very similar to the head command. Simply execute "tail -n 10 filename" to achieve this effect:
root@linuxprobe:~# tail -n 10 anaconda-ks.cfg
autopart
# Partition clearing information
clearpart --none --initlabel

# System timezone
timezone Asia/Shanghai --utc

# Root password
rootpw --iscrypted --allow-ssh $y$j9T$9ksHS/agdH0v1Da0mwbUp6Kg$G.cHNWJ1EJEaBWJxwahrFRlQkqRs82A0ajf32ZTB.PB
user --groups=wheel --name=linuxprobe --password=$y$j9T$nv/rjZ.6xpHhLADJDvIa3uGH$f623oMdVJdxy/QygxwnuZc0FsAdcj8amW9
The most powerful feature of the tail command is its ability to continuously refresh a file's contents. This is particularly useful when you want to view the latest log file in real-time. The command format for this is tail -f filename:
root@linuxprobe:~# tail -f /var/log/messages
May 18 10:28:07 linuxprobe systemd[1]: packagekit.service: Deactivated successfully.
May 18 10:28:43 linuxprobe systemd[1]: Starting packagekit.service - PackageKit Daemon...
May 18 10:28:43 linuxprobe packagekitd[9218]: g_path_get_basename: assertion 'file_name != NULL' failed
May 18 10:28:43 linuxprobe systemd[1]: Started packagekit.service - PackageKit Daemon.
May 18 10:28:43 linuxprobe packagekitd[9218]: Skipping refresh of media: Cannot update read-only repo
May 18 10:29:13 linuxprobe ptyxis[2945]: context mismatch in svga_surface_destroy
May 18 10:29:13 linuxprobe ptyxis[2945]: context mismatch in svga_surface_destroy
May 18 10:29:13 linuxprobe ptyxis[2945]: context mismatch in svga_surface_destroy
5. tr Command
The tr command is used to replace characters within text content. Its full English name is "translate," and its syntax is "tr source_character target_character".
Often, we need to quickly replace specific words in text or perform wholesale replacements across entire documents. Manual editing proves impractical for large volumes of content. In such cases, you can first use the cat command to read the text to be processed, then pipe (see Chapter 3) this content to the tr command for replacement. For example, to convert all English letters in a text to uppercase:
root@linuxprobe:~# cat anaconda-ks.cfg | tr 'a-z' 'A-Z'
# GENERATED BY ANACONDA 40.22.3.12
# GENERATED BY PYKICKSTART V3.52.5
#VERSION=RHEL10
# USE GRAPHICAL INSTALL
GRAPHICAL

%ADDON COM_REDHAT_KDUMP --DISABLE

%END

# KEYBOARD LAYOUTS
KEYBOARD --VCKEYMAP=US --XLAYOUTS='US'
# SYSTEM LANGUAGE
LANG EN_US.UTF-8
[... output omitted ...]
6. wc Command
The wc command counts the number of lines, words, or bytes in a specified text file. Its full English name is "word count," and the syntax is wc [options] filename.
Whenever I mention this command in class, some students inevitably associate it with a public facility—though the two are completely unrelated. The wc command counts lines, words, bytes, and so on in text. To help remember its function, you might associate it like this: when bored in the restroom, you end up counting the lines in your reading material. The parameters and corresponding functions of the wc command are shown in Table 2-15.
Table 2-15 wc Command Parameters and Functions
| Parameter | Function |
|---|---|
| -l | Display lines only |
| -w | Display words only |
| -c | Display bytes only |
In Linux systems, /etc/passwd is the file that stores all user information. To count how many users are currently on the system, you can use the following command to query it. Isn't that amazing?
root@linuxprobe:~# wc -l /etc/passwd
38 /etc/passwd
7. stat Command
The stat command displays detailed storage information and timestamps for files. Its full name is status, and the syntax is stat filename.
As you know, files have a modification time. In Linux systems, files actually contain three types of time states: Access Time (the last time the content was accessed, abbreviated as Atime), Modify Time (the last time the content was modified, abbreviated as Mtime), and Change Time (the last time the file attributes were modified, abbreviated as Ctime).
Below, we use the stat command to view these three time states for a file:
root@linuxprobe:~# stat anaconda-ks.cfg
  File: anaconda-ks.cfg
  Size: 1019      	Blocks: 8          IO Block: 4096   regular file
Device: 253,0	Inode: 33826925    Links: 1
Access: (0600/-rw-------)  Uid: (    0/    root)   Gid: (    0/    root)
Context: system_u:object_r:admin_home_t:s0
Access: 2025-05-18 10:05:30.651095368 +0800
Modify: 2025-03-08 20:06:44.282103236 +0800
Change: 2025-03-08 20:06:44.282103236 +0800
 Birth: 2025-03-08 20:06:44.235103234 +0800
8. grep Command
The grep command searches for and extracts text matching a specified pattern (such as strings or regular expressions). Its full name is Global Regular Expression Print. The syntax is grep [options] pattern filename.
The grep command is the most widely used text search and matching tool. While it has numerous parameters, most are rarely needed. Therefore, after careful consideration, we will focus solely on the two most frequently used grep parameters here.
-n option: Displays the line numbers of matched lines.
-v option: Inverts the search (shows all lines not containing the keyword).
These two options cover approximately 80% of your future work needs. As for the other hundreds of options, if you encounter them during your work later, you can always use the man grep command to look them up.
Common grep command parameters and their functions are listed in Table 2-16.
Table 2-16 Common grep command parameters and their functions
| Parameter | Function |
|---|---|
| -b | Treat executable files (binaries) as text files for searching |
| -c | Display only the number of lines found |
| -i | Ignore case |
| -n | Display line numbers |
| -v | Inverse selection—list only lines without the "keyword" |
In Linux systems, the /etc/passwd file stores all user information. If a user's login terminal is set to /sbin/nologin, they are no longer permitted to log into the system. Therefore, the grep command can be used to find information about all users currently prohibited from logging into the system:
root@linuxprobe:~# grep /sbin/nologin /etc/passwd
bin:x:1:1:bin:/bin:/usr/sbin/nologin
daemon:x:2:2:daemon:/sbin:/usr/sbin/nologin
adm:x:3:4:adm:/var/adm:/usr/sbin/nologin
lp:x:4:7:lp:/var/spool/lpd:/usr/sbin/nologin
mail:x:8:12:mail:/var/spool/mail:/usr/sbin/nologin
operator:x:11:0:operator:/root:/usr/sbin/nologin
games:x:12:100:games:/usr/games:/usr/sbin/nologin
ftp:x:14:50:FTP User:/var/ftp:/usr/sbin/nologin
[... output omitted ...]
9. cut Command
The cut command extracts text content by "column," with the syntax cut [options] filename.
System files store user data with values separated by colons. Let's examine:
root@linuxprobe:~# head -n 2 /etc/passwd
root:x:0:0:Super User:/root:/bin/bash
bin:x:1:1:bin:/bin:/usr/sbin/nologin
Generally, extracting data by "line" is simpler—just set the keyword to search for. However, column-based searches require both the -f parameter to specify the column number and the -d parameter to define the delimiter.
Next, use the following command to extract username information from the passwd file, specifically the first column separated by colons (:):
root@linuxprobe:~# cut -d : -f 1 /etc/passwd
root
bin
daemon
adm
lp
sync
shutdown
halt
mail
operator
games
ftp
[... output omitted ...]
10. diff Command
The diff command compares differences between multiple files. Its full English name is "difference." The syntax is "diff [options] filename A filename B".
When using diff, you can employ the --brief option to confirm whether two files are identical, or use the -c option to display detailed differences between multiple files. This is an indispensable tool for detecting file tampering. For example, first use the cat command to view the contents of diff_A.txt and diff_B.txt separately, then compare them:
root@linuxprobe:~# cat diff_A.txt
Welcome to linuxprobe.com
Red Hat certified
Free Linux Lessons
Professional guidance
Linux Course
root@linuxprobe:~# cat diff_B.txt
Welcome tooo linuxprobe.com

Red Hat certified
Free Linux LeSSonS
////////.....////////
Professional guidance
Linux Course
Next, use the diff --brief command to display the comparison results and determine if the files are identical:
root@linuxprobe:~# diff --brief diff_A.txt diff_B.txt
Files diff_A.txt and diff_B.txt differ
Finally, use the diff command with the -c option to describe the specific differences in file content:
root@linuxprobe:~# diff -c diff_A.txt diff_B.txt
*** diff_A.txt    2025-05-18 10:34:30.829180338 +0800
--- diff_B.txt    2025-05-18 10:34:40.334180802 +0800
***************
*** 1,5 ****
! Welcome to linuxprobe.com
  Red Hat certified
! Free Linux Lessons
  Professional guidance
  Linux Course
--- 1,7 ----
! Welcome tooo linuxprobe.com
!
  Red Hat certified
! Free Linux LeSSonS
! ////////.....////////
  Professional guidance
  Linux Course
11. uniq Command
The uniq command removes consecutive duplicate lines from text files. Its full English name is "unique." The syntax is uniq [options] filename.
As its full English name "unique" suggests, this command removes consecutive duplicate lines from text files. Non-adjacent lines (those not immediately following duplicates) are not deduplicated by default. After removing duplicates, only unique lines remain—hence the term "unique."
Using the uniq command on two text files demonstrates the difference clearly:
root@linuxprobe:~# cat uniq.txt
Welcome to linuxprobe.com
Welcome to linuxprobe.com
Welcome to linuxprobe.com
Welcome to linuxprobe.com
Red Hat certified
Free Linux Lessons
Professional guidance
Linux Course
root@linuxprobe:~# uniq uniq.txt
Welcome to linuxprobe.com
Red Hat certified
Free Linux Lessons
Professional guidance
Linux Course
12. sort Command
The sort command is used to sort text content. Its syntax is "sort [options] filename".
Sometimes text content is out of order, and manually fixing each line is tedious. This is where the sort command shines—it efficiently organizes text. Theory alone won't suffice; hands-on examples make it crystal clear. Table 2-17 lists sort command parameters and their functions.
Table 2-17 Sort Command Parameters and Their Functions
| Option | Function |
|---|---|
| -f | Ignore case |
| -b | Ignore indentation and whitespace |
| -f | Ignore case |
| -b | Ignore indentation and whitespace |
| -n | Sort numerically |
| -r | Reverse sort |
| -u | Remove duplicate lines |
| -t | Specify separator |
| -k | Set field range |
First, after executing the sort command, it defaults to sorting alphabetically, which is very convenient:
root@linuxprobe:~# cat fruit.txt
banana
pear
apple
orange
raspberry
root@linuxprobe:~# sort fruit.txt
apple
banana
orange
pear
raspberry
Additionally, unlike the uniq command, sort can immediately remove duplicates using the -u option whenever two identical lines exist—regardless of any intervening content:
root@linuxprobe:~# cat sort.txt
Welcome to linuxprobe.com
Red Hat certified
Welcome to linuxprobe.com
Free Linux Lessons
Linux Course
root@linuxprobe:~# sort -u sort.txt
Free Linux Lessons
Linux Course
Red Hat certified
Welcome to linuxprobe.com
Want to sort numbers? No problem at all, and you don't need to worry about issues like "1 being greater than 20" (since some commands only compare the first digit of numbers, ignoring tens, hundreds, and thousands):
root@linuxprobe:~# cat number.txt
45
12
3
98
82
67
24
56
9
root@linuxprobe:~# sort -n number.txt
3
9
12
24
45
56
67
82
98
Finally, we tackle a "challenging" little experiment. The following content is extracted from the first five fields of the /etc/passwd file and has been randomly scrambled.
root@linuxprobe:~# cat user.txt
tss:x:59:59:Account used by the trousers package to sandbox the tcsd daemon
polkitd:x:998:996:User for polkitd
geoclue:x:997:995:User for geoclue
rtkit:x:172:172:RealtimeKit
pulse:x:171:171:PulseAudio System Daemon
qemu:x:107:107:qemu user
usbmuxd:x:113:113:usbmuxd user
unbound:x:996:991:Unbound DNS resolver
rpc:x:32:32:Rpcbind Daemon
gluster:x:995:990:GlusterFS daemons
It's easy to see that the above actually consists of 5 fields, separated by colons. If you want to sort based on the number in the third field, you can use the -t parameter to specify the delimiter, the -k parameter to specify the column number, and the -n parameter to perform numeric sorting:
root@linuxprobe:~# sort -t : -k 3 -n user.txt
rpc:x:32:32:Rpcbind Daemon
tss:x:59:59:Account used by the trousers package to sandbox the tcsd daemon
qemu:x:107:107:qemu user
usbmuxd:x:113:113:usbmuxd user
pulse:x:171:171:PulseAudio System Daemon
rtkit:x:172:172:RealtimeKit
gluster:x:995:990:GlusterFS daemons
unbound:x:996:991:Unbound DNS resolver
geoclue:x:997:995:User for geoclue
polkitd:x:998:996:User for polkitd
2.7 File Directory Management Commands
Up to this point, learning Linux commands has been like laying a solid foundation. While no "skyscrapers" have risen yet, your underlying skills have grown remarkably strong. Building on this knowledge, this section introduces the most frequently used commands in daily Linux system administration. These commands enable operations like creating, modifying, copying, cutting, renaming, and deleting files.
1. touch Command
The touch command creates empty files or sets file timestamps. Its syntax is touch [options] filename. For creating blank text files, this command is so straightforward it hardly warrants detailed explanation.
For example, the command touch linuxprobe creates an empty text file named linuxprobe. The more complex aspects of the touch command involve modifying a file's modification time (Mtime), change time (Ctime), or access time (Atime). The parameters and their functions for the touch command are shown in Table 2-18.
Table 2-18 Parameters and Functions of the touch Command
| Parameter | Function |
|---|---|
| -a | Modify only the access time (Atime) |
| -m | Modify only the modification time (Mtime) |
| -d | Modify both Atime and Mtime simultaneously |
Next, use the ls command to check a file's modification time. Then modify the file and check its modification time again to see if it has changed:
root@linuxprobe:~# ls -l anaconda-ks.cfg
-rw-------. 1 root root 1019 Mar  8 20:06 anaconda-ks.cfg
root@linuxprobe:~# echo "Visit LinuxProbe.com to learn linux" >> anaconda-ks.cfg
root@linuxprobe:~# ls -l anaconda-ks.cfg
-rw-------. 1 root root 1062 May 18 10:38 anaconda-ks.cfg
If you don't want others to know we modified it, you can use the touch command to set the modified file's time back to before the change (many hackers do this):
root@linuxprobe:~# touch -d "2025-05-18 15:44" anaconda-ks.cfg
root@linuxprobe:~# ls -l anaconda-ks.cfg
-rw-------. 1 root root 1062 May 18  2025 anaconda-ks.cfg
2. mkdir Command
The mkdir command creates empty directories. Its full name is "make directory," and the syntax is "mkdir [options] directory_name".
Beyond creating single directories, the mkdir command can recursively create nested directories with the -p parameter:
root@linuxprobe:~# mkdir linuxprobe
root@linuxprobe:~# cd linuxprobe
root@linuxprobe:~/linuxprobe# mkdir -p a/b/c/d/e
root@linuxprobe:~/linuxprobe# cd a
root@linuxprobe:~/linuxprobe/a# cd b
root@linuxprobe:~/linuxprobe/a/b#
3. cp Command
The cp command is used to copy files or directories. Its full English name is "copy," and the syntax is "cp [options] source_filename destination_filename".
You're likely familiar with file copying operations, as they're used almost daily. In Linux systems, copying operations are categorized into three specific scenarios:
If the destination is a directory, the source file is copied into that directory;
If the destination is also a regular file, you will be prompted to confirm overwriting it;
If the destination file does not exist, the normal copy operation proceeds.
The copy command rarely fails. The only thing to remember is to add the -r parameter when copying directories. The parameters of the cp command and their functions are shown in Table 2-19.
Table 2-19 cp command options and their functions
| Option | Function |
|---|---|
| -p | Preserve original file attributes |
| -d | Preserve the symbolic link itself if the target is a symbolic link, rather than copying the file it points to |
| -r | Recursively copy all files and directories |
| -i | Prompt for confirmation if the destination file already exists |
| -a | Equivalent to -pdr (where p, d, r are the parameters above) |
Next, use the touch command to create an empty regular file named install.log, then copy it as a backup file named x.log, and finally use the ls command to view the files in the directory:
root@linuxprobe:~# touch install.log
root@linuxprobe:~# cp install.log x.log
root@linuxprobe:~# ls
install.log x.log
4. mv Command
The mv command is used to cut or rename files. Its full English name is "move," and the syntax is mv [options] source_filename destination_filename.
Unlike copying, moving deletes the source file by default, leaving only the destination file. If you move a file within the same directory and then paste it back into the current directory, it effectively renames the file:
root@linuxprobe:~# mv x.log linux.log
root@linuxprobe:~# ls
install.log linux.log
5. rm Command
The rm command is used to delete files or directories. Its full English name is "remove," and the syntax is rm [options] filename.
When deleting files in Linux, the system defaults to prompting you for confirmation. To bypass these repeated prompts, append the -f parameter to force deletion. Additionally, to delete a directory, include the -r parameter after rm; otherwise, it cannot be removed. The parameters and their functions for the rm command are listed in Table 2-20.
Table 2-20 rm Command Parameters and Their Functions
| Parameter | Function |
|---|---|
| -f | Force deletion |
| -i | Prompt before deletion |
| -r | Delete directories |
| -v | Display progress |
Below, we attempt to delete the previously created install.log and linux.log files. Observe the difference between using and omitting the -f parameter:
root@linuxprobe:~# rm install.log
rm: remove regular empty file 'install.log'? y
root@linuxprobe:~# rm -f linux.log
root@linuxprobe:~# ls
root@linuxprobe:~#
6. dd Command
The dd command copies or transforms files by specifying the size and number of data blocks. Its syntax is dd if=parameter_value of=parameter_value count=parameter_value bs=parameter_value.
The dd command is a relatively important and distinctive command that allows users to copy file contents in specified data blocks of size and count. Of course, if desired, data conversion can also be performed during the copying process.In Linux systems, there exists a device file named /dev/zero. Whenever explaining this file in class, it invariably sparks rich, speculative theoretical discussions. Since this file occupies no system storage space yet provides an infinite supply of data, it is frequently used as the input file for the dd command to generate a file of a specified size. The parameters of the dd command and their functions are shown in Table 2-21.
Table 2-21 dd Command Parameters and Their Functions
| Parameter | Function |
|---|---|
| if | Input file name |
| of | Output file name |
| bs | Sets the size of each "block" |
| count | Sets the number of "blocks" to copy |
For example, use the dd command to extract a 560MB data block from the /dev/zero device file and save it as a file named 560_file. Once you understand this command, you can freely create files of any size:
root@linuxprobe:~# dd if=/dev/zero of=560_file count=1 bs=560M
1+0 records in
1+0 records out
587202560 bytes (587 MB, 560 MiB) copied, 14.7741 s, 39.7 MB/s
The dd command's capabilities extend far beyond simple file copying. To create an .iso image file from a disc in an optical drive, Windows systems require third-party software. However, Linux systems can directly use the dd command to extract the disc image, transforming it into an immediately usable ISO image:
root@linuxprobe:~# dd if=/dev/cdrom of=RHEL-server-10.0-x86_64-LinuxProbe.Com.iso
13554816+0 records in
13554816+0 records out
6940065792 bytes (6.9 GB, 6.5 GiB) copied, 131.439 s, 52.8 MB/s
Considering some readers might be confused about the relationship between bs block size and count block count, let's illustrate with a foodie example. Suppose Xiao Ming's appetite (i.e., demand) is a fixed value. The size of the spoon used to scoop rice represents the bs block size, while the number of scoops taken represents the count block count.To satisfy his appetite (meet demand), Xiao Ming must balance the spoon size (bs block size) with the number of scoops (count blocks). A larger spoon requires fewer scoops. As seen above, both bs and count specify capacity size. As long as demand is met, they can be freely combined.
7. file command
The file command is used to determine a file's type. Its syntax is file filename.
In Linux systems, everything—text files, directories, devices, and more—is collectively referred to as "files." Unlike Windows systems, these files lack distinct extensions, making it difficult to determine their specific type just by looking at the filename. This is where the file command comes in handy.
root@linuxprobe:~# file anaconda-ks.cfg
anaconda-ks.cfg: ASCII text
root@linuxprobe:~# file /dev/sda
/dev/sda: block special (8/0)
Tips:
In Windows systems, files are typically opened by double-clicking, and the system automatically identifies the file type based on the extension. Linux systems, however, invoke files based on user commands—such as usingcatto view text orbashto execute scripts—so there's no strict requirement for users to assign file extensions.
8. tar Command
The tar command is used to compress or decompress files. Its syntax is tar [options] [file or directory name].
Online, people increasingly prefer transferring compressed files because smaller file sizes reduce transfer time over the same network speed.In Linux systems, the primary formats used are .tar, .tar.gz, or .tar.bz2. Don't worry about having too many formats to remember—most of these formats are actually generated by the tar command. The parameters of the tar command and their functions are shown in Table 2-22.
Table 2-22 Parameters and Functions of the tar Command
| Parameter | Function |
|---|---|
| -c | Create a compressed archive |
| -x | Extract files from a compressed archive |
| -t | List files within an archive |
| -z | Compress or decompress using gzip format |
| -j | Compress or decompress using bzip2 format |
| -v | Display compression/decompression progress |
| -f | Specify target filename |
| -p | Preserve original permissions and attributes |
| -P | Preserve absolute paths |
| -C | Specify target directory for extraction |
First, the -c option creates compressed files, while the -x option decompresses files; therefore, these two options cannot be used simultaneously. Second, the -z option specifies gzip format for compression or decompression, and the -j option specifies bzip2 format. Users should determine which format to use based on the file extension.Certain compression or extraction operations may take several hours to complete. If the screen remains blank, it becomes difficult to gauge progress and may lead to concerns about system crashes. Therefore, using the -v parameter to continuously display the compression/extraction process is highly recommended. The -C parameter specifies the target directory for extraction. The -f parameter is particularly crucial and must immediately follow the target filename; the order of other parameters is not strictly enforced.
Professor Liu Chuan typically uses the command tar -czvf compressed_package_name.tar.gz directory_to_pack to compress specified files into a package. The corresponding extraction command is tar -xzvf compressed_package_name.tar.gz.Below we demonstrate the compression and decompression operations step by step. First, use the tar command to compress the /etc directory into a .gzip format and name the file etc.tar.gz:
root@linuxprobe:~# tar czvf etc.tar.gz /etc
tar: Removing leading `/' from member names
/etc/
/etc/mtab
/etc/fstab
/etc/crypttab
/etc/lvm/
/etc/lvm/devices/
/etc/lvm/devices/system.devices
/etc/lvm/archive/
[... output omitted ...]
Next, extract the compressed file to the /root/etc directory (first create the /root/etc directory using the mkdir command):
root@linuxprobe:~# mkdir /root/etc
root@linuxprobe:~# tar xzvf etc.tar.gz -C /root/etc
etc/
etc/mtab
etc/fstab
etc/crypttab
etc/lvm/
etc/lvm/devices/
etc/lvm/devices/system.devices
etc/lvm/archive/
[... output omitted ...]
Before concluding this chapter, let me add a few more points. Many readers initially worry that their limited English proficiency will hinder their ability to learn Linux. There's no need for concern, as our books, training courses, and even Red Hat exam questions are all in Chinese.After completing this chapter, you'll realize that what you'll be using are Linux commands—not mere English words. Even if their spellings are 100% identical, their functions will inevitably differ. Therefore, when it comes to learning Linux system technology, you and English experts are absolutely on the same starting line. Especially since you've chosen a Linux textbook tailored for you.
Take a break, then dive into Chapter 3!
Review Questions
- What is the most commonly used shell terminal in RHEL 10 and numerous Linux systems?
Answer: The Bash (Bourne-Again Shell) interpreter.
- What is the purpose of adding parameters when executing Linux system commands?
Answer: To enable Linux commands to work more closely aligned with the user's actual needs.
- What should be used to separate Linux system commands, command parameters, and command objects?
Answer: One or more spaces should be used for separation.
- Write the command to output the value of the SHELL variable to the screen terminal using the echo command.
Answer: echo $SHELL.
- Attempt to use a Linux system command to terminate the service process with PID 5529.
Answer: Execute the kill 5529 command; if the service name is known, use the killall command to terminate it.
- When using the ifconfig command to view network status information, what are the four key pieces of information to focus on?
Answer: Network interface name, IP address, MAC address, and RX/TX data transfer volume.
- When using the
uptimecommand to check system load, if the load values are 0.91, 0.56, and 0.32, which time period had the highest load pressure within the last 15 minutes?
Answer: The load values indicate that the highest load pressure occurred within the last minute.
- When using the
historycommand to view past command execution records, what purpose do the numeric codes preceding commands serve besides sorting?
Answer: The "!number" command format allows you to re-execute a specific command record, eliminating the need to retype lengthy commands.
- If you want to view a file with extensive content, which command—cat, more, head, or tail—is most appropriate?
Answer: Use the more command for long files; use the cat command for short files.
- When using the mkdir command to create nested directories, what parameter should be added?
Answer: The -p (recursive) parameter should be added to automatically create nested directories.