Chapter 20 · Deploying Dynamic Websites with the LNMP Stack
Chapter Overview
The LNMP dynamic website deployment architecture is a comprehensive solution built on Linux+Nginx+MySQL+PHP. It offers excellent characteristics such as being free, efficient, highly scalable, and resource-efficient, making it a favorite among developers. This chapter will thoroughly compare the advantages and disadvantages of installing services using source packages versus RPM packages, and provide detailed instructions on manually compiling source packages and installing each service. Finally, we will validate the deployment effectiveness of the entire architecture using the widely popular WordPress blogging system.
As the final chapter of this book, the author not only hopes that readers will secure desirable, well-paying jobs after completing their studies, but also encourages you to apply the knowledge gained to build your own blog or forum system. Use this platform to share the Linux expertise and techniques accumulated in your work with a broader audience, contributing to the growth of the open-source community and collectively advancing its promising future.
20.1 Source Package Programs
As covered in Chapter 1, before the advent of RPM (Red Hat Package Manager) technology, Linux system administrators could only install various service programs via source packages—a highly tedious process that consumed significant time and patience. Moreover, installing, upgrading, or uninstalling programs required careful consideration of dependencies with other programs or libraries. This demanded not only a deep understanding of Linux system theory and advanced practical skills but also exceptional patience to successfully install a source package. Considering that most readers of this book are newcomers or aspiring newcomers to system administration, we have consistently used software repositories to install service programs in the preceding chapters.
However, many software programs are still only available as source packages. Relying solely on the dnf command for installation leaves one vulnerable when encountering source-only software. Options become limited: either wait for third parties to convert it into an RPM package or seek alternative software available as an RPM package. Thus, limiting oneself to repository-based installations creates a knowledge gap that can hinder future operations work.
With the goal of ensuring our readers don't fall behind in their operations work, we will now provide a detailed explanation of how to install service programs using source packages.
In fact, installing programs from source packages offers two distinct advantages:
Source packages offer excellent portability, functioning on nearly any Linux system. In contrast, RPM packages are instruction sets tailored to specific systems and architectures, requiring strict compliance with the execution environment for successful installation (meaning they install services in a rigid manner).
Source package installations involve a compilation process, allowing better adaptation to the host system environment. This results in superior runtime efficiency and optimization compared to RPM-installed programs. In essence, installing services via source packages can be viewed as "tailoring" the solution to the system.
Generally, when installing software, if it can be installed via a software repository, use the dnf command to handle it. Otherwise, seek out a suitable RPM package for installation. If no resources are available, resort to installing via source packages. While the process of installing services using source packages may seem complex, it can be summarized into just 4–5 steps. Each step will be detailed below.
Tips:
It should be noted upfront that source package installations generate extensive process information, which is often not particularly meaningful. This chapter will omit such output without special annotation. Please refer to the actual output during your operations.
Step 1: Download and extract the source package file. To facilitate network transmission, source packages are usually compressed using formats like gzip or bzip2 after archiving, typically bearing the .tar.gz or .tar.bz2 extension. To install the service program from source, first extract its contents and then navigate to the directory containing the source package file.
root@linuxprobe:~# tar xzvf FileName.tar.gz
root@linuxprobe:~# cd  DirectoryName
Step 2: Compile the source package code. Before formally installing the service program from the source package, a compilation script must perform a series of evaluations for the current system. This includes checking the source package files, dependencies between software and libraries, as well as the compiler, assembler, and linker.You may also optionally add the --prefix parameter to specify the installation path for the source package program, providing greater control over the service program installation process. Upon completing the compilation, if the system environment meets the installation requirements, a Makefile installation file is typically generated automatically in the current directory.
root@linuxprobe:~# ./configure --prefix=/usr/local/program
Step 3: Generate the binary installation program. The newly created Makefile contains information about the system environment, software dependencies, and installation rules. Next, use the make command to compile according to the appropriate rules specified in the Makefile, generating the actual binary executable file that users can install.
root@linuxprobe:~# make
Step 4: Run the binary service program installer. Since no further system checks or code compilation are required, executing the binary installer should be the fastest step. If the --prefix parameter was used during source compilation, the service program will be installed in the specified directory. Otherwise, it will typically default to /usr/local/bin.
root@linuxprobe:~# make install
Step 5: Clean up temporary source package files. Since code compilation occurred during service installation, numerous temporary files remain in the directory post-installation. To minimize disk space waste, use the make clean command for thorough cleanup.
root@linuxprobe:~# make clean
Some readers may wonder: Why does compiling source packages (configure) and generating binary files (make) take so long when installing a service program, while using RPM packages is so efficient? The reason is simple. In the RHCA certification exam RH401, candidates are required to write an RPM package.As Instructor Liu Chuan will explain in the advanced section of this book, an RPM package essentially bundles the software's source package with a set of installation rules tailored to specific systems, architectures, and environments. To ensure users can install the program using this package, software developers typically release RPM packages for multiple architectures (such as i386, x86_64, etc.) for users to choose from.Software authors naturally want their source packages installed on more systems and adopted by a broader user base. Consequently, during the configuration phase (configure), the software checks the user's current system environment to devise a viable installation plan. This process consumes significant system resources and requires longer waiting times.
20.2 LNMP Dynamic Website Architecture
The LNMP dynamic website deployment architecture is a comprehensive solution for dynamic websites, comprising Linux + Nginx + MySQL + PHP (their respective logos are shown in Figure 20-1). The letter L in LNMP refers to the Linux operating system, which can be RHEL, CentOS Stream, Fedora, Debian, Ubuntu, or other variants. The companion website for this book, https://www.linuxprobe.com, is deployed using LNMP and has consistently operated with high stability and fast access speeds.
Figure 20-1: Logos of software involved in the LNMP dynamic website deployment architecture
Before installing service programs from source packages, the host must first have an environment capable of compiling source code. This requires compilers for C, C++, and Perl, along with various common compilation support libraries. Therefore, first configure the software repositories properly, then install the Development Tools package group, and finally install all the software packages listed below (output omitted):
root@linuxprobe:~# dnf groupinstall -y "Development Tools"
root@linuxprobe:~# dnf install -y libxcrypt-compat libxml2-devel sqlite-devel libcurl-devel
If possible, increase the virtual machine's memory limit to speed up the upcoming compilation process. Additionally, since you'll need to download installation packages for Nginx, MySQL, PHP, and WordPress from external networks, configure the virtual machine to connect to the internet.
Modify the network interface, already set to bridge mode, to automatically obtain network information via DHCP using the nmtui or nm-connection-editor command, as shown in Figure 20-2. In most cases, the virtual machine should now access the internet. If internet access remains unavailable, consider whether external restrictions exist, then configure the virtual machine's network interface to match the physical machine's settings.
root@linuxprobe:~# ping -c 4 www.linuxprobe.com
PING www.linuxprobe.com.w.kunlunno.com (202.97.231.16) 56(84) bytes of data.
64 bytes from www.linuxprobe.com (202.97.231.16): icmp_seq=1 ttl=55 time=27.5 ms
64 bytes from www.linuxprobe.com (202.97.231.16): icmp_seq=2 ttl=55 time=27.10 ms
64 bytes from www.linuxprobe.com (202.97.231.16): icmp_seq=3 ttl=55 time=27.4 ms
64 bytes from www.linuxprobe.com (202.97.231.16): icmp_seq=4 ttl=55 time=28.9 ms

--- www.linuxprobe.com.w.kunlunno.com ping statistics ---
4 packets transmitted, 4 received, 0% packet loss, time 8ms
rtt min/avg/max/mdev = 27.354/27.913/28.864/0.593 ms
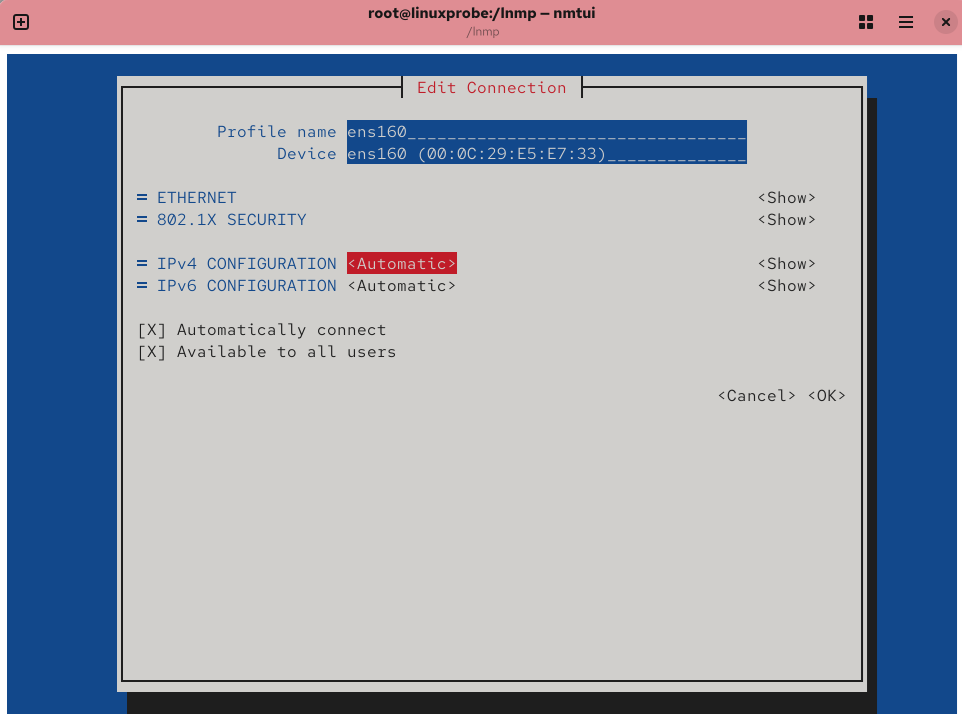
Figure 20-2 Configuring the Network Interface for DHCP Automatic Acquisition Mode
Instructor Liu Chuan has uploaded the five software source packages required for installing the LNMP dynamic website deployment architecture, along with one blog system package for testing results, to the server accompanying this book. You can download them on a Windows system and transfer them via SSH to the Linux server where you plan to deploy the LNMP dynamic website architecture. Alternatively, you can directly download these source package files on the Linux server using the wget command.To organize them efficiently, place all files in the /lnmp directory:
root@linuxprobe:~# mkdir /lnmp
root@linuxprobe:~# cd /lnmp
root@linuxprobe:/lnmp# wget https://www.linuxprobe.com/Software/rpcsvc-proto-1.4.4.tar.xz
root@linuxprobe:/lnmp# wget https://www.linuxprobe.com/Software/pcre-8.45.tar.gz
root@linuxprobe:/lnmp# wget https://www.linuxprobe.com/Software/nginx-1.27.4.tar.gz
root@linuxprobe:/lnmp# wget https://www.linuxprobe.com/Software/mysql-8.0.18.tar.xz
root@linuxprobe:/lnmp# wget https://www.linuxprobe.com/Software/php-8.1.32.tar.gz
root@linuxprobe:/lnmp# wget https://www.linuxprobe.com/Software/wordpress.zip
root@linuxprobe:/lnmp# ls
mysql-8.0.18.tar.xz  pcre-8.45.tar.gz   rpcsvc-proto-1.4.4.tar.xz
nginx-1.27.4.tar.gz  php-8.1.32.tar.gz  wordpress.zip
Now let's get started. rpcsvc-proto is a support package containing the rpcsvc protocol files. The rpcsvc protocol will be referenced during the subsequent deployment of Nginx and MySQL services.To install services from source packages, strictly follow the installation steps outlined above: download and extract source files, compile source code, generate binary installers, run binary service installers, and clean up temporary source files. Extracting and compiling source packages generates extensive output, which is omitted below. Readers should refer to actual operations.
root@linuxprobe:/lnmp# tar xvf rpcsvc-proto-1.4.4.tar.xz
root@linuxprobe:/lnmp# cd rpcsvc-proto-1.4.4
root@linuxprobe:/lnmp/rpcsvc-proto-1.4.4# ./configure
root@linuxprobe:/lnmp/rpcsvc-proto-1.4.4# make
root@linuxprobe:/lnmp/rpcsvc-proto-1.4.4# make install
root@linuxprobe:/lnmp/rpcsvc-proto-1.4.4# cd ..
root@linuxprobe:/lnmp#
PCRE is a Perl-compatible regular expression library. Currently, no compilation or installation is required. Simply extract it and place it in the /usr/local/src directory. It will be installed later alongside Nginx:
root@linuxprobe:/lnmp# tar xzvf pcre-8.45.tar.gz
root@linuxprobe:/lnmp# mv pcre-8.45 /usr/local/src/
Given the numerous software components covered in this chapter, frequent directory switching is unavoidable. We will strive to return to the /lnmp directory after each operation. Additionally, please carefully note your current directory path to avoid frustration from missing files.
20.2.1 Configuring Nginx Service
Nginx is an exceptional lightweight service program widely used for deploying dynamic websites. Originally developed for a Russian portal site, Nginx quickly gained user trust due to its stability, rich features, low memory consumption, and strong concurrent processing capabilities. Currently, major domestic portals like Sina, NetEase, and Tencent have adopted Nginx services.
Nginx's high stability stems from its phased resource allocation technology, which significantly reduces CPU and memory consumption. Consequently, dynamic website environments deployed with Nginx are not only stable and efficient but also extremely low in system resource usage. Furthermore, Nginx supports nearly as many modules as Apache and fully accommodates common modules like proxy, rewrite, mod_fcgi, SSL, and vhosts. Crucially, Nginx also supports hot deployment technology, enabling seamless 24/7 uninterrupted service and allowing upgrades without service interruption.

Frankly speaking, although Nginx boasts high-quality code, standardized development practices, mature technology, and easy module extensibility, it still faces several challenges. For instance, being developed by Russians, its documentation remains incomplete, and the quality of Chinese resources varies wildly. Nevertheless, Nginx has seen rapid growth in recent years and is poised for a promising future in the lightweight web server market.
Now let's get down to business and prepare to configure the Nginx service.
Step 1: Create a system account for managing web services. This practice is deeply ingrained in Linux systems from the outset—to enhance security, different system users should manage distinct service programs. This way, even if a hacker compromises the server through a web service, they cannot escalate privileges to higher levels, cause greater system damage, or even access SSH services. They would only gain access to a single system account. Unlike previous setups, when creating this new account, use the -M parameter to prevent creation of a home directory. Additionally, use the -s parameter to specify the login shell as /sbin/nologin. This ensures no one can log into the host using this account.
root@linuxprobe:/lnmp# useradd nginx -M -s /sbin/nologin
root@linuxprobe:/lnmp# id nginx
uid=1001(nginx) gid=1001(nginx) groups=1001(nginx)
Step 2: Compile and install the Nginx web service program.To enable more features for the web service, additional parameters must be added during compilation. The most important is the --prefix parameter, which specifies the installation directory for easy future access and invocation. Considering the growing prevalence of HTTPS, the --with-http_ssl_module parameter is used to enable Nginx's SSL encryption module, preparing for future HTTPS functionality.Finally, the --with-pcre parameter specifies the PCRE source path, which Nginx will automatically compile alongside the core.
root@linuxprobe:/lnmp# tar xzvf nginx-1.27.4.tar.gz
root@linuxprobe:/lnmp# cd nginx-1.27.4/
root@linuxprobe:/lnmp/nginx-1.27.4# ./configure --prefix=/usr/local/nginx --with-http_ssl_module --with-pcre=/usr/local/src/pcre-8.45
root@linuxprobe:/lnmp/nginx-1.27.4# make
root@linuxprobe:/lnmp/nginx-1.27.4# make install
root@linuxprobe:/lnmp/nginx-1.27.4# cd ..
Relatively speaking, compiling script files (configure) is faster than generating binary files (make), while the installer (make install) is the fastest, equivalent to double-clicking a binary installer package.During these three stages—compilation, generation, and installation—various messages will appear on the screen. These primarily include the package overview, the software dependencies of the current system, and whether the installation conditions are met. As long as the process isn't forcibly terminated or no obvious error messages are displayed, everything is proceeding normally.
Step 3: After installation completes, proceed to final configuration. Since the --prefix parameter specified the installation path during compilation, the Nginx service configuration files will be waiting for us in the /usr/local/nginx directory.
We need to make three modifications. First, remove the comment symbol (#) from line 2, then add the username and user group responsible for running the web service. Here, we assume the nginx user and nginx user group will manage the web service.
root@linuxprobe:/lnmp# vim /usr/local/nginx/conf/nginx.conf
  1
  2 user  nginx nginx;
Next, modify the homepage filename on line 45 by adding index.php. This file is the first one users see when browsing the site, also known as the homepage file.
 43         location / {
 44             root   html;
 45             index  index.php index.html index.htm;
 46         }
Finally, remove the comment symbols (#) from lines 65 to 71 to enable virtual host functionality. Then, modify the website root directory after line 69 to /usr/local/nginx/html. The fastcgi_script_name parameter represents the script name, which corresponds to the requested URL.Only with correct configuration can Nginx properly parse user requests; otherwise, pages will display a "404 Not Found" error.
 63         # pass the PHP scripts to FastCGI server listening on 127.0.0.1:9000
 64         #
 65         location ~ \.php$ {
 66             root           html;
 67             fastcgi_pass   127.0.0.1:9000;
 68             fastcgi_index  index.php;
 69             fastcgi_param  SCRIPT_FILENAME  /usr/local/nginx/html$fastcgi_script_name;
 70             include        fastcgi_params;
 71         }
Step 4: Services installed by compiling source code cannot be managed by the systemctl command by default. Instead, use Nginx's own management tools, located in the /usr/local/nginx/sbin directory. Since typing absolute paths can be cumbersome, it's recommended to add /usr/local/nginx/sbin to your PATH variable. This allows the Bash interpreter to automatically locate it when executing subsequent commands. Then, load the configuration file after the source command to apply the changes immediately. Next time, you'll only need to enter the nginx command to start the web service.
root@linuxprobe:/lnmp# vim ~/.bash_profile
# .bash_profile
# Get the aliases and functions
if [ -f ~/.bashrc ]; then
	. ~/.bashrc
fi
# User specific environment and startup programs
PATH=$PATH:$HOME/bin:/usr/local/nginx/sbin
export PATH
root@linuxprobe:/lnmp# source ~/.bash_profile
Next, load the library directory into the system so the nginx command can execute and the service will start.
root@linuxprobe:/lnmp# echo "/usr/local/lib" > /etc/ld.so.conf.d/local-lib.conf
root@linuxprobe:/lnmp# ldconfig
root@linuxprobe:/lnmp# nginx
While we're at it, add HTTP traffic to the firewall's allow list:
root@linuxprobe:/lnmp# firewall-cmd --permanent --add-service=http
success
root@linuxprobe:/lnmp# firewall-cmd --reload
success
Done! Enter the server's IP address in your browser to access the default Nginx web server page, as shown in Figure 20-3. Compared to Apache's red default page, Nginx's default page appears much cleaner.
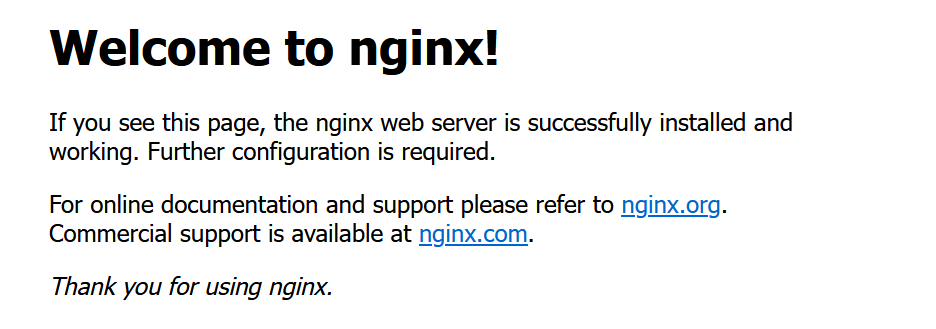
Figure 20-3 Nginx default page
20.2.2 Configuring MySQL Service
Chapter 18 discussed the relationship and characteristics between MySQL and MariaDB database management systems, and we highly praised MariaDB. However, MySQL remains one of the most widely used relational database management systems in production environments today. It holds a significant market share and has proven its stability and security to the industry through over a decade of continuous development. Additionally, while Chapter 18 covered fundamental database management concepts, this chapter consolidates MySQL database content to further solidify your foundation, allowing you to review essentials while gaining new insights.

When installing services via software repositories, the system automatically configures software based on instructions within RPM packages.However, if you choose to install using source packages, you must handle all these steps manually. For the MySQL database, we need to create a dedicated user named mysql on the system to run the MySQL database. Remember to set the Bash terminal for this account to the nologin interpreter to prevent hackers from logging into the server via this user, thereby enhancing system security.
Next, prepare to configure the MySQL service.
root@linuxprobe:/lnmp# useradd mysql -M -s /sbin/nologin
Step 1: Extract the MySQL installation package. Rename the extracted program directory and move it to the /usr/local directory. After initialization, it will be ready for use.Note: Do not use the z parameter to extract archives ending with .tar.xz.
root@linuxprobe:/lnmp# tar xvf mysql-8.0.18.tar.xz
root@linuxprobe:/lnmp# mv mysql-8.0.18-linux-glibc2.12-x86_64 mysql
root@linuxprobe:/lnmp# mv mysql /usr/local
Step 2: When managing MySQL databases in production environments, two directories are commonly used. The /usr/local/mysql directory stores MySQL program files. The /usr/local/mysql/data directory stores actual database content, with each database's data stored in its own separate directory.For the data directory holding actual database files, users must manually create it first.
root@linuxprobe:/lnmp# cd /usr/local/mysql
root@linuxprobe:/usr/local/mysql# mkdir data
Step 3: Initialize the MySQL service program and grant directory permissions to ensure data is readable by the MySQL system user.During initialization, use the mysqld command to verify the MySQL database service username, data storage directory, and encoding information. Proceed with initialization only after confirming these details are correct. At the final stage of initialization, the system will assign a temporary initialization password. Be sure to save this password securely. For example, the password assigned in the following example is yr+IUmh9l,/i.
root@linuxprobe:/usr/local/mysql# chown -R mysql:mysql /usr/local/mysql
root@linuxprobe:/usr/local/mysql# cd bin
root@linuxprobe:/usr/local/mysql/bin# ./mysqld --initialize --user=mysql --basedir=/usr/local/mysql --datadir=/usr/local/mysql/data
2025-04-07T02:17:21.539094Z 0 [System] [MY-013169] [Server] /usr/local/mysql/bin/mysqld (mysqld 8.0.18) initializing of server in progress as process 42031
2025-04-07T02:17:23.141934Z 5 [Note] [MY-010454] [Server] A temporary password is generated for root@localhost: yr+IUmh9l,/i
Step 4: Similar to the Nginx service, the MySQL database's binary executable commands are also stored separately in their own program directory /usr/local/mysql/bin. Having to switch to this directory before executing each command can be quite cumbersome. Adding it to the PATH variable would make things much more convenient. Let's get it done!
root@linuxprobe:/usr/local/mysql/bin# cd ~
root@linuxprobe:~# vim ~/.bash_profile
# .bash_profile
# Get the aliases and functions
if [ -f ~/.bashrc ]; then
        . ~/.bashrc
fi
# User specific environment and startup programs
PATH=$PATH:$HOME/bin:/usr/local/nginx/sbin:/usr/local/mysql/bin
export PATH
root@linuxprobe:~# source ~/.bash_profile
After this setup, you can continue executing MySQL database management commands even when returning to the source code directory. But hold on! Since this is a manual service installation, the task of putting the files "back in their place" falls squarely on your shoulders—place the startup script mysql.server into the /etc/init.d directory to ensure the database starts automatically after each server reboot, and grant it executable permissions.
MySQL databases require a crucial library file to start after version 8.0—libtinfo.so.5. This file name differs from libtinfo.so.6 in Red Hat RHEL 10 systems, necessitating a manual symbolic link.
root@linuxprobe:~# ln -s /usr/lib64/libtinfo.so.6 /usr/lib64/libtinfo.so.5
Unlike the nginx service package, mysqld does not provide a startup script (older versions included one in the bin directory). Therefore, we manually create a systemd service file, enabling future management via systemctl commands:
root@linuxprobe:~# vim /usr/lib/systemd/system/mysqld.service
[Unit]
Description=MySQL 8.0 Server
After=network.target

[Service]
User=mysql
Group=mysql
ExecStart=/usr/local/mysql/bin/mysqld
LimitNOFILE = 5000

[Install]
WantedBy=multi-user.target
root@linuxprobe:~# systemctl daemon-reexec
root@linuxprobe:~# systemctl daemon-reload
Finally, change the SELinux security context of the mysqld binary to bin_t so it can start:
root@linuxprobe:~# semanage fcontext -a -t bin_t /usr/local/mysql/bin/mysqld
root@linuxprobe:~# restorecon -v /usr/local/mysql/bin/mysqld
Relabeled /usr/local/mysql/bin/mysqld from unconfined_u:object_r:default_t:s0 to unconfined_u:object_r:bin_t:s0
root@linuxprobe:~# systemctl start  mysqld
root@linuxprobe:~# systemctl enable mysqld
Created symlink '/etc/systemd/system/multi-user.target.wants/mysqld.service' → '/usr/lib/systemd/system/mysqld.service'.
Step 5: Execute the MySQL database service startup file and perform initialization tasks. Starting from MySQL 8.0, enhanced security measures prohibit users from managing databases with temporary passwords and disallow remote access. Users must modify the initialization password to proceed. Given the database's critical role in the system, it is recommended to set a password with at least 20 characters for enhanced security.For example, change the password to 7U9cnbMNVkcWVQZNtX9q.
root@linuxprobe:~# mysql -u root -p
Enter password: Enter the randomly generated password above and press Enter
Welcome to the MySQL monitor.  Commands end with ; or \g.
Your MySQL connection id is 8
Server version: 8.0.18

Copyright (c) 2000, 2019, Oracle and/or its affiliates. All rights reserved.

Oracle is a registered trademark of Oracle Corporation and/or its
affiliates. Other names may be trademarks of their respective
owners.

Type 'help;' or '\h' for help. Type '\c' to clear the current input statement.

mysql> alter user 'root'@'localhost' identified by '7U9cnbMNVkcWVQZNtX9q';
Query OK, 0 rows affected (0.01 sec)
But this still isn't enough. You must switch to the mysql database and modify the password value in the user table. This is a new security requirement introduced in MySQL 8.0 and later; MySQL 5/6 versions didn't have this hassle.
mysql> use mysql;
Reading table information for completion of table and column names
You can turn off this feature to get a quicker startup with -A

Database changed
mysql> show tables;
+---------------------------+
| Tables_in_mysql           |
+---------------------------+
| columns_priv              |
| tables_priv               |
| time_zone                 |
| time_zone_leap_second     |
| time_zone_name            |
| time_zone_transition      |
| time_zone_transition_type |
| user                      |
|... output omitted ...|
+---------------------------+
33 rows in set (0.00 sec)

mysql> ALTER USER 'root'@'localhost' IDENTIFIED WITH mysql_native_password BY '7U9cnbMNVkcWVQZNtX9q';
Query OK, 0 rows affected (0.01 sec)
Since Section 20.3 will install and deploy the WordPress blog system, we need to create the database in advance:
mysql> create database linuxcool;
Query OK, 1 row affected (0.00 sec)

mysql> exit
Bye
20.2.3 Configuring PHP Services

PHP (Hypertext Preprocessor) is a versatile open-source scripting language invented in 1995. It incorporates strengths from C, Java, and Perl, offering open-source, free, fast, cross-platform, and highly efficient features. It remains one of the most widely used languages in web development today.
Compiling and installing the PHP environment using source packages is not complicated. The challenge lies in resolving dependencies between PHP packages and other software.
Step 1: Extract the PHP installation package and compile it. During compilation, use the --prefix parameter to specify the installation path and parameters like --with-mysqli to enable database support modules, preparing for subsequent online website installations.
root@linuxprobe:~# cd /lnmp
root@linuxprobe:/lnmp# tar xvf php-8.1.32.tar.gz
root@linuxprobe:/lnmp# cd php-8.1.32
root@linuxprobe:/lnmp/php-8.1.32# ./configure --prefix=/usr/local/php --enable-fpm --with-mysqli --with-curl --with-pdo-mysql --with-pdo-sqlite --enable-mysqlnd --with-openssl --with-zlib
Use the following commands to generate the binary files and install them. This process takes approximately 10–20 minutes; please wait patiently.
root@linuxprobe:/lnmp/php-8.1.32# make
root@linuxprobe:/lnmp/php-8.1.32# make install
Step 2: Copy the generated PHP service configuration file to the installation directory (/usr/local/php/) to activate it.Now that the main configuration file is ready, we also need the php-fpm configuration file. Fortunately, it is already provided in the /usr/local/php/etc/ directory. Simply copy the template.
root@linuxprobe:/lnmp/php-8.1.32# cp php.ini-development /usr/local/php/lib/php.ini
root@linuxprobe:/lnmp/php-8.1.32# cd /usr/local/php/etc/
root@linuxprobe:/usr/local/php/etc# mv php-fpm.conf.default php-fpm.conf
Copy a template file to the php-fpm.d directory for later control over website connection performance.
root@linuxprobe:/usr/local/php/etc# mv php-fpm.d/www.conf.default php-fpm.d/www.conf
root@linuxprobe:/usr/local/php/etc# cd ~
Step 3: Manually create a systemd service file and add the PHP service to the startup items.
root@linuxprobe:~# vim /usr/lib/systemd/system/php-fpm.service
[Unit]
Description=The PHP 8.1.32 FastCGI Process Manager
After=network.target

[Service]
Type=simple
ExecStart=/usr/local/php/sbin/php-fpm --nodaemonize --fpm-config /usr/local/php/etc/php-fpm.conf
ExecReload=/bin/kill -USR2 $MAINPID
PrivateTmp=true
Restart=on-failure

[Install]
WantedBy=multi-user.target
root@linuxprobe:~# systemctl daemon-reexec
root@linuxprobe:~# systemctl daemon-reload
Step 4: Since PHP configuration parameters can impact the web service runtime environment, enabling unnecessary and high-risk features by default (such as allowing users to execute Linux commands via web pages) lowers the barrier for website compromise. This could even grant attackers full administrative access to the web server. Therefore, edit the php.ini configuration file and append prohibited functions after the disable_functions parameter on line 323. The following list of disabled functions is tailored based on operational experience from this book's companion site and may not suit every production environment. It is recommended to adapt and trim this list according to your specific operational needs.
root@linuxprobe:~# vim /usr/local/php/lib/php.ini
 320 ; This directive allows you to disable certain functions.
 321 ; It receives a comma-delimited list of function names.
 322 ; https://php.net/disable-functions
 323 disable_functions = passthru,exec,system,chroot,chgrp,chown,shell_exec,proc_open,proc_get_status,popen,ini_alter,ini_restore,dl,openlog,syslog,readlink,symlink,stream_socket_server
Step 5: The compilation of the LNMP architecture source code is now complete. Get ready to enjoy the fruits of your labor.
root@linuxprobe:~# systemctl start  php-fpm
root@linuxprobe:~# systemctl enable php-fpm
20.3 Setting Up a WordPress Blog
To verify the proper configuration of the LNMP dynamic website architecture, deploy the WordPress blog system on it and review the results. Successful installation and operation of WordPress within the LNMP environment confirms the architecture's functionality. WordPress is a blog system developed in PHP, enabling users to host their blogs on servers supporting PHP and MySQL databases.WordPress boasts an extensive library of plugins and templates, making it the most popular website content management system today. As of April 2025, 43.2% of the top 10 million websites globally use WordPress. Among content management systems specifically, WordPress commands a market share of 62.7%.
We are now preparing to set up a WordPress blog.
After clearing the contents of the Nginx service root directory, copy the extracted WordPress files into it:
root@linuxprobe:~# cd /lnmp
root@linuxprobe:/lnmp# rm -f /usr/local/nginx/html/*
root@linuxprobe:/lnmp# unzip wordpress.zip
root@linuxprobe:/lnmp# mv wordpress/* /usr/local/nginx/html
To ensure Nginx can read the website files, adjust directory ownership and permissions. For simplicity in this lab environment we use 777 (writeable by everyone), but in production you should use more restrictive settings (for example, 755 for directories and 644 for files):
root@linuxprobe:/lnmp# chown -Rf nginx:nginx /usr/local/nginx/html
root@linuxprobe:/lnmp# chmod -Rf 777 /usr/local/nginx/html
Next, access the WordPress homepage as shown in Figure 20-4. This page provides installation instructions for later use.
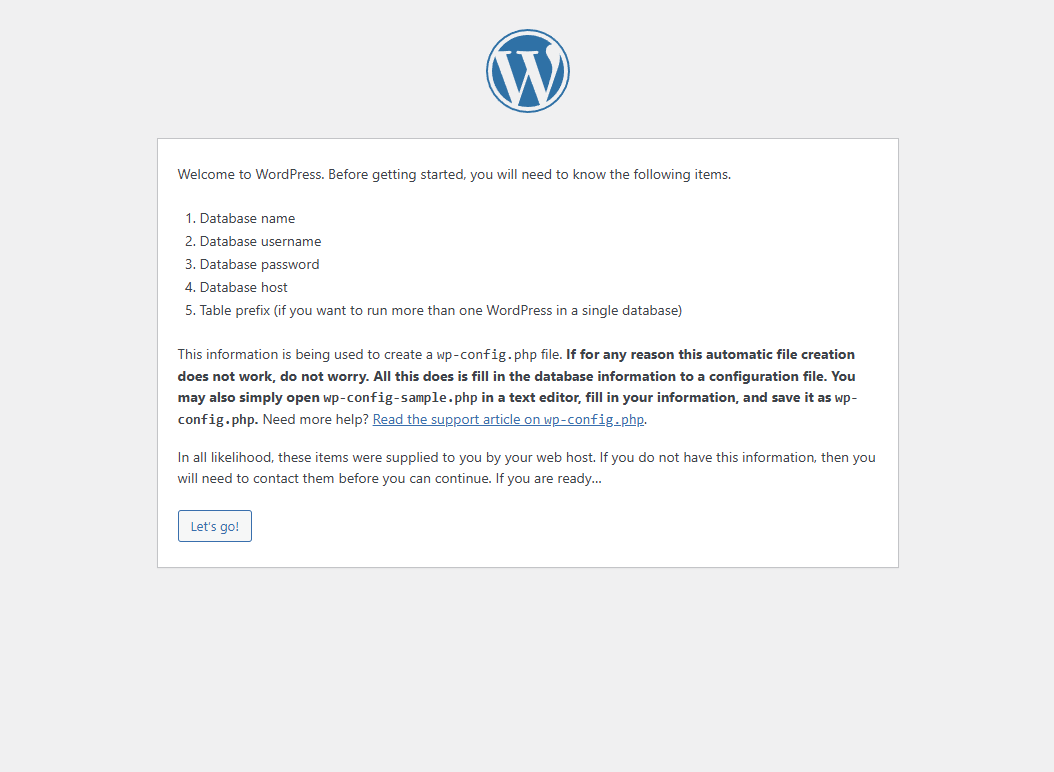
Figure 20-4 WordPress System Installation Homepage
Click the "Let's go!" button in Figure 20-4. On the subsequent page, enter the database name, username, and reset password you just created. Since WordPress requires users to set up their own database, ensure the database name matches the one you created earlier. Additionally, the database address should be 127.0.0.1 instead of localhost, as shown in Figure 20-5. After clicking the "Submit" button to confirm, you will enter the final installation stage, as shown in Figure 20-6.
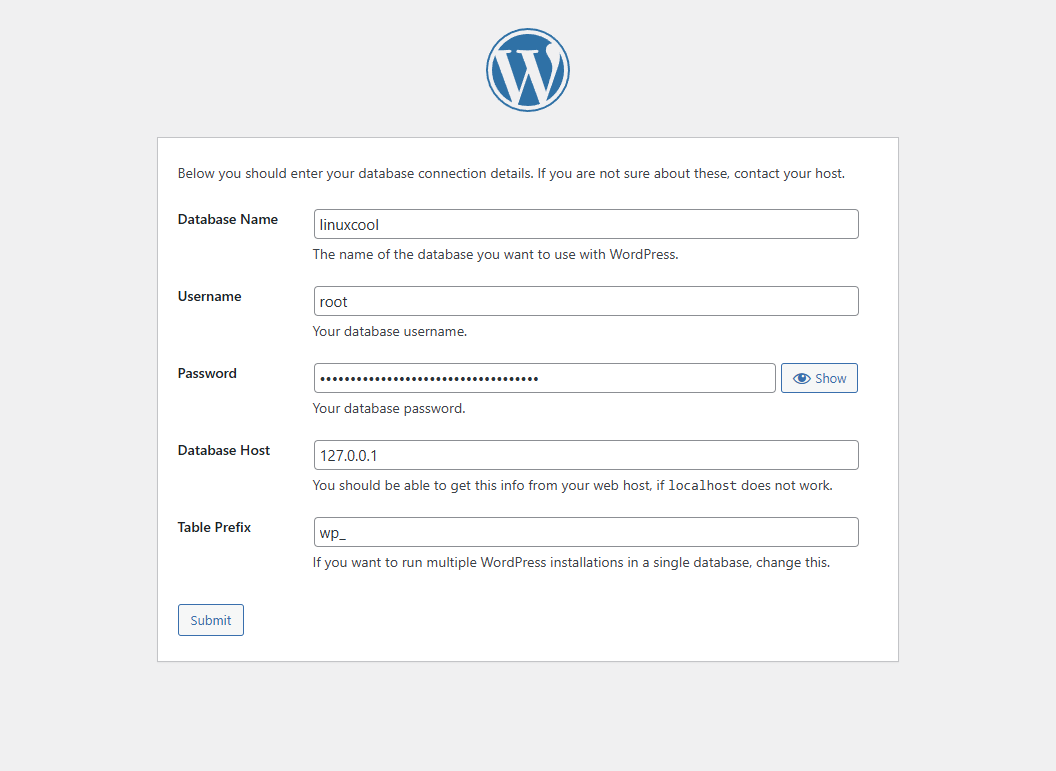
Figure 20-5: Entering Installation Information

Figure 20-6: Confirming WordPress Installation
After successful installation, the WordPress blog system prompts users to enter site title, username, password, and other details, as shown in Figure 20-7. All fields can be customized, though a moderately complex password is recommended. After verifying the information, click the "Install WordPress" button to proceed. The post-installation page appears as shown in Figure 20-8.
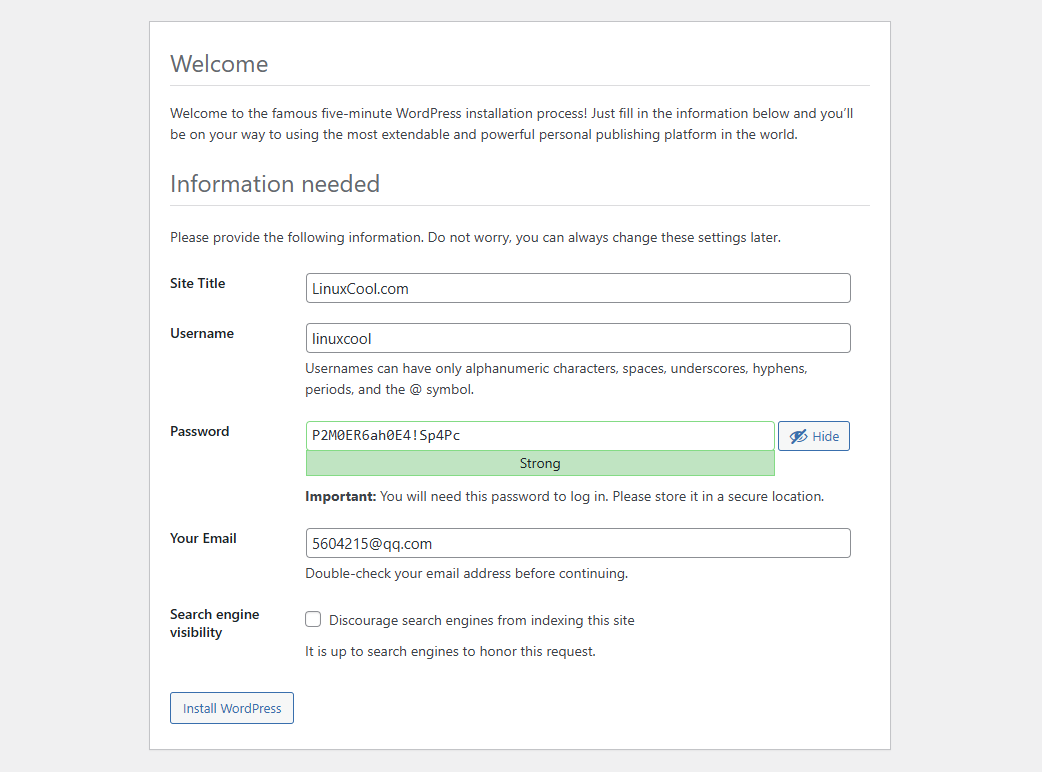
Figure 20-7: Entering Site Title and Administrator Name
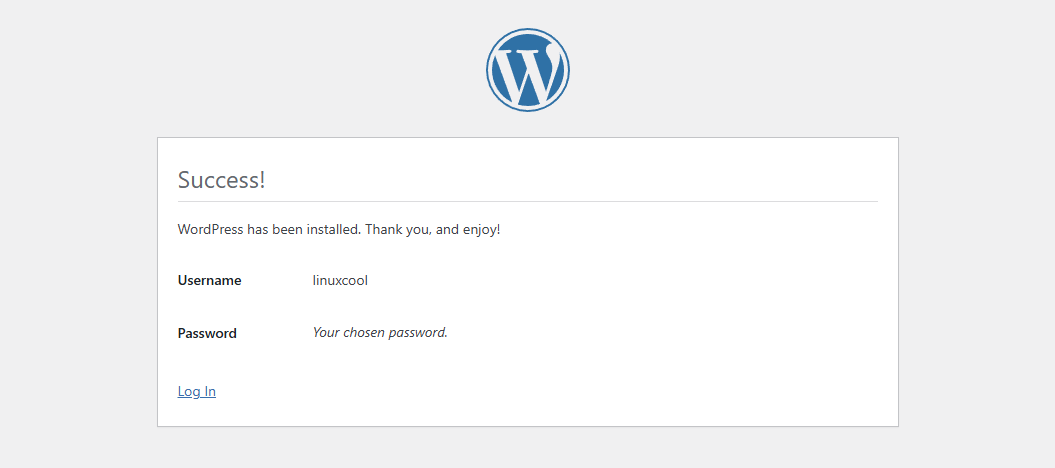
Figure 20-8: Installation Completion Interface
The WordPress login page will automatically appear after the user enters their account and password and clicks the "Login" button, as shown in Figure 20-9.

Figure 20-9 Entering Website Account and Password
You will successfully enter the WordPress admin dashboard, as shown in Figure 20-10. As the most popular website content management system, what kinds of websites can WordPress create? You must be curious about this. Interested students can explore it on their own.
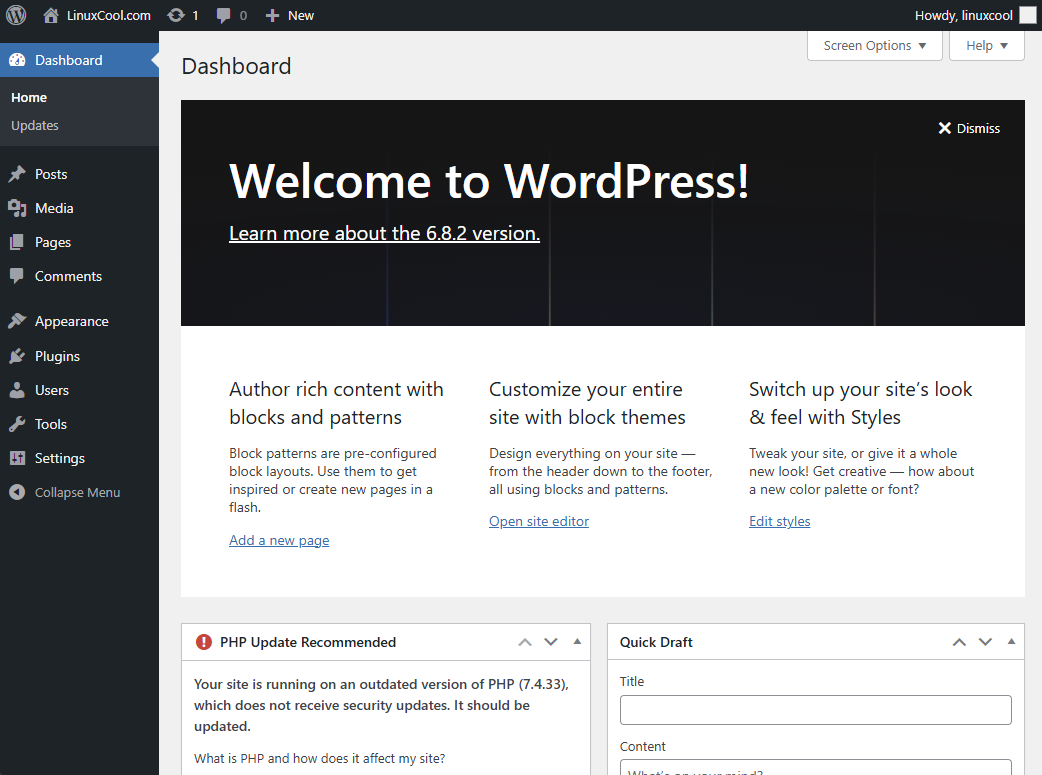
Figure 20-10 WordPress Admin Dashboard
Seeing the successfully built site page in Figure 20-10, Instructor Liu Chuan felt a mix of emotions. Since starting his business in 2015, this platform has witnessed his dreams gradually becoming reality. He recommends that students with aspirations also build their own sites. Not only can this allow your high-quality content to help more people, but it might just help you achieve your dreams too.
20.4 Choosing a Server Hosting Plan
The websites we visit daily consist of a domain name, site source code, and server hosting. The server hosting stores the site's source code and displays web content to users. As this book draws to a close, let me share a few more insights about server hosting and selection tips. These techniques have been refined through years of website development and I hope they prove useful.
Shared Hosting: Allocates a portion of a server's disk space for users to store website information and data. This type of hosting provides only basic website access, data storage, and transmission functions. Shared hosting significantly reduces costs and requires minimal user maintenance beyond the website itself, making it ideal for small-scale sites.
VPS (Virtual Private Server): Multiple "hosts" (VPS instances) are simulated within a single server using virtualization technologies like OpenVZ, Xen, or KVM. Each VPS has its own dedicated IP address and operating system. Disk space, memory, CPU, processes, and system configurations are completely isolated between different VPS instances. Users can freely utilize all resources allocated to their host, but this requires a certain level of system maintenance capability. VPS is suitable for small websites.
ECS (Elastic Compute Service, commonly referred to as cloud servers): ECS is a computing service integrating compute, storage, and networking capabilities that supports elastic scaling. Its usage is nearly identical to VPS, differing only in that ECS operates within a cluster of servers, each storing backup images of the virtual host. This significantly enhances security and stability.Additionally, ECS offers greater flexibility and scalability, with users paying based on actual usage. ECS is suitable for websites of all sizes.
Dedicated Server: A dedicated server is exclusively allocated to a single user, available through either rental or managed hosting models.In the leased model, users specify their hardware requirements to an IDC provider and rent the hardware equipment on a monthly, quarterly, or yearly basis. The IDC provider's facility staff maintains this hardware, while users typically install the necessary software and deploy their website services themselves. This reduces the user's investment in hardware and is well-suited for medium to large websites. The managed hosting model requires users to purchase their own server hardware and entrust its management to the IDC provider (subject to a management service fee). Users retain full control over the server's hardware configuration, offering greater autonomy, but must handle maintenance and repairs themselves. This model is also well-suited for medium to large-scale websites.
Finally, readers should be reminded to thoroughly research a server hosting provider's reputation before making a decision. Some providers engage in unscrupulous practices such as restricting functionality, forcing ad placements, hiding fees, or imposing mandatory charges. Readers must stay vigilant and avoid falling victim to such tactics!
Review Questions
- What are the primary advantages and disadvantages of installing service programs using source code packages?
Answer: The primary advantage of installing service programs via source code packages is enhanced portability and improved operational efficiency. The disadvantage is that installation, management, maintenance, and uninstallation of source code packages are relatively cumbersome.
- What are the general steps for installing software services using source code packages?
Answer: It generally involves five steps: downloading and extracting the source package files, compiling the source code, generating the binary installation program, running the binary service installation package, and cleaning up temporary source package files.
- What services are typically included in the LNMP dynamic website deployment architecture?
Answer: The LNMP dynamic website deployment architecture typically includes the Linux operating system, Nginx web server, MySQL database management system, and PHP scripting language.
- Can the password generated by initializing the MySQL database service using the
mysqldcommand andinitializeparameter be directly used for website setup?
Answer: No, the system will prompt insufficient privileges. The password generated during initialization is temporary and serves solely to allow users to log into the database and set their own new password.
- What is Nginx's most significant advantage over Apache?
Answer: Nginx offers greater stability due to its phased resource allocation technology, which reduces CPU and memory consumption. Consequently, dynamic website environments deployed with Nginx are highly stable, efficient, and consume minimal system resources.
- Why might the nginx command be unavailable after installing Nginx?
Answer: The Nginx command directory (/usr/local/nginx/sbin) has not been added to the system PATH variable.
- What is the difference between the /usr/local/mysql and /usr/local/mysql/data directories for the MySQL service program?
Answer: /usr/local/mysql is the service program directory, while /usr/local/mysql/data is the database file directory.
- How can I disable unsafe features in the PHP service program?
Answer: Edit the PHP service configuration file (/usr/local/php/lib/php.ini) and append the functions to disable after the disable_functions parameter.
- Besides WordPress, name a few other common website systems.
Answer: Discuz!, DedeCMS, Z-Blog, PHPWind, EmpireCMS, ThinkPHP.
- For small website owners in the startup phase, what type of server is most suitable to purchase?
Answer: We recommend choosing ECS. Not only is it cost-effective (monthly fees under 100 RMB), but it also delivers robust performance.