Chapter 09 · Managing Remote Servers with SSH
Chapter Overview
This chapter explains how to configure network parameters using the nmtui command and how to view network information and manage network session services via nmcli. This enables readers to quickly switch network operation parameters across different work scenarios. It also covers manually bonding dual network interfaces in round-robin mode to achieve network load balancing.
This chapter delves into the theoretical foundations of the SSH protocol and the sshd service program, remote management methods for Linux systems, and techniques for configuring the service program within the system. Through practical demonstrations, it illustrates remote access using sshd with both password and key-based authentication, as well as implementing uninterrupted remote management sessions for Linux systems using the Tmux service program.This chapter also thoroughly explains the theoretical foundations of logging systems and demonstrates how to use the journalctl command to retrieve log information based on various conditions, enabling rapid identification of fault points during operations.
Upon mastering this chapter's content, readers will possess comprehensive knowledge for Linux system configuration management. Subsequent chapters will progressively introduce configurations for numerous practical services, which readers will implement using the skills learned here. This approach not only provides broad and deep understanding of most popular production-grade services but also equips readers with their corresponding configuration methodologies.
9.1 Configuring Network Interface Services
To thoroughly grasp network configuration in Linux from the ground up, we will progressively practice basic NIC parameter configuration, creating network sessions, and binding dual NICs. This step-by-step approach increases code complexity and difficulty, ensuring a complete understanding of network services.
9.1.1 Configuring Network Interface Parameters
By now, you can manage Linux systems using the knowledge acquired thus far. Of course, your skills can advance further. When you eventually reach the pinnacle of technical expertise, you'll thank your present self for diligently studying.
Next, we'll learn how to configure services on Linux systems. But first, we must ensure seamless communication between hosts. If the network fails, users won't access services—no matter how flawlessly deployed. Thus, configuring networks and ensuring connectivity is the final crucial step before deploying Linux services.
Section 4.1.3 explains how to configure network interface parameters using the Vim text editor. In fact, RHEL 10 offers at least five methods for network configuration, and Instructor Liu Chuan will demonstrate each one in this book. Here, we teach you how to configure the network using the nmtui command. The specific configuration steps are shown in Figures 9-1 through 9-8. Additional explanations will be provided for any content that may be difficult to understand.
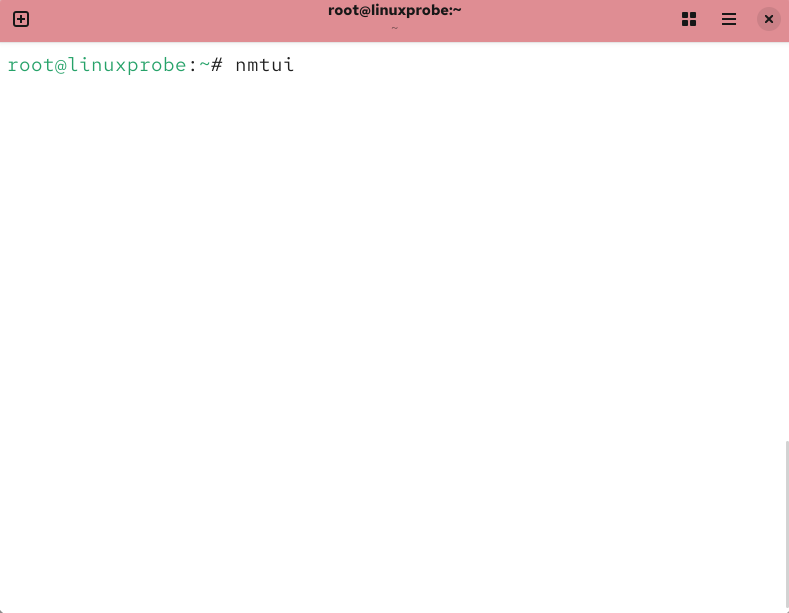
Figure 9-1 Executing the nmtui command to run the network configuration tool
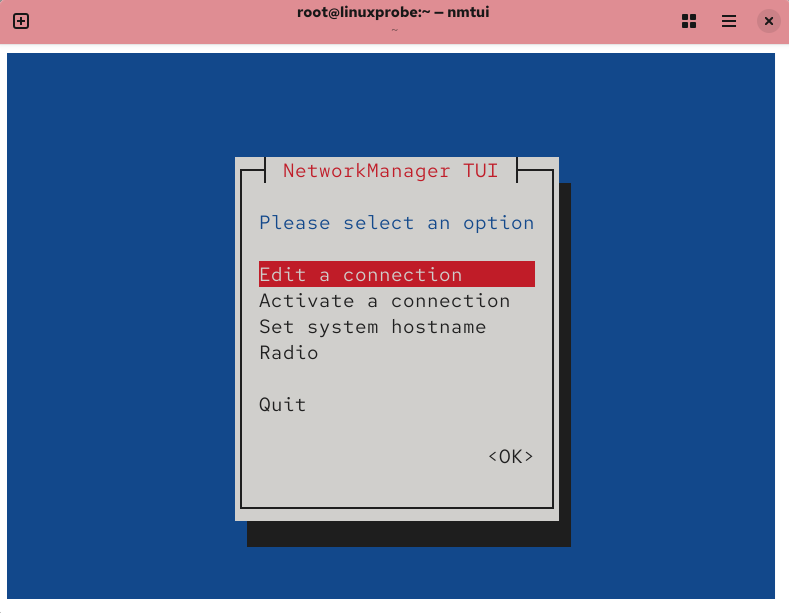
Figure 9-2 Select the network interface configuration button and press Enter
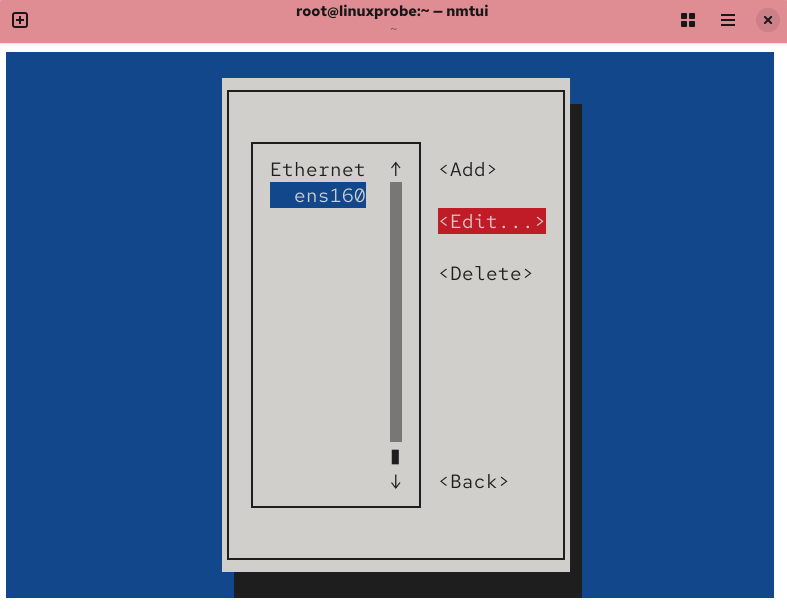
Figure 9-3 Select the network interface name to configure, then press the Edit button
Now, enter the IP address 192.168.10.10/24 in the server host's network configuration. The "24" indicates that the first 24 bits of the subnet mask represent the network number, while the last 8 bits represent the host number (equivalent to writing 255.255.255.0). Information such as the gateway and DNS can be left blank for now and added later when needed.
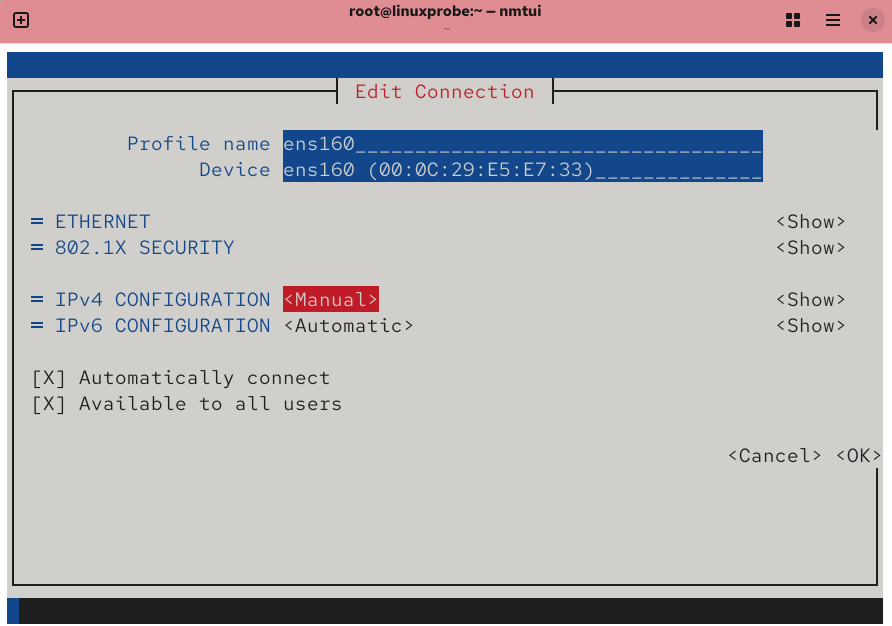
Figure 9-4 Changing the network interface's IPv4 configuration to manual mode
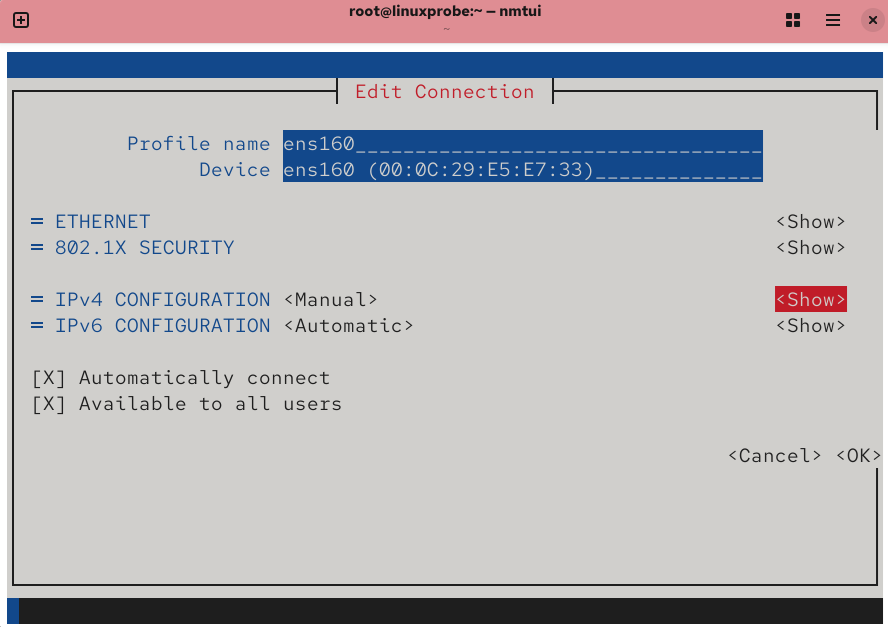
Figure 9-5 Pressing the Show Details button
Tips:
One more thing—this book, Learn Linux the Right Way (3rd Edition), not only has a low learning threshold and is easy to understand, but also has a hidden advantage: all server host IP addresses in the book are 192.168.10.10,while client hosts are uniformly 192.168.10.20 and 192.168.10.30. This design ensures that when deploying Linux services later, you won't need to constantly worry about IP address changes, allowing you to focus entirely on configuration details.
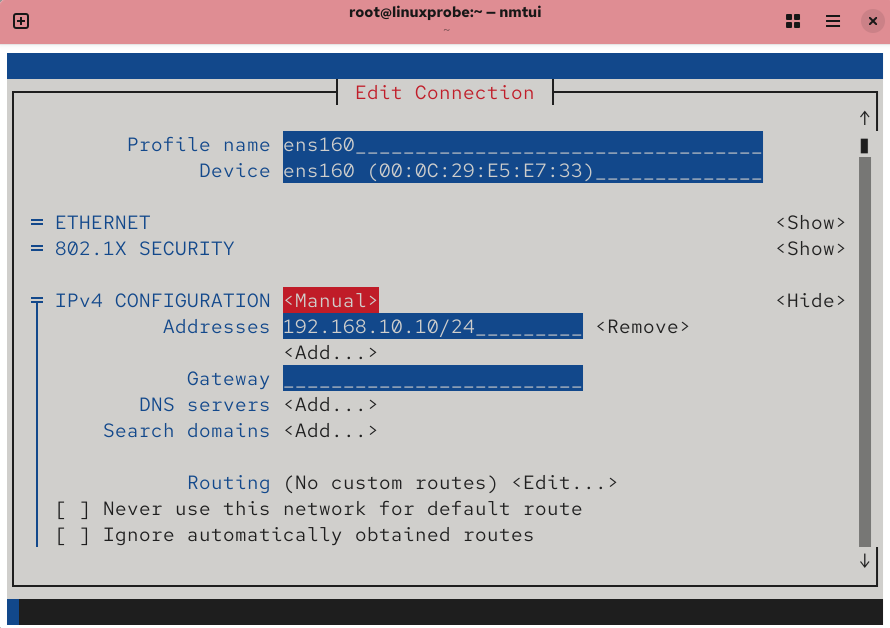
Figure 9-6 Entering IP Address and Subnet Mask
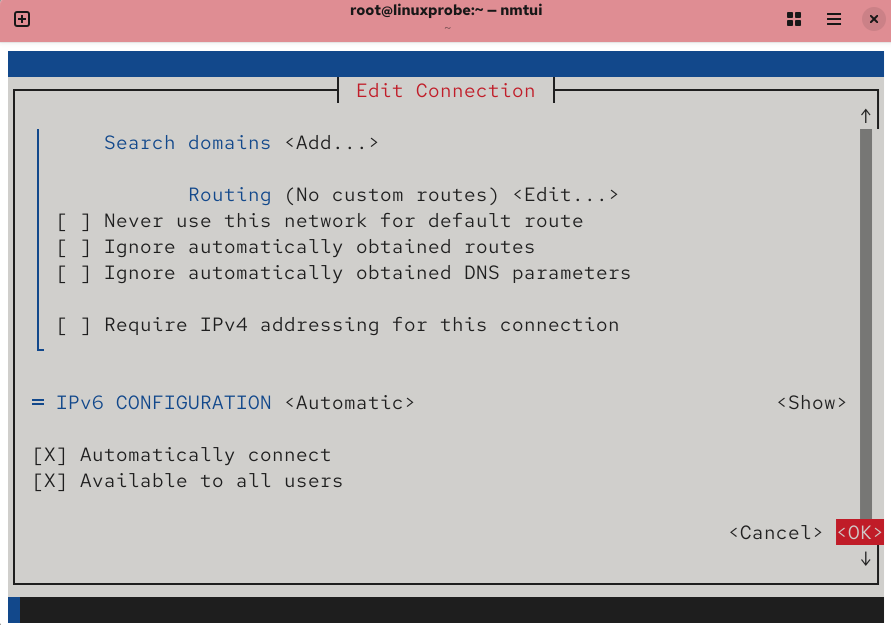
Figure 9-7 Click the OK button to save the configuration
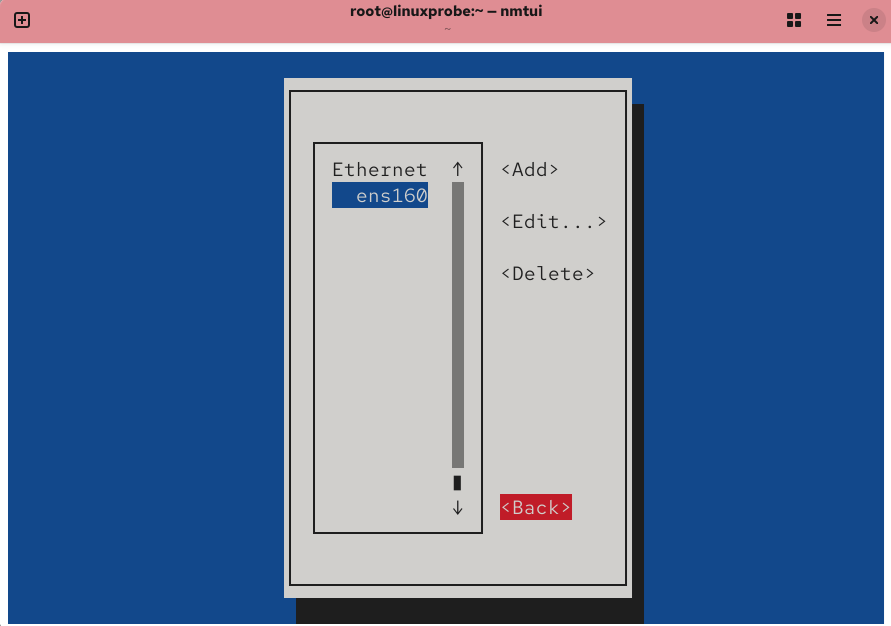
Figure 9-8 Click the Back button to finish the configuration
This concludes the steps for configuring the network in the Linux system. All network interface information configured via the nmtui command will be automatically written to the network interface configuration file. If you're unsure, you can verify it:
root@linuxprobe:~# cat /etc/NetworkManager/system-connections/ens160.nmconnection
[connection]
id=ens160
uuid=f75b55fd-2891-3f5d-ba2c-adadbcd7505c
type=ethernet
autoconnect-priority=-999
interface-name=ens160
timestamp=1741809963

[ethernet]

[ipv4]
address1=192.168.10.10/24
method=manual

[ipv6]
addr-gen-mode=eui64
method=auto
To ensure the service program retrieves the latest configuration file, manually restart the corresponding service. Afterward, you should observe uninterrupted network connectivity:
root@linuxprobe:~# nmcli connection reload
root@linuxprobe:~# nmcli connection up ens160
Connection successfully activated (D-Bus active path: /org/freedesktop/NetworkManager/ActiveConnection/3)
root@linuxprobe:~# ping -c 4 192.168.10.10
PING 192.168.10.10 (192.168.10.10) 56(84) bytes of data.
64 bytes from 192.168.10.10: icmp_seq=1 ttl=64 time=0.110 ms
64 bytes from 192.168.10.10: icmp_seq=2 ttl=64 time=0.196 ms
64 bytes from 192.168.10.10: icmp_seq=3 ttl=64 time=0.086 ms
64 bytes from 192.168.10.10: icmp_seq=4 ttl=64 time=0.064 ms

--- 192.168.10.10 ping statistics ---
4 packets transmitted, 4 received, 0% packet loss, time 3069ms
rtt min/avg/max/mdev = 0.064/0.114/0.196/0.050 ms
9.1.2 Creating a Network Session
RHEL and CentOS systems use NetworkManager by default to provide network services. This is a daemon that dynamically manages network configurations, keeping network devices connected. The nmcli command can be used to manage the NetworkManager service. nmcli is a command-line network configuration tool with rich functionality and numerous parameters, enabling easy viewing of network information or network status:
root@linuxprobe:~# nmcli connection show
NAME    UUID                                  TYPE      DEVICE
ens160  f75b55fd-2891-3f5d-ba2c-adadbcd7505c  ethernet  ens160
lo      1b2c44f7-af47-4291-9997-d8de6cf5fa3f  loopback  lo
root@linuxprobe:~# nmcli connection show ens160
connection.id:                          ens160
connection.uuid:                        f75b55fd-2891-3f5d-ba2c-adadbcd7505c
connection.stable-id:                   --
connection.type:                        802-3-ethernet
connection.interface-name:              ens160
connection.autoconnect:                 yes
[... output omitted ...]
Additionally, RHEL 10 systems support network sessions, enabling users to quickly switch between multiple profiles (similar to the zone mechanism in the firewalld firewall service). If you need to manually specify an IP address for your laptop on the company network but use DHCP for automatic IP assignment at home, this would require frequent manual IP address changes. However, using network sessions simplifies this process—simply activate the appropriate network session for each environment to automatically switch network configuration settings.
Use the nmcli command to create network sessions following the format connection add con-name type ifname. Suppose we name the company network session company and the home network session house. Now create each session sequentially.
Use the con-name parameter to specify the network session name company for the office network. Then, use the ifname parameter to specify the local network interface name (ensure this matches your actual environment—do not copy ens160 from the book). Set the network session to not activate automatically by default using the autoconnect no parameter. Finally, manually specify the network IP address using the ip4 and gw4 parameters.
root@linuxprobe:~# nmcli connection add con-name company ifname ens160 autoconnect no type ethernet ip4 192.168.10.88/24 gw4 192.168.10.1
Connection 'company' (2040b650-edf6-4709-a1a3-4956ee0ffc2e) successfully added.
Use the con-name parameter to specify the network session name 'house' for home use. Since IP addresses will be automatically obtained from an external DHCP server, manual specification is unnecessary here.
root@linuxprobe:~# nmcli connection add con-name house type ethernet ifname ens160
Connection 'house' (52b64b23-fb88-4248-af74-6b67f1237d60) successfully added.
After successfully creating the network session, use the nmcli command to view all created network sessions.
root@linuxprobe:~# nmcli connection show
NAME     UUID                                  TYPE      DEVICE
ens160   f75b55fd-2891-3f5d-ba2c-adadbcd7505c  ethernet  ens160
lo       1b2c44f7-af47-4291-9997-d8de6cf5fa3f  loopback  lo
company  2040b650-edf6-4709-a1a3-4956ee0ffc2e  ethernet  --
house    52b64b23-fb88-4248-af74-6b67f1237d60  ethernet  --
Network sessions configured using the nmcli command persist permanently. This means that when we start work and casually activate the company network session, the network interface information is automatically configured:
root@linuxprobe:~# nmcli connection up company
Connection successfully activated (D-Bus active path: /org/freedesktop/NetworkManager/ActiveConnection/3)
root@linuxprobe:~# ifconfig
ens160: flags=4163<UP,BROADCAST,RUNNING,MULTICAST>  mtu 1500
        inet 192.168.10.88  netmask 255.255.255.0  broadcast 192.168.10.255
        inet6 fe80::2936:b131:9ed3:3120  prefixlen 64  scopeid 0x20<link>
        ether 00:0c:29:e5:e7:33  txqueuelen 1000  (Ethernet)
        RX packets 57244  bytes 4969903 (4.7 MiB)
        RX errors 0  dropped 0  overruns 0  frame 0
        TX packets 88  bytes 9242 (9.0 KiB)
        TX errors 0  dropped 0 overruns 0  carrier 0  collisions 0
[... output omitted ...]
If you are using a virtual machine, switch the virtual machine's network adapter to bridge mode, as shown in Figure 9-9. Then restart the virtual machine system.
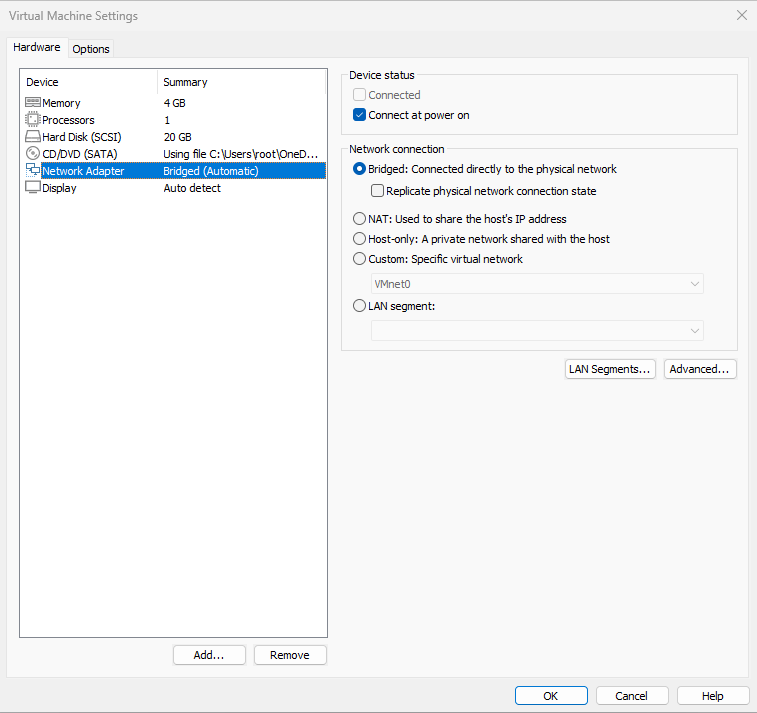
Figure 9-9 Configuring the virtual machine's network adapter mode
After this configuration, you can utilize your home router. Start the house session to observe the effect:
root@linuxprobe:~# nmcli connection up house
Connection successfully activated (D-Bus active path: /org/freedesktop/NetworkManager/ActiveConnection/4)
root@linuxprobe:~# ifconfig
ens160: flags=4163<UP,BROADCAST,RUNNING,MULTICAST>  mtu 1500
        inet 192.168.31.191  netmask 255.255.255.0  broadcast 192.168.31.255
        inet6 fe80::a689:6ecd:767e:7571  prefixlen 64  scopeid 0x20<link>
        ether 00:0c:29:e5:e7:33  txqueuelen 1000  (Ethernet)
        RX packets 57592  bytes 5001809 (4.7 MiB)
        RX errors 0  dropped 0  overruns 0  frame 0
        TX packets 142  bytes 15284 (14.9 KiB)
        TX errors 0  dropped 0 overruns 0  carrier 0  collisions 0
[... output omitted ...]
If enabling the company session succeeds but enabling the house session fails and you cannot obtain a dynamic address, this confirms your configuration is correct and the issue lies in the external network environment. There are three common scenarios: First, your home devices connect to the internet via dial-up or shared Wi-Fi instead of a router. Second, readers still in school or at work must pass through an institution's authentication page before accessing the web. Finally, check your physical machine's firewall settings—temporarily disable it and retry.
When no longer needing the network session, simply delete it using the delete command—it's very straightforward:
root@linuxprobe:~# nmcli connection delete house
Connection 'house' (52b64b23-fb88-4248-af74-6b67f1237d60) successfully deleted.
root@linuxprobe:~# nmcli connection delete company
Connection 'company' (2040b650-edf6-4709-a1a3-4956ee0ffc2e) successfully deleted.
9.1.3 Bonding Two Network Interfaces
Generally, production environments must provide 24/7 network transmission services. Network interface bonding not only enhances transmission speeds but, more critically, ensures uninterrupted service even if one interface fails. Suppose we implement bonding across two network interfaces. During normal operation, they jointly transmit data, accelerating network throughput. Should one interface suddenly fail, the other immediately takes over automatically, guaranteeing seamless data continuity.
Let's examine how to bind network adapters.
When adding a second network adapter device within the virtual machine system, ensure both adapters share the same network connection mode, as illustrated in Figures 9-10 and 9-11. Only adapters operating in identical modes can be bonded; otherwise, they cannot exchange data.
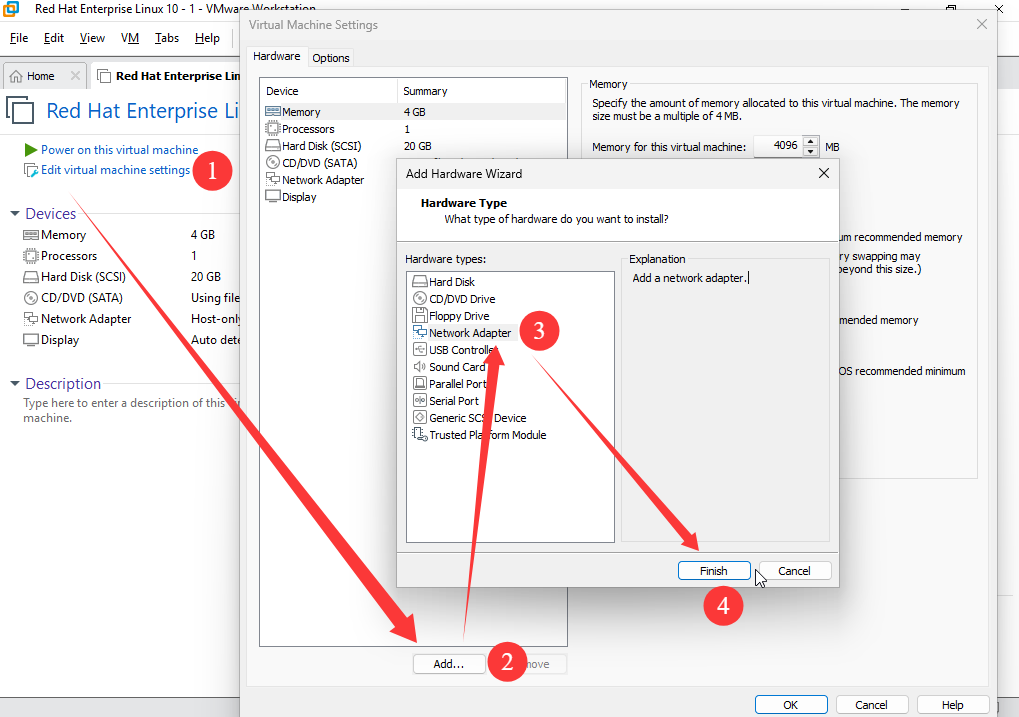
Figure 9-10 Adding an additional network adapter in the virtual machine
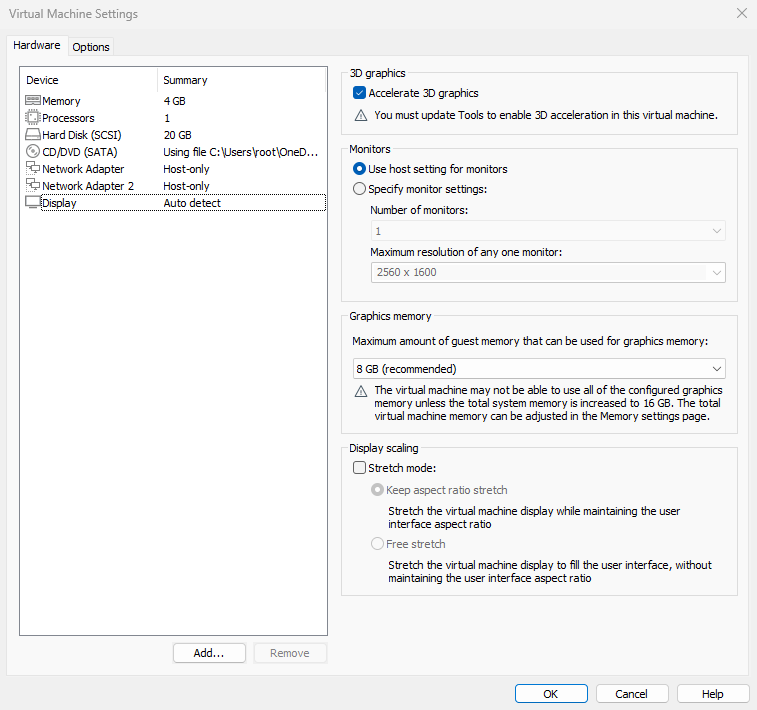
Figure 9-11 Ensuring both network interfaces are in the same network connection (i.e., identical interface mode)
Previously, we used the nmtui command to configure network information. This time, we'll use the nmcli command to configure the bonding parameters for network interface devices. This ensures you learn both commands without relying on any specific one. The theory behind network interface bonding is similar to the RAID disk groups we studied earlier—we need to perform "initial setup" for each network interface device participating in the bond.Note that in Figure 9-12, the originally independent network interface devices on the left (ens160 and ens192) must now be configured as "slave" interfaces serving the "master" bond0 interface on the right. They should no longer have their own IP addresses or other configuration details. After initial setup, they become ready to support network interface bonding.

Figure 9-12: Network Interface Bonding Schematic
Before proceeding, verify your actual interface names. If not ens160 and ens192, replace them accordingly.
root@linuxprobe:~# ifconfig
ens160: flags=4163<UP,BROADCAST,RUNNING,MULTICAST>  mtu 1500
        inet 192.168.10.10  netmask 255.255.255.0  broadcast 192.168.10.255
        inet6 fe80::20c:29ff:fee5:e733  prefixlen 64  scopeid 0x20<link>
        ether 00:0c:29:e5:e7:33  txqueuelen 1000  (Ethernet)
        RX packets 1319  bytes 113553 (110.8 KiB)
        RX errors 0  dropped 0  overruns 0  frame 0
        TX packets 56  bytes 5770 (5.6 KiB)
        TX errors 0  dropped 0 overruns 0  carrier 0  collisions 0

ens192: flags=6211<UP,BROADCAST,RUNNING,SLAVE,MULTICAST>  mtu 1500
        ether 00:0c:29:e5:e7:3d  txqueuelen 1000  (Ethernet)
        RX packets 76  bytes 6960 (6.7 KiB)
        RX errors 0  dropped 0  overruns 0  frame 0
        TX packets 50  bytes 5014 (4.8 KiB)
        TX errors 0  dropped 0 overruns 0  carrier 0  collisions 0
[... output omitted ...]
1. Create a bond network interface Configuring network settings with nmcli commands can be challenging, so we'll cover this in Chapter 9. First, create a bond interface using the following command. This command creates a bond device named bond0 with the type set to bond, interface name bond0, and balance-rr mode:
root@linuxprobe:~# nmcli connection add type bond con-name bond0 ifname bond0 bond.options "mode=balance-rr"
Connection 'bond0' (3fb9d014-677f-4b83-8579-d1f959905632) successfully added.
Here, the balance-rr network interface bonding mode is used, where "rr" stands for round-robin. Round-robin sequentially transmits packets based on device order, providing load balancing to enhance bandwidth performance. Additionally, if one network interface fails, it immediately switches to the other interface, ensuring uninterrupted network transmission.Active-backup is another commonly used network interface binding mode. Its characteristic is that only one network interface operates normally at a time, while the other remains on standby. Should the active interface fail, the standby interface automatically takes over. This mode demonstrates strong redundancy capabilities, hence it is also referred to as the primary-standby mode.
For example, consider a file server providing NFS or Samba services. Its maximum network throughput is 100Mbit/s, but it experiences heavy access pressure due to a large number of users.In production environments, network reliability is paramount, and consistent transmission speeds must be guaranteed. For such scenarios, the balance-rr network interface bonding mode is an optimal choice. This mode enables both NICs to operate simultaneously. Should one NIC fail, the other automatically takes over without requiring switch support, ensuring reliable network transmission.
2. Adding Slave Network Interfaces to bond0 The bond0 device created earlier is currently just a name without any actual network interfaces capable of transmitting data. Use the following command to add the ens160 and ens192 network interfaces. The con-name parameter specifies the name of the slave interface (configurable at any time), while the ifname parameter lists the names of the two network interfaces. Always use the actual names of your network interfaces; do not copy the names provided here.
root@linuxprobe:~# nmcli connection add type ethernet slave-type bond con-name bond0-port1 ifname ens160 master bond0
Connection 'bond0-port1' (2976973b-34fe-4fe2-9135-91e6be5123c7) successfully added.
root@linuxprobe:~# nmcli connection add type ethernet slave-type bond con-name bond0-port2 ifname ens192 master bond0
Connection 'bond0-port2' (45036f7d-c042-49f3-8fa1-65a2671e92c9) successfully added.
3. Configuring the bond0 Device's Network Interface Information There are multiple methods to configure network parameters. To ensure consistency in this experiment's setup process, we will use the nmcli command to sequentially configure the network's IP address, subnet mask, gateway, DNS, search domain, and manual configuration parameters. If you are unfamiliar with this command, you can directly edit the network interface configuration file or use the nmtui command to complete the following operations:
root@linuxprobe:~# nmcli connection modify bond0 ipv4.addresses 192.168.10.10/24
root@linuxprobe:~# nmcli connection modify bond0 ipv4.gateway 192.168.10.1
root@linuxprobe:~# nmcli connection modify bond0 ipv4.dns 192.168.10.1
root@linuxprobe:~# nmcli connection modify bond0 ipv4.dns-search linuxprobe.com
root@linuxprobe:~# nmcli connection modify bond0 ipv4.method manual
4. Start it up! Now comes the exciting part—let's start it up! And while we're at it, let's check the detailed device list:
root@linuxprobe:~# nmcli connection up bond0
Connection successfully activated (controller waiting for ports) (D-Bus active path: /org/freedesktop/NetworkManager/ActiveConnection/5)
root@linuxprobe:~# nmcli device status
DEVICE  TYPE      STATE                                  CONNECTION
ens160  ethernet  connected                              ens160
ens192  ethernet  connected                              bond0-port2
bond0   bond      connecting (getting IP configuration)  bond0
lo      loopback  connected (externally)                 lo
When users subsequently access the host IP address 192.168.10.10, the host is actually served by both network interfaces. You can check network connectivity by executing the ping 192.168.10.10 command on the local host.To test the auto-failover capability of network interface bonding, randomly remove one NIC device from the virtual machine's hardware configuration, as shown in Figure 9-13.

Figure 9-13 Randomly removing any network interface card
The network interface switch process is clearly observable (typically resulting in only one dropped packet), while the other network interface card continues to serve the user.
root@linuxprobe:~# ping 192.168.10.10
PING 192.168.10.10 (192.168.10.10) 56(84) bytes of data.
64 bytes from 192.168.10.10: icmp_seq=1 ttl=64 time=0.057 ms
64 bytes from 192.168.10.10: icmp_seq=2 ttl=64 time=0.068 ms
64 bytes from 192.168.10.10: icmp_seq=3 ttl=64 time=0.039 ms
ping: sendmsg: Network is unreachable
64 bytes from 192.168.10.10: icmp_seq=5 ttl=64 time=0.270 ms
64 bytes from 192.168.10.10: icmp_seq=6 ttl=64 time=0.092 ms
64 bytes from 192.168.10.10: icmp_seq=7 ttl=64 time=0.082 ms
64 bytes from 192.168.10.10: icmp_seq=8 ttl=64 time=0.089 ms
^C
--- 192.168.10.10 ping statistics ---
8 packets transmitted, 7 received, 12% packet loss, time 7006ms
rtt min/avg/max/mdev = 0.042/0.073/0.109/0.023 ms
9.2 Remote Control Service
As one of the most commonly used remote control services in Linux systems, SSH is indispensable in daily operations and maintenance. This section will guide students through three practical exercises—basic parameter configuration, secure key authentication setup, and remote command execution—to deepen their understanding of the SSH protocol and master the operation of the sshd service. This will lay a solid foundation for future work in production environments.
9.2.1 Configuring the sshd Service
SSH (Secure Shell) is a protocol that enables secure remote login and remains the preferred method for remotely managing Linux systems today. Previously, Telnet was commonly used for remote login. However, Telnet transmits account passwords and data in plaintext over the network, making it highly insecure—vulnerable to man-in-the-middle attacks by hackers. At best, transmitted data could be tampered with; at worst, server account credentials could be directly captured.
To remotely manage Linux systems using the SSH protocol, you must configure and deploy the sshd service program. sshd is a remote management service developed based on the SSH protocol. It is not only convenient and efficient to use but also provides two methods of secure authentication:
Password-based authentication—verifying login with username and password;
Key-based authentication—requires generating a key pair locally, uploading the public key to the server, and verifying it against the server's stored public key; this method is comparatively more secure.
As previously emphasized, "everything in Linux is a file." Therefore, modifying a service's operational parameters in Linux essentially involves editing its configuration file. The sshd service's configuration resides in the /etc/ssh/sshd_config file. Operators typically refer to the file containing the most critical configuration settings as the main configuration file. Many lines in the configuration file begin with a hash symbol (#) as comments. To activate these configuration parameters, remove the preceding hash symbol after modifying the parameter. The parameters included in the sshd service main configuration file and their functions are shown in Table 9-1.
Table 9-1 Parameters and Functions in the sshd Service Main Configuration File
| Parameter | Function |
|---|---|
| Port 22 | Default sshd service port |
| ListenAddress 0.0.0.0 | IP address where sshd listens |
| Protocol 2 | SSH protocol version number |
| HostKey /etc/ssh/ssh_host_key | Location of the host key used for legacy SSH protocol version 1 |
| HostKey /etc/ssh/ssh_host_rsa_key | Location of RSA private key when SSH protocol version is 2 |
| HostKey /etc/ssh/ssh_host_dsa_key | Location of the DSA private key when SSH protocol version is 2 |
| PermitRootLogin yes | Sets whether root administrator direct login is allowed |
| StrictModes yes | Verifies user file ownership and permissions; rejects login if they are too open |
| MaxAuthTries 6 | Maximum number of password attempts |
| MaxSessions 10 | Maximum number of concurrent sessions |
| PasswordAuthentication yes | Whether to allow password authentication |
| PermitEmptyPasswords no | Whether to allow empty password logins (highly insecure) |
The following experiment will use two virtual machines: one acting as the server and the other as the client. Their IP addresses and roles are shown in Table 9-2.
Table 9-2 sshd Service Experiment Machine Information
| Host Address | Hostname | OS | Role |
|---|---|---|---|
| 192.168.10.10 | Server | Linux | Acts as server |
| 192.168.10.20 | Client | Linux | Acts as client |
On RHEL 10 systems, the sshd service is installed and enabled by default. Next, use the ssh command on the client to remotely connect to the server. The format is "ssh [options] username@host IP address". To log out, execute the exit command. During the first connection, you must enter yes to confirm the fingerprint of the remote host:
root@Client:~# ssh 192.168.10.10
The authenticity of host '192.168.10.10 (192.168.10.10)' can't be established.
ED25519 key fingerprint is SHA256:0R7Kuk/yCTlJ+E4G9y9iX/A/hAklHkALm5ZUgnJ01cc.
This key is not known by any other names.
Are you sure you want to continue connecting (yes/no/[fingerprint])? yes
Warning: Permanently added '192.168.10.10' (ED25519) to the list of known hosts.
root@192.168.10.10's password: Enter the server administrator password here
Last login: Thu Mar 13 06:56:57 2025
[... output omitted ...]
root@Server:~# exit
logout
Connection to 192.168.10.10 closed.
Allowing the root administrator user to remotely log in to the server via password is somewhat concerning.It is recommended to configure the server to allow only key-based authentication, significantly reducing the risk of password brute-force attacks by hackers. The method is straightforward: first, use the Vim text editor to open the main configuration file for the sshd service on the server. Then, remove the hash symbol (#) before the parameter #PermitRootLogin prohibit-password on line 40.
What if you want to completely block root administrator remote login to the server? That is, deny access regardless of the authentication method used. To achieve this, change the parameter value on line 40 to no:
root@Server:~# vim /etc/ssh/sshd_config
[... output omitted ...]
 39 #LoginGraceTime 2m
 40 PermitRootLogin no
 41 #StrictModes yes
 42 #MaxAuthTries 6
 43 #MaxSessions 10
[... output omitted ...]
Then comment out the configuration parameter that allowed root login during RHEL 10 installation:
root@Server:~# vim /etc/ssh/sshd_config.d/01-permitrootlogin.conf
# This file has been generated by the Anaconda Installer.
# Allow root to log in using ssh. Remove this file to opt-out.
# PermitRootLogin yes
It's important to note that services typically do not immediately recognize changes made to their configuration files. To apply the new settings, you must manually restart the relevant service. It's also advisable to add this service to the system startup items. This ensures the service runs automatically at the next system boot, continuing to provide services to users.
root@Server:~# systemctl restart sshd
root@Server:~# systemctl enable sshd
Consequently, when the root administrator attempts to access the sshd service again, the system will display an "inaccessible" error message. Although the sshd service parameters are relatively straightforward, this represents the correct method for configuring services in Linux systems. The key is to apply this knowledge flexibly and adapt it to new situations. This way, even when encountering unfamiliar services later, you'll be able to handle them effectively.
root@Client:~# ssh 192.168.10.10
root@192.168.10.10's password: Enter the server administrator password here
Permission denied, please try again.
To avoid being unable to log in with the root administrator account in subsequent experiments, please manually modify the above parameters back:
root@Server:~# vim /etc/ssh/sshd_config
[... output omitted ...]
 39 #LoginGraceTime 2m
 40 PermitRootLogin yes
 41 #StrictModes yes
 42 #MaxAuthTries 6
 43 #MaxSessions 10
[... output omitted ...]
root@Server:~# systemctl restart sshd
Accessing via Windows systems is also supported.First, ensure network connectivity is established. Then, select a preferred login tool from options like Xshell, PuTTY, SecureCRT, or SSH Secure Shell Client to attempt a remote connection. The results are shown in Figures 9-14 through 9-16.
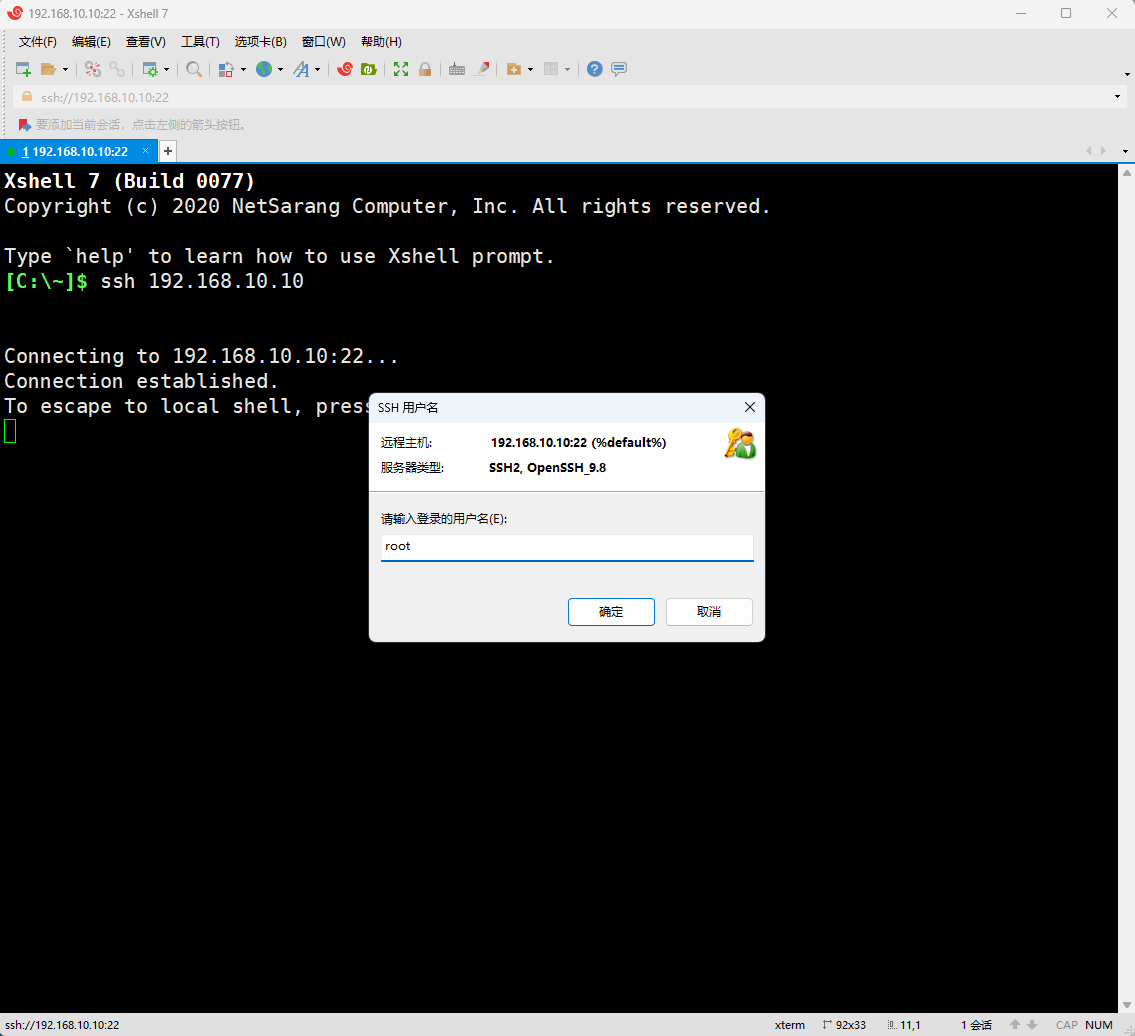
Figure 9-14: Remote login account name input
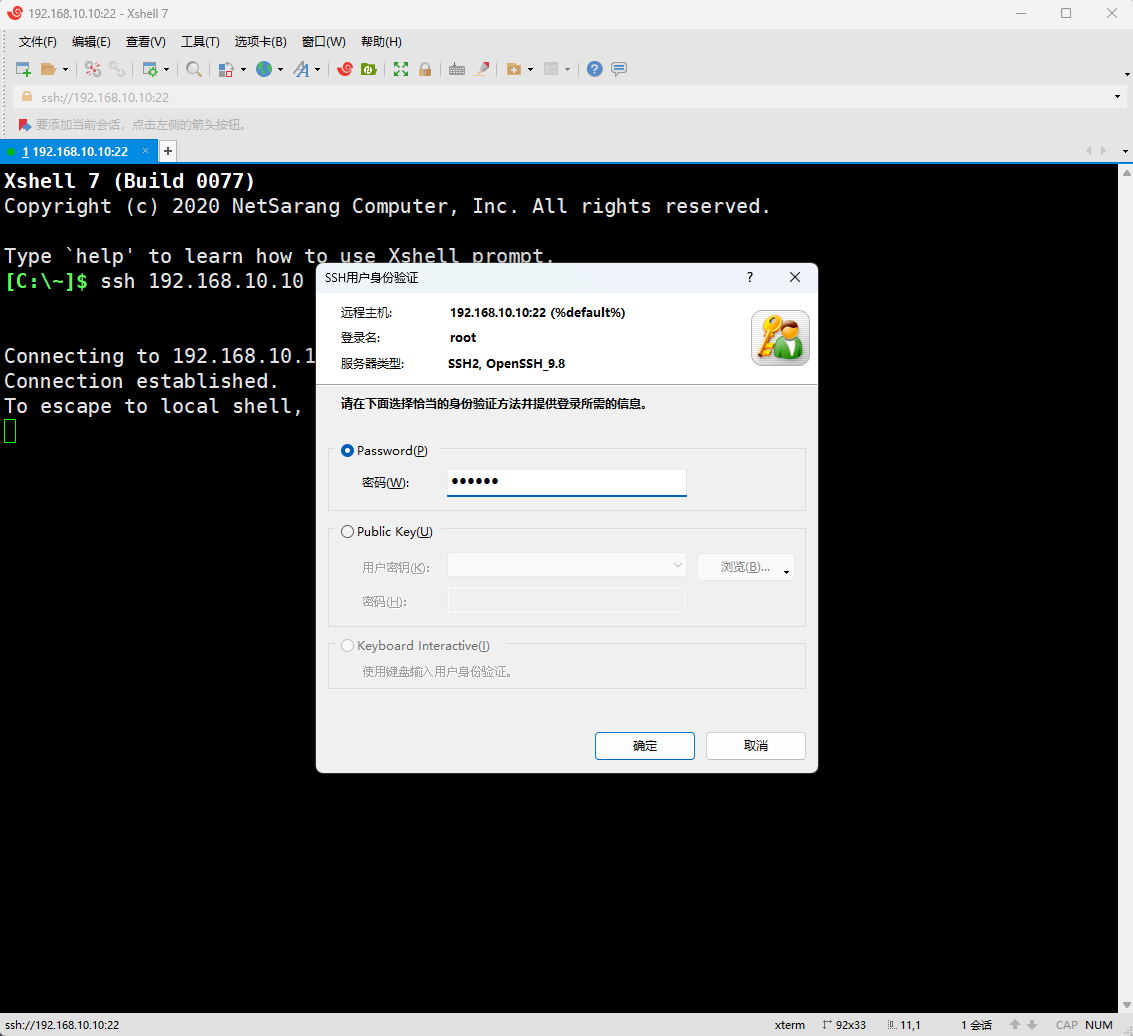
Figure 9-15: Remote login account password input
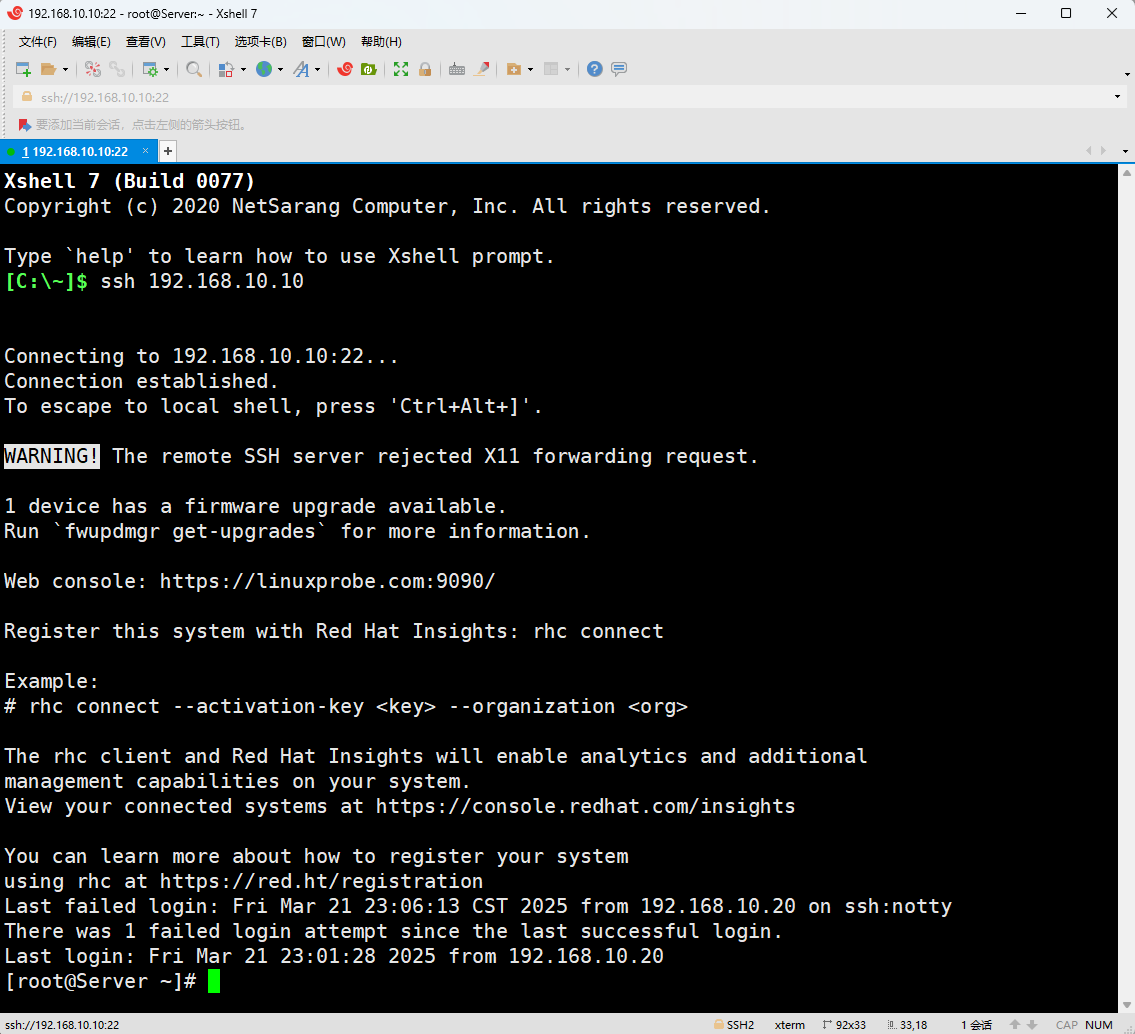
Figure 9-16 Remote Login Success Interface
9.2.2 Secure Key Verification
Encryption is the process of encoding information, converting plaintext into ciphertext. It uses specific algorithms (keys) to transform readable plaintext into an encrypted format. Keys serve as the "keys" to decrypt ciphertext, categorized into private keys and public keys. When transmitting data, if you fear eavesdropping or interception, you can encrypt the data using the public key before transmission. This ensures only users possessing the private key can decrypt the data. Even if intercepted, others generally cannot decipher it into plaintext.
In short, using passwords for authentication in production environments carries inherent risks of brute-force attacks or sniffing. Properly configuring key-based authentication significantly enhances the security of the sshd service. The specific configuration steps are outlined below.
Step 1: Generate a "key pair" on the client side. Remember, this is done on the client.
root@Client:~# ssh-keygen
Generating public/private ed25519 key pair.
Enter file in which to save the key (/root/.ssh/id_ed25519): Press Enter or specify the key storage path
Enter passphrase (empty for no passphrase): Press Enter or set the key password
Enter same passphrase again: Press Enter again or set the key password
Your identification has been saved in /root/.ssh/id_ed25519
Your public key has been saved in /root/.ssh/id_ed25519.pub
The key fingerprint is:
SHA256:5EbLRQAHIY4+1uPwWsJAytg5YK1dYbAZyCvBAHhwWkc root@Client
The key's randomart image is:
+--[ED25519 256]--+
|X.++Eo++o..      |
|oBo+=... .       |
|o=o+..  o .      |
|B=oo.  = o       |
|=oO.o   S        |
| + * . .         |
|  o +            |
|   +             |
|  .              |
+----[SHA256]-----+
Step 2: Transfer the public key file generated on the client to the remote server.
root@Client:~# ssh-copy-id 192.168.10.10
/usr/bin/ssh-copy-id: INFO: attempting to log in with the new key(s), to filter out any that are already installed
/usr/bin/ssh-copy-id: INFO: 1 key(s) remain to be installed -- if you are prompted now it is to install the new keys
root@192.168.10.10's password: Enter the server administrator password here

Number of key(s) added: 1

Now try logging into the machine, with:   "ssh '192.168.10.10'"
and check to make sure that only the key(s) you wanted were added.
Step 3: Configure the server by changing the parameter value on line 65 to no. This enables key-based authentication only and disables traditional password authentication. Remember to save the configuration file and restart the sshd service after making changes.
We neither need nor recommend using the PermitRootLogin prohibit-password parameter for two main reasons: First, this setting only applies to the root administrator account and cannot prevent other users from logging in with passwords. Second, Linux systems discard user-entered passwords immediately upon receipt. While the effect is the same (i.e., preventing server login), users cannot distinguish whether they were denied access or simply entered an incorrect password, potentially causing confusion.
root@Server:~# vim /etc/ssh/sshd_config
[... output omitted ...]
 64 # To disable tunneled clear text passwords, change to no here!
 65 PasswordAuthentication no
 66 #PermitEmptyPasswords no
[... output omitted ...]
root@Server:~# systemctl restart sshd
Step 4: The client attempts to log in to the server. At this point, successful login occurs without requiring a password, which is particularly convenient.
root@Client:~# ssh 192.168.10.10
[... output omitted ...]
Last login: Fri Mar 21 23:11:10 2025 from 192.168.10.1
root@Server:~#
However, if the user lacks key information, they will be denied access even with a password. The system won't even prompt for the password, as shown in Figure 9-17.
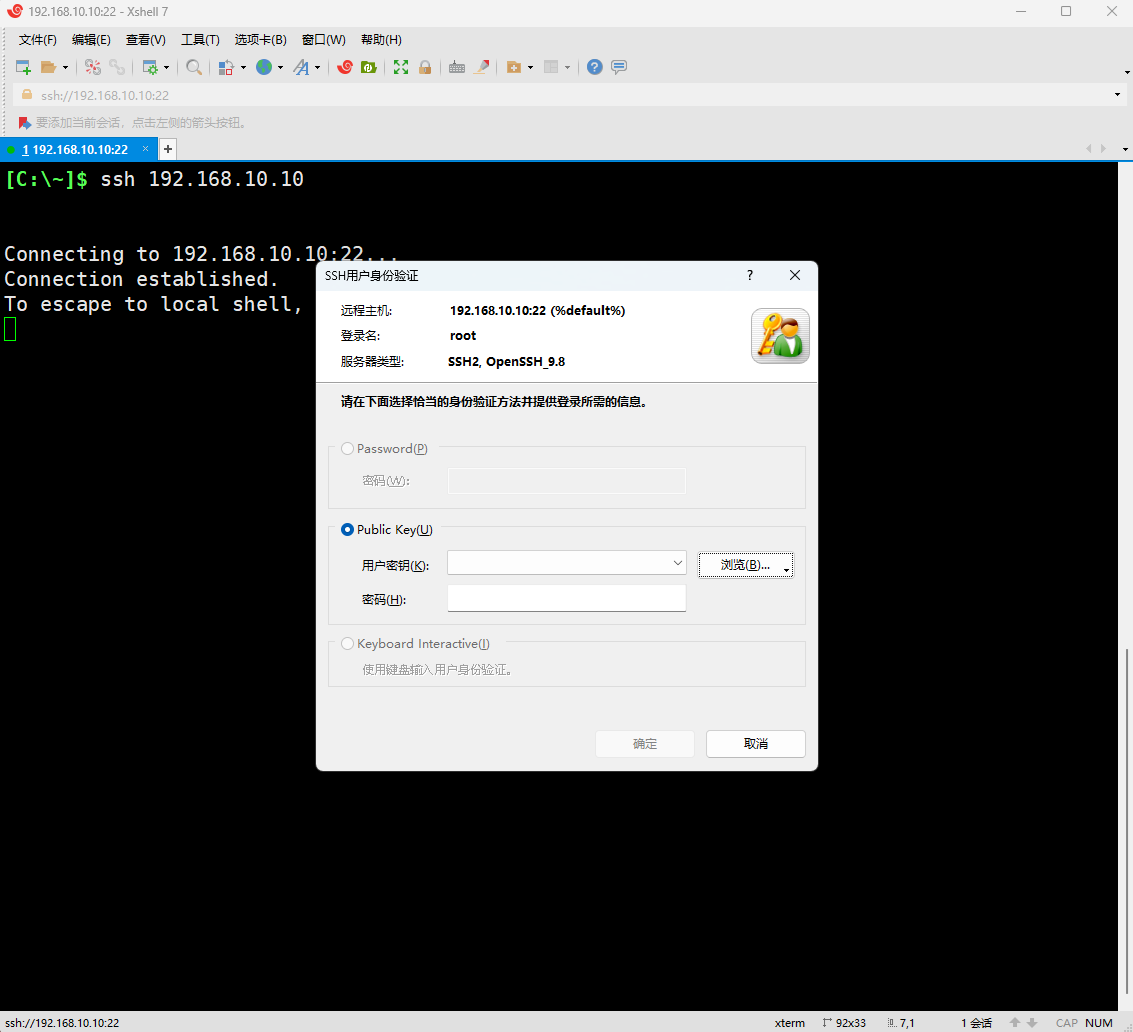
Figure 9-17: Access Denied to Remote Server Without Key
9.2.3 Remote Command Transfer
Have you ever wondered: Since the SSH protocol allows remote server control and command transmission, can it also transfer files?
scp (secure copy) is a command that leverages the SSH protocol for secure file transfers over networks. Its syntax is: scp [options] local_file remote_username@remote_IP_address:remote_directory.
Unlike the cp command covered in Chapter 2—which only copies files locally—scp not only transfers data over networks but also encrypts all transmitted data. For example, if you want to transfer files over a network from one host to another, and both hosts happen to be running Linux systems, you can easily accomplish this file transfer using the scp command. The available parameters and their functions in the scp command are shown in Table 9-3.
Table 9-3 Available Parameters and Functions in the scp Command
| Parameter | Function |
|---|---|
| -v | Display detailed connection progress |
| -P | Specify the sshd port number on the remote host |
| -r | Used to transfer directories |
| -6 | Use IPv6 protocol |
When using the scp command to copy files from a local machine to a remote host, you must first specify the local file's location using an absolute path. To transfer all data within an entire directory, add the -r parameter for recursive operation. Then enter the IP address of the remote host, which will prompt for authentication.The current username is root, and the password is the remote host's password. To authenticate using a specific user, use the format username@hostname.Finally, append a colon after the remote host's IP address, followed by the destination directory on the remote host. Provided the parameters are correct and user authentication succeeds, the transfer will commence. Since the scp command transfers files via the SSH protocol, and key-based authentication was configured in Section 9.2.2, no username or password is required during this file transfer.
root@Client:~# echo "Welcome to LinuxProbe.Com" > readme.txt
root@Client:~# scp /root/readme.txt 192.168.10.10:/home
readme.txt                                    100%   26    20.1KB/s   00:00
Additionally, the scp command can download files from a remote host to the local host. The command format is "scp [options] remote_user@remote_IP_address:remote_file local_directory". This eliminates the need to log in to the remote host before transferring files, saving significant effort. For example, downloading the system version information file from the remote host:
root@Client:~# scp 192.168.10.10:/etc/redhat-release /root
redhat-release                                100%   54    22.7KB/s   00:00
root@Client:~# cat redhat-release
Red Hat Enterprise Linux release 10.0
9.3 Uninterrupted Session Service
When learning about the sshd service, have you noticed this behavior: When a session with a remote host is closed, commands running on that remote host also terminate.
If you're using a command to package files or running a script to install a service program, you absolutely cannot close the local terminal window or disconnect the network connection midway. Even fluctuations in network speed can potentially interrupt the task. Once interrupted, you must re-establish the remote connection and restart the task.Sometimes, while executing a file packaging operation, you might also need to run a script to install a service program. In such cases, the output from the packaging operation can flood your screen, forcing you to open another terminal window for the remote session. Over time, it's easy to forget what each open terminal window is for.
Terminal Multiplexer (Tmux) is an open-source utility enabling multi-window remote control. Simply put, it's designed to address network interruptions and manage multiple remote terminal windows simultaneously. Users can freely switch between multiple remote sessions using Tmux, achieving the following capabilities:
Session Recovery: Even if the network disconnects, sessions can be resumed at any time, ensuring users never lose control of their remote sessions.
Multi-Window: Each session runs independently with its own input/output terminal window. Terminal window states are preserved, allowing window states and content to be restored upon reconnection.
Session Sharing: When multiple users log into a remote server simultaneously, session sharing enables input/output information to be shared between users.
On RHEL 10 systems, the Tmux service is not installed by default. Therefore, you must configure software repositories to install it. Refer to Section 8.3.2 for repository configuration steps. Both BaseOS and AppStream repositories require configuration. Proceed directly to installing Tmux here.
root@linuxprobe:~# dnf install tmux
Updating Subscription Management repositories.
BaseOS                                          2.7 MB/s | 2.7 kB     00:00
AppStream                                       2.7 MB/s | 2.8 kB     00:00
Dependencies resolved.
================================================================================
 Package   Arch        Version                                Repository   Size
================================================================================
Installing:
 tmux      x86_64      3.3a-10.20230918gitb202a2f.el10        BaseOS      518 k

Transaction Summary
================================================================================
Install  1 Package

Total size: 518 k
Installed size: 1.2 M
Is this ok [y/N]: y
Downloading Packages:
Running transaction check
Transaction check succeeded.
Running transaction test
Transaction test succeeded.
Running transaction
  Preparing        :                                                        1/1
  Installing       : tmux-3.3a-10.20230918gitb202a2f.el10.x86_64            1/1
  Running scriptlet: tmux-3.3a-10.20230918gitb202a2f.el10.x86_64            1/1
Installed products updated.

Installed:
  tmux-3.3a-10.20230918gitb202a2f.el10.x86_64

Complete!
Tips:
For brevity, Instructor Liu Chuan will filter out software installation details in subsequent chapters—omitting repetitive and non-essential information.
9.3.1 Managing Remote Sessions
Tmux offers extensive capabilities, such as creating persistent sessions, resuming offline work, splitting the interface into panes, and sharing sessions. Below, we directly enter the session window by running the tmux command, as shown in Figure 9-18.

Figure 9-18 Tmux Service Session Interface
Notice the green status bar at the bottom of the session window, displaying the session ID, name, hostname, and system time.
To exit the session window, use the exit command. After entering it, you will return to the normal terminal interface, as shown in Figure 9-19.
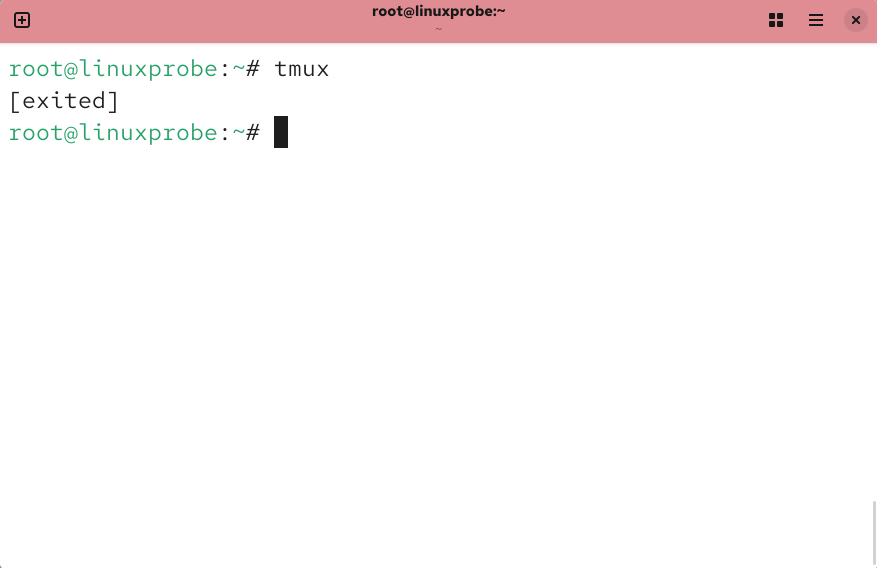
Figure 9-19: Returning from a session window to the terminal interface
Session windows are automatically numbered starting from 0 (i.e., 0, 1, 2, 3, ...). This works fine with few sessions, but becomes cumbersome when managing many.Next, create a session named backup. Notice that when you enter the following command in the terminal, the screen briefly flickers—indicating you've entered the Tmux session. All actions performed here will be recorded in the background.
root@linuxprobe:~# tmux new -s backup
Suppose we suddenly need to attend to other tasks, but the processes running in the session window cannot be interrupted. In this case, we can use the detach parameter to hide the session in the background. Although it appears unchanged from before, the current session is still actively running:
root@linuxprobe:~# tmux detach
[detached (from session backup)]
If repeatedly typing detach feels cumbersome, simply close the session window as shown in Figure 9-20 (this mimics the effect of a sudden network disconnection during remote connections). The Tmux service will automatically save your session for you.
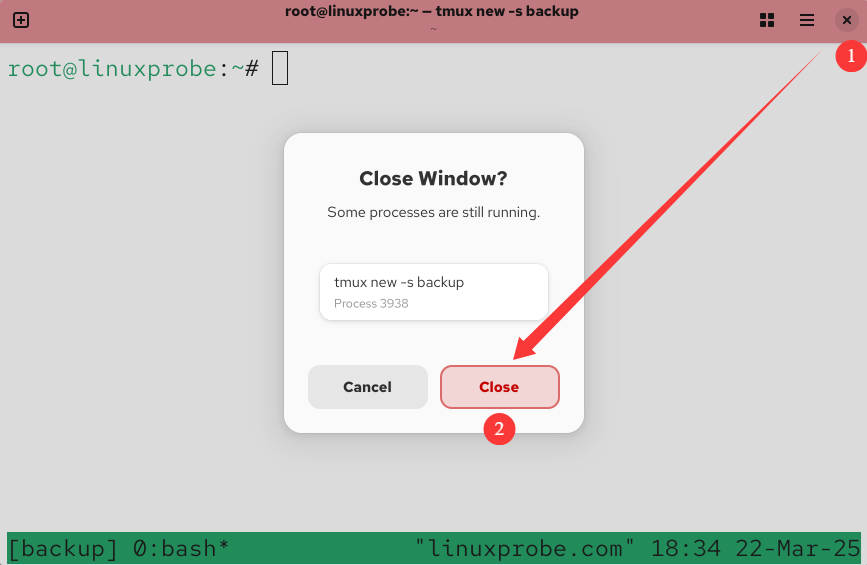
Figure 9-20 Forcibly closing the session window
After this operation, the service and processes will continue running silently in the background without data loss due to the window closing. If unsure, you can check which sessions are running in the background:
root@linuxprobe:~# tmux ls
backup: 1 windows (created Sat Mar 22 18:34:42 2025)
In traditional remote control scenarios, abruptly closing the session window would inevitably terminate running commands. However, Tmux's persistent session service prevents this.Simply locate the name of the recently detached session and attempt to reattach to it. The session will resume exactly where it left off. Reattaching to the backup session is straightforward: append attach followed by the session ID or name after the tmux command. All work in progress before closing the window will be restored intact, completely unaffected:
root@linuxprobe:~# tmux attach -t backup
If you no longer need this Tmux session, you don't have to attach to it and type exit first. You can simply kill the session directly:
root@linuxprobe:~# tmux attach -t backup
[exited]
root@linuxprobe:~# tmux ls
no server running on /tmp/tmux-0/default
In daily production environments, it's not necessary to create a session before starting work. You can directly use the tmux command to execute the desired command. All operations within the command will be recorded, and the background session will automatically terminate once the command completes.
root@linuxprobe:~# tmux new "vim memo.txt"
9.3.2 Managing Multiple Panes
In real-world work, a single shell terminal window is often insufficient. How can this be addressed? Tmux offers a multi-pane feature that splits a terminal interface vertically or horizontally. This enables simultaneous multitasking without interference between tasks, providing exceptional convenience.
First, create a session. Use the tmux split-window command to create a vertically split multi-pane terminal interface, as shown in Figure 9-21. Use the tmux split-window -h command to create a horizontally split multi-pane terminal interface, as shown in Figure 9-22.
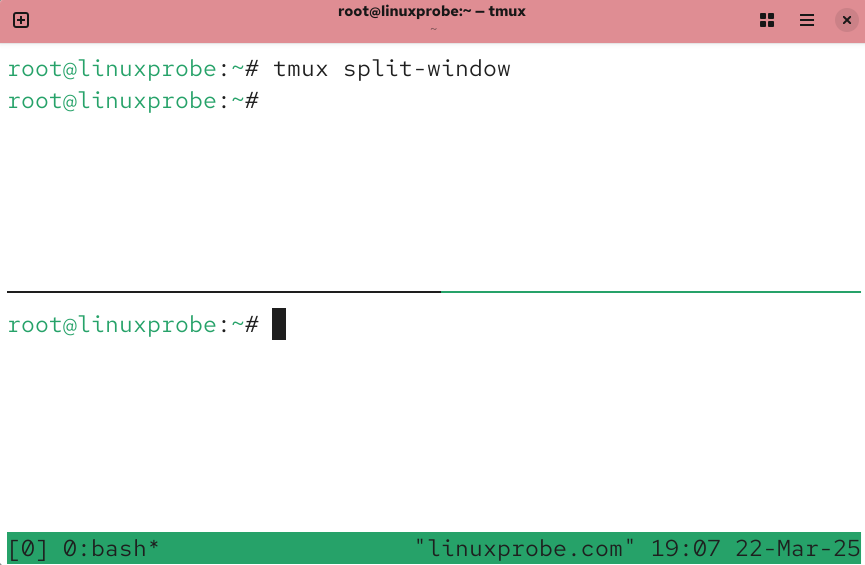
Figure 9-21: Vertical Split Multi-Pane
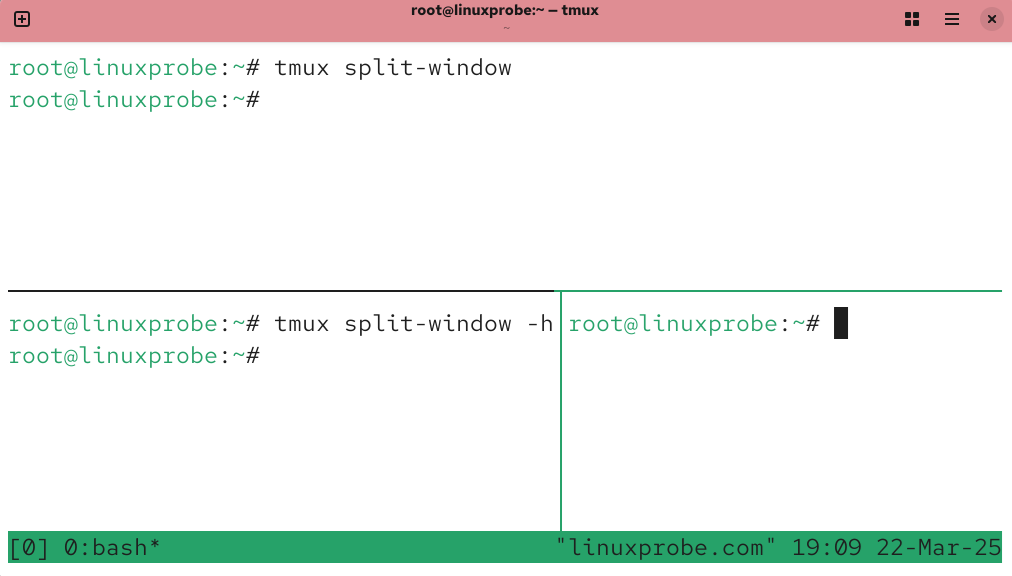
Figure 9-22: Horizontally Split Multi-Pane
After creating a multi-pane terminal interface, you can handle multiple tasks simultaneously without confusion. If two panes aren't enough, simply repeat the above commands. To exit, use the exit command.
Oops! Accidentally created too many? The active pane shrinks so small you can't see your input? No worries! Press Ctrl+B + arrow keys to resize panes. For example, if the active pane is too narrow and you want to expand it to the right, press Ctrl+B + Right Arrow.
If you need to switch to another pane for work without closing the current one, use the commands shown in Table 9-4 to switch.
Table 9-4 Tmux Multi-Pane Switching Commands for Persistent Sessions
| Command | Effect |
|---|---|
| tmux select-pane -U | Switch to the top pane |
| tmux select-pane -D | Switch to the bottom pane |
| tmux select-pane -L | Switch to the left pane |
| tmux select-pane -R | Switch to the right pane |
To swap the positions of the top and bottom panes, use the commands shown in Table 9-5.
Table 9-5 Tmux Swap Commands for Multi-Pane Sessions
| Command | Effect |
|---|---|
| tmux swap-pane -U | Swap current pane with the pane above it |
| tmux swap-pane -D | Swap current pane with the pane below it |
As shown in Figure 9-23, the pane that originally executed the uptime command is positioned below. Simply execute the command tmux swap-pane -U within that pane to swap its position with the upper pane, as demonstrated in Figure 9-24.
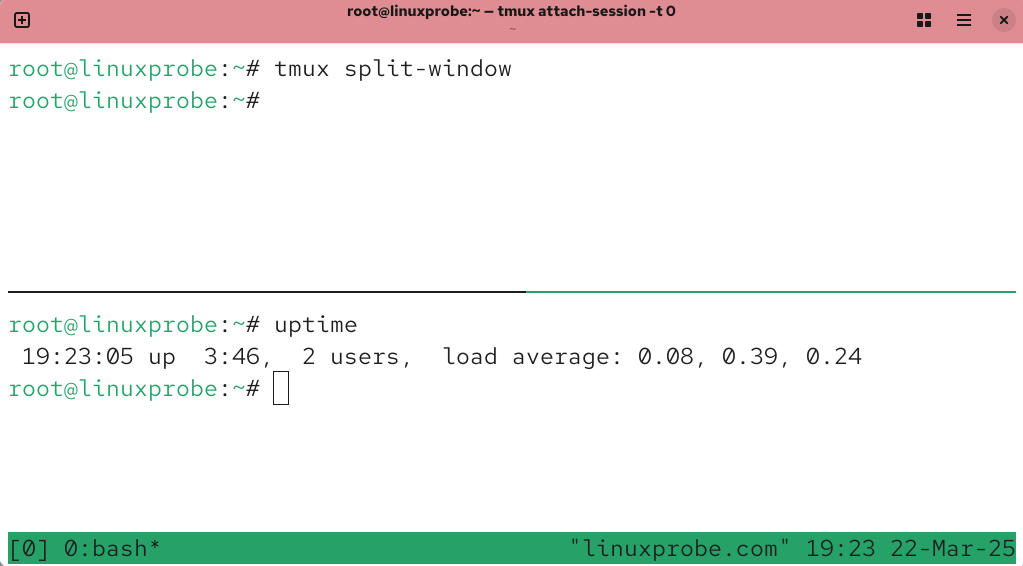
Figure 9-23 Before swapping pane positions
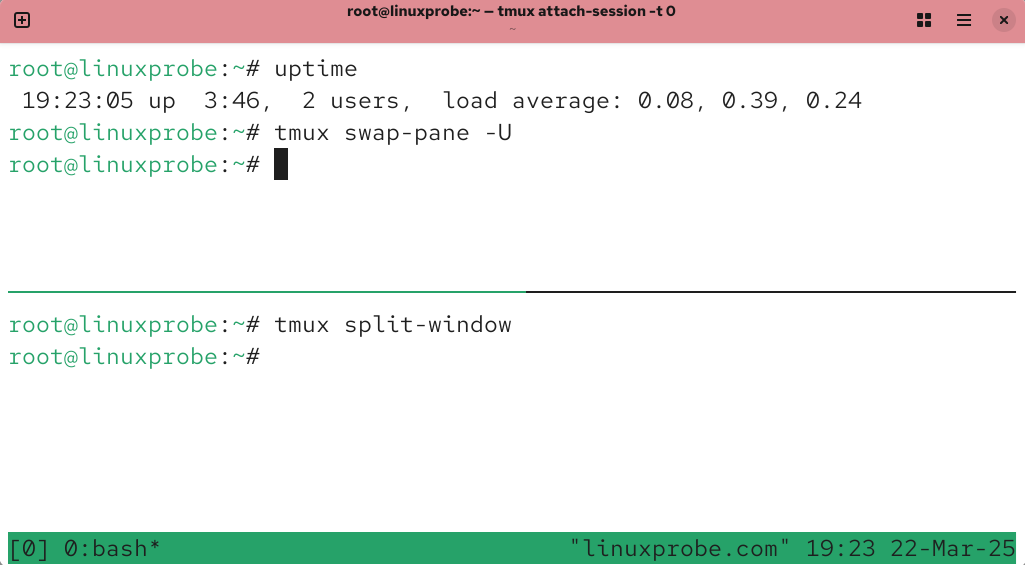
Figure 9-24 After swapping pane positions
In practice, switching panes by typing commands can be cumbersome. Fortunately, Tmux provides a set of keyboard shortcuts for pane switching. To use them, press Ctrl+B simultaneously, then release both keys before quickly pressing the subsequent key(s) – they don't need to be held down together. This accommodates users with smaller hands. Common shortcuts for session pane operations are listed in Table 9-6.
Table 9-6 Common Shortcuts for Managing Tmux Session Panes
| Shortcut | Function |
|---|---|
| % | Split into left and right panes |
| " | Split into top and bottom panes |
| ; | Switch to the previous pane |
| o | Switch to the next pane |
| { | Swap the current pane with the previous pane |
| } | Swap the current pane with the next pane |
| x | Close pane |
| ! | Split current pane into separate windows |
| q | Display pane number |
Please note that when using keyboard shortcuts to manipulate session panes, you must first press the Ctrl+B key combination before pressing any other keys. Otherwise, the operation will not take effect.Suppose we have two panes as shown in Figure 9-25 and wish to swap their positions. The procedure is: simultaneously press and release the Ctrl+B key combination, then press the "}" key. The final result is shown in Figure 9-26.
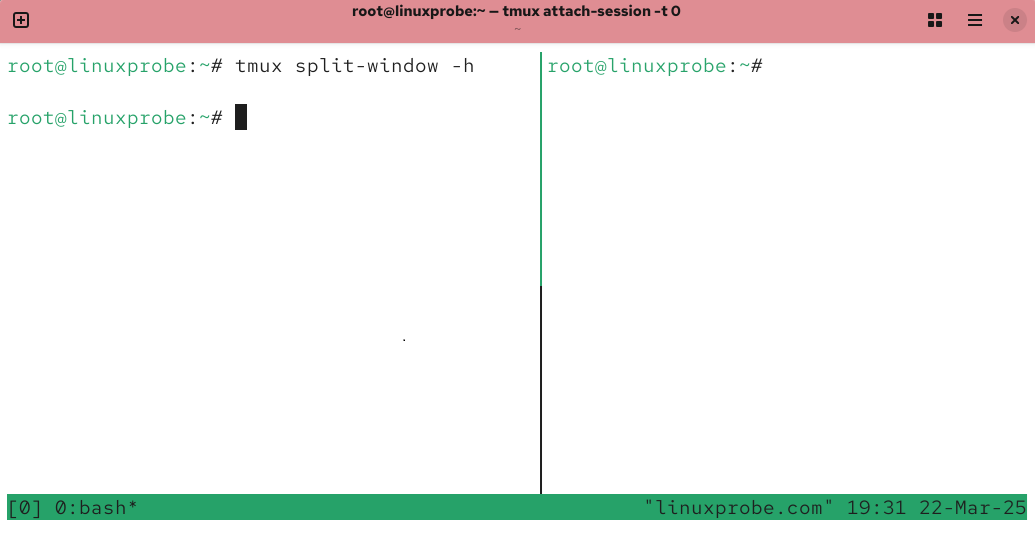
Figure 9-25 Before pane swap
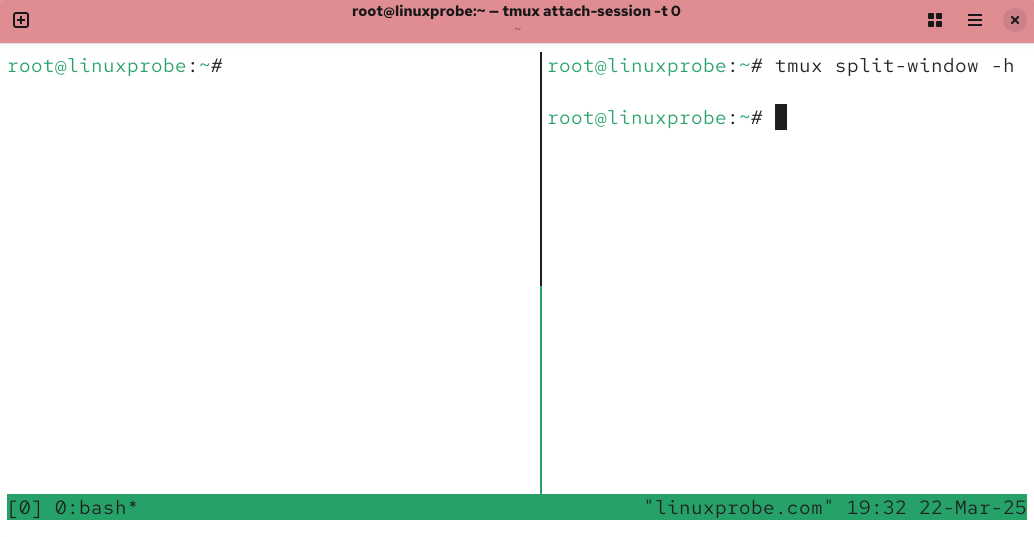
Figure 9-26 After pane swap
Once you master these Tmux service operations, daily management becomes straightforward. We don't recommend memorizing the commands and shortcuts mentioned here. Instead, keep this book handy at your desk for quick reference during work.
9.3.3 Session Sharing Feature
Tmux not only ensures users retain remote control of the system even in extreme situations—guaranteeing uninterrupted remote work in production environments—but also offers practical features like session sharing, split-screen pane division, and session locking. Among these, session sharing is particularly impressive: when multiple users simultaneously control a server, it enables sharing the server's screen content.This means every user sees identical content and can perform operations simultaneously. The technical topology for session sharing is illustrated in Figure 9-27.
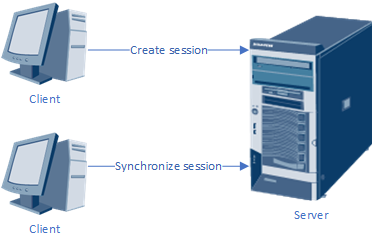
Figure 9-27 Technical Topology of Session Sharing
To enable session sharing, first use the ssh service to remotely connect Client A to the server. Then, use the Tmux service to create a new session window named share:
root@ClientA:~# ssh 192.168.10.10
The authenticity of host '192.168.10.10 (192.168.10.10)' can't be established.
ED25519 key fingerprint is SHA256:0R7Kuk/yCTlJ+E4G9y9iX/A/hAklHkALm5ZUgnJ01cc.
This key is not known by any other names.
Are you sure you want to continue connecting (yes/no/[fingerprint])? yes
Warning: Permanently added '192.168.10.10' (ED25519) to the list of known hosts.
root@192.168.10.10's password: Enter the server administrator password here
[... output omitted ...]
Last login: Thu Mar 13 06:56:57 2025
root@ClientA:~# tmux new -s share
Next, use the ssh service to remotely connect Client B to the server and execute the command to capture the remote session. Subsequently, both clients will display identical content.
root@ClientB:~# ssh 192.168.10.10
The authenticity of host '192.168.10.10 (192.168.10.10)' can't be established.
ED25519 key fingerprint is SHA256:0R7Kuk/yCTlJ+E4G9y9iX/A/hAklHkALm5ZUgnJ01cc.
This key is not known by any other names.
Are you sure you want to continue connecting (yes/no/[fingerprint])? yes
Warning: Permanently added '192.168.10.10' (ED25519) to the list of known hosts.
root@192.168.10.10's password: Enter the server administrator password here
[... output omitted ...]
Last login: Thu Mar 13 06:56:57 2025
root@ClientB:~# tmux attach-session -t share
After completing these steps, all terminal information across both clients will synchronize in real-time, sharing the same session window for exceptional convenience. To visually demonstrate the power of session sharing, readers can attempt simultaneous remote connections to this server from two different clients.We also created two panes on the same computer (see Figure 9-28) to simulate this scenario, enabling clear observation of the data synchronization process.
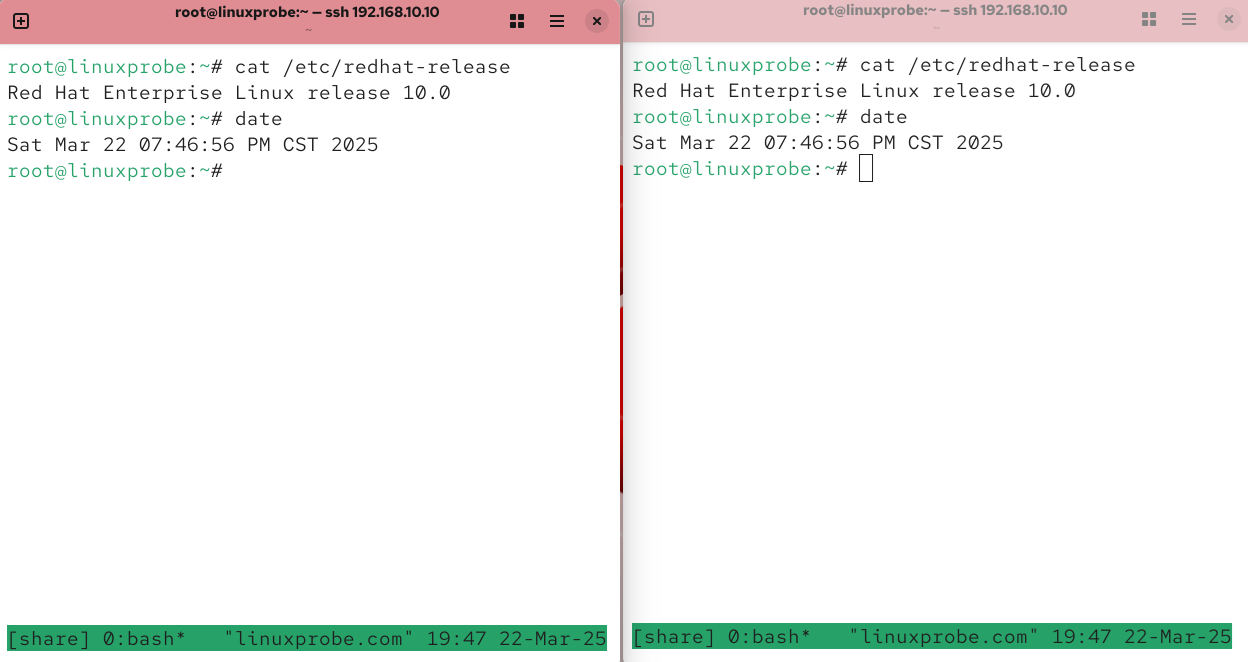
Figure 9-28 Terminal interface with session synchronization
9.4 Retrieving Log Information
Linux systems feature a robust and flexible logging system that records nearly all operational activities and service statuses, categorized under labels such as "error," "warning," "notice," and "other." System administrators can retrieve specific information based on their needs, quickly locating desired details—making it highly useful for understanding system health.
In RHEL 10, the default logging service is rsyslog. This can be understood as an enhanced version of the previous syslogd service, with greater emphasis on log security and performance metrics. To facilitate future retrieval, different log information is written to separate files. Common log file locations and their functions in Linux systems are shown in Table 9-7.
Table 9-7 Common Log File Locations and Functions
| Log File Location | Purpose |
|---|---|
| /var/log/boot.log | Stores system self-test events and boot process info |
| /var/log/lastlog | Stores user login timestamps, terminal names, and IPs |
| /var/log/btmp | Records failed login attempts, terminal names, IPs, etc. |
| /var/log/messages | Records system and service operation logs and errors |
| /var/log/secure | Records system security-related information |
| /var/log/wtmp | Records system startup and shutdown information |
In daily operations, the comprehensive /var/log/messages file is used most frequently. When troubleshooting various issues in Linux systems, it typically reveals the first symptoms of a problem. Identifying the root cause inevitably relies on log information.
Theoretically, log files fall into the following three categories:
System Logs: Primarily record system operation status and kernel information.
User Logs: Primarily record user access information, including username, terminal name, login/logout times, source IP address, and executed operations.
Application Logs: Larger services typically maintain a log file named after the service itself, documenting various events during its operation. Each service program has its own distinct log file, often with significantly different formats.
Only by quickly pinpointing the fault location can we address the root cause and promptly resolve various system issues.
As mentioned earlier, each moderately large service maintains its own log file. To simplify information retrieval for users, the journalctl command was developed. This command manages and searches system log information, with the full English name being "journal control." Its syntax is "journalctl [options]," enabling searches based on events, types, service names, and more, significantly boosting daily troubleshooting efficiency.Common parameters and their functions in the journalctl command are listed in Table 9-8. Familiarize yourself with them before proceeding with the experiments.
Table 9-8 Common Parameters and Functions in the journalctl Command
| Parameter | Function |
|---|---|
| -k | Kernel logs |
| -b | Boot logs |
| -u | Specify service |
| -n | Specify number of entries |
| -p | Specify type |
| -f | Real-time refresh (trace logs) |
| --since | Specify time range |
| --disk-usage | Disk space usage |
Now let's get hands-on! First, view the last 5 log entries in the system:
root@linuxprobe:~# journalctl -n 5
Mar 22 19:56:09 linuxprobe.com systemd[1]: Starting sshd.service - OpenSSH serv>
Mar 22 19:56:09 linuxprobe.com (sshd)[3650]: sshd.service: Referenced but unset>
Mar 22 19:56:09 linuxprobe.com sshd[3650]: Server listening on 0.0.0.0 port 22.
Mar 22 19:56:09 linuxprobe.com sshd[3650]: Server listening on :: port 22.
Mar 22 19:56:09 linuxprobe.com systemd[1]: Started sshd.service - OpenSSH serve>
lines 1-5/5 (END)
You can also use the -f parameter to refresh the latest log entries in real time (this achieves the same effect as the tail -f /var/log/messages command introduced in Chapter 2):
root@linuxprobe:~# journalctl -f
Mar 22 19:56:09 linuxprobe.com systemd[1]: sshd-keygen@ecdsa.service - OpenSSH ecdsa Server Key Generation was skipped because no trigger condition checks were met.
Mar 22 19:56:09 linuxprobe.com systemd[1]: sshd-keygen@ed25519.service - OpenSSH ed25519 Server Key Generation was skipped because no trigger condition checks were met.
Mar 22 19:56:09 linuxprobe.com systemd[1]: sshd-keygen@rsa.service - OpenSSH rsa Server Key Generation was skipped because no trigger condition checks were met.
Mar 22 19:56:09 linuxprobe.com systemd[1]: Reached target sshd-keygen.target.
[... output omitted ...]
In the rsyslog service program, logs are categorized into 9 severity levels, from highest to lowest as shown in Table 9-9. This allows us to focus directly on the most critical information without being overwhelmed by a flood of output. Keep this table handy for future reference in your work.
Table 9-9 Log Severity Levels
| Log Level | Description |
|---|---|
| emerg | Critical system failure, e.g., kernel crash |
| alert | Immediately actionable failure, e.g., database corruption |
| crit | High-risk failure, e.g., disk corruption causing program failure |
| err | Moderate-risk failure, e.g., service startup or runtime failure |
| warning | Warning messages, such as service parameter or feature errors |
| notice | Non-critical general failures, such as issues requiring attention later |
| info | General messages providing useful information |
| debug | Information generated during program debugging |
| none | No priority assigned; not logged |
To view only higher-level error messages in the system, specify the -p parameter in the journalctl command:
root@linuxprobe:~# journalctl -p crit
Mar 13 04:05:59 linuxprobe.com kernel: Warning: Unmaintained driver is detected>
Mar 13 04:05:59 linuxprobe.com kernel: Warning: Unmaintained driver is detected>
Mar 13 04:05:59 linuxprobe.com kernel: Warning: Unmaintained driver is detected>
[... output omitted ...]
We can not only search based on log levels but also use the --since parameter to retrieve logs from today, the past N hours, or a specified time range to find the most recent log data. Let's look at a few examples.
Query logs from today only:
root@linuxprobe:~# journalctl --since today
Mar 22 19:47:34 linuxprobe.com systemd[1]: Starting fstrim.service - Discard un>
Mar 22 19:47:34 linuxprobe.com systemd[1]: Starting fwupd-refresh.service - Ref>
Mar 22 19:47:34 linuxprobe.com systemd[1]: Starting plocate-updatedb.service - >
Mar 22 19:47:34 linuxprobe.com systemd[1]: Starting raid-check.service - RAID s>
Mar 22 19:47:34 linuxprobe.com systemd[1]: Starting logrotate.service - Rotate >
[... output omitted ...]
Query only the last hour's log information:
root@linuxprobe:~# journalctl --since "-1 hour"
Mar 22 19:47:34 linuxprobe.com systemd[1]: Starting fstrim.service - Discard un>
Mar 22 19:47:34 linuxprobe.com systemd[1]: Starting fwupd-refresh.service - Ref>
Mar 22 19:47:34 linuxprobe.com systemd[1]: Starting plocate-updatedb.service - >
Mar 22 19:47:34 linuxprobe.com systemd[1]: Starting raid-check.service - RAID s>
Mar 22 19:47:34 linuxprobe.com systemd[1]: Starting logrotate.service - Rotate >
Mar 22 19:47:34 linuxprobe.com systemd[1]: raid-check.service: Deactivated succ>
[... output omitted ...]
Query logs only from 6:00 PM to 8:00 PM:
root@linuxprobe:~# journalctl --since "18:00" --until "20:00"
Mar 22 19:47:34 linuxprobe.com systemd[1]: Starting fstrim.service - Discard un>
Mar 22 19:47:34 linuxprobe.com systemd[1]: Starting fwupd-refresh.service - Ref>
Mar 22 19:47:34 linuxprobe.com systemd[1]: Starting plocate-updatedb.service - >
Mar 22 19:47:34 linuxprobe.com systemd[1]: Starting raid-check.service - RAID s>
Mar 22 19:47:34 linuxprobe.com systemd[1]: Starting logrotate.service - Rotate >
[... output omitted ...]
Query logs only from March 1, 2025 to June 1, 2025:
root@linuxprobe:~# journalctl --since "2025-03-01" --until "2025-06-1"
Mar 13 04:05:58 linuxprobe.com kernel: Linux version 6.11.0-0.rc5.23.el10.x86_6>
Mar 13 04:05:58 linuxprobe.com kernel: Command line: BOOT_IMAGE=(hd0,gpt2)/vmli>
Mar 13 04:05:58 linuxprobe.com kernel: BIOS-provided physical RAM map:
Mar 13 04:05:58 linuxprobe.com kernel: BIOS-e820: [mem 0x0000000000000000-0x000>
Mar 13 04:05:58 linuxprobe.com kernel: BIOS-e820: [mem 0x0000000000001000-0x000>
Mar 13 04:05:58 linuxprobe.com kernel: BIOS-e820: [mem 0x0000000000002000-0x000>
[... output omitted ...]
Now let's look at something different: querying logs for a specific service. By default, all log information is mixed together. To view logs for a particular service, use the _SYSTEMD_UNIT parameter. The service name must end with .service, which is the standard naming convention for services.
root@linuxprobe:~# journalctl -u sshd
Mar 13 04:06:03 linuxprobe.com systemd[1]: Starting sshd.service - OpenSSH serv>
Mar 13 04:06:03 linuxprobe.com (sshd)[1346]: sshd.service: Referenced but unset>
Mar 13 04:06:03 linuxprobe.com sshd[1346]: Server listening on 0.0.0.0 port 22.
Mar 13 04:06:03 linuxprobe.com sshd[1346]: Server listening on :: port 22.
Mar 13 04:06:03 linuxprobe.com systemd[1]: Started sshd.service - OpenSSH serve>
[... output omitted ...]
Congratulations! You've completed another chapter. Following the book's structure, Chapter 10 will introduce various service configuration methods. As you successfully complete configuration experiments, your learning enjoyment will surely double. Keep up the great work!
Review Questions
- List several methods for configuring network parameters in Linux systems.
Answer: Network parameters can be modified using the nmtui command, nmcli command, nm-connection-editor command, or by directly editing the network interface configuration file.
- What is the purpose of using network session technology in RHEL 10?
Answer: The purpose of using the nmcli command to manage network sessions is to quickly switch network parameters to adapt to different work scenarios.
- Briefly describe the characteristics of the balance-rr mode in network interface binding technology.
Answer: Both network interfaces operate normally under normal conditions and provide automatic failover, eliminating the need for additional support from switch equipment.
- In Linux systems, when configuring a service program by modifying parameters in its configuration file, what additional action is required for the new configuration to take effect?
Answer: You must restart the relevant service program, reload the configuration file for the service program, or reboot the system.
- Which authentication method for the sshd service is more secure: password-based or key-based?
Answer: Key-based authentication is generally more secure. For users with higher security requirements, additional encryption of the key file can be implemented to achieve dual-layer encryption.
- For two Linux servers needing to transfer files between each other, which of FTP, HTTP, or SSH is the simplest method?
Answer: SSH is the preferred choice for one-to-one transfers. The scp command is the ultimate solution!
- To transfer a local file
/root/out.txtto the/homedirectory on a remote host at 192.168.10.20, where both hosts run Linux, what's the simplest method?
Answer: Execute the command scp /root/out.txt root@192.168.10.20:/home. The file transfer will begin after password authentication succeeds.
- The Tmux service enables users to maintain uninterrupted remote control sessions, preserving session control over the remote host even if the network connection is lost. How can you restore a session named
linux?
Answer: Execute the command tmux attach -t linux to restore this session window.
- What command should be executed to view only the highest priority (emerg) log entries?
Answer: Execute the command journalctl -p emerg.
- How can I view historical login information without using the journalctl command?
Answer: In Linux, everything is stored in files. Historical login information is kept in the /var/log/lastlog file, which you can view using the lastlog command (rather than cat, since the file is in a binary format).