Chapter 04 · The Vim Editor and Shell Scripts
Chapter Overview
In this chapter I first walk you through the Vim editor—how to write and modify text, and how to work fluently across its three modes. We’ll practice by editing real system files (hostname, network interfaces, and repository definitions) so you truly internalize the most-used commands, shortcuts, and modes.
Next, we revisit highlights from Chapters 2–3 and combine them with logical operators to write practical shell scripts. You’ll learn several ways to accept user input in scripts and how to validate and compare that input as files, integers, or strings. Building on the three logical operators (and, or, not), you’ll practice if, for, while, and case constructs through more than ten hands‑on examples—enough to use them flexibly at work.
Finally, I’ll demonstrate how to schedule one‑off tasks with at and recurring tasks with the crond service, automating jobs by minute, hour, day, month, and weekday so routine work gets done on time—and you get to clock out earlier.
4.1 The Vim Text Editor
Vim dates back to 1991; the name is short for Vi Improved (its logo appears in Figure 4‑1). It extends the classic vi editor; one especially helpful improvement is syntax highlighting, which helps you spot and correct mistakes quickly.
When I teach, there’s a line my students remember because I often raise my voice right before it: “On Linux, everything is a file; configuring a service means editing its configuration files.” In day‑to‑day work you’ll constantly write documents and change configs, and a text editor is the tool you reach for. My goal with Learn Linux the Right Way is to teach genuine Linux administration—not merely “how to operate a particular desktop.” That’s why I standardize on Vim. It’s installed by default on essentially every Linux system and it’s a superb editor.

Figure 4‑1 Vim logo
Vim succeeds in large part because it offers three modes—command, insert, and last‑line—each with its own shortcuts. Once those motions are in your fingers, your efficiency jumps, and editing configs feels natural. The key is to understand what each mode does and how to switch among them (Figure 4‑2).
Command mode: move the cursor; copy, paste, delete, and search.
Insert mode: normal text entry.
Last‑line mode: save or quit; change editor settings; run external commands; jump to a specific line.
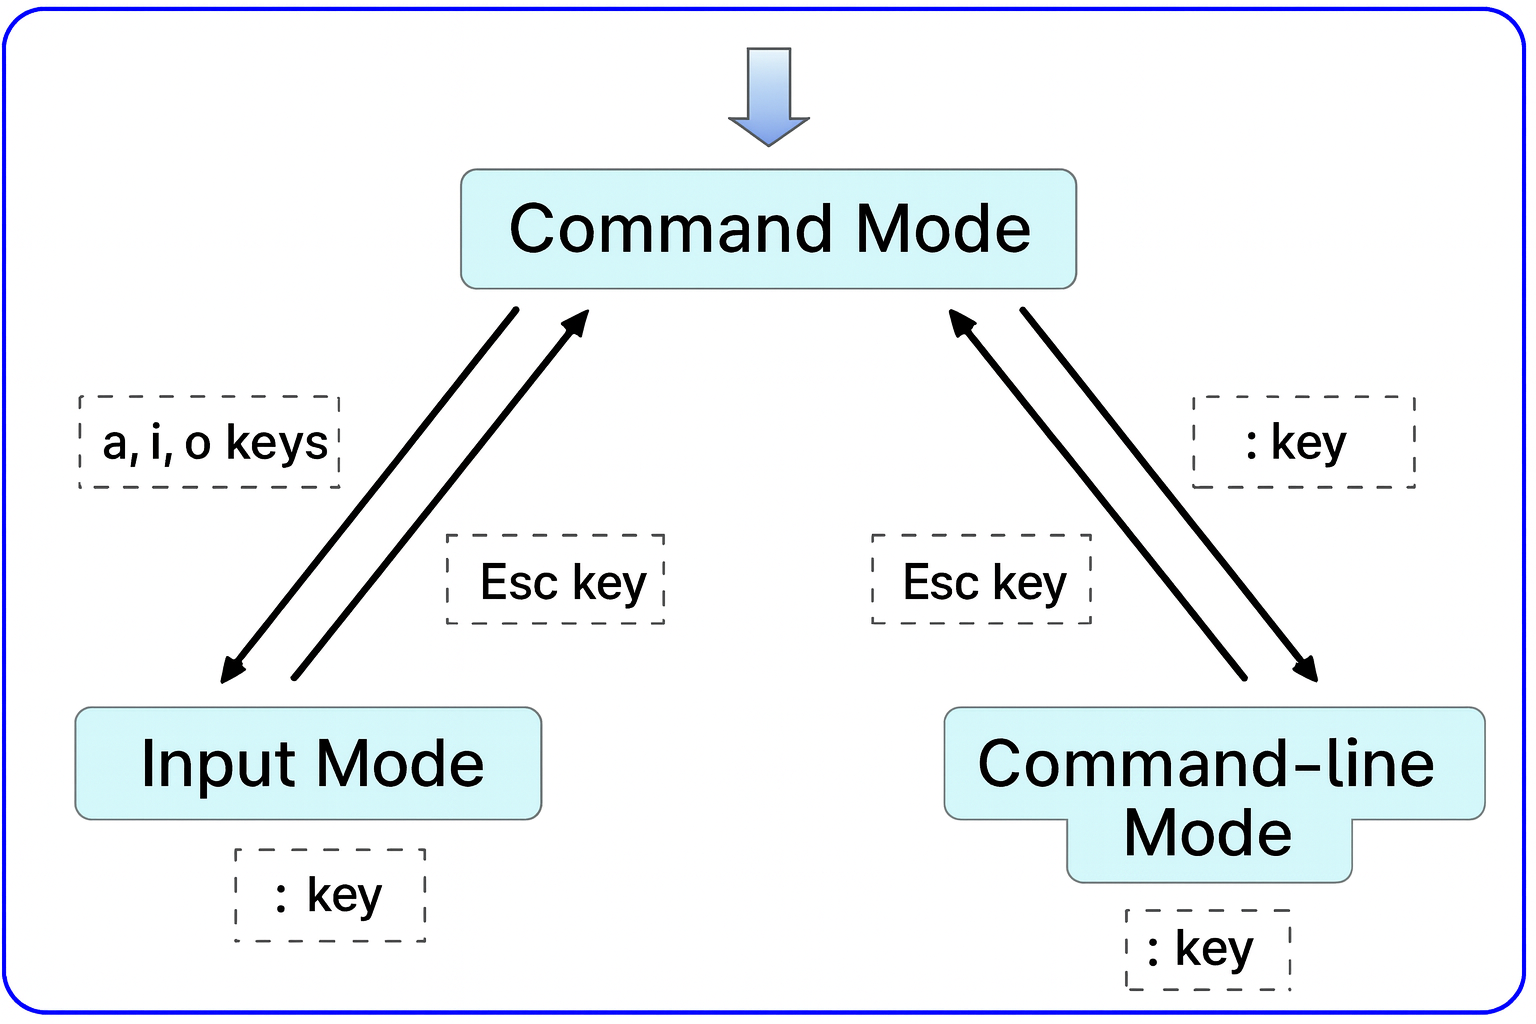
Figure 4‑2 Switching among Vim modes
Each Vim session starts in command mode. Switch to insert mode before typing. When you’re done, return to command mode, enter last‑line mode, and save or quit. (You cannot jump directly from insert mode to last‑line mode.)
To help you get productive quickly, Table 4‑1 lists the command‑mode keys you’ll use most often.
Table 4‑1 Frequently used command‑mode keys
| Command | Action |
|---|---|
dd | Delete (cut) the current line |
5dd | Delete (cut) 5 lines starting here |
yy | Copy the current line |
5yy | Copy 5 lines starting here |
n | Jump to the next search match |
N | Jump to the previous search match |
u | Undo the last change |
p | Paste the last deleted/yanked text after the cursor |
Last‑line mode is where you save, quit, adjust options, execute external Linux commands, or jump to a specific line. Type a colon in command mode to enter it. Table 4‑2 lists the usual commands.
Table 4‑2 Common last‑line commands
| Command | Action |
|---|---|
:w | Save |
:q | Quit |
:q! | Quit and discard changes |
:wq! | Save and quit (force) |
:set nu | Show line numbers |
:set nonu | Hide line numbers |
:command | Run that external command |
:number | Jump to that line |
:s/one/two | Replace the first “one” on the current line with “two” |
:s/one/two/g | Replace all “one” on the current line |
:%s/one/two/g | Replace all “one” in the entire file |
?text | Search upward for text |
/text | Search downward for text |
Practice Vim whenever you can. Once you’re fluent, config editing becomes fast and reliable. In 2011, a hacker named Aleksandr Levchuk even built a “Vim Clutch” (Figure 4‑3): two pedals wired over USB—left pedal to enter insert mode (i), right pedal to save & quit (wq!). That’s dedication!

Figure 4‑3 The Vim Clutch prototype
4.1.1 Write a Simple Document
You now have the theory—let’s write a tiny script‑like text file. I’ll label every step; if you forget what a key does, scroll back to the tables above.
First, name the file practice.txt. If it exists, Vim opens it; if not, Vim creates a new buffer (Figure 4‑4).
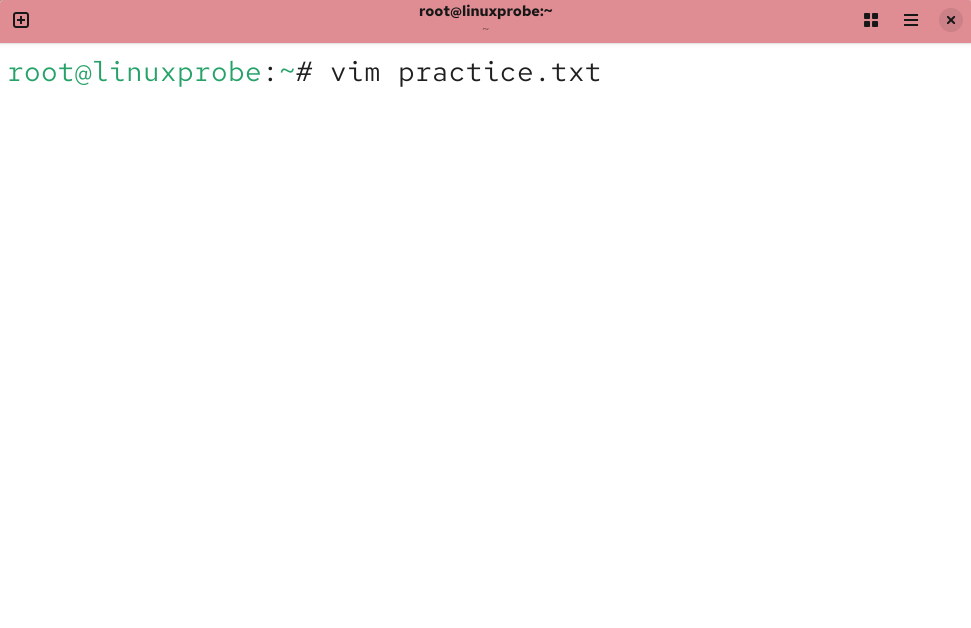
Figure 4‑4 Opening a text document
When practice.txt opens, you’re in command mode; you can’t type text freely yet. Switch to insert mode with one of a, i, or o (Figure 4‑5):
ainserts after the cursoriinserts at the cursoroopens a new line below the cursor

Figure 4‑5 Entering insert mode
Now enter your text (Figure 4‑6).
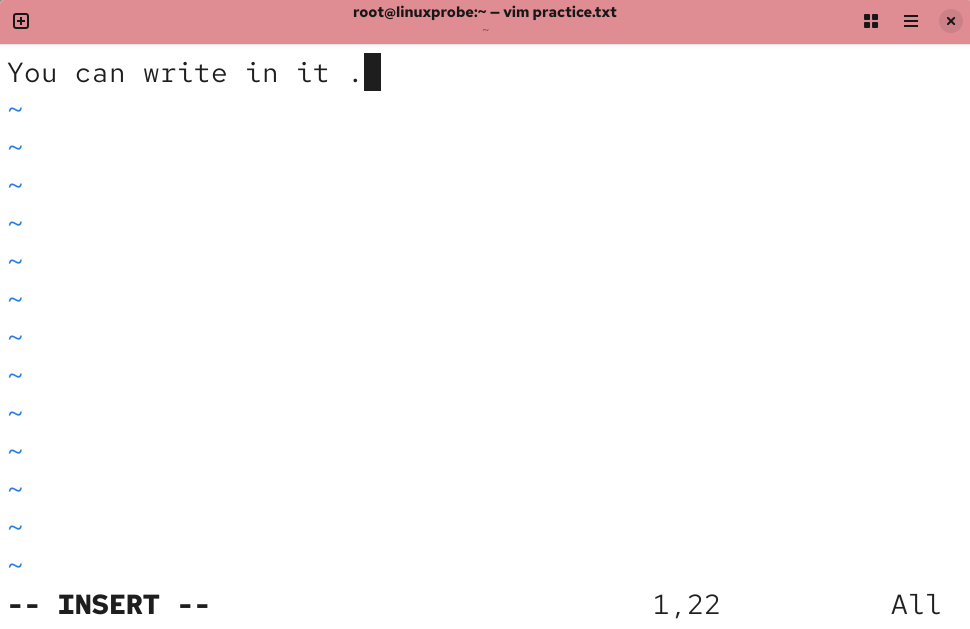
Figure 4‑6 Typing in the editor
When finished, press Esc to return to command mode (Figure 4‑7), then type :wq! to enter last‑line mode and force a save & quit (Figure 4‑8).
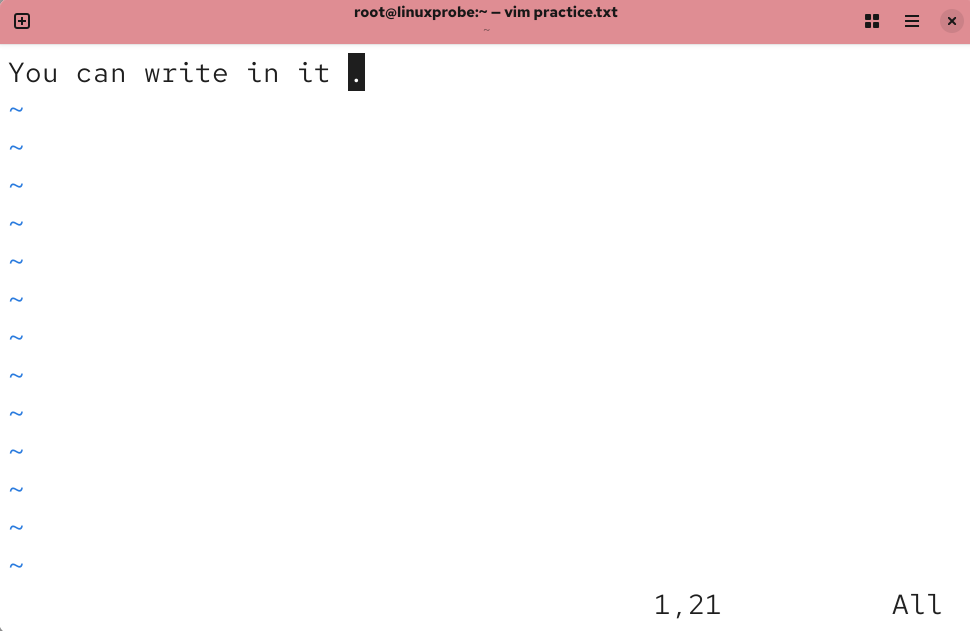
Figure 4‑7 Back to command mode
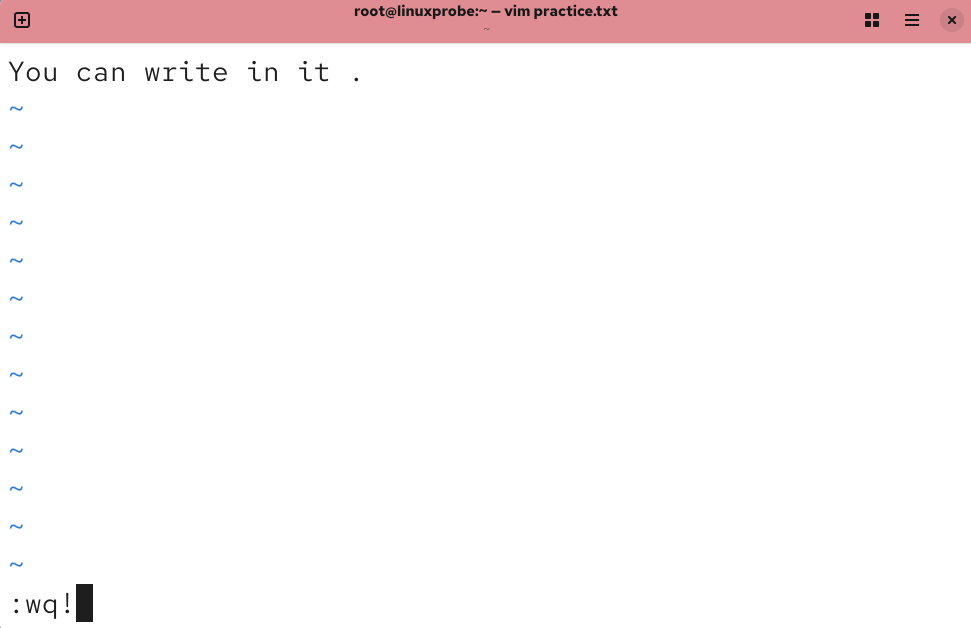
Figure 4‑8 Save and quit
Tips:
Watch the lower‑left indicator—Vim shows different hints in different modes (compare Figures 4‑6 through 4‑8).
After saving with :wq!, check the content with cat (Figure 4‑9).

Figure 4‑9 Viewing the document
Let’s edit the file again. Because we want to append a new line, press o from command mode to enter insert mode on a new line (Figures 4‑10 to 4‑12).
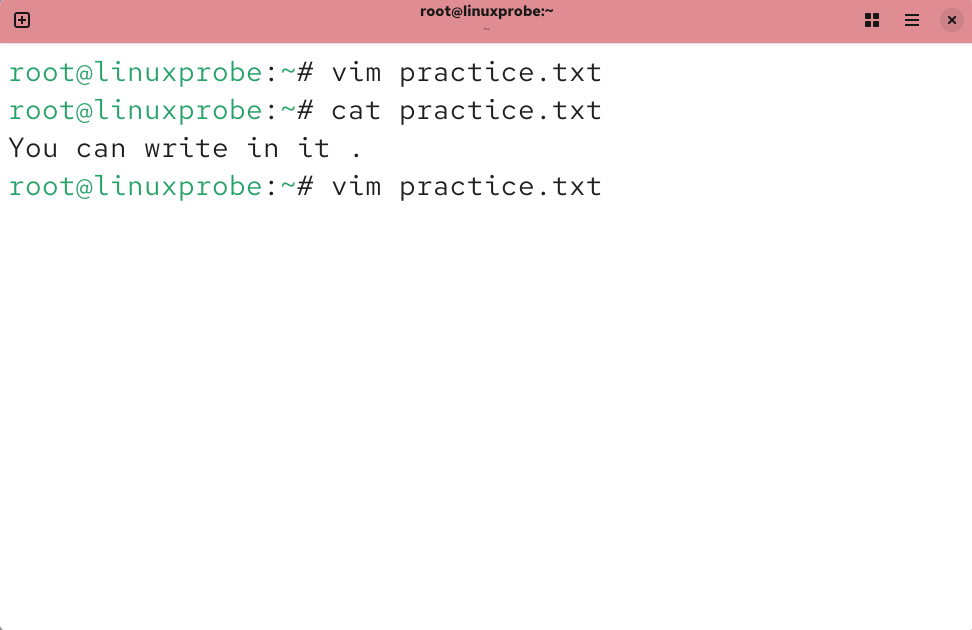
Figure 4‑10 Editing again in Vim
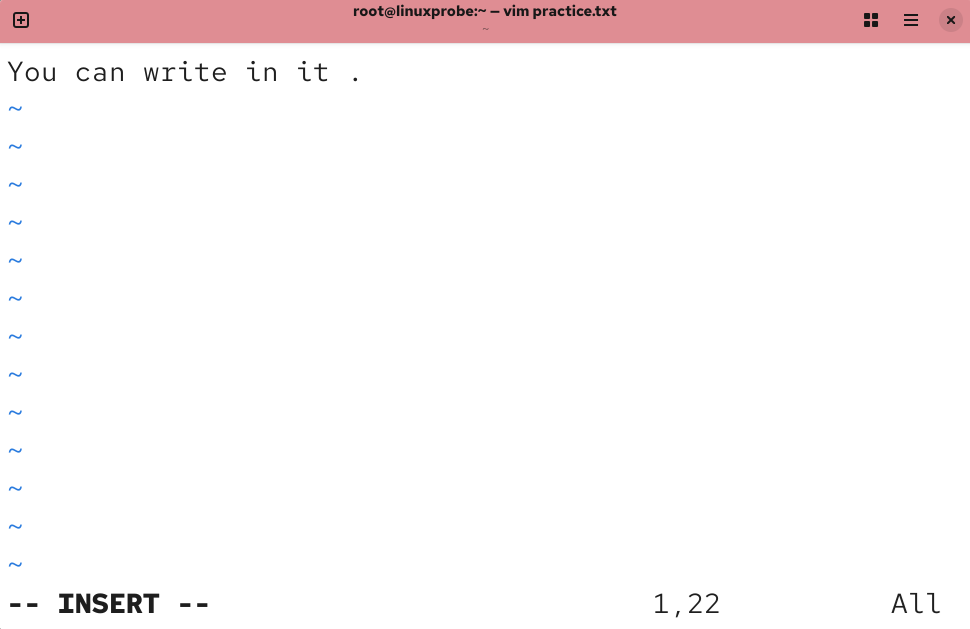
Figure 4‑11 Back in insert mode
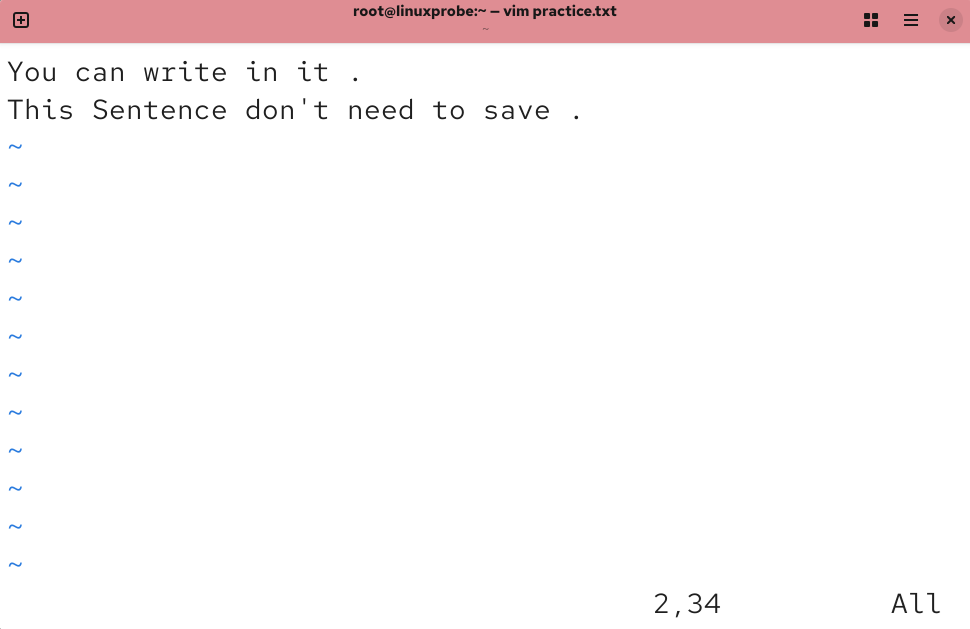
Figure 4‑12 Appending one line of text
Because the buffer has been modified, Vim won’t let you quit without saving (Figures 4‑13 and 4‑14). To exit and discard the changes, use :q! (Figure 4‑15).
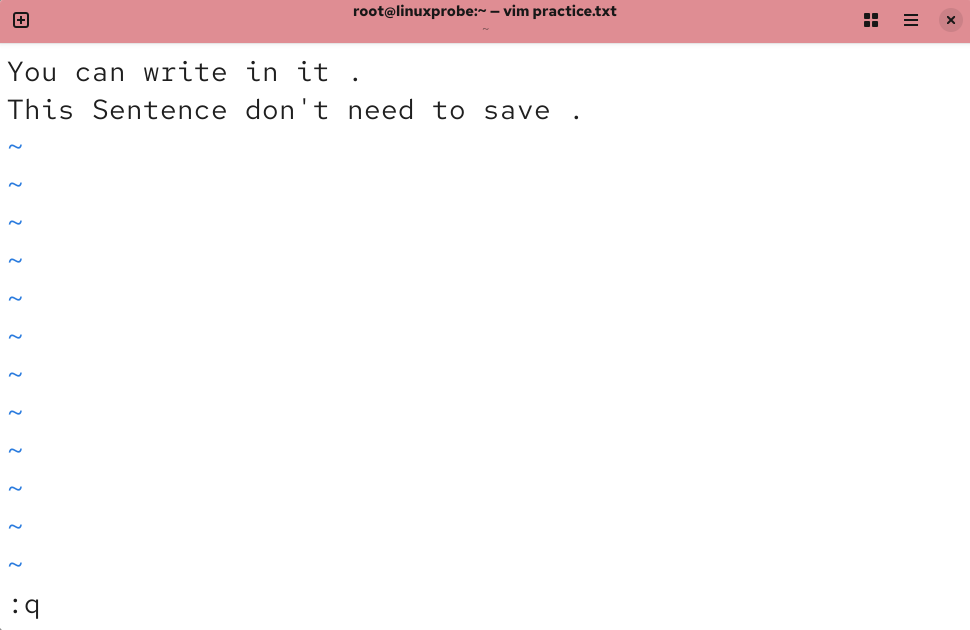
Figure 4‑13 Attempting to quit
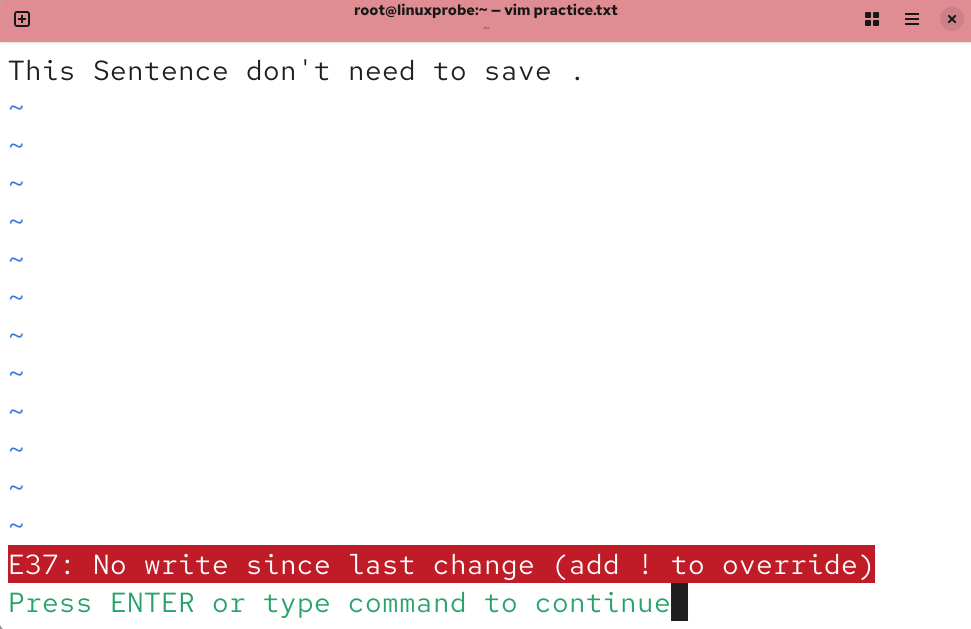
Figure 4‑14 Refusing to quit due to unsaved edits
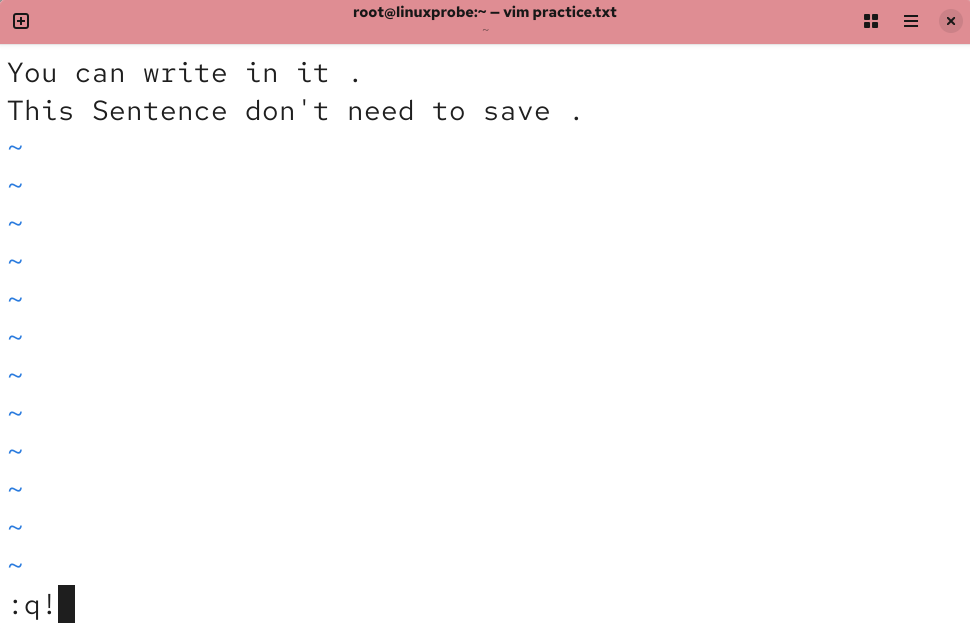
Figure 4‑15 Forced quit
Check the file again (Figure 4‑16): the appended line wasn’t saved—as expected after :q!.
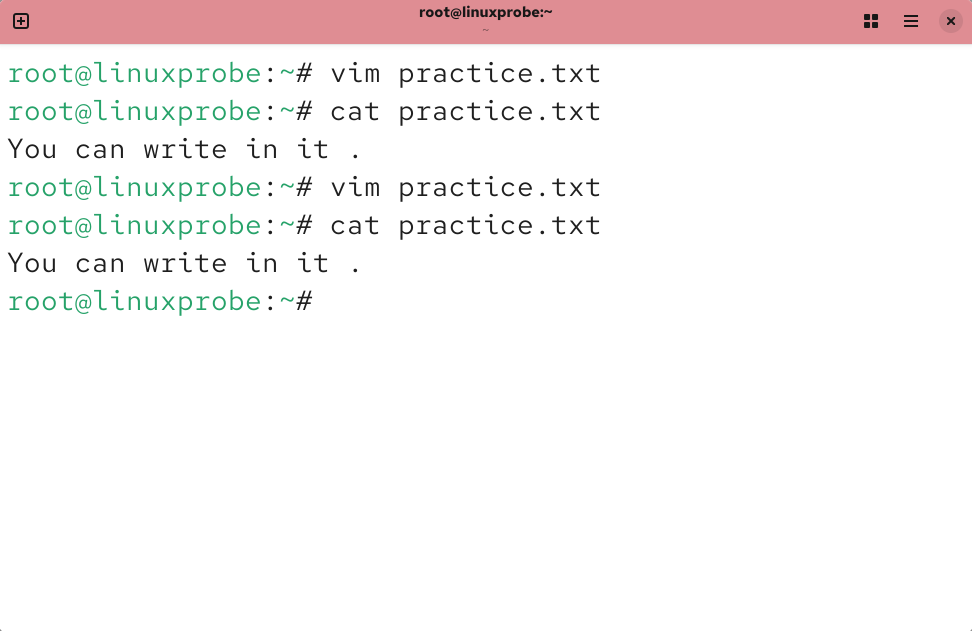
Figure 4‑16 Final content after discarding changes
With the basics in hand, here are three small tasks. Do them one by one; don’t skip. If a step fails, that’s fine—focus on getting comfortable with Vim.
Tips:
It’s okay if the following exercises don’t work the first time. Concentrate on Vim; being able to edit configs correctly is the real goal.
4.1.2 Set the Hostname
To make hosts easier to find and distinguish on a LAN, each has an IP and a hostname—much like a short domain. Linux stores the hostname in /etc/hostname. Change it to linuxprobe.com:
Step 1: Open
/etc/hostnamein Vim.
Step 2: Delete the original text and typelinuxprobe.com, then save with:wq!.
Step 3: Verify with thehostnamecommand.
root@linuxprobe:~# vim /etc/hostname
linuxprobe.com
If the change hasn’t taken effect (some systems cache the old name), reboot the VM and check again:
root@linuxprobe:~# hostname
linuxprobe.com
4.1.3 Configure Network Interfaces
Whether two hosts can talk depends first on correct IP configuration. In Linux, everything is a file, so configuring networking means editing the interface’s configuration file. This not only gives you Vim practice—it lays the groundwork for all service configuration that follows. By the time you finish this book, you’ll really feel the payoff: a solid foundation up front, then nearly identical IP and environment across later chapters so you can focus on services, not setup.
If you’ve used older Linux releases, you’ll see naming differences. In RHEL 5/6, interface names were eth0, eth1, and so on. RHEL 7 used names like eno16777736. In RHEL 8/9/10, common names include ens160. Aside from filenames, the parameters are similar.
Assume a device named ens160. We’ll enable autostart and set static IPv4 settings. First, interface profiles live under /etc/NetworkManager/system-connections:
Step 1: Go to /etc/NetworkManager/system-connections.
Step 2: Edit ens160.nmconnection in Vim and fill in the following (the Chinese annotations are for explanation—do not type them). Because hardware varies, confirm your adapter name with ifconfig.
root@linuxprobe:~# cd /etc/NetworkManager/system-connections
root@linuxprobe:/etc/NetworkManager/system-connections# vim ens160.nmconnection
[connection]
id=ens160
type=ethernet
interface-name=ens160
autoconnect=true
[ipv4]
address1=192.168.10.10/24
method=manual
gateway=192.168.10.10
dns=192.168.10.10
Step 3: Restart networking and test connectivity. Remember ping runs until you stop it; press Ctrl+C to end.
root@linuxprobe:/etc/NetworkManager/system-connections# nmcli connection up ens160
Connection successfully activated (D-Bus active path: /org/freedesktop/NetworkManager/ActiveConnection/8)
root@linuxprobe:/etc/NetworkManager/system-connections# nmcli connection reload
root@linuxprobe:/etc/NetworkManager/system-connections# ping 192.168.10.10
PING 192.168.10.10 (192.168.10.10) 56(84) bytes of data.
64 bytes from 192.168.10.10: icmp_seq=1 ttl=64 time=0.079 ms
64 bytes from 192.168.10.10: icmp_seq=2 ttl=64 time=0.050 ms
64 bytes from 192.168.10.10: icmp_seq=3 ttl=64 time=0.083 ms
64 bytes from 192.168.10.10: icmp_seq=4 ttl=64 time=0.038 ms
^C
--- 192.168.10.10 ping statistics ---
4 packets transmitted, 4 received, 0% packet loss, time 3092ms
rtt min/avg/max/mdev = 0.038/0.062/0.083/0.019 ms
If it still doesn’t work, don’t worry—later chapters cover networking in depth. For now, keep your attention on Vim.
4.1.4 Configure a Software Repository
Earlier we learned that repositories make RPM package management far easier: DNF/Yum automatically analyze dependencies and install what’s needed. Think of a repository as a giant warehouse: tell it the package name, and it handles the rest. In RHEL 10 you can use both dnf and yum; I recommend dnf for better performance and multi‑threaded installs.
Step 1: Go to /etc/yum.repos.d.
Step 2: Create a new repo file named rhel10.repo (the filename is arbitrary, but must end with .repo) and fill in the parameters below, then save and exit.
Repository ID: a unique identifier that must not collide with other repos.
Description (name): a human‑readable label for the repo.
Location (baseurl): where packages are fetched—FTP, HTTP, or a local path (prefix local paths withfile://).
Enabled (enabled): set to1to enable,0to disable.
GPG check (gpgcheck):1to verify signatures,0to skip verification.
GPG key (gpgkey): the public‑key file location ifgpgcheck=1; otherwise omit.
Step 3: Mount the installation media at the location you referenced, and add it to /etc/fstab for persistent mounts.
Step 4: Test with dnf install httpd -y.
root@linuxprobe:~# cd /etc/yum.repos.d
root@linuxprobe:/etc/yum.repos.d# vim rhel10.repo
[BaseOS]
name=BaseOS
baseurl=file:///media/cdrom/BaseOS
enabled=1
gpgcheck=0
[AppStream]
name=AppStream
baseurl=file:///media/cdrom/AppStream
enabled=1
gpgcheck=0
Create a mount point, mount the disc, and configure automatic mounting (see Chapter 6):
root@linuxprobe:/etc/yum.repos.d# mkdir -p /media/cdrom
root@linuxprobe:/etc/yum.repos.d# mount /dev/cdrom /media/cdrom
mount: /media/cdrom: WARNING: device write-protected, mounted read-only.
root@linuxprobe:/etc/yum.repos.d# vim /etc/fstab
………………(output truncated in book for brevity)………………
/dev/cdrom /media/cdrom iso9660 defaults 0 0
Try installing the Apache Web server package (httpd). Seeing Complete! indicates success:
root@linuxprobe:/etc/yum.repos.d# dnf install httpd -y
Updating Subscription Management repositories.
BaseOS                                                18 MB/s | 1.7 MB     00:00
AppStream                                             80 MB/s | 6.3 MB     00:00
Dependencies resolved.
………………(output truncated)………………
Installed:
  apr-1.7.0-11.el9.x86_64                     apr-util-1.6.1-20.el9.x86_64
  apr-util-bdb-1.6.1-20.el9.x86_64            apr-util-openssl-1.6.1-20.el9.x86_64
  httpd-2.4.53-11.el9_2.4.x86_64              httpd-core-2.4.53-11.el9_2.4.x86_64
  httpd-filesystem-2.4.53-11.el9_2.4.noarch   httpd-tools-2.4.53-11.el9_2.4.x86_64
  mod_http2-1.15.19-4.el9_2.4.x86_64          mod_lua-2.4.53-11.el9_2.4.x86_64
  redhat-logos-httpd-90.4-1.el9.noarch

Complete!
If you’re used to yum, that still works—RHEL 10 keeps the commands compatible.
4.2 Write Shell Scripts
You can think of the shell as the “translator” between people and hardware. Beyond variables and parameters, Bash offers the same control structures you see in higher‑level languages, such as loops and branches. In practice, scripts run in two styles:
Interactive: you type a command and the system executes it immediately.
Batch: you write a complete script and the shell executes all of its commands at once.
You’ll use many commands you learned earlier plus regexes, pipelines, and redirection; we’ll group related pieces into modules and tie them together with logic to form the scripts you see in daily work.
Confirm the default interpreter is Bash:
root@linuxprobe:~# echo $SHELL
/bin/bash
4.2.1 A First Script
After reading the formal definition you might be thinking, “this sounds complicated.” But that description applies to advanced scripting. A simple script is just a text file where you write ordinary Linux commands in order.
For example, to print the current working directory and then list all files with attributes:
root@linuxprobe:~# vim example.sh
#!/bin/bash
#For Example by linuxprobe.com
pwd
ls -al
Script filenames are arbitrary, but I recommend using the .sh suffix so you and others recognize them at a glance.
This tiny script actually contains three kinds of content:
The shebang on the first line (
#!) tells the OS which interpreter to use.
Lines beginning with#are comments that explain the script’s purpose or warn about side effects—useful to you or anyone else who reads it later.
The remaining lines are executable commands—the same Linux commands you run interactively.
Try it:
root@linuxprobe:~# bash example.sh
/root
total 44
dr-xr-x---. 14 root root 4096 Mar 12 23:53 .
dr-xr-xr-x. 18 root root  235 Mar 10 02:32 ..
-rw-------.  1 root root 1019 Mar 10 02:37 anaconda-ks.cfg
-rw-------.  1 root root   52 Mar 10 10:51 .bash_history
-rw-r--r--.  1 root root   18 Jun 24  2024 .bash_logout
-rw-r--r--.  1 root root  141 Jun 24  2024 .bash_profile
-rw-r--r--.  1 root root  429 Jun 24  2024 .bashrc
………………(output truncated)………………
Another way to run a script is by path. By default, you’ll get a permissions error; grant execute permission (Chapter 5 covers this in detail) and try again:
root@linuxprobe:~# ./example.sh
bash: ./example.sh: Permission denied
root@linuxprobe:~# chmod u+x example.sh
root@linuxprobe:~# ./example.sh
/root
total 44
dr-xr-x---. 14 root root 4096 Mar 12 23:53 .
dr-xr-xr-x. 18 root root  235 Mar 10 02:32 ..
-rw-------.  1 root root 1019 Mar 10 02:37 anaconda-ks.cfg
-rw-------.  1 root root   52 Mar 10 10:51 .bash_history
-rw-r--r--.  1 root root   18 Jun 24  2024 .bash_logout
-rw-r--r--.  1 root root  141 Jun 24  2024 .bash_profile
-rw-r--r--.  1 root root  429 Jun 24  2024 .bashrc
………………(output truncated)………………
4.2.2 Receive User Parameters
The simple script above can only perform predefined work—too rigid. To meet real‑time needs, scripts must accept parameters, just like commands do.
For example, different parameters produce different wc outputs:
root@linuxprobe:~# wc -l anaconda-ks.cfg
40 anaconda-ks.cfg
root@linuxprobe:~# wc -c anaconda-ks.cfg
1019 anaconda-ks.cfg
root@linuxprobe:~# wc -w anaconda-ks.cfg
92 anaconda-ks.cfg
Bash already provides positional parameters, separated by spaces: $0 is the script name, $# the number of parameters, $* all parameters, $? the previous command’s exit code, and $1, $2, $3 … are the first, second, third, and so on (Figure 4‑17).

Figure 4‑17 Positional parameters in a shell script
Let’s see them in action:
root@linuxprobe:~# vim Example.sh
#!/bin/bash
echo "Script name: $0"
echo "There are $# parameters: $*."
echo "The 1st is $1; the 5th is $5."
root@linuxprobe:~# bash Example.sh one two three four five six
Script name: Example.sh
There are 6 parameters: one two three four five six.
The 1st is one; the 5th is five.
4.2.3 Make Decisions on Parameters
Learning is a climb from basics to mastery. After Linux commands, script syntax, and parameter handling, the next step is processing those parameters.
Earlier we saw that when mkdir runs, it checks your input: if the directory already exists, it prints an error; otherwise it creates it. Shell test expressions check whether conditions are true. A true test returns 0; false returns a non‑zero value. Figure 4‑18 shows the general form—remember to include spaces around the expression.

Figure 4‑18 Test expression syntax
There are four common families: file tests, logical operators, integer comparisons, and string comparisons.
- File tests
Use file‑test operators to check whether files exist and whether permissions are satisfied (Table 4‑3).
Table 4‑3 File‑test operators
| Operator | Meaning |
|---|---|
-d | Is a directory |
-e | Exists |
-f | Is a regular file |
-r | Current user has read permission |
-w | Current user has write permission |
-x | Current user has execute permission |
Examples:
root@linuxprobe:~# [ -d /etc/fstab ]
root@linuxprobe:~# echo $?
1
root@linuxprobe:~# [ -f /etc/fstab ]
root@linuxprobe:~# echo $?
0
- Logical operators
Chain tests with logical “and,” “or,” and “not.”
root@linuxprobe:~# [ -e /dev/cdrom ] && echo "Exist"
Exist
root@linuxprobe:~# echo $USER
root
root@linuxprobe:~# [ $USER = root ] || echo "user"
root@linuxprobe:~# su - linuxprobe
linuxprobe@linuxprobe:~$ [ $USER = root ] || echo "user"
user
linuxprobe@linuxprobe:~$ exit
root@linuxprobe:~# [ ! $USER = root ] || echo "administrator"
administrator
Tips:
&&runs the right‑hand command only if the left succeeded.
||runs the right‑hand command only if the left failed.
!inverts the test result (true becomes false; false becomes true).
A compact example that prints user for non‑root and root otherwise:
root@linuxprobe:~# [ ! $USER = root ] && echo "user" || echo "root"
root
In shell logic,
&&and||short‑circuit. Only when the&&condition fails does the||clause run.
- Integer comparisons
Use the integer comparison operators in Table 4‑4. These work only with numbers; don’t mix in strings or files. Also avoid the everyday =, <, > symbols here: = conflicts with assignment; > and < are redirection operators.
Table 4‑4 Integer comparison operators
| Operator | Meaning |
|---|---|
-eq | Equal to |
-ne | Not equal to |
-gt | Greater than |
-lt | Less than |
-le | Less than or equal to |
-ge | Greater than or equal to |
Examples:
root@linuxprobe:~# [ 10 -gt 10 ]
root@linuxprobe:~# echo $?
1
root@linuxprobe:~# [ 10 -eq 10 ]
root@linuxprobe:~# echo $?
0
A practical check: warn if free memory is below a threshold. First examine memory usage, then isolate the “free” column, and finally assign it to a variable:
root@linuxprobe:~# free -m
               total        used        free      shared  buff/cache   available
Mem:            3879        1370        2008          14         746        2509
Swap:           2047           0        2047
root@linuxprobe:~# free -m | grep Mem:
Mem:            3879        1371        2006          14         746        2508
root@linuxprobe:~# free -m | grep Mem: | awk '{print $4}'
2006
root@linuxprobe:~# FreeMem=`free -m | grep Mem: | awk '{print $4}'`
root@linuxprobe:~# echo $FreeMem
2006
root@linuxprobe:~# [ $FreeMem -lt 2024 ] && echo "Insufficient Memory"
Insufficient Memory
- String comparisons
String tests check for emptiness or equality (Table 4‑5).
Table 4‑5 Common string operators
| Operator | Meaning |
|---|---|
= | Strings are equal |
!= | Strings differ |
-z | String is empty |
Examples:
root@linuxprobe:~# [ -z $String ]
root@linuxprobe:~# echo $?
0
root@linuxprobe:~# echo $LANG
en_US.UTF-8
root@linuxprobe:~# [ ! $LANG = "en.US" ] && echo "Not en.US"
Not en.US
4.3 Control‑Flow Statements
Although you can glue commands together with pipelines and &&/||, production scripts need adaptability: they must branch when conditions change and repeat tasks as needed. By default the shell executes top‑to‑bottom, but if one step fails, blindly continuing often makes things worse. Real work calls for conditionals and loops.
To make this concrete, imagine the “plan in your head” when you meet someone you like (Figure 4‑19). If the chat doesn’t go well, you won’t proceed to ask for a number, then dinner, then a movie—you’ll change course. Scripts need the same flexibility.

Figure 4‑19 A mental flow
We’ll start with if, then practice for, while, and case. I’ll keep the examples realistic and self‑contained so you learn by doing rather than patching a single script repeatedly.
4.3.1 if Conditionals
A single‑branch if runs commands only when the test is true (Figure 4‑20).

Figure 4‑20 Single‑branch if
Create /media/cdrom if it doesn’t exist:
root@linuxprobe:~# vim mkcdrom.sh
#!/bin/bash
DIR="/media/cdrom"
if [ ! -d "$DIR" ]; then
  mkdir -p "$DIR"
fi
root@linuxprobe:~# bash mkcdrom.sh
root@linuxprobe:~# ls -ld /media/cdrom
drwxr-xr-x. 2 root root 6 Mar 13 00:00 /media/cdrom
A two‑branch if … else … selects one of two paths (Figure 4‑21).

Figure 4‑21 Two‑branch if
Ping a host and print Online/Offline based on the exit code:
root@linuxprobe:~# vim chkhost.sh
#!/bin/bash
ping -c 3 -i 0.2 -W 3 "$1" &> /dev/null
if [ $? -eq 0 ]; then
  echo "Host $1 is On-line."
else
  echo "Host $1 is Off-line."
fi
root@linuxprobe:~# bash chkhost.sh 192.168.10.10
Host 192.168.10.10 is On-line.
root@linuxprobe:~# bash chkhost.sh 192.168.10.20
Host 192.168.10.20 is Off-line.
A multi‑branch if … elif … else … handles ranges (Figure 4‑22).
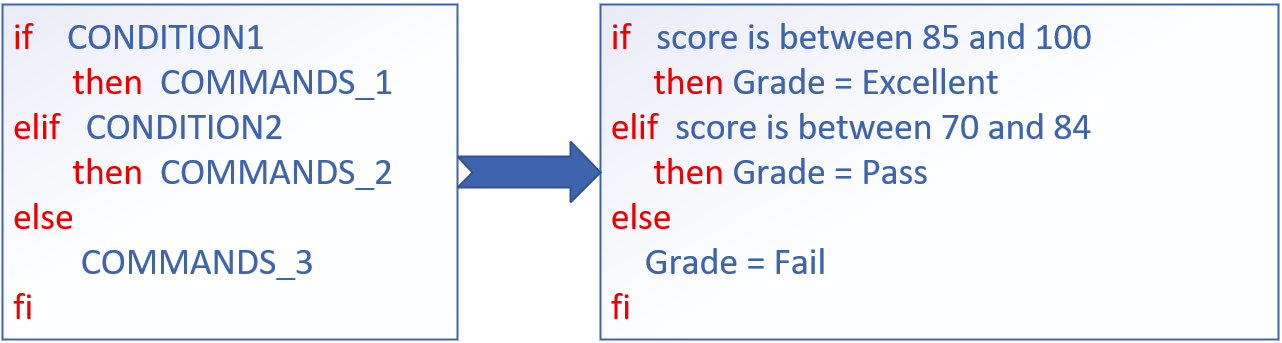
Figure 4‑22 Multi‑branch if
Classify a score:
root@linuxprobe:~# vim chkscore.sh
#!/bin/bash
read -p "Enter your score (0-100): " GRADE
if   [ "$GRADE" -ge 85 ] && [ "$GRADE" -le 100 ]; then
  echo "$GRADE is Excellent"
elif [ "$GRADE" -ge 70 ] && [ "$GRADE" -le 84 ]; then
  echo "$GRADE is Pass"
else
  echo "$GRADE is Fail"
fi
root@linuxprobe:~# bash chkscore.sh
Enter your score (0-100): 88
88 is Excellent

root@linuxprobe:~# bash chkscore.sh
Enter your score (0-100): 80
80 is Pass
4.3.2 for Loops
for loops iterate over lists or ranges (Figure 4‑23). They shine when you already know the items to process.

Figure 4‑23 for loop
Create several users from a text file:
root@linuxprobe:~# vim users.txt
andy
barry
carl
duke
eric
george
winston
root@linuxprobe:~# vim addusers.sh
#!/bin/bash
read -p "Enter The Users Password : " PASSWD
for UNAME in $(cat users.txt); do
  id "$UNAME" &> /dev/null
  if [ $? -eq 0 ]; then
    echo "$UNAME , Already exists"
  else
    useradd "$UNAME"
    echo "$PASSWD" | passwd --stdin "$UNAME" &> /dev/null
    echo "$UNAME , Create success"
  fi
done
Tips:
/dev/nullis Linux’s black hole—redirect noisy output there to keep the screen clean.
Run it, then confirm in /etc/passwd:
root@linuxprobe:~# bash addusers.sh
Enter The Users Password : linuxprobe
andy , Create success
…
winston , Create success

root@linuxprobe:~# tail -6 /etc/passwd
andy:x:1001:1001::/home/andy:/bin/bash
barry:x:1002:1002::/home/barry:/bin/bash
carl:x:1003:1003::/home/carl:/bin/bash
duke:x:1004:1004::/home/duke:/bin/bash
eric:x:1005:1005::/home/eric:/bin/bash
george:x:1006:1006::/home/george:/bin/bash
winston:x:1007:1007::/home/winston:/bin/bash
Process a list of hosts:
root@linuxprobe:~# vim ipaddrs.txt
192.168.10.10
192.168.10.11
192.168.10.12
root@linuxprobe:~# vim CheckHosts.sh
#!/bin/bash
HLIST=$(cat ~/ipaddrs.txt)
for IP in $HLIST; do
  ping -c 3 -i 0.2 -W 3 "$IP" &> /dev/null
  if [ $? -eq 0 ]; then
    echo "Host $IP is On-line."
  else
    echo "Host $IP is Off-line."
  fi
done
root@linuxprobe:~# bash CheckHosts.sh
Host 192.168.10.10 is On-line.
Host 192.168.10.11 is On-line.
Host 192.168.10.12 is Off-line.
4.3.3 while Loops
while repeats as long as a condition is true (Figure 4‑24). It’s ideal when you don’t know in advance how many times you’ll iterate.

Figure 4‑24 while loop
Count from 1 to 10:
root@linuxprobe:~# vim count.sh
#!/bin/bash
N=1
while [ $N -le 10 ]; do
  echo $N
  N=$((N+1))
done
root@linuxprobe:~# bash count.sh
1
2
3
4
5
6
7
8
9
10
Monitor free memory every 2 seconds, stop when it dips below a threshold:
root@linuxprobe:~# vim watchmem.sh
#!/bin/bash
THRESH=2024
while true; do
  FreeMem=$(free -m | awk '/^Mem:/{print $4}')
  echo "Free: $FreeMem MB"
  [ "$FreeMem" -lt "$THRESH" ] && echo "Insufficient Memory" && break
  sleep 2
done
4.3.4 case Statements
case selects behavior based on patterns—often simpler than a forest of if/elif. (Figure 4‑25)
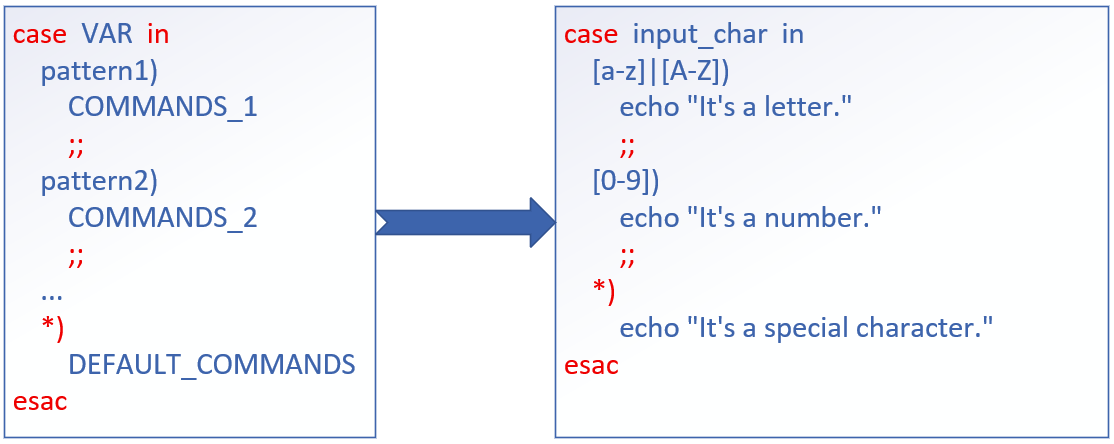
Figure 4‑25 case statement
Start/stop/restart a service by name:
root@linuxprobe:~# vim svc.sh
#!/bin/bash
ACTION="$1"
SERVICE="$2"
case "$ACTION" in
  start)   systemctl start "$SERVICE"   ;;
  stop)    systemctl stop  "$SERVICE"   ;;
  restart) systemctl restart "$SERVICE" ;;
  status)  systemctl status "$SERVICE"  ;;
  *) echo "Usage: $0 {start|stop|restart|status} <service>" ;;
esac
root@linuxprobe:~# bash svc.sh status sshd | head -5
● sshd.service - OpenSSH server daemon
     Loaded: loaded (/usr/lib/systemd/system/sshd.service; enabled; preset: enabled)
     Active: active (running) ...
4.4 Schedule Tasks with at and crond
The last step in this chapter is automation. For one‑time jobs, use at; for recurring jobs, use crond.
4.4.1 One‑Time Jobs with at
Enable the atd service and schedule a job for 5 minutes from now:
root@linuxprobe:~# systemctl enable --now atd
root@linuxprobe:~# at now + 5 minutes
at> echo "Hello from at at $(date)" >> /root/at.log
at> <Ctrl+D>
job 2 at Tue Mar 18 10:35:00 2025
List and remove pending at jobs:
root@linuxprobe:~# atq
2   Tue Mar 18 10:35:00 2025 a root
root@linuxprobe:~# atrm 2
4.4.2 Recurring Jobs with crond
crond runs commands at fixed times/dates, defined in crontab files. Each line has five time fields plus the command:
# ┌─ minute (0 - 59)
# │ ┌─ hour (0 - 23)
# │ │ ┌─ day of month (1 - 31)
# │ │ │ ┌─ month (1 - 12)
# │ │ │ │ ┌─ day of week (0 - 7) (Sunday = 0 or 7)
# │ │ │ │ │
# * * * * *  command-to-execute
Common patterns:
*/5 * * * *   /usr/local/bin/backup.sh          # every 5 minutes
0 2 * * *     /usr/local/bin/rotate-logs.sh     # daily at 02:00
0 3 * * 0     /usr/local/bin/full-backup.sh     # Sundays at 03:00
Edit your user’s crontab and add a simple test job:
root@linuxprobe:~# systemctl enable --now crond
root@linuxprobe:~# crontab -e
# add:
*/1 * * * * echo "Cron tick at $(date)" >> /root/cron.log
Check whether crond is running and tail the log after a minute:
root@linuxprobe:~# systemctl status crond | sed -n '1,5p'
root@linuxprobe:~# tail -3 /root/cron.log
Cron tick at Tue Mar 18 10:36:00 CST 2025
Cron tick at Tue Mar 18 10:37:00 CST 2025
Cron tick at Tue Mar 18 10:38:00 CST 2025
Tips:
System‑wide cron jobs live under/etc/crontaband/etc/cron.*. For safety, prefer per‑user crontabs (crontab -e) unless you specifically need system‑wide behavior.
Review Questions
-
Which Vim mode do you use to save and quit a file?
Answer: Last‑line mode (:wq,:q!, etc.). -
Where does Linux store the hostname? What command verifies it?
Answer:/etc/hostname; verify withhostname. -
What’s the difference between interactive and batch shell usage?
Answer: Interactive executes each command immediately; batch runs a script of commands. -
What exit code represents “true” for a test expression in Bash?
Answer:0means true/success; non‑zero means false/failure. -
Write a one‑liner that echoes “Exist” only if
/dev/cdromexists.
Answer:[ -e /dev/cdrom ] && echo "Exist" -
Which integer comparison operators mean “less than” and “greater than or equal to”?
Answer:-ltand-ge. -
Show a compact command that prints
userwhen the current user is not root, otherwise printsroot.
Answer:[ ! "$USER" = root ] && echo "user" || echo "root" -
In
forvs.while, when would you prefer each?
Answer: Useforwhen you already know the items; usewhilewhen you loop until a condition changes. -
What is the basic crontab time‑field layout?
Answer:minute hour day-of-month month day-of-week command -
Which tool schedules a one‑time command for, say, “now + 10 minutes”?
Answer:at(with theatdservice running).