Chapter 17 Deploying Networked Storage with iSCSI
Chapter Overview
I begin with a brief tour of common disk interface technologies and their strengths and trade‑offs, as a springboard into this chapter’s main topic—iSCSI. Internet Small Computer System Interface (iSCSI) combines block storage with TCP/IP so users can access shared storage over ordinary Ethernet. Then I deploy an iSCSI target service on Linux and connect to it from both Linux and Windows clients. Together with Chapters 6 and 7, this chapter deepens your understanding of disk and storage management on Linux and prepares you for real‑world operations work.
17.1 Introducing iSCSI
Disk storage is a foundational component of computer hardware, and its read/write performance directly affects a server’s overall throughput. In Chapters 6 and 7 I discussed disk layouts, RAID arrays, and LVM. Although these can be implemented in software or hardware, they share the same goals: improve I/O performance and keep data safe.
To further raise read/write performance, engineers keep improving physical disk interface protocols. The three common interfaces are:
IDE: a mature, low‑cost parallel interface suitable for budget devices.
SATA: a serial interface with higher transfer speeds and more reliable checksums, widely used in modern computers.
SCSI: a system‑level interface standard, often used between computers and disks or optical drives, with low CPU overhead, high spindle speeds, and fast transfers.
Regardless of interface type, disk data ultimately moves over the motherboard’s buses to the CPU and memory. That physical coupling makes sharing disks inconvenient. To break this constraint, IBM developed Internet Small Computer System Interface (iSCSI), which blends SCSI with Ethernet. It encapsulates SCSI commands and data into TCP/IP packets and sends them across the network, removing the physical limits of traditional SCSI devices, enabling cross‑site storage sharing, and allowing capacity expansion without taking systems offline.
To use iSCSI effectively on the job, it’s important to understand both its strengths and weaknesses. iSCSI is extremely convenient: it changes how we access storage, removes cabling constraints, and lets many servers share the same storage resources, which makes it attractive for enterprises. However, iSCSI performance is bound by network speed and stability. What once rode a local bus now rides the network, so throughput and reliability depend on your LAN/WAN. As network technology improves, iSCSI improves along with it.
Because iSCSI moves storage over Ethernet, you might wonder: does data enter the computer through an ordinary network card? This is where the iSCSI‑HBA (Host Bus Adapter) comes in (see Figure 17‑1). Unlike a general NIC (which bridges the network bus to memory for everyday networking), an iSCSI‑HBA bridges the SCSI or FC (Fibre Channel) bus to memory and speaks storage protocols. A Linux server packages disk commands and data into TCP/IP using the iSCSI protocol; the target storage device unpacks those packets back into disk commands and executes them.
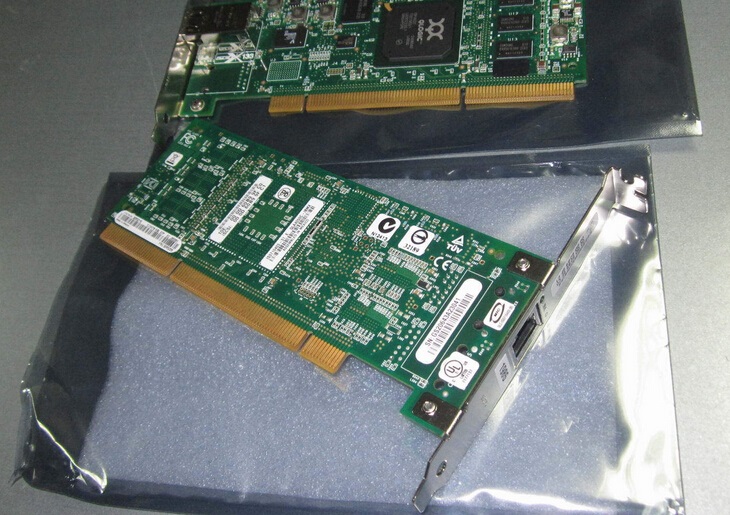
Figure 17-1 An iSCSI-HBA adapter card
In short, iSCSI offers low hardware cost, simple operation, easy maintenance, and strong scalability for centralized, block‑level storage. Because it presents block storage, users manage it just like a local disk using the operating system’s native tools. This elastic, low‑cost, low‑maintenance consolidated storage is especially suitable for small and mid‑sized organizations and offices with limited budgets.
17.2 Creating a RAID Array
Because an iSCSI target provides shared storage to remote users, the storage server that backs it must be stable and highly available—failures are harder to handle than with local disks. I recommend following the RAID techniques from Chapter 7 to ensure data safety. The example below builds a RAID‑5 array with a hot spare. Since Chapter 7 already covered RAID concepts and configuration in detail, I won’t repeat the parameter explanations here.
First add four new virtual disks to the VM for the RAID‑5 array and the spare (Figure 17‑2).
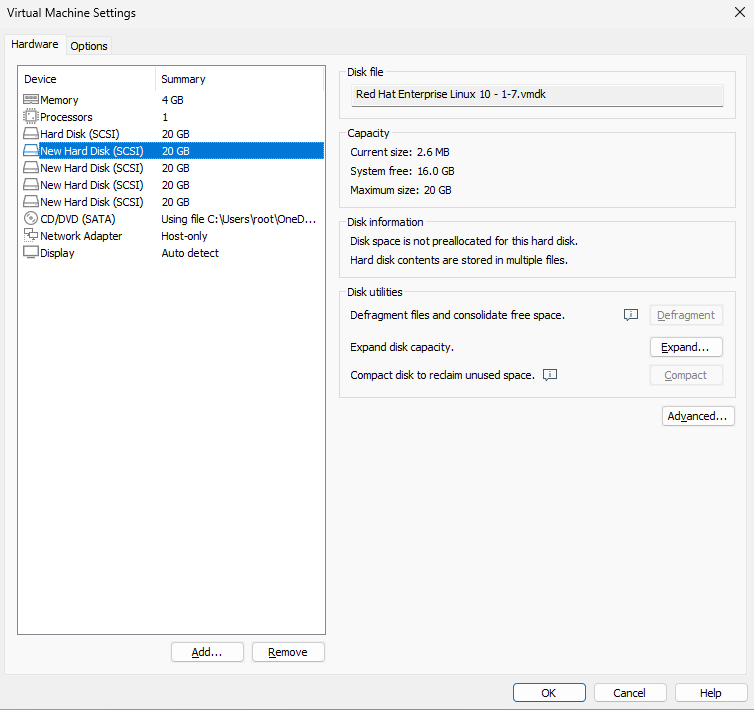
Figure 17-2 Add four disks for a RAID‑5 array
Boot the system and create the array with mdadm. Here, -Cv creates and shows progress, /dev/md0 is the array name, -n 3 builds a three‑disk RAID‑5, -l 5 selects level 5, and -x 1 adds one hot spare. List each disk explicitly (you may also use the wildcards from Chapter 3).
root@linuxprobe:~# mdadm -Cv /dev/md0 -n 3 -l 5 -x 1 /dev/sdb /dev/sdc /dev/sdd /dev/sde
mdadm: layout defaults to left-symmetric
mdadm: chunk size defaults to 512K
mdadm: size set to 20954112K
mdadm: Defaulting to version 1.2 metadata
mdadm: array /dev/md0 started.
After that command succeeds, a new device /dev/md0 appears: a RAID‑5 array with a spare to safeguard your data. Use mdadm -D to inspect its details. Because remote device discovery order can change, writing raw device names like /dev/sdb or /dev/sdc into /etc/fstab risks mounting the wrong device later. UUIDs uniquely identify devices and avoid that pitfall. Record the UUID for use in your fstab entry.
root@linuxprobe:~# mdadm -D /dev/md0
/dev/md0:
           Version : 1.2
     Creation Time : Fri Apr  4 02:17:44 2025
        Raid Level : raid5
        Array Size : 41908224 (39.97 GiB 42.91 GB)
     Used Dev Size : 20954112 (19.98 GiB 21.46 GB)
      Raid Devices : 3
     Total Devices : 4
       Persistence : Superblock is persistent

       Update Time : Fri Apr  4 02:19:29 2025
             State : clean
    Active Devices : 3
   Working Devices : 4
    Failed Devices : 0
     Spare Devices : 1

            Layout : left-symmetric
        Chunk Size : 512K

Consistency Policy : resync

              Name : linuxprobe.com:0  (local to host linuxprobe.com)
              UUID : af6bd598:f912ea12:d45fb1b8:8aeb9c2d
            Events : 18

    Number   Major   Minor   RaidDevice State
       0       8       16        0      active sync   /dev/sdb
       1       8       32        1      active sync   /dev/sdc
       4       8       48        2      active sync   /dev/sdd

       3       8       64        -      spare   /dev/sde
17.3 Configuring the iSCSI Target (Server)
iSCSI has two roles: the target (server that exports storage) and the initiator (client that consumes it). I’ll use the following addressing:
Table 17-1 Hosts and addresses
| Host | OS | IP address |
|---|---|---|
| iSCSI target | RHEL 10 | 192.168.10.10 |
| iSCSI initiator | RHEL 10 | 192.168.10.20 |
Step 1: On RHEL/CentOS Stream 10, the iSCSI target components are present by default. After configuring your repos, install the interactive configuration tool targetcli. Adding -y to dnf install suppresses prompts.
root@linuxprobe:~# dnf install -y targetcli
Updating Subscription Management repositories.
Last metadata expiration check: 0:00:28 ago on Fri 04 Apr 2025 02:21:55 AM CST.
Dependencies resolved.
================================================================================
 Package                      Arch      Version              Repository    Size
================================================================================
Installing:
 targetcli                    noarch    2.1.58-2.el10        AppStream     95 k
Installing dependencies:
 python3-configshell          noarch    1:1.1.30-7.el10      BaseOS        92 k
 python3-kmod                 x86_64    0.9.2-5.el10         BaseOS       114 k
 python3-pyparsing            noarch    3.1.1-5.el10         BaseOS       273 k
 python3-rtslib               noarch    2.1.76-8.el10        AppStream    128 k
 python3-typing-extensions    noarch    4.9.0-5.el10         BaseOS        81 k
 python3-urwid                x86_64    2.5.3-3.el10         BaseOS       1.1 M
 python3-wcwidth              noarch    0.2.6-4.el10         BaseOS        50 k
 target-restore               noarch    2.1.76-8.el10        AppStream     17 k
Installed:
  python3-configshell-1:1.1.30-7.el10.noarch
  python3-kmod-0.9.2-5.el10.x86_64
  python3-pyparsing-3.1.1-5.el10.noarch
  python3-rtslib-2.1.76-8.el10.noarch
  python3-typing-extensions-4.9.0-5.el10.noarch
  python3-urwid-2.5.3-3.el10.x86_64
  python3-wcwidth-0.2.6-4.el10.noarch
  target-restore-2.1.76-8.el10.noarch
  targetcli-2.1.58-2.el10.noarch

Complete!
Because iSCSI is cross‑platform, you could also build a target on Windows. In practice, however, popular Windows iSCSI target products (for example, DataCore’s SANmelody or FalconStor iSCSI Server for Windows) are commercial.
Step 2: Configure the target’s shared resources. targetcli provides an interactive, directory‑like interface (similar to fdisk) that abstracts iSCSI configuration into “directories.” Use familiar Linux verbs like ls to list nodes and cd to navigate between them. The main challenge is simply learning what each “parameter directory” controls. Once the entries are filled in correctly, the target can export storage.
Run targetcli to open the interactive shell:
root@linuxprobe:~# targetcli
targetcli shell version 2.1.58
Copyright 2011-2013 by Datera, Inc and others.
For help on commands, type 'help'.
/> ls
o- / ..................................................................... [...]
  o- backstores .......................................................... [...]
  | o- block .............................................. [Storage Objects: 0]
  | o- fileio ............................................. [Storage Objects: 0]
  | o- pscsi .............................................. [Storage Objects: 0]
  | o- ramdisk ............................................ [Storage Objects: 0]
  o- iscsi ........................................................ [Targets: 0]
  o- loopback ..................................................... [Targets: 0]
  o- vhost ........................................................ [Targets: 0]
Under /backstores/block we register exported devices. Add the RAID‑5 array /dev/md0 into this backstore “pool” and rename it disk0, so users won’t see which physical disk provides the storage—they’ll simply see a device named disk0.
/> cd /backstores/block
/backstores/block> create disk0 /dev/md0
Created block storage object disk0 using /dev/md0.
/backstores/block> cd /
/> ls
o- / ..................................................................... [...]
  o- backstores .......................................................... [...]
  | o- block .............................................. [Storage Objects: 1]
  | | o- disk0 ..................... [/dev/md0 (40.0GiB) write-thru deactivated]
  | |   o- alua ............................................... [ALUA Groups: 1]
  | |     o- default_tg_pt_gp ................... [ALUA state: Active/optimized]
  | o- fileio ............................................. [Storage Objects: 0]
  | o- pscsi .............................................. [Storage Objects: 0]
  | o- ramdisk ............................................ [Storage Objects: 0]
  o- iscsi ........................................................ [Targets: 0]
  o- loopback ..................................................... [Targets: 0]
  o- vhost ........................................................ [Targets: 0]
Step 3: Create a target IQN and configure the export. The target name (IQN) is auto‑generated—a unique string that clients will see during discovery, so you don’t need to memorize it.
/> cd iscsi
/iscsi> create
Created target iqn.2003-01.org.linux-iscsi.linuxprobe.x8664:sn.bdf25f04da95.
Created TPG 1.
Global pref auto_add_default_portal=true
Created default portal listening on all IPs (0.0.0.0), port 3260.
/iscsi> ls
o- iscsi .......................................................... [Targets: 1]
  o- iqn.2003-01.org.linux-iscsi.linuxprobe.x8664:sn.bdf25f04da95 .... [TPGs: 1]
    o- tpg1 ............................................. [no-gen-acls, no-auth]
      o- acls ........................................................ [ACLs: 0]
      o- luns ........................................................ [LUNs: 0]
      o- portals .................................................. [Portals: 1]
        o- 0.0.0.0:3260 ................................................... [OK]
Tips:
In the auto‑generated iSCSI name, the final dot is punctuation, not part of the IQN.
In /iscsi, the system creates a directory named after the new target. Add the backstore device as a LUN under this target so that, after login, clients can use the exported disk by default.
/iscsi> cd iqn.2003-01.org.linux-iscsi.linuxprobe.x8664:sn.bdf25f04da95/
/iscsi/iqn.20....bdf25f04da95> cd tpg1/luns
/iscsi/iqn.20...a95/tpg1/luns> create /backstores/block/disk0
Created LUN 0.
Step 4: Create an Access Control List (ACL). In this lab, iSCSI authentication is based on initiator name. In other words, no password is required: as long as the client’s initiator name matches an entry in the target’s ACL, access is granted. The acls directory stores the names allowed to access the target. I recommend appending :client to the system‑generated target string; this convention keeps names unique and easier to read.
/iscsi/iqn.20...a95/tpg1/luns> cd ..
/iscsi/iqn.20...5f04da95/tpg1> cd acls
/iscsi/iqn.20...a95/tpg1/acls> create iqn.2003-01.org.linux-iscsi.linuxprobe.x8664:sn.bdf25f04da95:client
Created Node ACL for iqn.2003-01.org.linux-iscsi.linuxprobe.x8664:sn.bdf25f04da95:client
Created mapped LUN 0.
Step 5: Bind the portal to a specific IP and port. Production servers may have multiple NICs. Which NIC/IP will export the storage? By default, all IPv4 addresses are allowed. If that’s too open for your taste, delete the wildcard portal:
/iscsi/iqn.20...a95/tpg1/acls> cd ../portals/
/iscsi/iqn.20.../tpg1/portals> ls
o- portals ........................................................ [Portals: 1]
  o- 0.0.0.0:3260 ......................................................... [OK]
/iscsi/iqn.20.../tpg1/portals> delete 0.0.0.0 3260
Deleted network portal 0.0.0.0:3260
Then explicitly bind to 192.168.10.10:3260:
/iscsi/iqn.20.../tpg1/portals> create 192.168.10.10
Using default IP port 3260
Created network portal 192.168.10.10:3260.
Step 6: Review and save. Confirm the directories show the expected entries, then exit to save. Don’t press Ctrl+C, which won’t persist the configuration.
/iscsi/iqn.20.../tpg1/portals> cd /
/> ls
o- / ..................................................................... [...]
  o- backstores .......................................................... [...]
  | o- block .............................................. [Storage Objects: 1]
  | | o- disk0 ....................... [/dev/md0 (40.0GiB) write-thru activated]
  | |   o- alua ............................................... [ALUA Groups: 1]
  | |     o- default_tg_pt_gp ................... [ALUA state: Active/optimized]
  | o- fileio ............................................. [Storage Objects: 0]
  | o- pscsi .............................................. [Storage Objects: 0]
  | o- ramdisk ............................................ [Storage Objects: 0]
  o- iscsi ........................................................ [Targets: 1]
  | o- iqn.2003-01.org.linux-iscsi.linuxprobe.x8664:sn.bdf25f04da95 .. [TPGs: 1]
  |   o- tpg1 ........................................... [no-gen-acls, no-auth]
  |     o- acls ...................................................... [ACLs: 1]
  |     | o- iqn.2003-01.org.linux-iscsi.linuxprobe.x8664:sn.bdf25f04da95:client  [Mapped LUNs: 1]
  |     |   o- mapped_lun0 ............................. [lun0 block/disk0 (rw)]
  |     o- luns ...................................................... [LUNs: 1]
  |     | o- lun0 .................. [block/disk0 (/dev/md0) (default_tg_pt_gp)]
  |     o- portals ................................................ [Portals: 1]
  |       o- 192.168.10.10:3260 ........................................... [OK]
  o- loopback ..................................................... [Targets: 0]
  o- vhost ........................................................ [Targets: 0]
/> exit
Global pref auto_save_on_exit=true
Configuration saved to /etc/target/saveconfig.json
Open the firewall for TCP/3260:
root@linuxprobe:~# firewall-cmd --permanent --add-port=3260/tcp
success
root@linuxprobe:~# firewall-cmd --reload
success
17.4 Configuring a Linux Initiator (Client)
Client setup is usually simpler than server setup. On RHEL 10, the iSCSI software initiator is installed by default; if not, install it from the repos:
root@linuxprobe:~# dnf install iscsi-initiator-utils
Updating Subscription Management repositories.
BaseOS                                          2.7 MB/s | 2.7 kB     00:00
AppStream                                       2.7 MB/s | 2.8 kB     00:00
Package iscsi-initiator-utils-6.2.1.9-21.gita65a472.el10.x86_64 is already installed.
Dependencies resolved.
Nothing to do.
Complete!
Earlier I mentioned that our lab authenticates by initiator name—the client’s unique identifier—which must match the ACL entry on the server. Otherwise login fails.
Edit the name file to match the server’s ACL entry, then restart and enable the daemon:
root@linuxprobe:~# vim /etc/iscsi/initiatorname.iscsi
InitiatorName=iqn.2003-01.org.linux-iscsi.linuxprobe.x8664:sn.bdf25f04da95:client
root@linuxprobe:~# systemctl restart iscsid
root@linuxprobe:~# systemctl enable  iscsid
Created symlink '/etc/systemd/system/multi-user.target.wants/iscsid.service' → '/usr/lib/systemd/system/iscsid.service'.
To use the storage, remember my simple rule of thumb: discover, log in, then mount. The iscsiadm tool manages and queries the iSCSI database. First discover targets:
root@linuxprobe:~# iscsiadm -m discovery -t st -p 192.168.10.10
192.168.10.10:3260,1 iqn.2003-01.org.linux-iscsi.linuxprobe.x8664:sn.bdf25f04da95
Then log in (you can copy/paste the discovered IQN to avoid typos):
root@linuxprobe:~# iscsiadm -m node -T iqn.2003-01.org.linux-iscsi.linuxprobe.x8664:sn.bdf25f04da95 -p 192.168.10.10 --login
Logging in to [iface: default, target: iqn.2003-01.org.linux-iscsi.linuxprobe.x8664:sn.bdf25f04da95, portal: 192.168.10.10,3260]
Login to [iface: default, target: iqn.2003-01.org.linux-iscsi.linuxprobe.x8664:sn.bdf25f04da95, portal: 192.168.10.10,3260] successful.
After login, a new device appears on the client (for example /dev/sdb). As explained in Chapter 6, udev names devices based on discovery order, not slot position. From here on, operate it like a local disk:
root@linuxprobe:~# ls -l /dev/sdb
brw-rw----. 1 root disk 8, 16 Apr  3 18:37 /dev/sdb
root@linuxprobe:~# file /dev/sdb
/dev/sdb: block special (8/16)
Given the device is only 40GB and you’ve already practiced partitioning in Chapter 6, skip partitioning here—format and mount directly:
root@linuxprobe:~# mkfs.xfs /dev/sdb
log stripe unit (524288 bytes) is too large (maximum is 256KiB)
log stripe unit adjusted to 32KiB
meta-data=/dev/sdb               isize=512    agcount=16, agsize=654720 blks
         =                       sectsz=512   attr=2, projid32bit=1
         =                       crc=1        finobt=1, sparse=1, rmapbt=1
         =                       reflink=1    bigtime=1 inobtcount=1 nrext64=1
data     =                       bsize=4096   blocks=10475520, imaxpct=25
         =                       sunit=128    swidth=256 blks
naming   =version 2              bsize=4096   ascii-ci=0, ftype=1
log      =internal log           bsize=4096   blocks=16384, version=2
         =                       sectsz=512   sunit=8 blks, lazy-count=1
realtime =none                   extsz=4096   blocks=0, rtextents=0
root@linuxprobe:~# mkdir /iscsi
root@linuxprobe:~# mount /dev/sdb /iscsi
Optionally verify with df:
root@linuxprobe:~# df -h
Filesystem             Size  Used Avail Use% Mounted on
/dev/mapper/rhel-root   17G  3.8G   13G  23% /
devtmpfs               4.0M     0  4.0M   0% /dev
tmpfs                  1.9G   84K  1.9G   1% /dev/shm
efivarfs               256K   56K  196K  23% /sys/firmware/efi/efivars
tmpfs                  776M  9.7M  767M   2% /run
tmpfs                  1.0M     0  1.0M   0% /run/credentials/systemd-journald.service
/dev/sda2              960M  272M  689M  29% /boot
/dev/sr0               6.5G  6.5G     0 100% /media/cdrom
/dev/sda1              599M  8.3M  591M   2% /boot/efi
tmpfs                  388M  124K  388M   1% /run/user/0
/dev/sdb                40G  816M   40G   2% /iscsi
From now on the device behaves like a local disk. However, because udev assigns names by discovery order, mounting by UUID is safer when multiple remote LUNs are in use.
Use blkid to fetch the UUID and then add an entry to /etc/fstab. Since this is a network device and iSCSI rides over TCP/IP, remember the _netdev mount option so mounting waits for networking; otherwise boot can hang or fail.
root@linuxprobe:~# blkid | grep /dev/sdb
/dev/sdb: UUID="075956f7-ec81-420e-8e11-e165a4e2fb66" BLOCK_SIZE="512" TYPE="xfs"
root@linuxprobe:~# vim /etc/fstab
#
# /etc/fstab
# Created by anaconda on Wed Mar 12 20:08:04 2025
#
# Accessible filesystems, by reference, are maintained under '/dev/disk/'.
# See man pages fstab(5), findfs(8), mount(8) and/or blkid(8) for more info.
#
# After editing this file, run 'systemctl daemon-reload' to update systemd
# units generated from this file.
#
UUID=016bb74f-bfa8-4d80-aa6d-d5693c39a844 /             xfs     defaults        	0 0
UUID=c34124dd-c66e-4cbe-ba04-528666d30dc0 /boot         xfs     defaults        	0 0
UUID=9A1A-B195          /boot/efi               vfat    umask=0077,shortname=winnt  0 2
UUID=299dacfd-f999-48d8-bca4-e5274ac600a8 none          swap    defaults        	0 0
/dev/cdrom 								  /media/cdrom  iso9660 defaults 			0 0
UUID="075956f7-ec81-420e-8e11-e165a4e2fb66" /iscsi      xfs     defaults,_netdev    0 0
When you’re done with the target, log out to disconnect the LUN:
root@linuxprobe:~# iscsiadm -m node -T iqn.2003-01.org.linux-iscsi.linuxprobe.x8664:sn.bdf25f04da95 -u
Logging out of session [sid: 1, target: iqn.2003-01.org.linux-iscsi.linuxprobe.x8664:sn.bdf25f04da95, portal: 192.168.10.10,3260]
Logout of [sid: 1, target: iqn.2003-01.org.linux-iscsi.linuxprobe.x8664:sn.bdf25f04da95, portal: 192.168.10.10,3260] successful.
This approach uses the built‑in RHEL 10 software initiator. It virtualizes the Ethernet NIC as an iSCSI interface and uses the host CPU to process iSCSI/TCP traffic. It’s the lowest‑cost approach and works well for low‑I/O or low‑bandwidth scenarios, but it does consume CPU cycles.
If your production environment requires heavy remote I/O, consider iSCSI‑HBA hardware on the server and/or clients. Compared with the software initiator, an HBA offloads protocol processing from the CPU and provides deeper iSCSI support, at a higher cost. Choose based on your performance and budget needs.
17.5 Configuring a Windows Client
Windows clients can also access the same iSCSI target, and the general steps mirror Linux. Before testing Windows, shut down the Linux client to avoid simultaneous access to the same LUN. Use the following addressing:
Table 17-2 Hosts and addresses
| Host | OS | IP address |
|---|---|---|
| iSCSI target | RHEL 10 | 192.168.10.10 |
| Windows client | Windows 11 | 192.168.10.30 |
Step 1: Launch the iSCSI Initiator. In Windows 11, open Control Panel → System and Security → Windows Tools (Figure 17‑3), then double‑click iSCSI Initiator (Figure 17‑4). On first launch Windows prompts to start the Microsoft iSCSI service—click Yes.
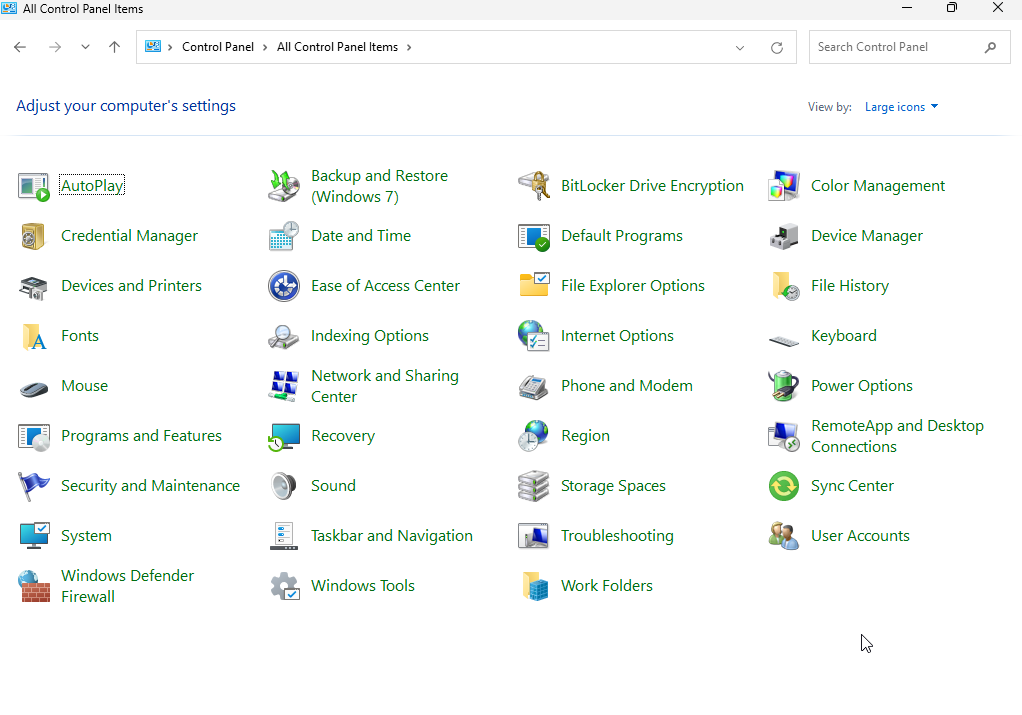
Figure 17-3 Open “Windows Tools” in Control Panel
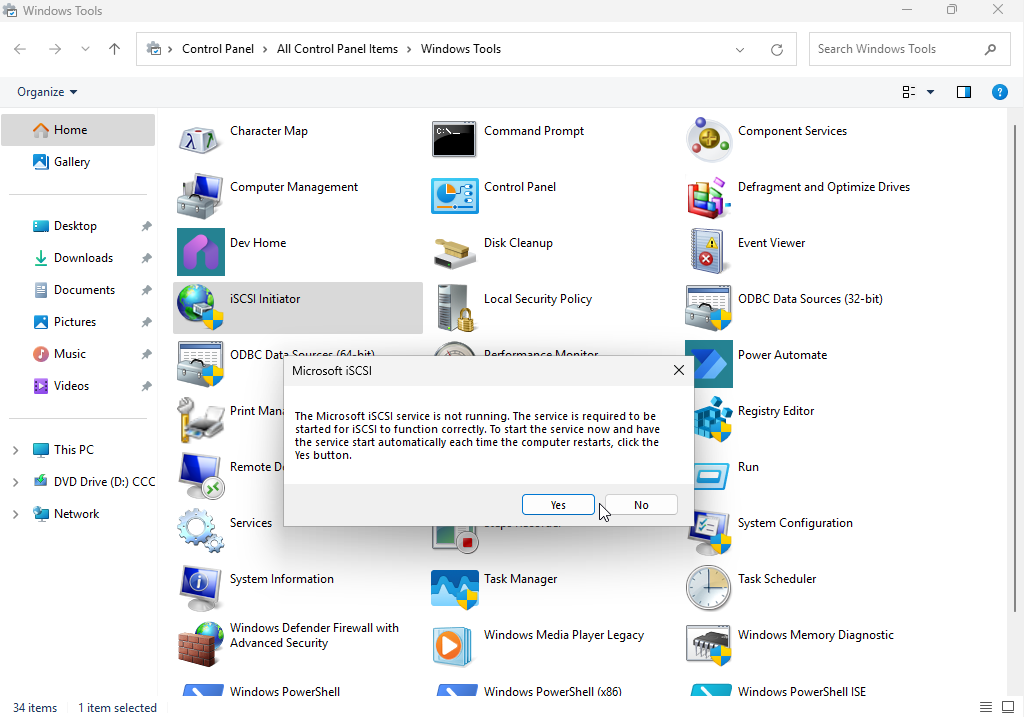
Figure 17-4 Double‑click “iSCSI Initiator”
Step 2: Discover the target. In the Targets tab, enter the iSCSI server IP and click Quick Connect (Figure 17‑5). The Quick Connect dialog shows the discovered storage (Figure 17‑6). A “cannot log on to the target” status is normal at this stage—click Done.
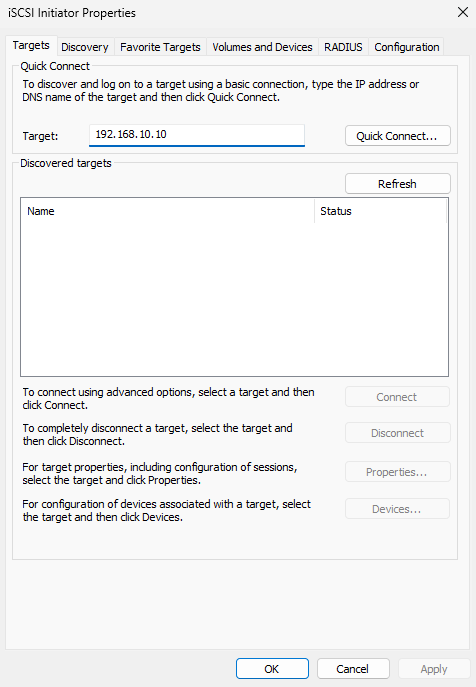
Figure 17-5 Enter the target IP address
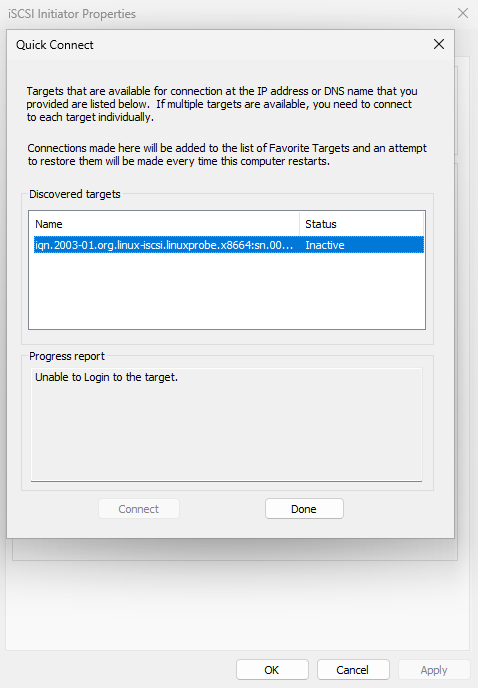
Figure 17-6 Discovered shared storage in “Quick Connect”
Back in the Targets tab, the storage name now appears (Figure 17‑7).
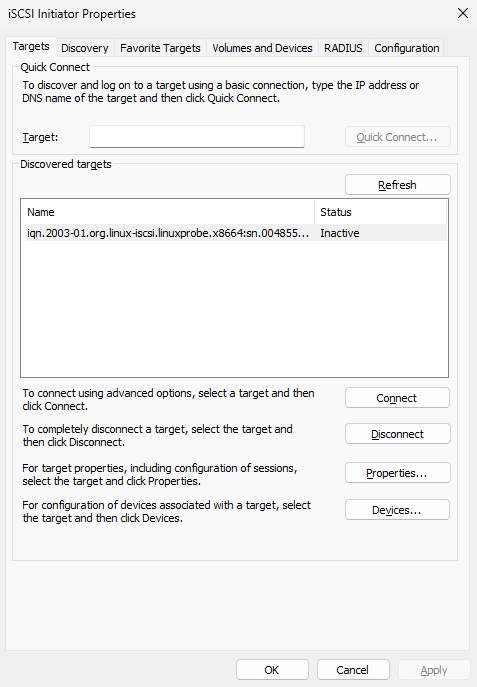
Figure 17-7 Target appears in the “Targets” tab
Step 3: Match the initiator name to the server ACL. Because the target authorizes by initiator name, open the Configuration tab and click Change (Figure 17‑8). Enter the exact ACL name configured on the server (Figure 17‑9). Return to Targets (Figure 17‑10).
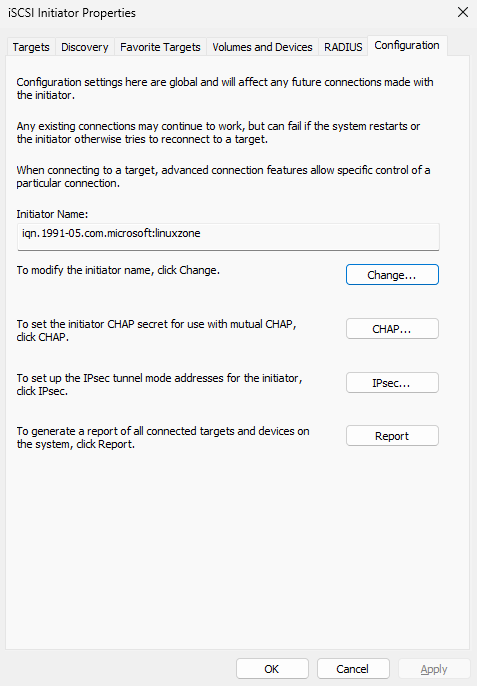
Figure 17-8 Change the initiator name
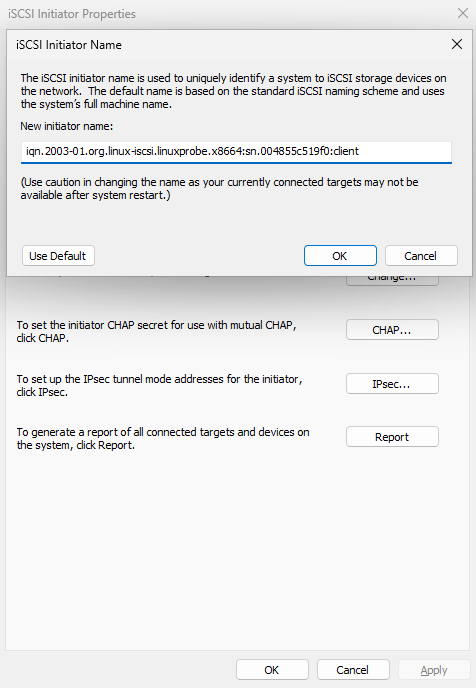
Figure 17-9 Set the initiator name to match the ACL
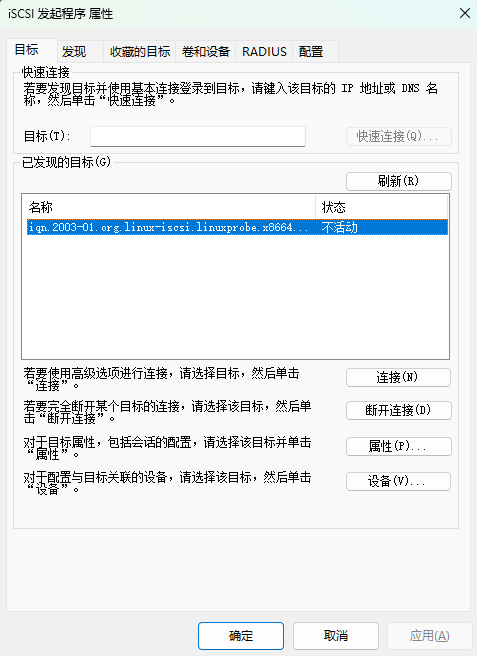
Figure 17-10 Back to the “Targets” tab
Click Connect (Figure 17‑11), confirm, and within a few seconds the status updates to Connected (Figure 17‑12).
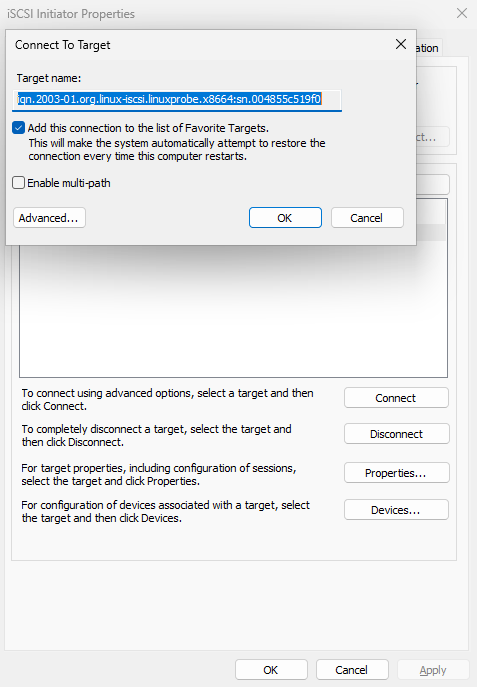
Figure 17-11 Connect to the iSCSI target
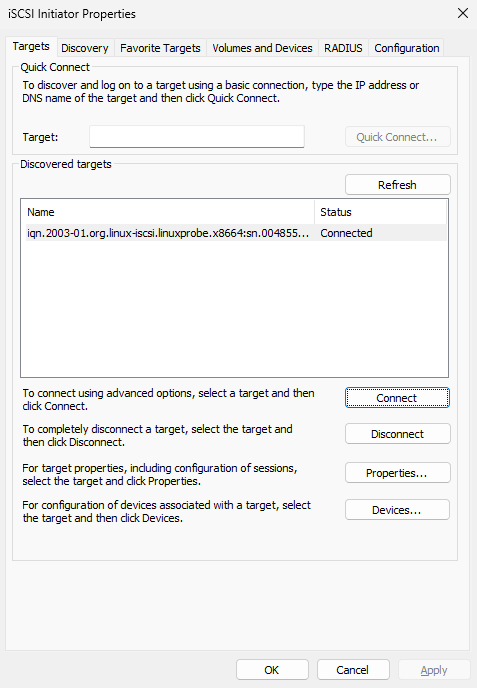
Figure 17-12 Connection succeeded
Step 4: Initialize and use the disk. Right‑click This PC → Manage to open Computer Management (Figure 17‑13). Initialize the new disk and create a New Simple Volume (Figures 17‑14 through 17‑21). Assign a drive letter, choose a filesystem and label, review, and finish. From here on, the LUN behaves like a local disk from the user’s perspective—though performance still depends on network bandwidth and latency. iSCSI’s strong security and centralized data storage remain compelling advantages.

Figure 17-13 Computer Management
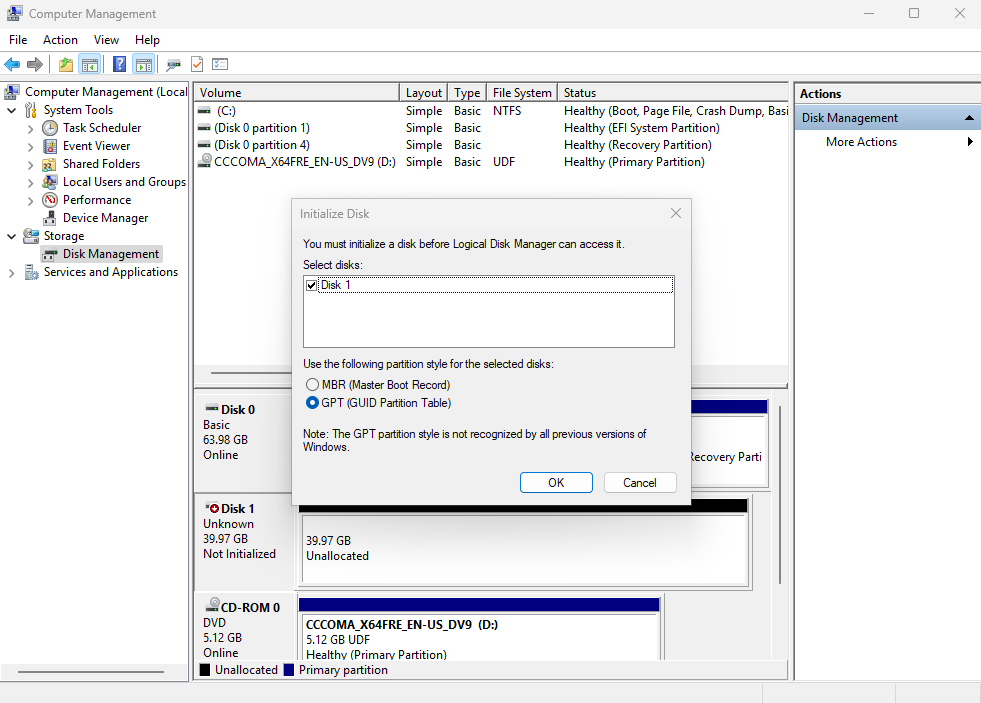
Figure 17-14 Initialize the disk
Figure 17-15 Start the “New Simple Volume Wizard”
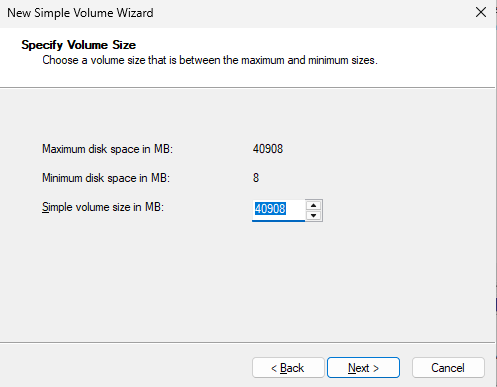
Figure 17-16 Partition the disk
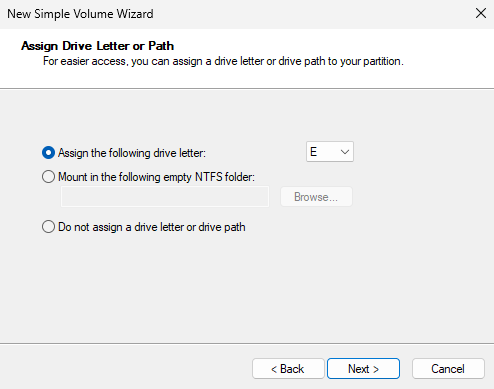
Figure 17-17 Assign a drive letter
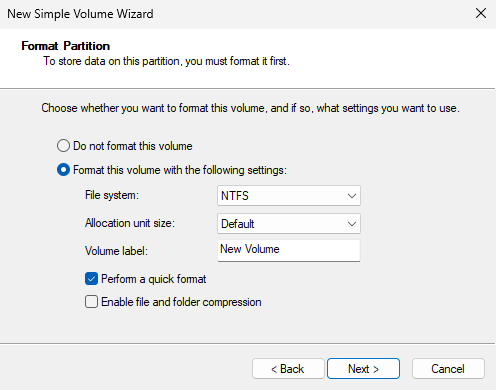
Figure 17-18 Choose filesystem and volume label
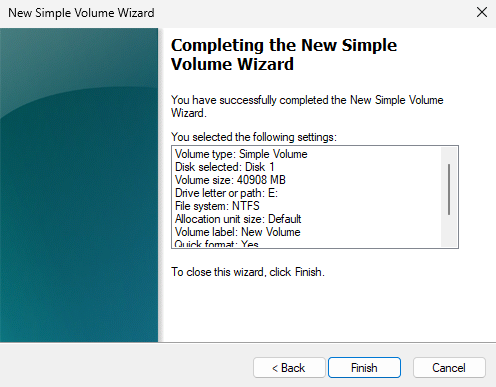
Figure 17-19 Review settings
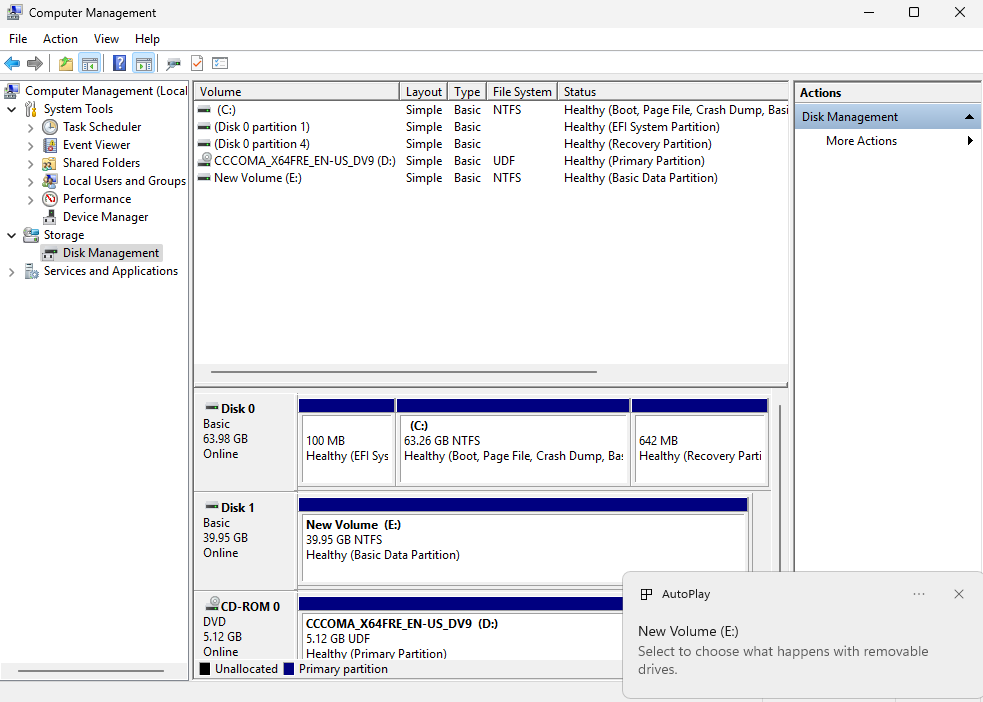
Figure 17-20 Wait for formatting to complete
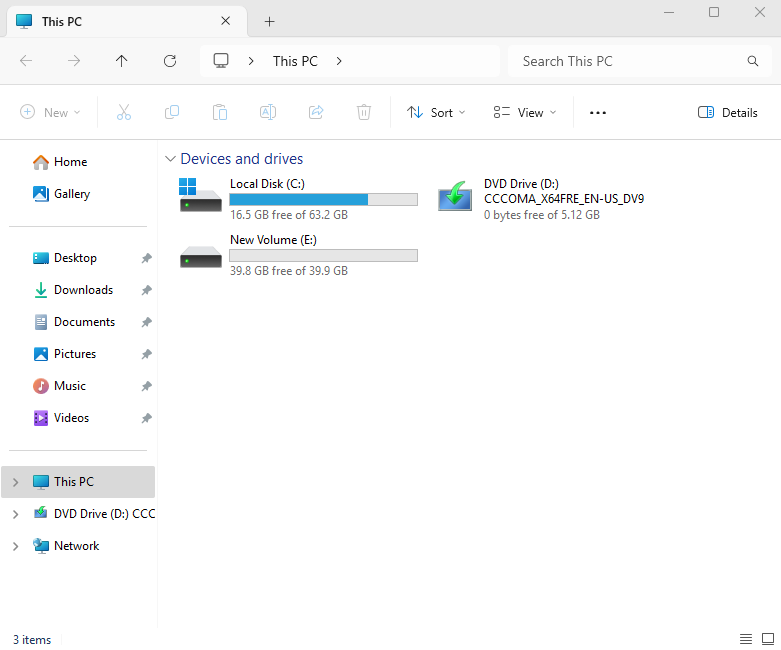
Figure 17-21 New volume appears
Review Questions
-
What role does iSCSI play in production?
Answer: It combines hardware storage with TCP/IP so users can access shared, remote block storage over the internet. -
What are the server and client components on Linux?
Answer:targetclifor the iSCSI target (server) and the software initiator for clients (iscsi-initiator-utils). -
In
targetcli, what are the purposes of the acls and portals directories?
Answer: acls stores the initiator names allowed to access storage; portals defines which server IP/port exports the service. -
Which transport and port does iSCSI use by default?
Answer: TCP port 3260. -
Why use UUIDs in
/etc/fstabfor remote storage?
Answer: udev‑assigned device names can change with discovery order; UUIDs are stable identifiers that prevent mis‑mounts. -
Which two steps are the same on Windows and Linux when using iSCSI?
Answer: Discover the target, then authenticate/log in. -
Can I use the host’s normal NICs if there’s no budget for iSCSI HBAs?
Answer: Yes—software initiators work fine; HBAs simply offload CPU and may perform better. -
After configuring with
targetcli, how do I save and exit?
Answer: Use theexitcommand; Ctrl+C does not save. -
What if the iSCSI initiator package isn’t installed?
Answer: Install it withdnf install iscsi-initiator-utils. -
How do I disconnect from a target when finished?
Answer: Useiscsiadm -m node -T <IQN> -u.