Chapter 19 · Unattended OS Installation with PXE + Kickstart
Chapter Overview
New operations engineers are often asked to install operating systems. If you follow the method in Chapter 1—installing from an ISO as if it were a physical disc—it works, but it’s slow and inefficient for scale. This chapter introduces an unattended installation solution built on PXE + Kickstart. You’ll deploy PXE, TFTP, FTP, DHCP, and Kickstart end to end and assemble a system that can install Linux on many machines at once. After this chapter, you can say goodbye to repetitive install work and dramatically increase installation throughput.
19.1 What is an unattended system?
Chapter 1 showed how to install Linux from an ISO. That’s fine for a handful of hosts, but in production you might need to install hundreds. In that case, build an unattended installation system with PXE + TFTP + FTP + DHCP + Kickstart. Such a system can automatically install tens or even hundreds of machines at the same time. It frees operators from repetitive work and greatly improves efficiency.
Figure 19-1 shows the overall workflow.

Figure 19-1 Workflow of the unattended installation system
PXE (Preboot eXecute Environment) is a technology from Intel that allows a computer to boot an OS over the network (the NIC must support PXE). In unattended installs, PXE boots the client and launches the Linux installer. Kickstart is a method of unattended installation. It works by pre-recording parameters—those that would normally be typed by hand—into a ks.cfg file. When the installer needs a value, it reads it from that file. As long as the Kickstart file contains every parameter the installer asks for, the entire process can run without human intervention. TFTP, FTP, and DHCP were covered in detail in Chapters 11 and 14; I’ll move faster here.
Because the client machine does not yet have an OS, it cannot authenticate over FTP. TFTP therefore delivers the initial bootloader and driver files. Then vsftpd transfers the full installation image over the network. You can replace FTP with httpd if you prefer HTTP—use any service that can reliably serve the installation content.
19.2 Deploy the required services
I will deploy several services, each with a clear role (Table 19-1). Some were covered earlier; when those reappear I’ll move briskly. If needed, jump back to the relevant chapters for refreshers.
Table 19-1 Services used in this lab and their roles
| Service | Role |
|---|---|
| kea | Assign NIC settings and point clients to boot files |
| tftp-server | Transfer bootloader and driver files |
| SYSLinux | Provide PXE bootloader files |
| vsftpd | Serve the full OS installation image |
| Kickstart | Supply answers to installer prompts |
19.2.1 Configure the DHCP service
DHCP assigns IP addresses to client hosts. It’s the foundation for all transfers between server and client, so configure it first. Set IPs as in Table 19-2, then disable VMware Workstation’s built-in DHCP in the Virtual Network Editor (Figures 19-2 and 19-3) to avoid conflicts with your own service.
Table 19-2 Addresses for the unattended server and client
| Hostname | OS | IP address |
|---|---|---|
| Unattended server | RHEL 10 | 192.168.10.10 |
| Client | Not yet installed | — |

Figure 19-2 Open the Virtual Network Editor
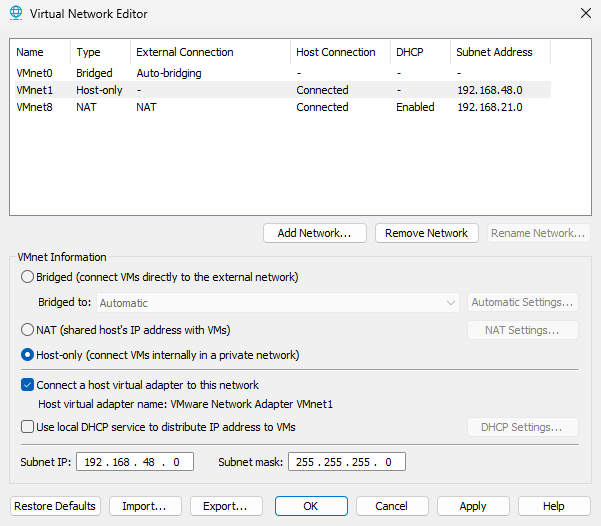
Figure 19-3 Disable the VM’s built-in DHCP service
Besides the services listed earlier, PXE + Kickstart may involve protocols such as sips, slp, and mountd. For the lab, temporarily stop firewalld so traffic can flow freely:
root@linuxprobe:~# systemctl stop firewalld
After mounting your ISO and configuring repo files, install kea:
root@linuxprobe:~# dnf install -y kea
Updating Subscription Management repositories.
Last metadata expiration check: 0:02:33 ago on Sat 05 Apr 2025 12:09:27 AM CST.
Dependencies resolved.
==========================================================================
 Package                       Arch      Version          Repo       Size
==========================================================================
Installing:
 kea                           x86_64    2.6.1-4.el10     BaseOS    1.3 M
Installing dependencies:
 boost-system                  x86_64    1.83.0-4.el10    BaseOS     16 k
 kea-libs                      x86_64    2.6.1-4.el10     BaseOS    3.1 M
 libpq                         x86_64    16.1-7.el10      BaseOS    253 k
 log4cplus                     x86_64    2.1.1-7.el10     BaseOS    355 k
 mariadb-connector-c           x86_64    3.4.1-1.el10     BaseOS    214 k
 mariadb-connector-c-config    noarch    3.4.1-1.el10     BaseOS     10 k
Installed:
  boost-system-1.83.0-4.el10.x86_64
  kea-2.6.1-4.el10.x86_64
  kea-libs-2.6.1-4.el10.x86_64
  libpq-16.1-7.el10.x86_64
  log4cplus-2.1.1-7.el10.x86_64
  mariadb-connector-c-3.4.1-1.el10.x86_64
  mariadb-connector-c-config-3.4.1-1.el10.noarch

Complete!
If you remember Chapter 14, I configured Kea already. Here the config differs in two key ways:
- It adds a boot-file-name of pxelinux.0 (I’ll create this file shortly) so that, after receiving an IP, the client fetches the PXE bootloader automatically.
- It specifies the TFTP server address so the client can retrieve initial drivers and boot files during installation.
root@linuxprobe:~# vim /etc/kea/kea-dhcp4.conf
{
  "Dhcp4": {
    "interfaces-config": {
      "interfaces": [ "ens160" ]
    },
    "subnet4": [
      {
        "id": 1,
        "subnet": "192.168.10.0/24",
        "pools": [
          {
            "pool": "192.168.10.100 - 192.168.10.200"
          }
        ],
        "option-data": [
          {
            "name": "routers",
            "data": "192.168.10.10"
          },
          {
            "name": "boot-file-name",
            "data": "pxelinux.0"
          },
          {
            "name": "tftp-server-name",
            "data": "192.168.10.10"
          }
        ]
      }
    ]
  }
}
Tips:
The file pxelinux.0 doesn’t exist yet; I’ll provide it in a later step.
Restart Kea and enable it at boot so the system can install clients automatically after any restart:
root@linuxprobe:~# systemctl restart kea-dhcp4
root@linuxprobe:~# systemctl enable  kea-dhcp4
Created symlink '/etc/systemd/system/multi-user.target.wants/kea-dhcp4.service' → '/usr/lib/systemd/system/kea-dhcp4.service'.
On RHEL 10, a few services can fail quietly if misconfigured. It’s a good habit to check status after starting Kea to catch errors early. If you see active (running), you’re good:
root@linuxprobe:~# systemctl status kea-dhcp4
● kea-dhcp4.service - Kea DHCPv4 Server
     Loaded: loaded (/usr/lib/systemd/system/kea-dhcp4.service; enabled; pres>
     Active: active (running) since Sat 2025-04-05 00:25:25 CST; 29s ago
 Invocation: 6b06921a371a4856ad8ce1c0189d8b30
       Docs: man:kea-dhcp4(8)
   Main PID: 4092 (kea-dhcp4)
      Tasks: 29 (limit: 24371)
     Memory: 3.3M (peak: 9M)
        CPU: 36ms
     CGroup: /system.slice/kea-dhcp4.service
             └─4092 /usr/sbin/kea-dhcp4 -c /etc/kea/kea-dhcp4.conf
19.2.2 Configure the TFTP service
In Chapter 11 I used vsftpd and TFTP. vsftpd is a full-featured file transfer service supporting anonymous, local, and virtual accounts. But at this stage the client has no OS, so there’s no login.
TFTP is a simple UDP-based protocol that requires no authentication—perfect for delivering early boot files. Configure TFTP to provide the bootloader and driver files. After the client has basic drivers, I’ll switch to vsftpd to transfer the full ISO.
root@linuxprobe:~# dnf install -y tftp-server
Updating Subscription Management repositories.
Last metadata expiration check: 0:18:20 ago on Sat 05 Apr 2025 12:09:27 AM CST.
Dependencies resolved.
==============================================================================
 Package            Architecture  Version              Repository        Size
==============================================================================
Installing:
 tftp-server        x86_64        5.2-47.el10          AppStream         44 k
Installed:
  tftp-server-5.2-47.el10.x86_64

Complete!
19.2.3 Configure SYSLinux
SYSLinux provides bootloader files. It’s not really a service; think of it as a package that installs a directory full of boot files under /usr/share/syslinux.
root@linuxprobe:~# systemctl restart tftp
root@linuxprobe:~# systemctl enable  tftp
Created symlink '/etc/systemd/system/sockets.target.wants/tftp.socket' → '/usr/lib/systemd/system/tftp.socket'.
Copy SYSLinux’s boot files (including pxelinux.0) into TFTP’s default directory so clients can fetch them. Also copy required boot files from the RHEL 10 ISO. Make sure the ISO is mounted at /media/cdrom first.
root@linuxprobe:~# dnf install -y syslinux
Updating Subscription Management repositories.
Last metadata expiration check: 0:21:45 ago on Sat 05 Apr 2025 12:09:27 AM CST.
Dependencies resolved.
==============================================================================
 Package                 Architecture Version              Repository    Size
==============================================================================
Installing:
 syslinux                x86_64       6.04-0.29.el10       BaseOS       576 k
Installing dependencies:
 syslinux-nonlinux       noarch       6.04-0.29.el10       BaseOS       605 k
Installed:
  syslinux-6.04-0.29.el10.x86_64    syslinux-nonlinux-6.04-0.29.el10.noarch

Complete!
The dot (.) means “copy into the current directory”—here, /var/lib/tftpboot. If prompted to overwrite duplicates, press y.
Create a pxelinux.cfg directory inside TFTP’s root. Despite the suffix, it’s a directory, not a file. Inside it, create a file named default that defines the boot menu (like Figure 19-4).
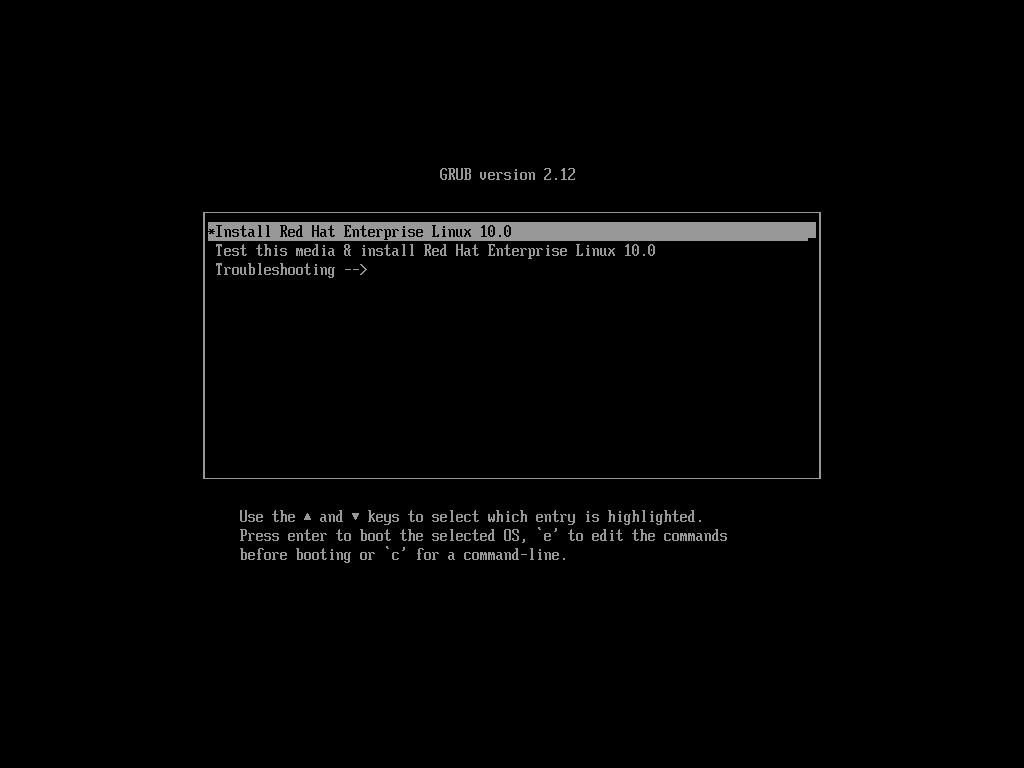
Figure 19-4 The Linux boot menu
The stock menu offers three choices: install, verify media, and troubleshooting. In unattended mode, I don’t want to manually pick an option on each machine. Provide a single auto-install entry and make it the default so the system proceeds without input.
root@linuxprobe:~# cd /var/lib/tftpboot
root@linuxprobe:/var/lib/tftpboot# cp -r /usr/share/syslinux/* .
root@linuxprobe:/var/lib/tftpboot# cp /media/cdrom/images/pxeboot/* .
DEFAULT sets the automatically selected entry. The KERNEL line loads vmlinuz from /var/lib/tftpboot/vmlinuz. The APPEND line points to the Kickstart file and to the FTP locations for the installer’s stage2 and the BaseOS repo. Adding quiet reduces prompts and noise during installation. Because this file is read by PXE at boot, no service restart is required.
19.2.4 Configure vsftpd
In this unattended system I’ll use FTP to serve the ISO. Using httpd is also fine—just update the URLs in both your PXE menu and Kickstart file accordingly.
root@linuxprobe:/var/lib/tftpboot# mkdir pxelinux.cfg
root@linuxprobe:/var/lib/tftpboot# vim pxelinux.cfg/default
1 DEFAULT auto
2   LABEL auto
3        KERNEL vmlinuz
4        APPEND initrd=initrd.img inst.ks=ftp://192.168.10.10/pub/ks.cfg inst.stage2=ftp://192.168.10.10 inst.repo=ftp://192.168.10.10/BaseOS quiet
root@linuxprobe:/var/lib/tftpboot# cd ~
On RHEL 10, vsftpd disables anonymous access by default. Enable it for the lab:
root@linuxprobe:~# dnf install -y vsftpd
Updating Subscription Management repositories.
Last metadata expiration check: 0:43:08 ago on Sat 05 Apr 2025 12:09:27 AM CST.
Dependencies resolved.
========================================================================================
 Package           Architecture      Version                   Repository            Size
========================================================================================
Installing:
 vsftpd            x86_64            3.0.5-8.el10              AppStream            174 k
Installed:
  vsftpd-3.0.5-8.el10.x86_64
Complete!
As always in production and on certification exams, enable services at boot so they survive reboots:
root@linuxprobe:~# vim /etc/vsftpd/vsftpd.conf
# Example config file /etc/vsftpd/vsftpd.conf
#
# The default compiled in settings are fairly paranoid. This sample file
# loosens things up a bit, to make the ftp daemon more usable.
# Please see vsftpd.conf.5 for all compiled in defaults.
#
# READ THIS: This example file is NOT an exhaustive list of vsftpd options.
# Please read the vsftpd.conf.5 manual page to get a full idea of vsftpd's
# capabilities.
#
# Allow anonymous FTP? (Beware - allowed by default if you comment this out).
anonymous_enable=YES
After confirming the ISO is mounted at /media/cdrom, copy its contents to vsftpd’s root:
root@linuxprobe:~# systemctl restart vsftpd
root@linuxprobe:~# systemctl enable  vsftpd
Created symlink '/etc/systemd/system/multi-user.target.wants/vsftpd.service' → '/usr/lib/systemd/system/vsftpd.service'.
While that runs (3–5 minutes), allow the SELinux boolean needed for FTP to access unreserved ports:
root@linuxprobe:~# cp -r /media/cdrom/* /var/ftp
19.2.5 Create the Kickstart answer file
I’m building an unattended installation system—not just a way to transfer an ISO—so the client must fetch the ISO and answer installer prompts by itself. If 100 machines need the same environment, the clicks and entries should be identical. A “requirements list” makes sense, and that’s exactly what Kickstart is: a file describing the answers.
Kickstart isn’t a daemon; it’s a plain text answer file. During installation, Anaconda reads the parameters from that file and proceeds automatically. Where to get it? Your current system already has a template: /root/anaconda-ks.cfg. Copy it to vsftpd’s pub directory as ks.cfg and ensure it’s world-readable so clients can fetch and read it. The earlier PXE APPEND line points to this path.
root@linuxprobe:~# setsebool -P ftpd_connect_all_unreserved=on
The Kickstart file isn’t complicated—about 41 lines including comments. The parameter names are self-explanatory. Highlights follow; feel free to edit and test further.
Lines 1–15 are comments and a few basic settings: graphical install, disable kdump, keyboard, and language. Leave as-is.
root@linuxprobe:~# cp ~/anaconda-ks.cfg /var/ftp/pub/ks.cfg
root@linuxprobe:~# chmod +r /var/ftp/pub/ks.cfg
Lines 16–18 configure networking. Use DHCP by default. Otherwise, identical static settings would cause IP conflicts across many machines.
root@linuxprobe:~# vim /var/ftp/pub/ks.cfg
  1 # Generated by Anaconda 40.22.3.12
  2 # Generated by pykickstart v3.52.5
  3 #version=RHEL10
  4 # Use graphical install
  5 graphical
  6
  7 %addon com_redhat_kdump --disable
  8
  9 %end
 10
 11 # Keyboard layouts
 12 keyboard --vckeymap=us --xlayouts='us'
 13 # System language
 14 lang en_US.UTF-8
 15
Lines 19–24 define BaseOS and AppStream as FTP repos and select Server with GUI (graphical-server-environment).
 16 # Network information
 17 network  --bootproto=dhcp --device=ens160 --onboot=on --ipv6=auto --activate
 18 network  --hostname=linuxprobe.com
Between %end and firstboot, add reboot so the system restarts automatically when installation finishes; otherwise you must click Reboot (Figure 19-5).
 19 repo --name="BaseOS" --baseurl=ftp://192.168.10.10/BaseOS
 20 repo --name="AppStream" --baseurl=ftp://192.168.10.10/AppStream
 21
 22 %packages
 23 @^graphical-server-environment
 24
Figure 19-5 Without reboot, you must click Reboot manually
Lines 31–35 specify sda for automatic partitioning. That implies your VM disk should be SCSI or SATA (Figure 19-6). If you choose a type that appears as /dev/hd* or /dev/nvme*, the installer won’t find sda and will stop. Defaults are fine here.
 25 %end
 26 reboot
 27 # Run the Setup Agent on first boot
 28 firstboot --enable
 29

Figure 19-6 Choose SCSI or SATA disk type
Finally, lines 36–41 set the timezone to Asia/Shanghai and create a regular user. Password hashes are generated automatically. Defaults are fine here, too.
30 # Generated using Blivet version 3.10.0
 31 ignoredisk --only-use=sda
 32 autopart
 33 # Partition clearing information
 34 clearpart --none --initlabel
 35
Preview of a complete ks.cfg:
 36 # System timezone
 37 timezone Asia/Shanghai --utc
 38
 39 # Root password
 40 rootpw --iscrypted --allow-ssh $y$j9T$MacHqEWCBAHDZWft7rBQjYSA$h5ypm01FEHP.1    VKG80r0iiv9H9AU6UDRnycTdwCEyhA
 41 user --groups=wheel --name=linuxprobe --password=$y$j9T$O1Btaze/IJPvCKbVOfQi    IJw.$ZjwvTAeWD1NYuqNHl3FeLFqeLDmxFvmsXR19KCKbUE6 --iscrypted --gecos="linuxprobe"
The Kickstart file is served over FTP and read by the installer; no service restart is required.
19.3 Automatically deploy clients
With all services configured, you can start using PXE + Kickstart. When creating the client VM, set its network mode to match the server’s Host-only network; otherwise they cannot communicate and installation won’t start. Other hardware choices are flexible; the following are reference steps.
Step 1: Open New Virtual Machine Wizard, choose Custom (advanced), and click Next (Figure 19-7). For virtual hardware compatibility, accept the default Workstation 17.x or later.
Step 2: For the installation source, choose I will install the operating system later. This forces the VM to boot from the network rather than letting VMware auto-install (Figure 19-8). Click Next.
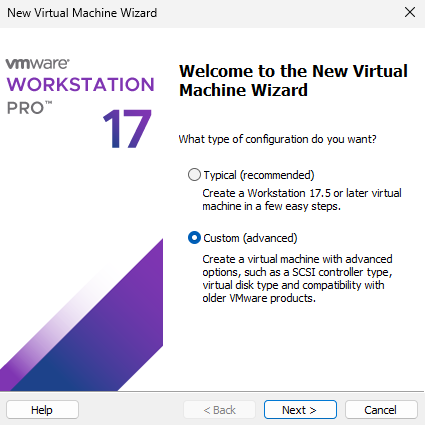
Figure 19-7 Choose the VM configuration type
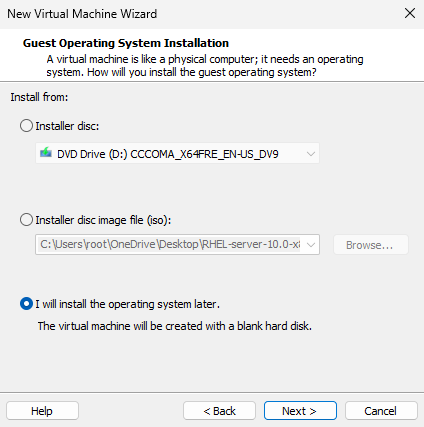
Figure 19-8 Choose to install the OS later
Step 3: Set the guest OS to Linux and version to Red Hat Enterprise Linux 9 64-bit (Figure 19-9). By the time you read this, VMware may list RHEL 10 explicitly—choose it if available.
Step 4: Name the VM and select a location with ample disk space (Figure 19-10). Choose CPU cores and memory appropriate to your machine.
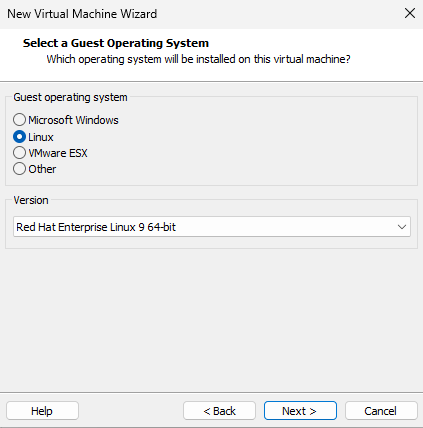
Figure 19-9 Choose the client OS
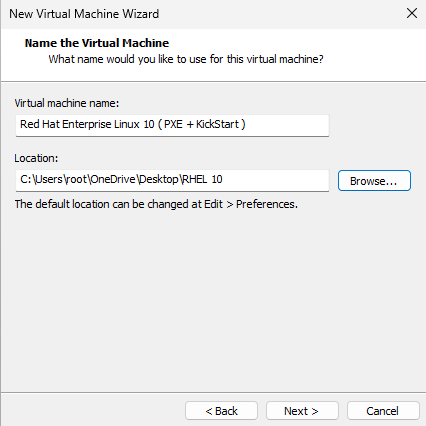
Figure 19-10 Name the VM and choose a location
Step 5: Set the network connection to Host-only (Figure 19-11). The client and server must be on the same network to fetch the ISO and Kickstart file. Choose the default LSI Logic SCSI controller.
Step 6: Choose the virtual disk type SCSI or SATA (Figure 19-12), then Create a new virtual disk. Set Maximum disk size to 20 GB (Figure 19-13). This is a thin-provisioned maximum, not immediately allocated, so it’s fine to set generously.
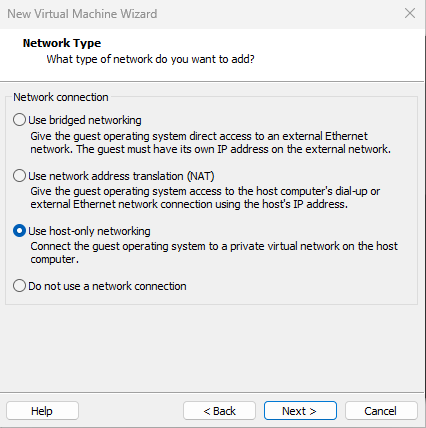
Figure 19-11 Use Host-only networking for the client

Figure 19-12 Choose SCSI or SATA
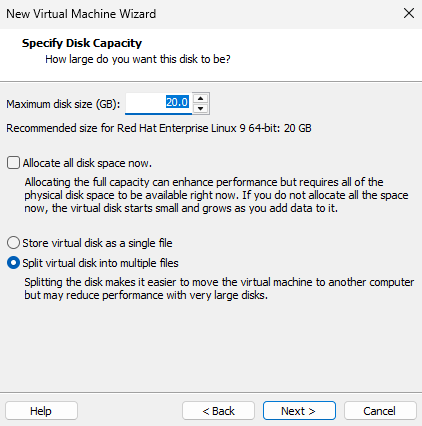
Figure 19-13 Set the virtual disk to 20 GB
Step 7: Before powering on, click Customize Hardware (Figure 19-14). In the dialog (Figure 19-15), ensure the Network Adapter is also set to Host-only and remove unnecessary hardware.
Figure 19-14 Click Customize Hardware
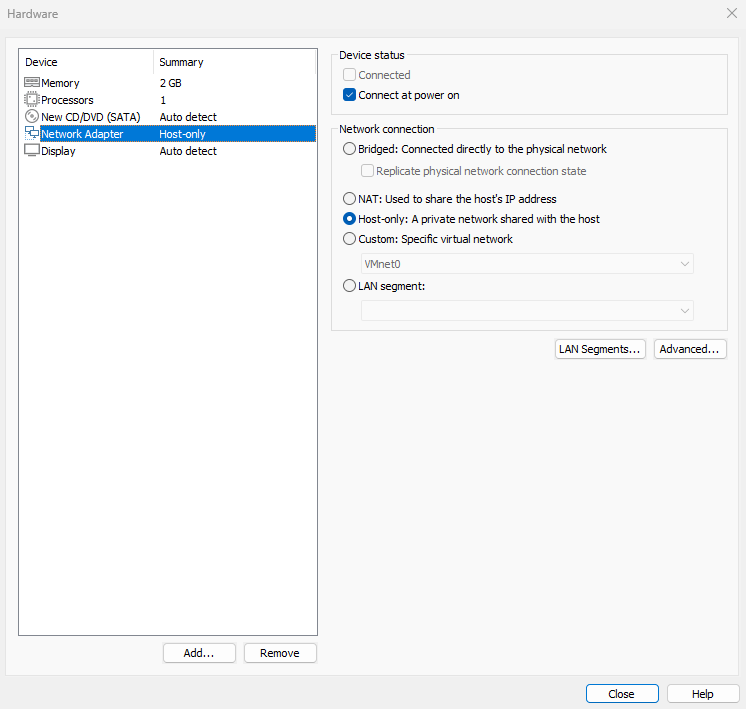
Figure 19-15 Set Network Adapter to Host-only
Step 8: Some VMs won’t enter the installer because they are set to UEFI by default. Go to the Options tab → Advanced, set Firmware type to BIOS, and click OK (Figure 19-16).
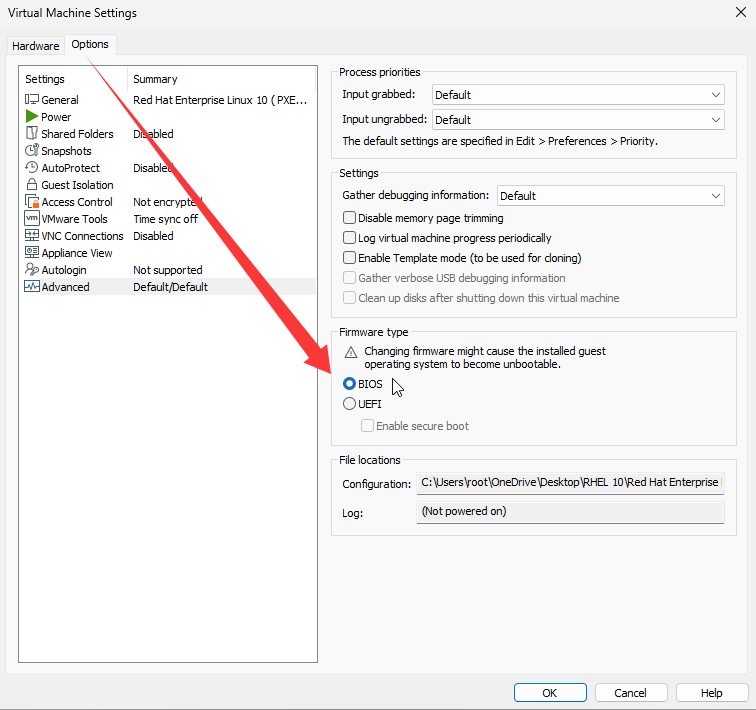
Figure 19-16 Ensure the firmware type is BIOS
That’s it. In production, rack the prepared server, plug in the cable to the client network, and power on clients. You should see the ISO transfer and the automatic installation proceed as in Figures 19-17 through 19-20—no manual input required the whole time.
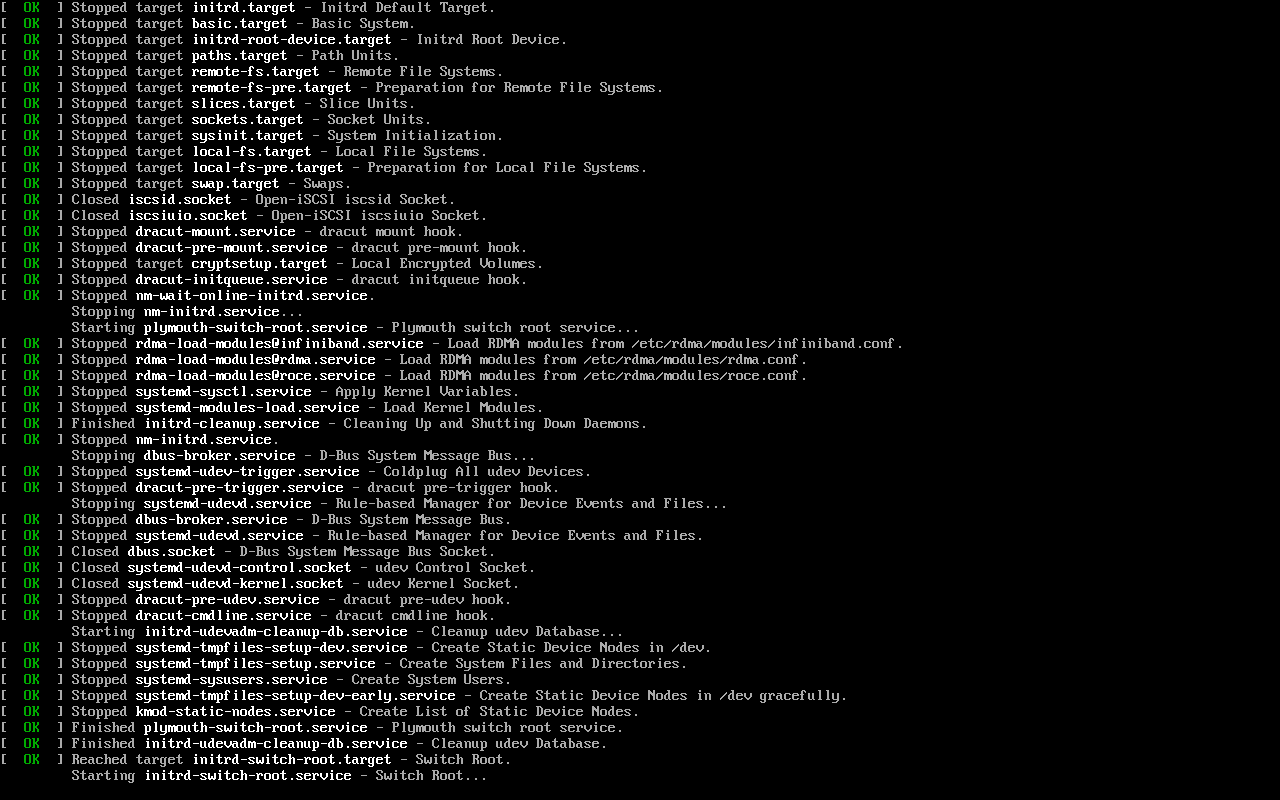
Figure 19-17 Automatic transfer of installation content
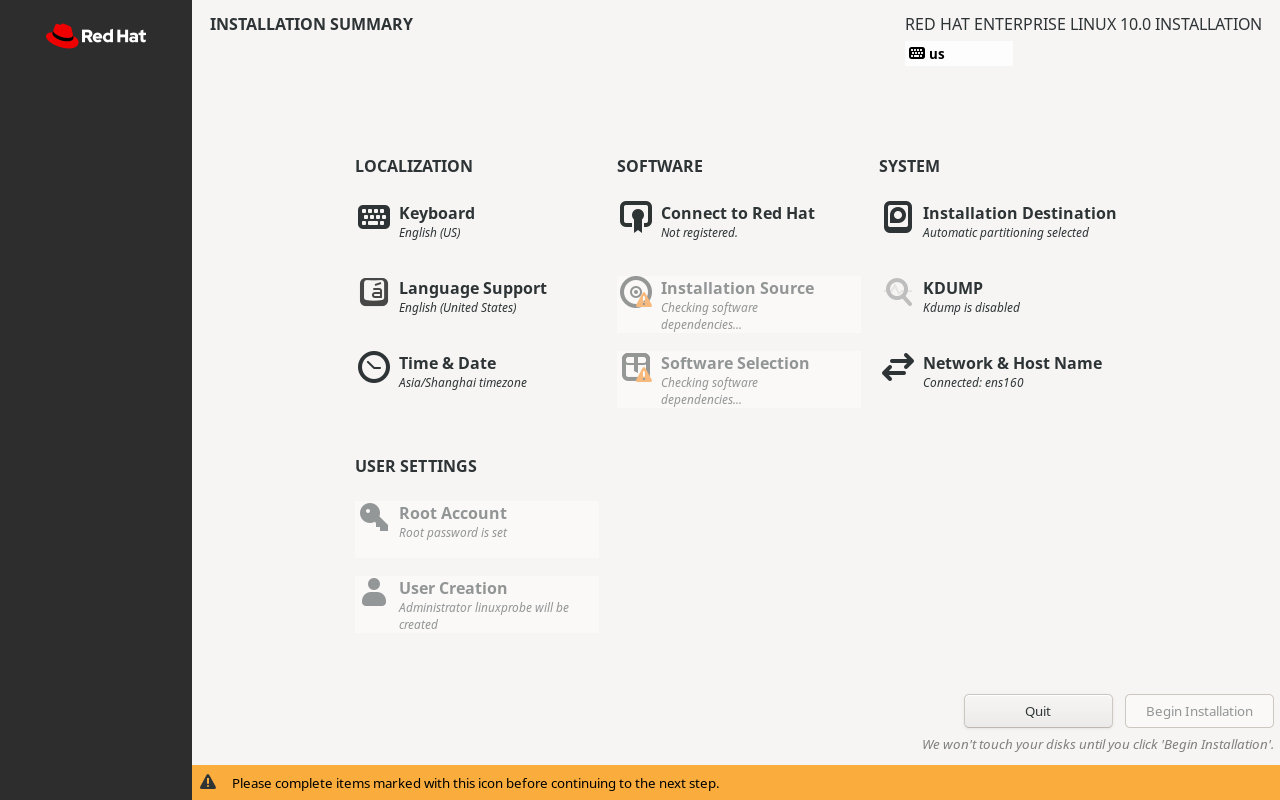
Figure 19-18 Installer fills answers from the Kickstart file
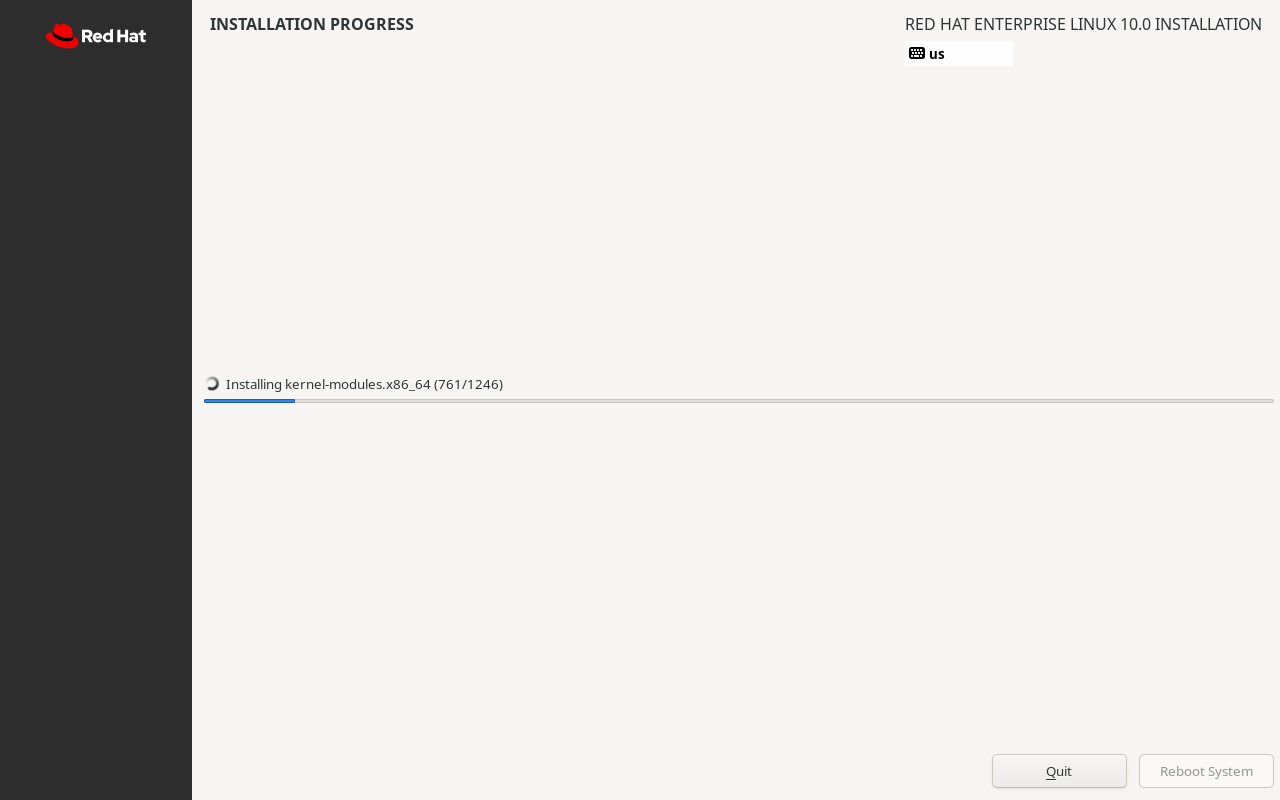
Figure 19-19 Fully unattended installation in progress
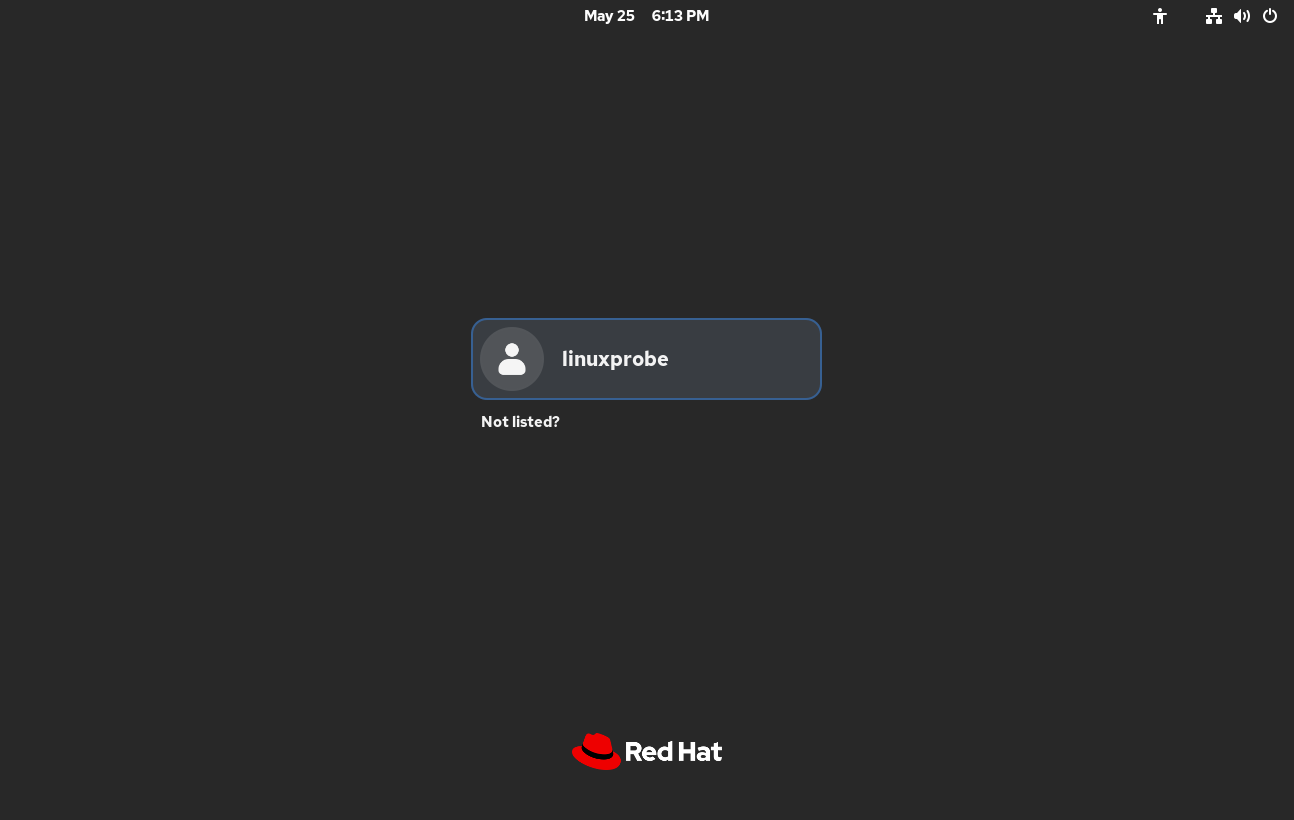
Figure 19-20 System boots successfully after installation
The benefit is obvious when you need to provision hundreds of systems.
Review Questions
-
Which services and files are needed for an unattended installation system?
Answer: SYSLinux boot files, DHCP, a file transfer service (vsftpd or httpd), TFTP, and a Kickstart answer file. -
In VMware Workstation, DHCP is handing out wrong addresses. Why?
Answer: The Virtual Network Editor’s built-in DHCP may still be enabled and conflicting with your Kea service. -
How do you start TFTP and vsftpd?
Answer: systemctl start tftp and systemctl start vsftpd. -
After installing SYSLinux, where are the boot files located?
Answer: In /usr/share/syslinux; copy the ones you need to /var/lib/tftpboot. -
In the boot menu, what does setting default to auto achieve?
Answer: It auto-selects the install entry so the process starts without manual input. -
Why must the client NIC be configured for DHCP in the Kickstart file?
Answer: Identical static settings would assign the same IP to every host, causing conflicts. -
What is the role of vsftpd or httpd here?
Answer: To serve the installation image files to clients over the network. -
What does the Kickstart file do?
Answer: Provides the installer with all required answers so the installation proceeds unattended. -
Summarize the purpose of ks.cfg.
Answer: It supplies the values that a human would otherwise type, enabling true unattended, mass installation. -
A client won’t auto-boot the installer despite correct configs. What else could be wrong?
Answer: The client’s boot order or firmware mode. Enter the VM’s BIOS, set network boot, and ensure BIOS mode if required.