Chapter 09 · Managing Remote Hosts with SSH
Chapter Overview
In this chapter, I first use nmtui to configure network parameters and nmcli to inspect network details and manage connection profiles so I can switch settings quickly in different environments. I also demonstrate how to bind two NICs in round‑robin mode to gain load balancing.
Then I dive into SSH and the sshd service: the protocol basics, remote‑management methods on Linux, and how to configure the service. Through labs, I show remote access over sshd by both password and key‑based authentication, and I use Tmux to keep remote sessions alive. Finally, I cover the logging system theory and use journalctl to search logs by various conditions to quickly locate faults.
Once you complete this chapter, you’ll be fully prepared to configure and manage Linux systems. Later chapters introduce many practical services that build directly on what you learn here.
9.1 Configuring Network Interfaces
To master networking from the ground up, I proceed in three steps: basic interface settings, creating connection profiles, and bonding two NICs—gradually increasing the amount of command work and difficulty until the concepts stick.
9.1.1 Configure interface parameters
Up to now you can already manage a Linux system with what you’ve learned. But we can push further. Before deploying services, hosts must be able to communicate smoothly. If the network is down, users can’t reach a perfectly configured service. Getting the network configured and reachable is the last prerequisite before service deployment.
Section 4.1.3 showed how to edit interface files with Vim. On RHEL 10 there are at least five ways to configure networking; I try to demonstrate them all in this book. Here I’ll use nmtui to configure networking, following Figures 9‑1 through 9‑8. I add extra notes where something isn’t immediately obvious.
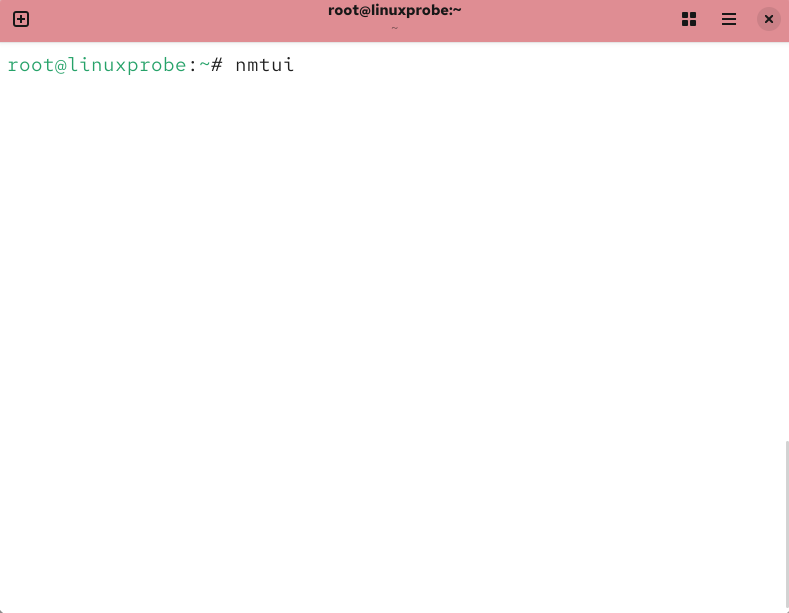
Figure 9-1 Run the network configurator with nmtui
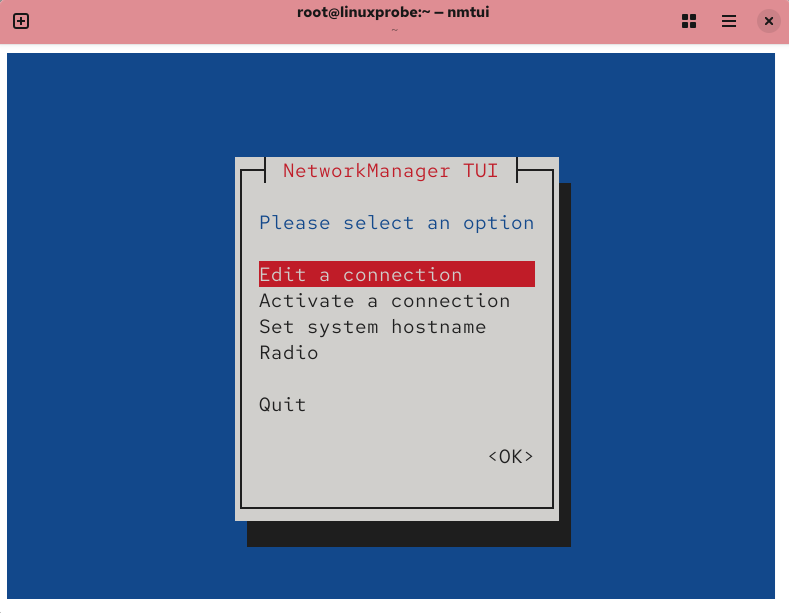
Figure 9-2 Choose to edit a connection
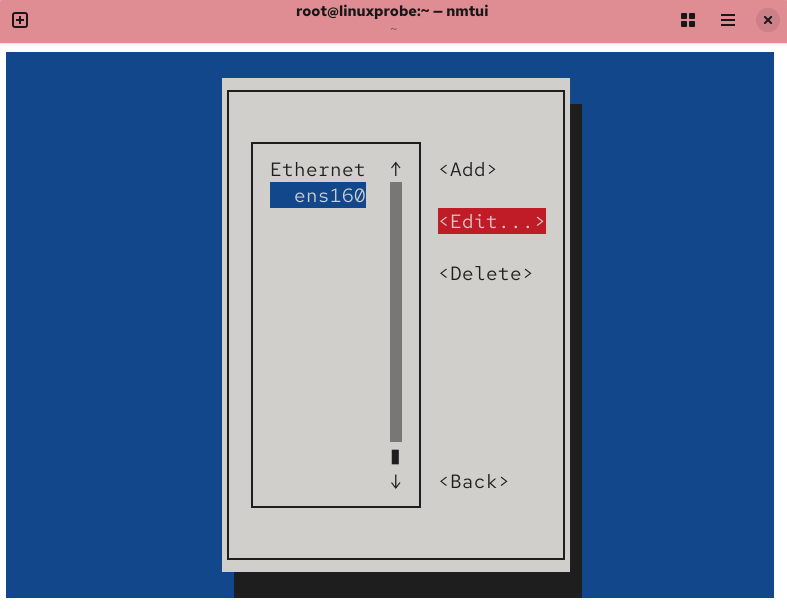
Figure 9-3 Select the interface to edit
Now, set the server’s IPv4 address to 192.168.10.10/24. “/24” means the first 24 bits are the network (equivalent to 255.255.255.0); the remaining 8 bits are host addresses. You can leave gateway and DNS blank for now and fill them in later when needed.
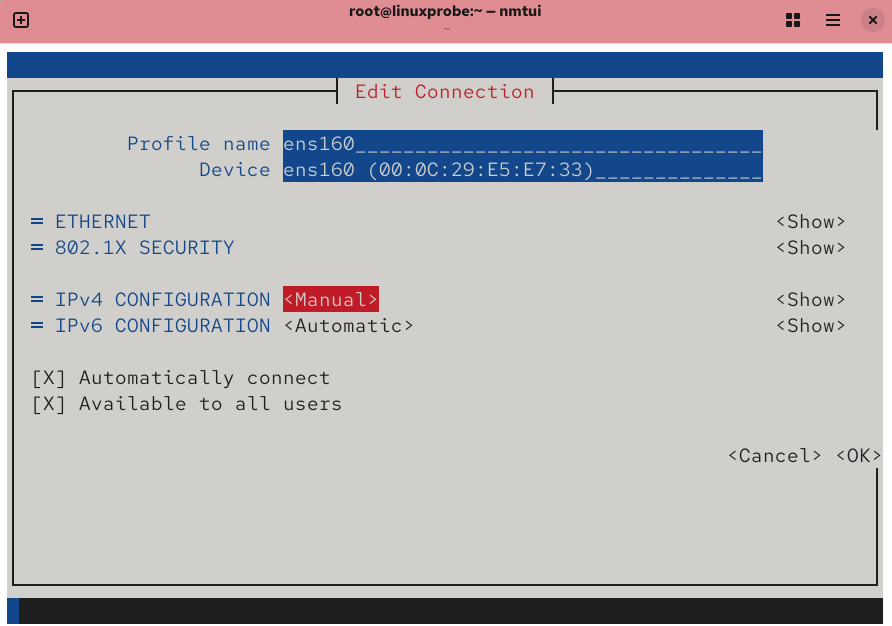
Figure 9-4 Switch IPv4 method to “Manual”
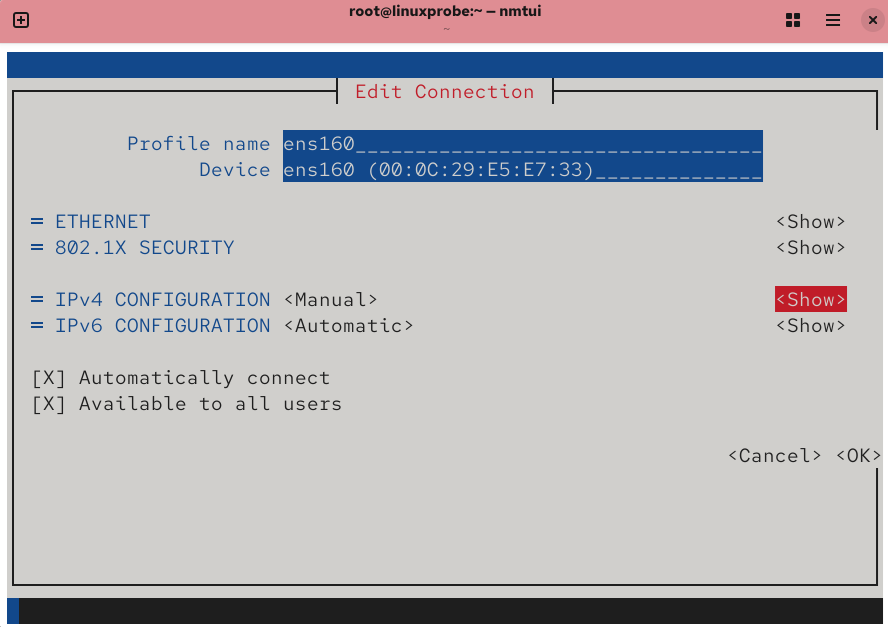
Figure 9-5 Show advanced details
Tips:
Throughout Learn Linux the Right Way, I use 192.168.10.10 for the server and 192.168.10.20 and 192.168.10.30 for clients. The benefit is that when configuring services later, you won’t have to rethink addresses each time—you can focus entirely on the configuration details.
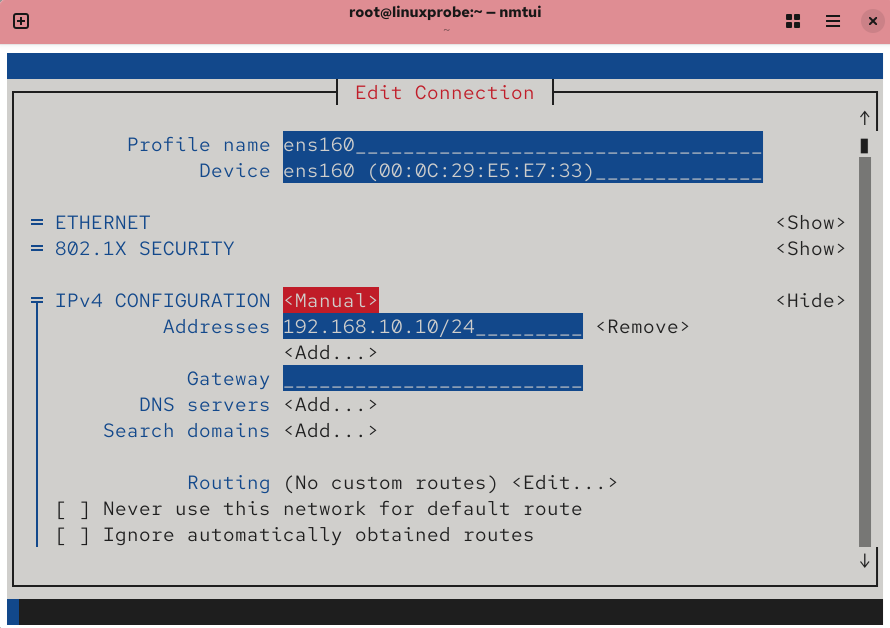
Figure 9-6 Fill in the address and prefix
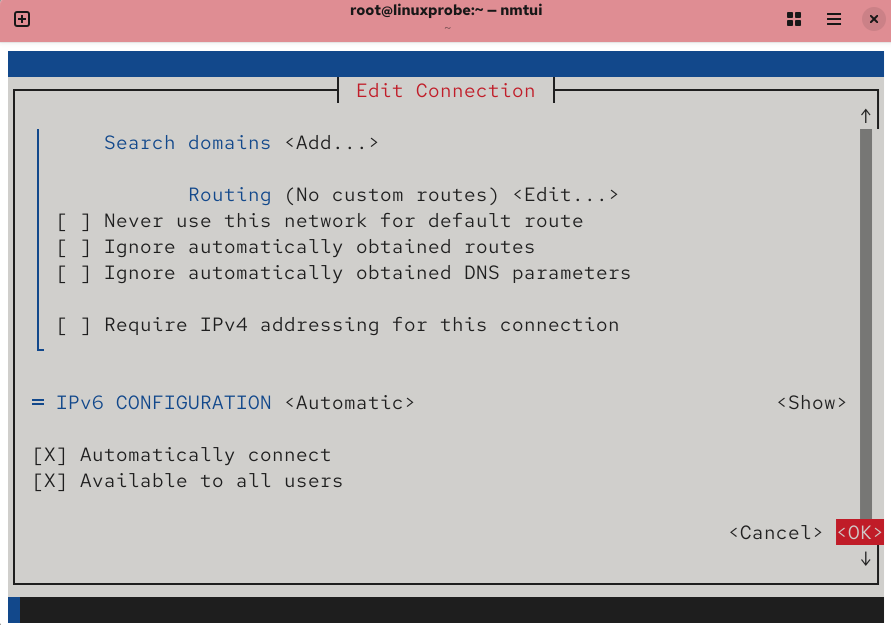
Figure 9-7 Save
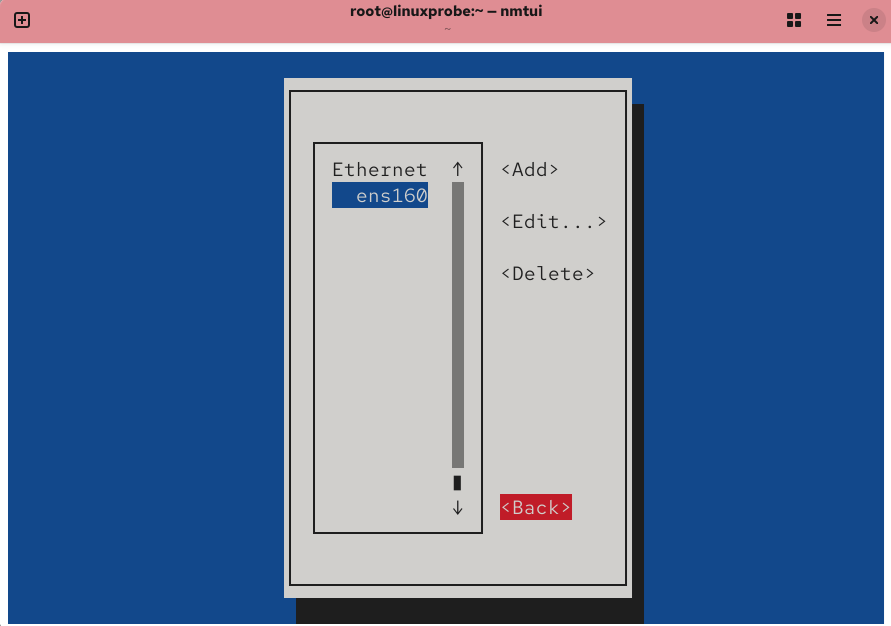
Figure 9-8 Back out when finished
Any changes made with nmtui are written to the connection profile; check if you like:
root@linuxprobe:~# cat /etc/NetworkManager/system-connections/ens160.nmconnection
[connection]
id=ens160
uuid=f75b55fd-2891-3f5d-ba2c-adadbcd7505c
type=ethernet
autoconnect-priority=-999
interface-name=ens160
timestamp=1741809963

[ethernet]

[ipv4]
address1=192.168.10.10/24
method=manual

[ipv6]
addr-gen-mode=eui64
method=auto
To make services pick up the new settings, reload the connection and bring it up; networking should be smooth now:
root@linuxprobe:~# nmcli connection reload
root@linuxprobe:~# nmcli connection up ens160
Connection successfully activated (D-Bus active path: /org/freedesktop/NetworkManager/ActiveConnection/3)
root@linuxprobe:~# ping -c 4 192.168.10.10
PING 192.168.10.10 (192.168.10.10) 56(84) bytes of data.
64 bytes from 192.168.10.10: icmp_seq=1 ttl=64 time=0.110 ms
64 bytes from 192.168.10.10: icmp_seq=2 ttl=64 time=0.196 ms
64 bytes from 192.168.10.10: icmp_seq=3 ttl=0.086 ms
64 bytes from 192.168.10.10: icmp_seq=4 ttl=0.064 ms

--- 192.168.10.10 ping statistics ---
4 packets transmitted, 4 received, 0% packet loss, time 3069ms
rtt min/avg/max/mdev = 0.064/0.114/0.196/0.050 ms
9.1.2 Create connection profiles
RHEL and CentOS use NetworkManager to manage links dynamically and keep devices online. I use nmcli (a powerful CLI) to inspect and manage it:
root@linuxprobe:~# nmcli connection show
NAME    UUID                                  TYPE      DEVICE
ens160  f75b55fd-2891-3f5d-ba2c-adadbcd7505c  ethernet  ens160
lo      1b2c44f7-af47-4291-9997-d8de6cf5fa3f  loopback  lo
root@linuxprobe:~# nmcli connection show ens160
connection.id:                          ens160
connection.uuid:                        f75b55fd-2891-3f5d-ba2c-adadbcd7505c
connection.stable-id:                   --
connection.type:                        802-3-ethernet
connection.interface-name:              ens160
connection.autoconnect:                 yes
RHEL 10 supports connection profiles so I can switch settings quickly (much like zones in firewalld). Suppose at the office I must set a static IP, but at home I use DHCP. Instead of editing addresses every time, I create two profiles and activate the one I need.
Create the office profile company and the home profile house (replace ens160 with your device name):
root@linuxprobe:~# nmcli connection add con-name company ifname ens160 autoconnect no type ethernet ip4 192.168.10.88/24 gw4 192.168.10.1
Connection 'company' (2040b650-edf6-4709-a1a3-4956ee0ffc2e) successfully added.
root@linuxprobe:~# nmcli connection add con-name house type ethernet ifname ens160
Connection 'house' (52b64b23-fb88-4248-af74-6b67f1237d60) successfully added.
List them and activate as needed:
root@linuxprobe:~# nmcli connection show
NAME     UUID                                  TYPE      DEVICE
ens160   f75b55fd-2891-3f5d-ba2c-adadbcd7505c  ethernet  ens160
lo       1b2c44f7-af47-4291-9997-d8de6cf5fa3f  loopback  lo
company  2040b650-edf6-4709-a1a3-4956ee0ffc2e  ethernet  --
house    52b64b23-fb88-4248-af74-6b67f1237d60  ethernet  --

root@linuxprobe:~# nmcli connection up company
Connection successfully activated (D-Bus active path: /org/freedesktop/NetworkManager/ActiveConnection/3)
root@linuxprobe:~# ifconfig
ens160: flags=4163<UP,BROADCAST,RUNNING,MULTICAST>  mtu 1500
        inet 192.168.10.88  netmask 255.255.255.0  broadcast 192.168.10.255
        inet6 fe80::2936:b131:9ed3:3120  prefixlen 64  scopeid 0x20<link>
        ether 00:0c:29:e5:e7:33  txqueuelen 1000  (Ethernet)
        RX packets 57244  bytes 4969903 (4.7 MiB)
        RX errors 0  dropped 0  overruns 0  frame 0
        TX packets 88  bytes 9242 (9.0 KiB)
        TX errors 0  dropped 0 overruns 0  carrier 0  collisions 0
If you use a VM, set the adapter to bridged mode (Figure 9‑9), then reboot the VM.
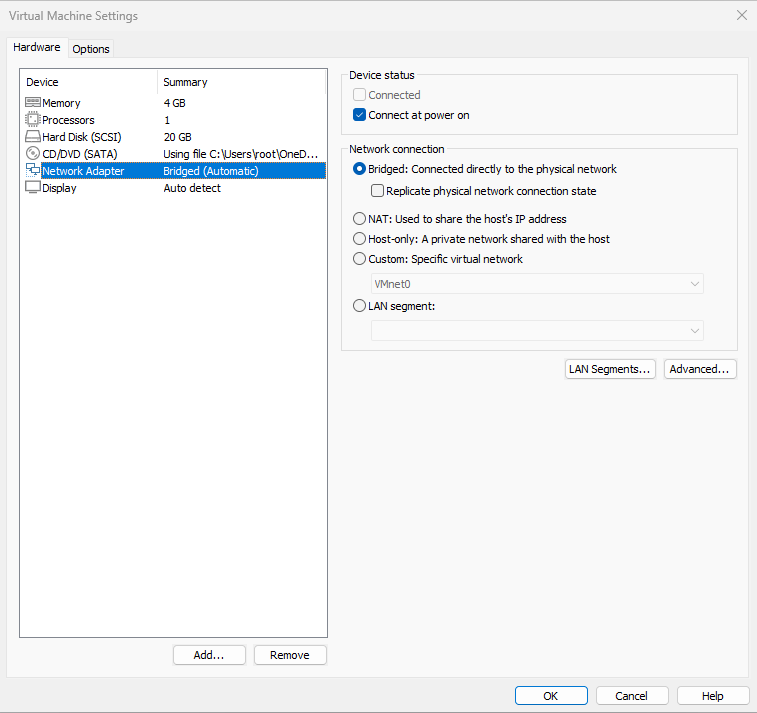
Figure 9-9 Set the NIC to bridged mode
Now activate the home profile and verify you received an address from the router:
root@linuxprobe:~# nmcli connection up house
Connection successfully activated (D-Bus active path: /org/freedesktop/NetworkManager/ActiveConnection/4)
root@linuxprobe:~# ifconfig
ens160: flags=4163<UP,BROADCAST,RUNNING,MULTICAST>  mtu 1500
        inet 192.168.31.191  netmask 255.255.255.0  broadcast 192.168.31.255
        inet6 fe80::a689:6ecd:767e:7571  prefixlen 64  scopeid 0x20<link>
        ether 00:0c:29:e5:e7:33  txqueuelen 1000  (Ethernet)
        RX packets 57592  bytes 5001809 (4.7 MiB)
        RX errors 0  dropped 0  overruns 0  frame 0
        TX packets 142  bytes 15284 (14.9 KiB)
        TX errors 0  dropped 0 overruns 0  carrier 0  collisions 0
If company works but house fails to obtain an address, your configuration is fine. The problem is likely external: perhaps your home uses PPPoE or Wi‑Fi sharing rather than a router; your school/company requires a captive‑portal login; or your physical host’s firewall is blocking the VM.
Delete profiles you no longer need:
root@linuxprobe:~# nmcli connection delete house
Connection 'house' (52b64b23-fb88-4248-af74-6b67f1237d60) successfully deleted.
root@linuxprobe:~# nmcli connection delete company
Connection 'company' (2040b650-edf6-4709-a1a3-4956ee0ffc2e) successfully deleted.
9.1.3 Bond two NICs
Production environments need 24×7 service. NIC bonding both increases throughput and provides redundancy. If one NIC fails, the other continues service.
Add a second NIC to the VM and make sure both adapters use the same network mode (Figures 9‑10 and 9‑11); only then can they be bonded.
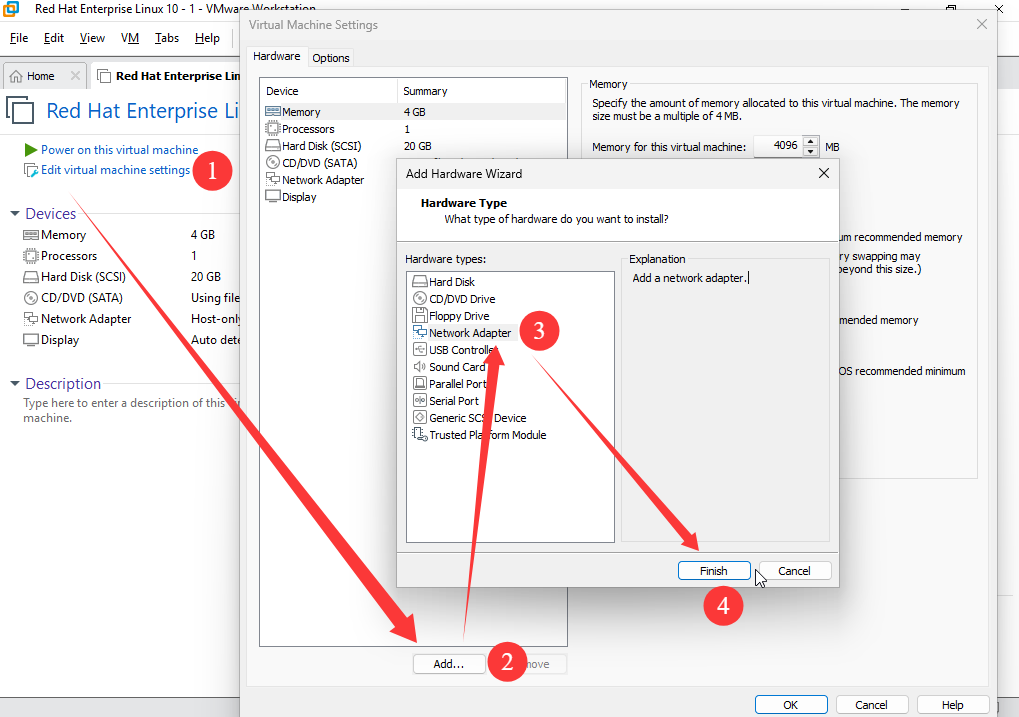
Figure 9-10 Add another NIC in the VM

Figure 9-11 Both NICs must be on the same network
This time I’ll use nmcli to configure bonding. The original devices become slaves of a new master bond0 and should not have their own IP settings (Figure 9‑12).

Figure 9-12 Bonding layout
Confirm your actual device names (they may differ from ens160 and ens192):
root@linuxprobe:~# ifconfig
ens160: flags=4163<UP,BROADCAST,RUNNING,MULTICAST>  mtu 1500
        inet 192.168.10.10  netmask 255.255.255.0  broadcast 192.168.10.255
        inet6 fe80::20c:29ff:fee5:e733  prefixlen 64  scopeid 0x20<link>
        ether 00:0c:29:e5:e7:33  txqueuelen 1000  (Ethernet)
        RX packets 1319  bytes 113553 (110.8 KiB)
        RX errors 0  dropped 0  overruns 0  frame 0
        TX packets 56  bytes 5770 (5.6 KiB)
        TX errors 0  dropped 0 overruns 0  carrier 0  collisions 0

ens192: flags=6211<UP,BROADCAST,RUNNING,SLAVE,MULTICAST>  mtu 1500
        ether 00:0c:29:e5:e7:3d  txqueuelen 1000  (Ethernet)
        RX packets 76  bytes 6960 (6.7 KiB)
        RX errors 0  dropped 0  overruns 0  frame 0
        TX packets 50  bytes 5014 (4.8 KiB)
        TX errors 0  dropped 0 overruns 0  carrier 0  collisions 0
1) Create the bond master
root@linuxprobe:~# nmcli connection add type bond con-name bond0 ifname bond0 bond.options "mode=balance-rr"
Connection 'bond0' (3fb9d014-677f-4b83-8579-d1f959905632) successfully added.
balance-rr (round‑robin) sends packets in device order to provide load balancing and better aggregate bandwidth. If a NIC fails, traffic automatically switches to the other. Another common mode is active‑backup, where one NIC carries traffic while the other stands by and takes over if the active NIC fails—great for redundancy.
2) Add slave interfaces
root@linuxprobe:~# nmcli connection add type ethernet slave-type bond con-name bond0-port1 ifname ens160 master bond0
Connection 'bond0-port1' (2976973b-34fe-4fe2-9135-91e6be5123c7) successfully added.
root@linuxprobe:~# nmcli connection add type ethernet slave-type bond con-name bond0-port2 ifname ens192 master bond0
Connection 'bond0-port2' (45036f7d-c042-49f3-8fa1-65a2671e92c9) successfully added.
3) Configure IP on the bond master
root@linuxprobe:~# nmcli connection modify bond0 ipv4.addresses 192.168.10.10/24
root@linuxprobe:~# nmcli connection modify bond0 ipv4.gateway 192.168.10.1
root@linuxprobe:~# nmcli connection modify bond0 ipv4.dns 192.168.10.1
root@linuxprobe:~# nmcli connection modify bond0 ipv4.dns-search linuxprobe.com
root@linuxprobe:~# nmcli connection modify bond0 ipv4.method manual
4) Bring it up
root@linuxprobe:~# nmcli connection up bond0
Connection successfully activated (controller waiting for ports) (D-Bus active path: /org/freedesktop/NetworkManager/ActiveConnection/5)
root@linuxprobe:~# nmcli device status
DEVICE  TYPE      STATE                                  CONNECTION
ens160  ethernet  connected                              ens160
ens192  ethernet  connected                              bond0-port2
bond0   bond      connecting (getting IP configuration)  bond0
lo      loopback  connected (externally)                 lo
When I ping 192.168.10.10, both NICs serve traffic. To test failover, remove one NIC from the VM hardware (Figure 9‑13). You usually lose at most one packet; the other NIC keeps service going.

Figure 9-13 Remove either NIC and watch failover
root@linuxprobe:~# ping 192.168.10.10
PING 192.168.10.10 (192.168.10.10) 56(84) bytes of data.
64 bytes from 192.168.10.10: icmp_seq=1 ttl=64 time=0.057 ms
64 bytes from 192.168.10.10: icmp_seq=2 ttl=64 time=0.068 ms
64 bytes from 192.168.10.10: icmp_seq=3 ttl=64 time=0.039 ms
ping: sendmsg: Network is unreachable
64 bytes from 192.168.10.10: icmp_seq=5 ttl=64 time=0.270 ms
64 bytes from 192.168.10.10: icmp_seq=6 ttl=64 time=0.092 ms
64 bytes from 192.168.10.10: icmp_seq=7 ttl=64 time=0.082 ms
64 bytes from 192.168.10.10: icmp_seq=8 ttl=64 time=0.089 ms
^C
--- 192.168.10.10 ping statistics ---
8 packets transmitted, 7 received, 12% packet loss, time 7006ms
rtt min/avg/max/mdev = 0.042/0.073/0.109/0.023 ms
9.2 Remote Control Service
SSH is one of the most common remote‑control services on Linux. Through three labs—basic configuration, key‑based authentication, and file transfer with scp—I’ll build solid proficiency with the protocol and the sshd daemon.
9.2.1 Configure the sshd service
SSH (Secure Shell) provides encrypted remote login and is the first choice for remote management today. Telnet used to be common, but it transmitted usernames/passwords and data in plain text, making it vulnerable to interception and tampering.
To manage a Linux system over SSH, configure the sshd service (the SSH server). It supports two authentication methods:
Password authentication — verify with a username and password.
Key‑based authentication — generate a key pair locally and upload the public key to the server; the server compares it against authorized keys. This is more secure.
Because “everything is a file” on Linux, changing a service’s parameters means editing its configuration file. For sshd, the main file is /etc/ssh/sshd_config. Lines beginning with # are comments; to activate an option, edit it and remove the #. Common options are shown in Table 9‑1.
Table 9-1 Common sshd_config options
| Option | Purpose |
|---|---|
| Port 22 | Default sshd port |
| ListenAddress 0.0.0.0 | IP address to bind/listen on |
| Protocol 2 | SSH protocol version |
| HostKey /etc/ssh/ssh_host_key | Server key for protocol v1 (DES) |
| HostKey /etc/ssh/ssh_host_rsa_key | RSA host key for protocol v2 |
| HostKey /etc/ssh/ssh_host_dsa_key | DSA host key for protocol v2 |
| PermitRootLogin yes | Allow direct root login |
| StrictModes yes | Refuse connections if a user’s private key permissions are insecure |
| MaxAuthTries 6 | Max password attempts |
| MaxSessions 10 | Max number of sessions |
| PasswordAuthentication yes | Allow password authentication |
| PermitEmptyPasswords no | Allow empty passwords (unsafe) |
We’ll use two VMs in the lab (Table 9‑2).
Table 9-2 Lab hosts
| Address | Hostname | OS | Role |
|---|---|---|---|
| 192.168.10.10 | Server | Linux | Server |
| 192.168.10.20 | Client | Linux | Client |
On RHEL 10, sshd is installed and enabled by default. From the client, connect with ssh [options] user@host and exit with exit. The first time, confirm the fingerprint with yes:
root@Client:~# ssh 192.168.10.10
The authenticity of host '192.168.10.10 (192.168.10.10)' can't be established.
ED25519 key fingerprint is SHA256:0R7Kuk/yCTlJ+E4G9y9iX/A/hAklHkALm5ZUgnJ01cc.
This key is not known by any other names.
Are you sure you want to continue connecting (yes/no/[fingerprint])? yes
Warning: Permanently added '192.168.10.10' (ED25519) to the list of known hosts.
root@192.168.10.10's password: Enter service here
Last login: Thu Mar 13 06:56:57 2025
root@Server:~# exit
logout
Connection to 192.168.10.10 closed.
Allowing root to log in with a password is convenient but not ideal. I recommend allowing only key‑based login for root, or even disallowing root login entirely. To forbid root login by any method, set:
root@Server:~# vim /etc/ssh/sshd_config
 39 #LoginGraceTime 2m
 40 PermitRootLogin no
 41 #StrictModes yes
 42 #MaxAuthTries 6
 43 #MaxSessions 10
Also comment out the installer‑generated snippet that would otherwise allow it:
root@Server:~# vim /etc/ssh/sshd_config.d/01-permitrootlogin.conf
# This file has been generated by the Anaconda Installer.
# Allow root to log in using ssh. Remove this file to opt-out.
# PermitRootLogin yes
As usual, services don’t automatically reload config changes. Restart and enable sshd:
root@Server:~# systemctl restart sshd
root@Server:~# systemctl enable sshd
Now root login is denied:
root@Client:~# ssh 192.168.10.10
root@192.168.10.10's password: Enter service here
Permission denied, please try again.
For the next labs, restore PermitRootLogin yes and restart so that we can proceed:
root@Server:~# vim /etc/ssh/sshd_config
 39 #LoginGraceTime 2m
 40 PermitRootLogin yes
 41 #StrictModes yes
 42 #MaxAuthTries 6
 43 #MaxSessions 10
root@Server:~# systemctl restart sshd
Windows clients are fine too: use Xshell, PuTTY, SecureCRT, or similar (Figures 9‑14 to 9‑16).
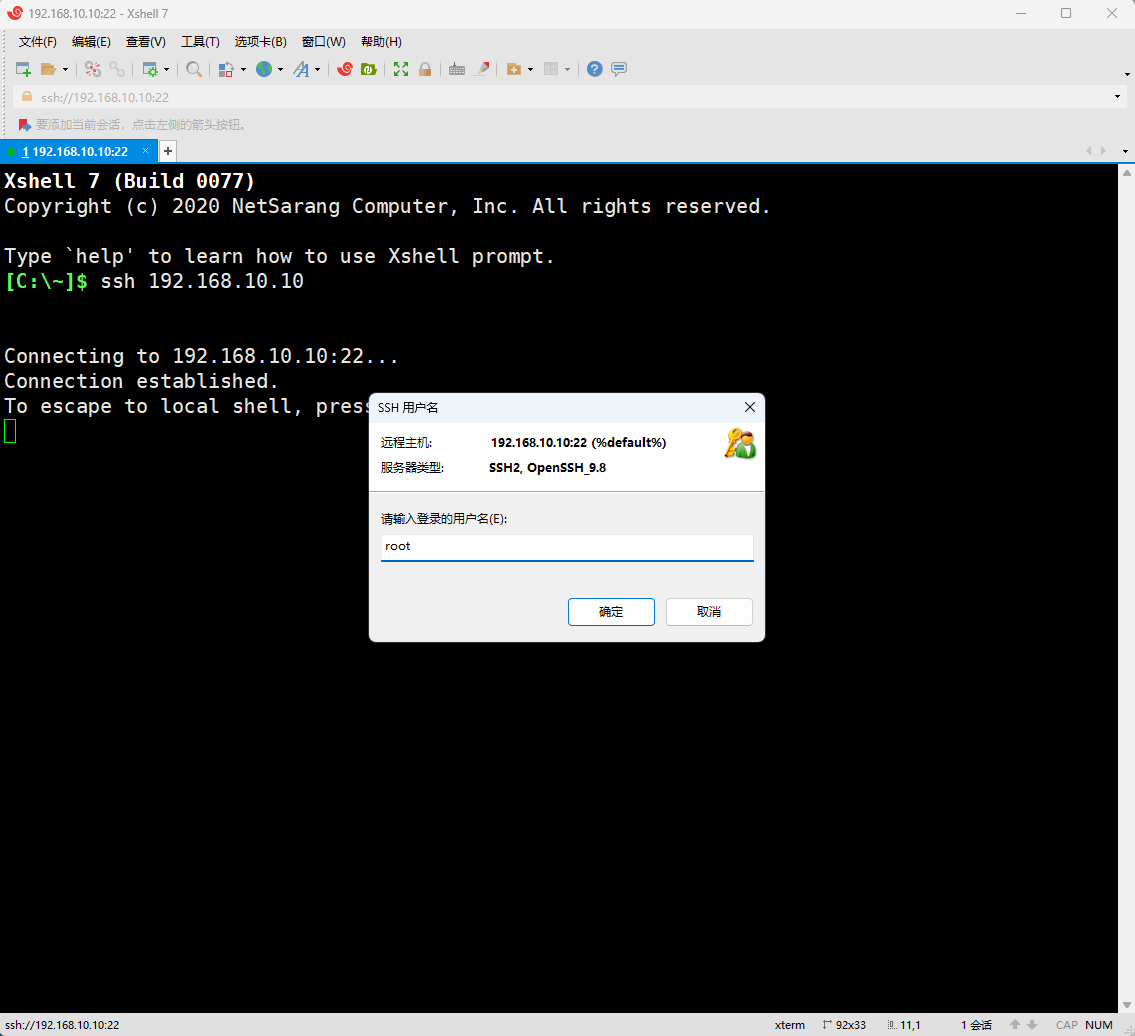
Figure 9-14 Enter username
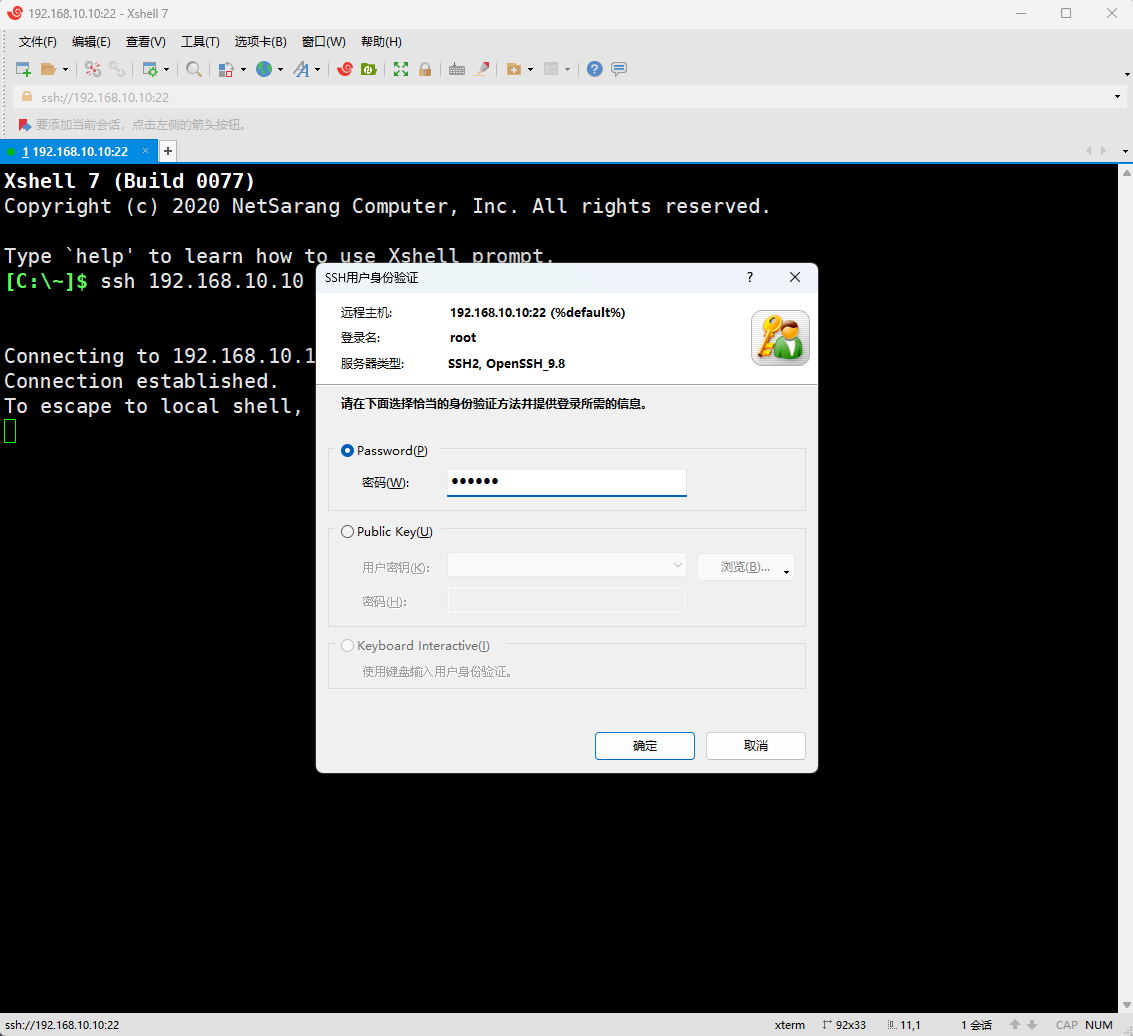
Figure 9-15 Enter password
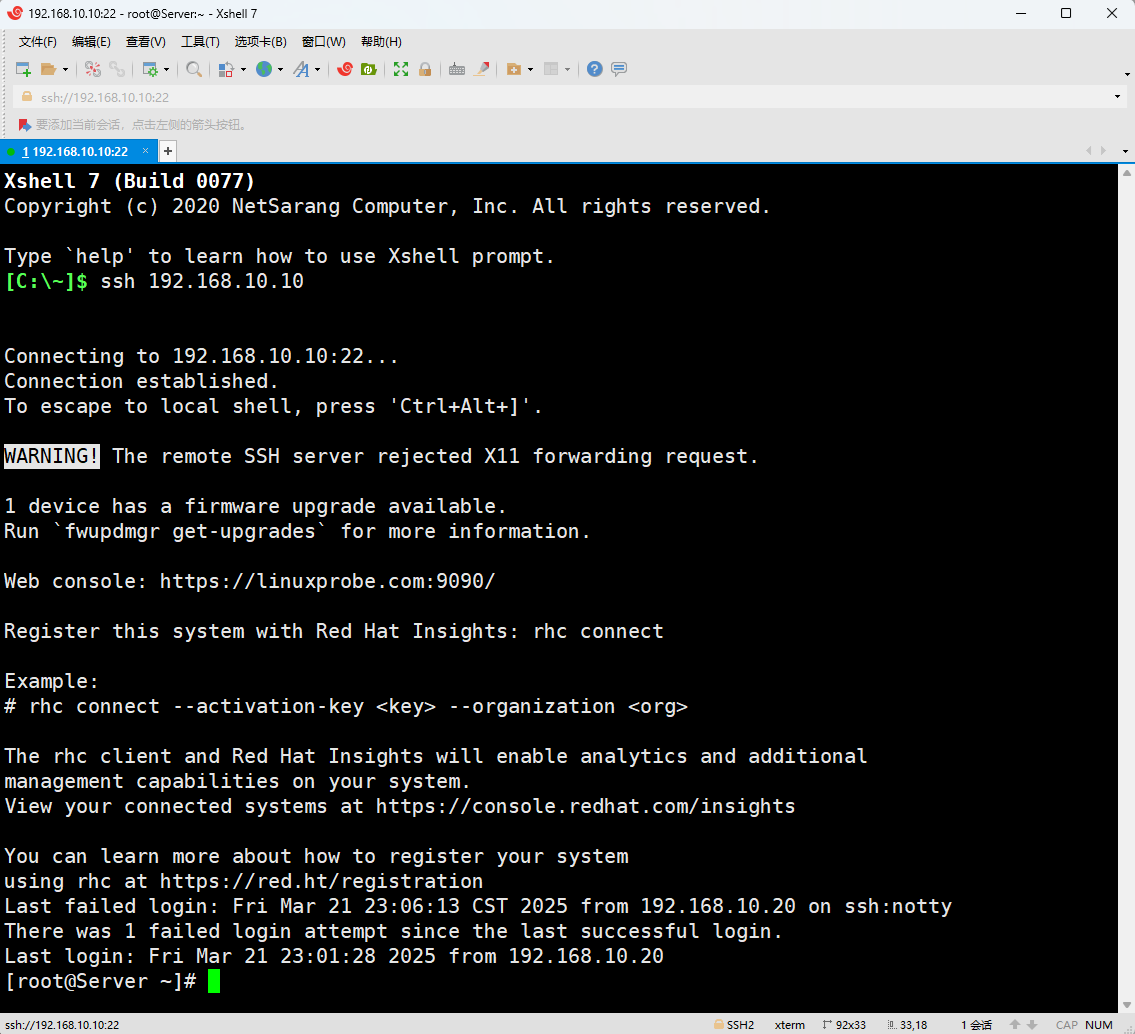
Figure 9-16 Logged in
9.2.2 Key‑based authentication
Cryptography encodes plain text into ciphertext using keys. In asymmetric crypto, a public key encrypts and the private key decrypts; only the private‑key holder can read the data even if it’s intercepted.
Passwords can be brute‑forced or sniffed; properly configured keys are safer. Configure them in four steps.
Step 1: Generate a key pair on the client.
root@Client:~# ssh-keygen
Generating public/private ed25519 key pair.
Enter the file in which to save the key (/root/.ssh/id_ed25519): Press Enter or set the key storage path.
Enter passphrase (empty for no passphrase): Press Enter or set the key passphrase.
Enter same passphrase again: Press Enter again or set the key passphrase.
Your identification has been saved in /root/.ssh/id_ed25519
Your public key has been saved in /root/.ssh/id_ed25519.pub
The key fingerprint is:
SHA256:5EbLRQAHIY4+1uPwWsJAytg5YK1dYbAZyCvBAHhwWkc root@Client
The key's randomart image is:
+--[ED25519 256]--+
|X.++Eo++o..      |
|oBo+=... .       |
|o=o+..  o .      |
|B=oo.  = o       |
|=oO.o   S        |
| + * . .         |
|  o +            |
|   +             |
|  .              |
+----[SHA256]-----+
Step 2: Copy the public key to the server.
root@Client:~# ssh-copy-id 192.168.10.10
/usr/bin/ssh-copy-id: INFO: attempting to log in with the new key(s), to filter out any that are already installed
/usr/bin/ssh-copy-id: INFO: 1 key(s) remain to be installed -- if you are prompted now it is to install the new keys
root@192.168.10.10's password: Enter the server administrator password here

Number of key(s) added: 1

Now try logging into the machine, with:   "ssh '192.168.10.10'"
and check to make sure that only the key(s) you wanted were added.
Step 3: On the server, set PasswordAuthentication no so only keys are accepted; then restart sshd. I don’t recommend PermitRootLogin prohibit-password here: it applies only to root and discards passwords silently, which confuses users.
root@Server:~# vim /etc/ssh/sshd_config
 64 # To disable tunneled clear text passwords, change to no here!
 65 PasswordAuthentication no
 66 #PermitEmptyPasswords no
root@Server:~# systemctl restart sshd
Step 4: Log in from the client—no password required:
root@Client:~# ssh 192.168.10.10
Last login: Fri Mar 21 23:11:10 2025 from 192.168.10.1
root@Server:~#
Without a key, access is refused and there’s no password prompt (Figure 9‑17).
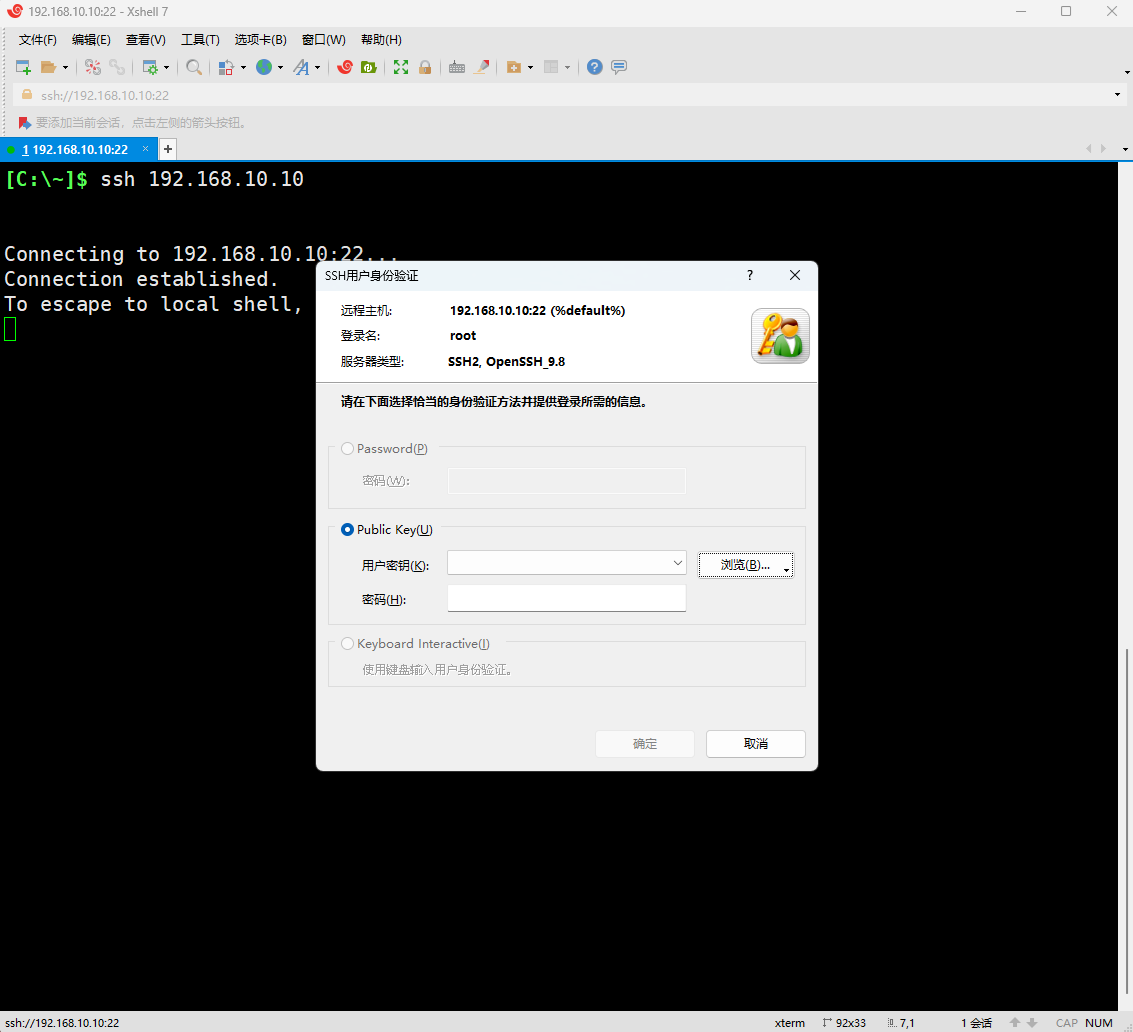
Figure 9-17 No key, no login
9.2.3 Transfer files with scp
scp (secure copy) transfers files over SSH. Its syntax is scp [options] local-file remote-user@remote-ip:remote-dir.
Unlike cp, scp works across the network and encrypts all data. Common options are in Table 9‑3.
Table 9-3 scp options
| Option | Purpose |
|---|---|
| -v | Verbose output |
| -P | Remote sshd port |
| -r | Copy directories recursively |
| -6 | Use IPv6 |
Copy a file to the server’s /home:
root@Client:~# echo "Welcome to LinuxProbe.Com" > readme.txt
root@Client:~# scp /root/readme.txt 192.168.10.10:/home
readme.txt                                    100%   26    20.1KB/s   00:00
Download a file from the server:
root@Client:~# scp 192.168.10.10:/etc/redhat-release /root
redhat-release                                100%   54    22.7KB/s   00:00
root@Client:~# cat redhat-release
Red Hat Enterprise Linux release 10.0
9.3 Uninterrupted Sessions (Tmux)
When a remote session closes, the processes you launched usually die with it. That’s unacceptable for long installs, backups, or scripts. Tmux keeps sessions alive, gives you multiple windows and panes, and even supports shared sessions for pair work.
Install Tmux from your local repos (see 8.3.2 for repo setup), then:
root@linuxprobe:~# dnf install tmux
Tips:
For brevity, I’ll omit repeated, unhelpful package‑manager lines in later chapters.
9.3.1 Manage sessions
Enter a session simply by running tmux (Figure 9‑18). A green status bar appears at the bottom showing the session number, name, host, and time.

Figure 9-18 Tmux session
Exit with exit (Figure 9‑19).
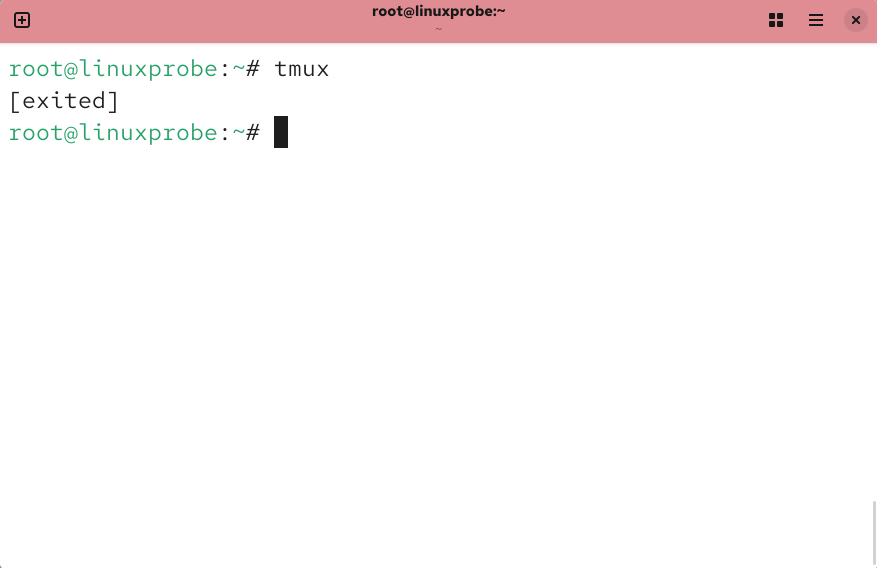
Figure 9-19 Leaving a session
Name sessions so they’re easier to recognize (e.g., backup):
root@linuxprobe:~# tmux new -s backup
Detach to leave it running in the background:
root@linuxprobe:~# tmux detach
[detached (from session backup)]
Closing the terminal window has the same effect (Figure 9‑20)—processes continue to run.
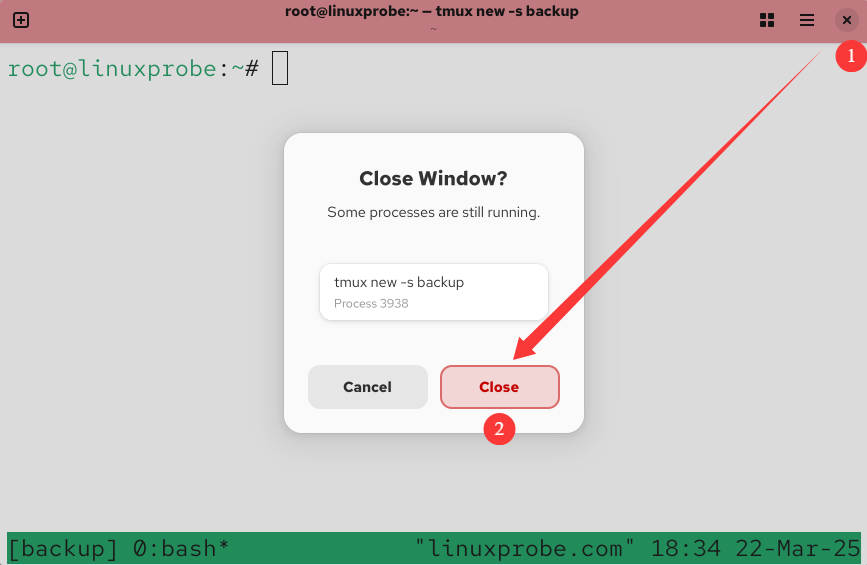
Figure 9-20 Closing the terminal
List and reattach:
root@linuxprobe:~# tmux ls
backup: 1 windows (created Sat Mar 22 18:34:42 2025)

root@linuxprobe:~# tmux attach -t backup
Kill a session you no longer need:
root@linuxprobe:~# tmux attach -t backup
[exited]
root@linuxprobe:~# tmux ls
no server running on /tmp/tmux-0/default
Run a one‑off command in a temporary session (it ends when the command ends):
root@linuxprobe:~# tmux new "vim memo.txt"
9.3.2 Manage panes
One terminal is rarely enough. Split the display to work in parallel (Figures 9‑21 and 9‑22):
tmux split-window          # split top/bottom
tmux split-window -h       # split left/right
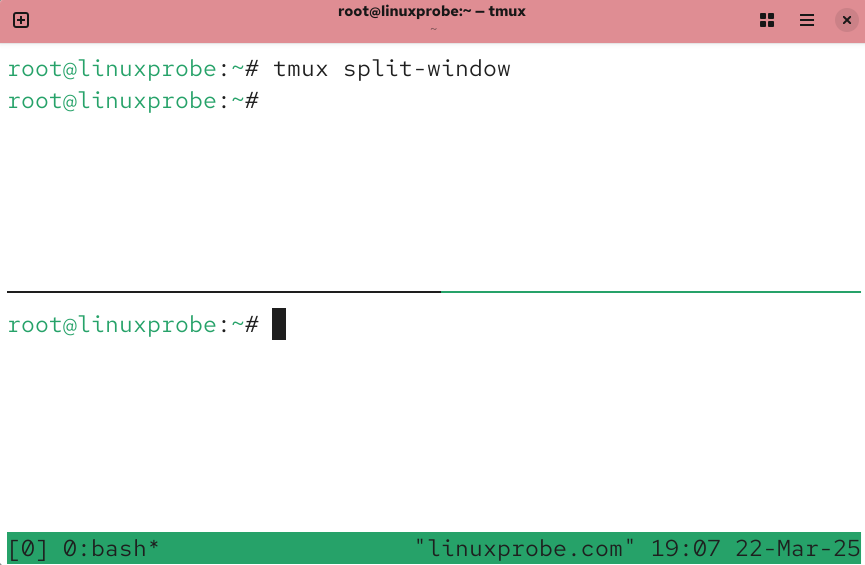
Figure 9-21 Top/bottom split
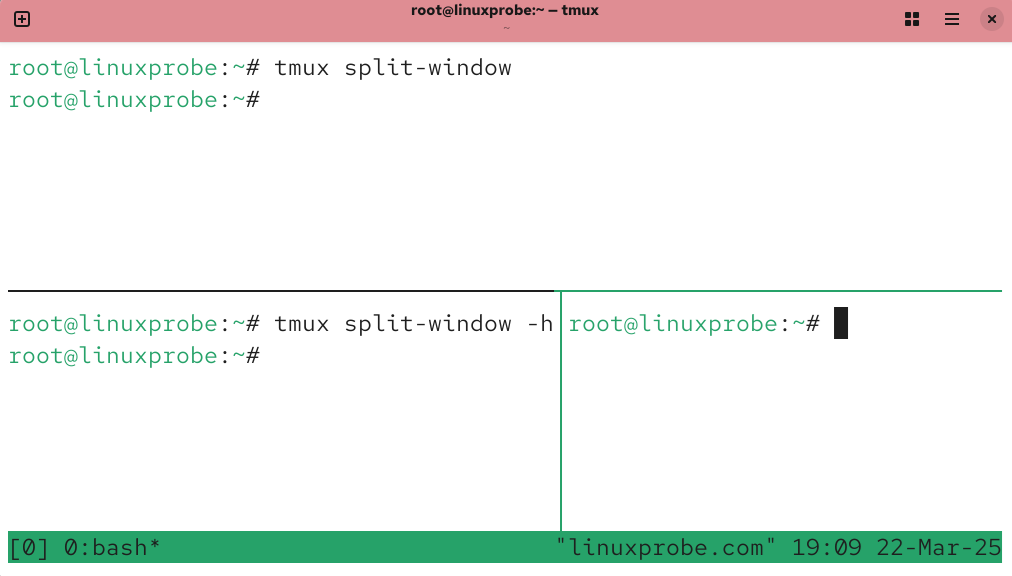
Figure 9-22 Left/right split
Resize panes with Ctrl+B, then the arrow keys (e.g., Ctrl+B, Right Arrow).
Switch panes (Table 9‑4).
Table 9-4 Switch between panes
| Command | Action |
|---|---|
tmux select-pane -U | Focus the pane above |
tmux select-pane -D | Focus the pane below |
tmux select-pane -L | Focus the pane to the left |
tmux select-pane -R | Focus the pane to the right |
Swap panes (Table 9‑5).
Table 9-5 Swap panes
| Command | Action |
|---|---|
tmux swap-pane -U | Swap with the pane above |
tmux swap-pane -D | Swap with the pane below |
Figures 9‑23 and 9‑24 show a swap:
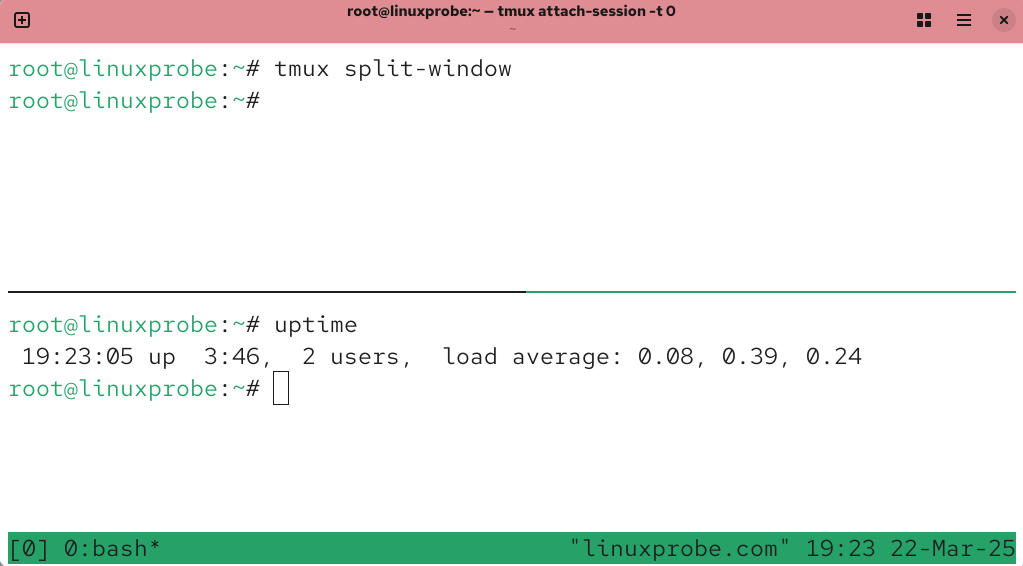
Figure 9-23 Before swapping
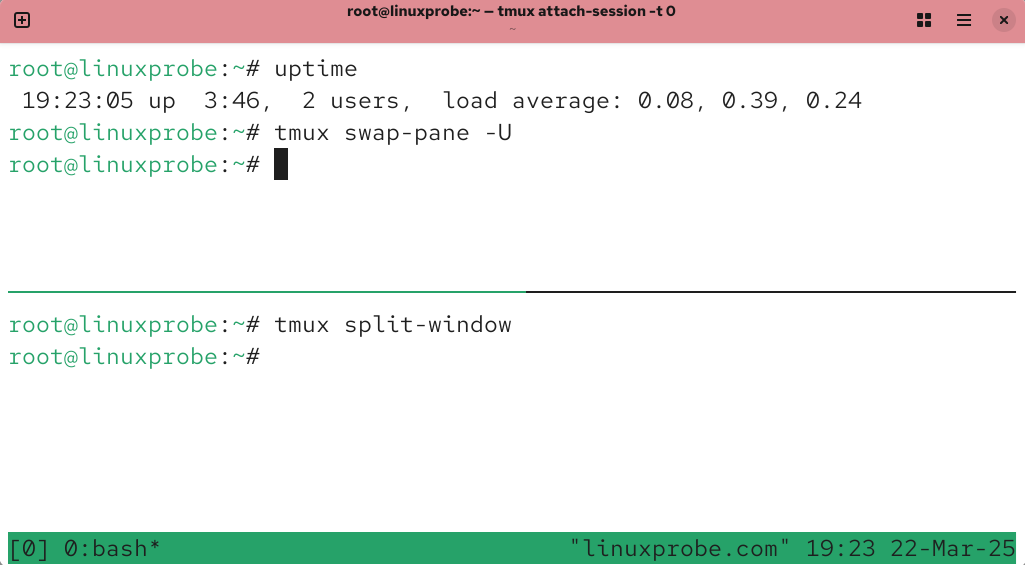
Figure 9-24 After swapping
Tmux also offers handy shortcuts. Press Ctrl+B, release, then press the shortcut key (Table 9‑6).
Table 9-6 Common pane shortcuts (after pressing Ctrl+B)
| Shortcut | Action |
|---|---|
| % | Split left/right |
| " | Split top/bottom |
| ; | Previous pane |
| o | Next pane |
| { | Swap with previous pane |
| } | Swap with next pane |
| x | Close the current pane |
| ! | Break the pane into a new window |
| q | Show pane numbers |
Tips:
Remember to press Ctrl+B first, then the shortcut—don’t hold them together.
Figures 9‑25 and 9‑26 illustrate swapping panes with Ctrl+B then }.
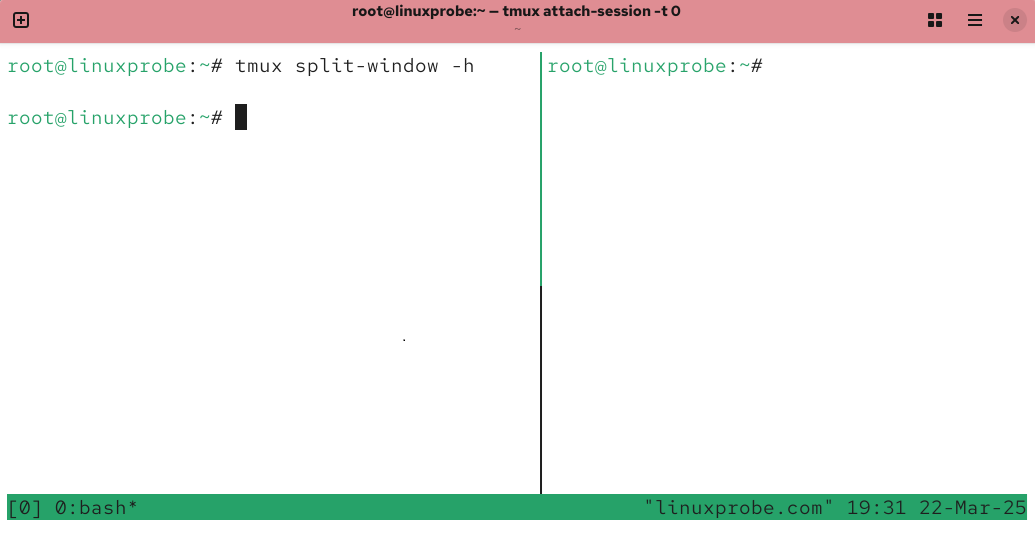
Figure 9-25 Before swap
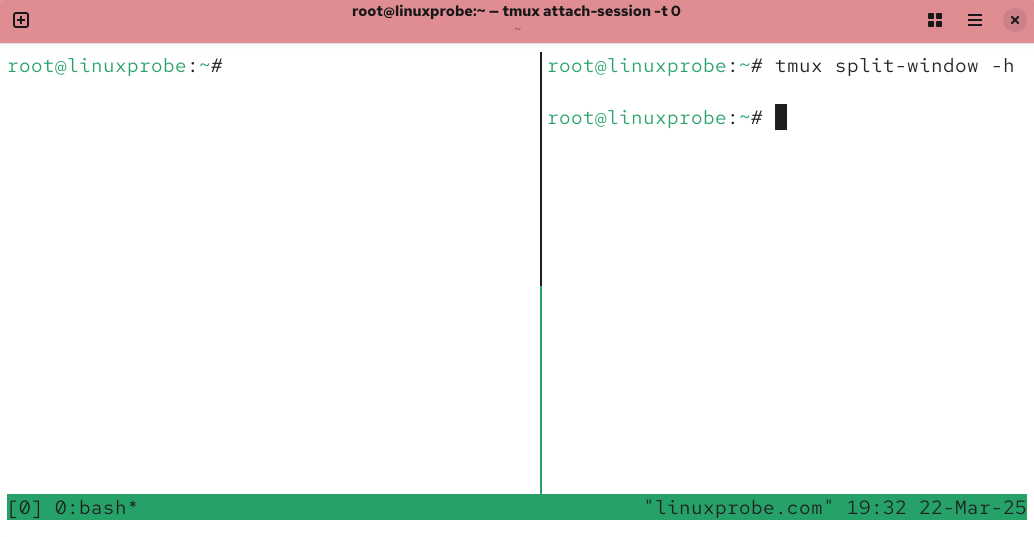
Figure 9-26 After swap
9.3.3 Share a session
Session sharing is fantastic for teaching, pair debugging, and change reviews. Multiple users can watch (and, if permitted, type into) the same terminal (Figure 9‑27).
From Client A, create a session named share; from Client B, attach to it:
root@ClientA:~# ssh 192.168.10.10
root@ClientA:~# tmux new -s share

root@ClientB:~# ssh 192.168.10.10
……
root@ClientB:~# tmux attach-session -t share
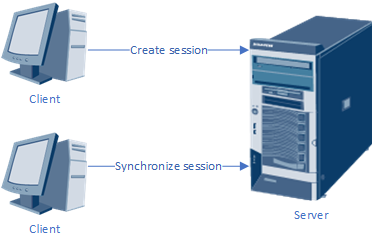
Figure 9-27 Session sharing overview
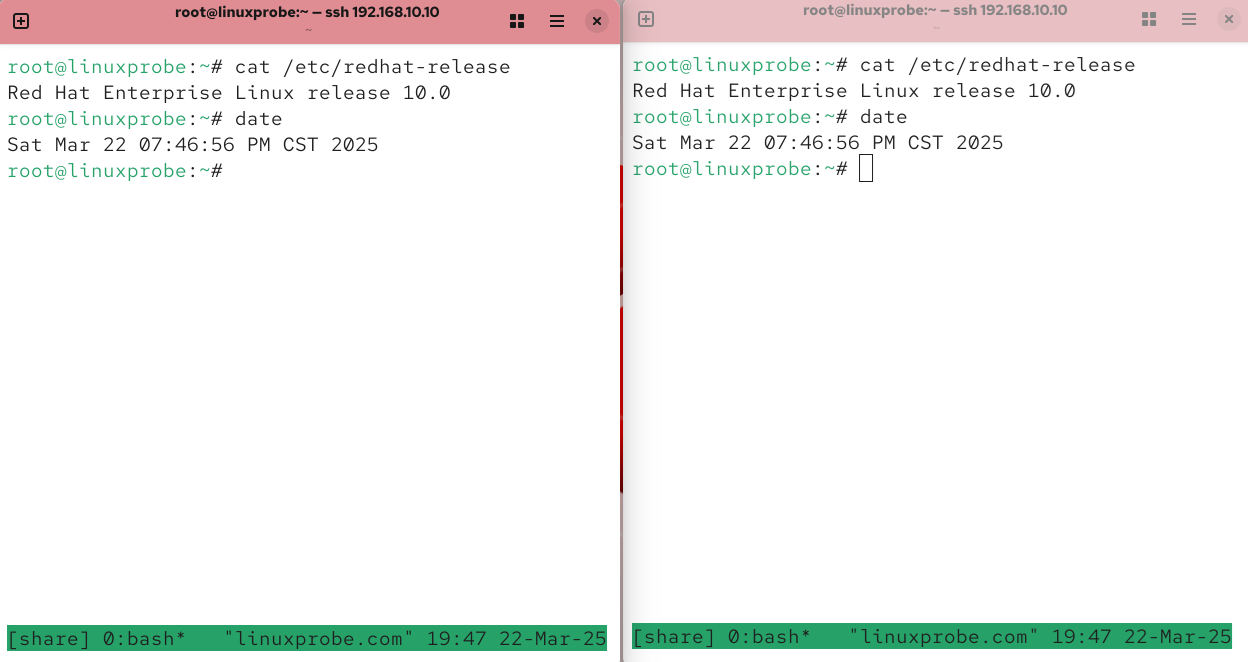
Figure 9-28 Two views, one session
9.4 Searching Logs
Linux logs almost everything: kernel messages, services starting and stopping, warnings, errors, and security events. RHEL 10 uses rsyslog. Different logs go to different files to make searching easier (Table 9‑7).
Table 9-7 Common log files
| Path | Purpose |
|---|---|
| /var/log/boot.log | Boot events and messages |
| /var/log/lastlog | Successful logins: time, TTY, IP |
| /var/log/btmp | Failed logins: time, TTY, IP |
| /var/log/messages | System and service events and errors |
| /var/log/secure | Security‑related events |
| /var/log/wtmp | System boots and shutdowns |
Conceptually, logs fall into three groups: system logs (kernel and system state), user logs (who logged in, from where, and what they did), and program logs (each major service writes its own format).
To query the system journal, use journalctl. It filters by severity, service, and time window. Common options are in Table 9‑8.
Table 9-8 Common journalctl options
| Option | Purpose |
|---|---|
| -k | Kernel messages |
| -b | Messages from this boot |
| -u | Filter by unit/service |
| -n | Show last N lines |
| -p | Filter by priority/severity |
| -f | Follow (tail) the log |
| --since | Start time |
| --disk-usage | Show journal disk usage |
Examples:
Show the last five lines:
root@linuxprobe:~# journalctl -n 5
Mar 22 19:56:09 linuxprobe.com systemd[1]: Starting sshd.service - OpenSSH serv>
Mar 22 19:56:09 linuxprobe.com (sshd)[3650]: sshd.service: Referenced but unset>
Mar 22 19:56:09 linuxprobe.com sshd[3650]: Server listening on 0.0.0.0 port 22.
Mar 22 19:56:09 linuxprobe.com sshd[3650]: Server listening on :: port 22.
Mar 22 19:56:09 linuxprobe.com systemd[1]: Started sshd.service - OpenSSH serve>
Follow new messages as they arrive (like tail -f):
root@linuxprobe:~# journalctl -f
Mar 22 19:56:09 linuxprobe.com systemd[1]: sshd-keygen@ecdsa.service - OpenSSH ecdsa Server Key Generation was skipped because no trigger condition checks were met.
Rsyslog defines nine severity levels (Table 9‑9). Focus on the high‑priority entries first to avoid drowning in noise.
Table 9-9 Severity levels
| Level | Meaning |
|---|---|
| emerg | System unusable (e.g., kernel panic) |
| alert | Immediate action required |
| crit | Critical conditions |
| err | Error conditions |
| warning | Warning conditions |
| notice | Normal but significant |
| info | Informational |
| debug | Debug‑level messages |
| none | No priority; don’t log |
Filter by severity:
root@linuxprobe:~# journalctl -p crit
Mar 13 04:05:59 linuxprobe.com kernel: Warning: Unmaintained driver is detected>
…
Filter by time:
root@linuxprobe:~# journalctl --since today
…

root@linuxprobe:~# journalctl --since "-1 hour"
…

root@linuxprobe:~# journalctl --since "18:00" --until "20:00"
…

root@linuxprobe:~# journalctl --since "2025-03-01" --until "2025-06-01"
…
Filter by service (systemd unit names end with .service):
root@linuxprobe:~# journalctl -u sshd
Mar 13 04:06:03 linuxprobe.com systemd[1]: Starting sshd.service - OpenSSH serv>
…
Review Questions
-
List several ways to configure network parameters on a Linux system.
Answer: Usenmtui,nmcli,nm-connection-editor, or edit the connection profile files directly. -
What is the purpose of connection profiles on RHEL 10?
Answer: To switch network parameters quickly for different environments usingnmclito activate the desired profile. -
What are the characteristics of the
balance-rrbonding mode?
Answer: Both NICs are active and share traffic; failover is automatic; no special switch features are required. -
After editing a service’s configuration file, what else must you do for changes to take effect?
Answer: Restart (or reload) the service, and enable it if you want it started at boot. -
How do you disallow remote root login entirely in
sshd?
Answer: SetPermitRootLogin noin/etc/ssh/sshd_config(and remove/override installer snippets), then restartsshd. -
Outline the steps for key‑based SSH authentication.
Answer: On the client, runssh-keygen; copy the public key withssh-copy-id; on the server setPasswordAuthentication noand restartsshd; connect from the client (no password needed). -
What’s the simplest way to copy
/root/out.txtto/homeon192.168.10.20(both hosts run Linux)?
Answer:scp /root/out.txt root@192.168.10.20:/home(authenticate as required). -
Tmux keeps sessions alive even if the network drops. How do you restore a session named
linux?
Answer:tmux attach -t linux. -
How do you show only the highest‑priority log entries (
emerg) withjournalctl?
Answer:journalctl -p emerg. -
Without
journalctl, where do you find historical login information?
Answer: In/var/log/lastlog.