Chapter 15 · Deploying a Mail System with Postfix and Dovecot
Chapter Overview
Email is one of the most frequently used network services in daily work and life. In this chapter I first trace the origins of email, then explain the common mail protocols—SMTP, POP3, and IMAP4—and the roles of MUA, MTA, and MDA.
I then demonstrate how to configure a complete mail system on Linux using the Postfix SMTP server and the Dovecot POP3/IMAP server, focusing on the most important configuration parameters. I also integrate the bind DNS service to provide name resolution and verify end‑to‑end sending and receiving between clients and the server. Finally, I show how to configure user aliases so you can better control and manage mail accounts and mailbox addresses in production environments.
15.1 Email Systems
In the 1960s, during the Cold War, the U.S. Department of Defense launched the ARPANET research project to maintain a technological edge. ARPANET was the prototype of today’s internet and the world’s first operational packet‑switching network. But it faced a serious challenge: scientists were distributed across the United States, and time zones often prevented timely sharing of research results. They urgently needed a way to transmit data between computers over the network.
Although the web and FTP services introduced in Chapters 10 and 11 can exchange data, they’re like a phone call—both sides must be online at the same time. If the recipient’s host is down or the researcher steps away, progress stalls. While working on ARPANET‑related research, MIT’s Ray Tomlinson believed it was necessary to design a “letter‑like” service and prepare a “mailbox” for receiving those letters so that even if the other party was temporarily offline, data reception could still complete and be processed later. In the fall of 1971 he sent the first electronic mail using the SNDMSG program—marking the birth of email on the internet.
Because email must be addressed to a unique recipient on the internet, Ray Tomlinson standardized mailbox names in the form name@hostname. He chose the @ symbol as a separator simply because personal names and hostnames don’t contain it.
Email systems rely on protocols to move messages. Common ones include:
Simple Mail Transfer Protocol (SMTP): sends and relays messages; uses TCP port 25.
Post Office Protocol version 3 (POP3): stores messages locally on the client; uses TCP port 110.
Internet Message Access Protocol version 4 (IMAP4): accesses mail on the server; uses TCP port 143.
Within an email system, servers play different roles. A Mail User Agent (MUA) is the client used by users to send and receive mail. Because email allows offline reception, there must be a mailbox server to store messages—this is the Mail Delivery Agent (MDA), which saves mail from the Mail Transfer Agent (MTA) into the local inbox. The MTA’s job is to relay and process mail between different providers, forwarding messages from the sender’s MUA to the appropriate recipient MTA. For example, Figure 15‑1 shows the path when sending an email from a Sina mailbox to a Gmail mailbox.

Figure 15-1 The transmission process of an email
Overall, most network services behave like a phone call when transmitting information and require both parties to be online simultaneously. In contrast, when using email, I can send a message and go offline without waiting for delivery to finish. If the recipient server is down or temporarily offline, the sender’s MTA automatically stores the content locally and retries after detecting recovery—no operator intervention needed. Later, the recipient’s MUA finds the message in their inbox.
In production, when deploying an enterprise email system, I strongly recommend focusing on the following ten items:
Add anti‑spam and antivirus modules: integrate filtering to block spam and malicious emails from invading the company mailbox.
Encrypt mail: use SSL/TLS to encrypt content during transport and at rest to prevent theft or tampering.
Add monitoring and auditing: deploy modules to monitor mail content in real time, accurately identify sensitive words and data leakage.
Ensure stability: it’s crucial to keep the email system stable; prepare emergency plans and actively defend against DDoS attacks.
Backups and recovery: establish a robust backup mechanism with regular full or incremental backups, and maintain a detailed, actionable disaster‑recovery plan.
Authentication and access control: enforce strict identity verification, require strong passwords and periodic rotation, and strengthen access control via multi‑factor authentication.
Logging and monitoring: enable detailed logs of sends, receives, and errors to support audits and troubleshooting.
Regular updates and patches: keep server software current with security patches to remediate known vulnerabilities.
Prevent abuse: set reasonable send/receive limits and supervise behavior to prevent resource overuse and spam.
Scalability and load balancing: design for growth and use load‑balancing to distribute resources so the system scales smoothly as users increase.
15.2 Building a Basic Mail System
A minimal email system must provide both sending and receiving. I use Postfix (SMTP) for sending and Dovecot (POP3) for receiving so users can send and fetch mail with Outlook Express, Foxmail, and similar clients. Figure 15‑2 shows the overall flow.
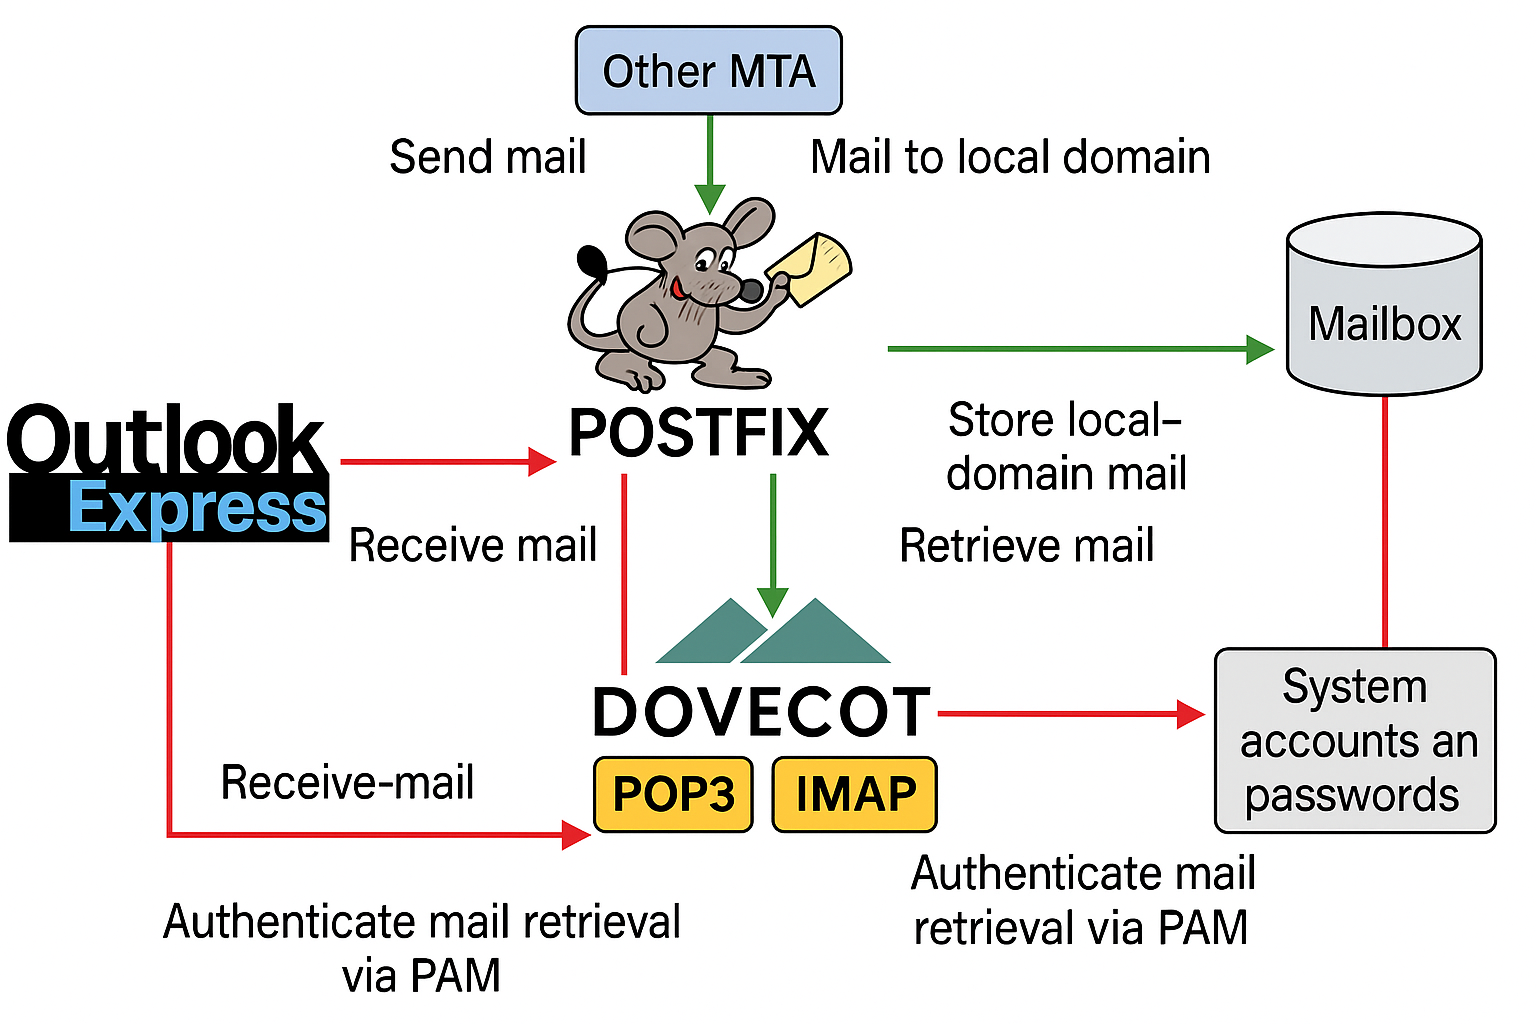
Figure 15-2 Workflow of an email system
On many early Linux systems, the default sending service was Sendmail, but on RHEL 10 it’s been replaced with Postfix. Compared with Sendmail, Postfix eliminates many unnecessary steps and significantly improves stability and concurrency.
In general, mailbox addresses follow the format username@hostname(domain)—for example, root@linuxprobe.com. If you give me root@192.168.10.10, I might not realize that’s an email address and could mistake it for SSH connection info. To better validate the mail system, I first deploy the bind service to provide DNS name resolution for both the mail server and the client.
Step 1: Configure the server hostname and make sure it matches the sending domain.
root@linuxprobe:~# vim /etc/hostname
mail.linuxprobe.com
root@linuxprobe:~# hostname
mail.linuxprobe.com
Tips:
If the hostname change doesn’t take effect immediately, reboot the server; or runhostnamectl set-hostname mail.linuxprobe.comto apply it at once.
Step 2: Add the DNS protocol to the firewalld allow list to pass client DNS queries.
root@linuxprobe:~# firewall-cmd --permanent --add-service=dns
success
root@linuxprobe:~# firewall-cmd --reload
success
Step 3: Provide DNS name resolution for the mail system. Since Chapter 13 already covered bind-chroot, I only show the main config, zone config, and data file here; complete the remaining steps yourself.
 root@linuxprobe:~# dnf install bind-chroot
 root@linuxprobe:~# cat /etc/named.conf
  1 //
  2 // named.conf
  3 //
  4 // Provided by Red Hat bind package to configure the ISC BIND named(8) DNS
  5 // server as a caching only nameserver (as a localhost DNS resolver only).
  6 //
  7 // See /usr/share/doc/bind*/sample/ for example named configuration files.
  8 //
  9
 10 options {
 11         listen-on port 53 { any; };
 12         listen-on-v6 port 53 { ::1; };
 13         directory       "/var/named";
 14         dump-file       "/var/named/data/cache_dump.db";
 15         statistics-file "/var/named/data/named_stats.txt";
 16         memstatistics-file "/var/named/data/named_mem_stats.txt";
 17         secroots-file   "/var/named/data/named.secroots";
 18         recursing-file  "/var/named/data/named.recursing";
 19         allow-query     { any; };
 20
root@linuxprobe:~# cat /etc/named.rfc1912.zones
zone "linuxprobe.com" IN {
        type master;
        file "linuxprobe.com.zone";
        allow-update {none;};
};
When copying the forward‑lookup template file, I add -a to cp so the new file inherits the original’s ownership and permissions.
root@linuxprobe:~# cp -a /var/named/named.localhost /var/named/linuxprobe.com.zone
root@linuxprobe:~# cat /var/named/linuxprobe.com.zone
| $TTL 1D | ||||
|---|---|---|---|---|
| @ | IN SOA | linuxprobe.com. | root.linuxprobe.com. | ( |
| 0;serial | ||||
| 1D;refresh | ||||
| 1H;retry | ||||
| 1W;expire | ||||
| 3H);minimum | ||||
| NS | ns.linuxprobe.com. | |||
| ns | IN A | 192.168.10.10 | ||
| @ | IN MX 10 | mail.linuxprobe.com. | ||
| IN A | 192.168.10.10 |
root@linuxprobe:~# systemctl restart named
root@linuxprobe:~# systemctl enable  named
Created symlink '/etc/systemd/system/multi-user.target.wants/named.service' → '/usr/lib/systemd/system/named.service'.
After editing the configs, I restart named. Now the mail server’s hostname is mail.linuxprobe.com and the mail domain is @linuxprobe.com. I change the server’s DNS address to the local IP, as shown in Figure 15‑3.
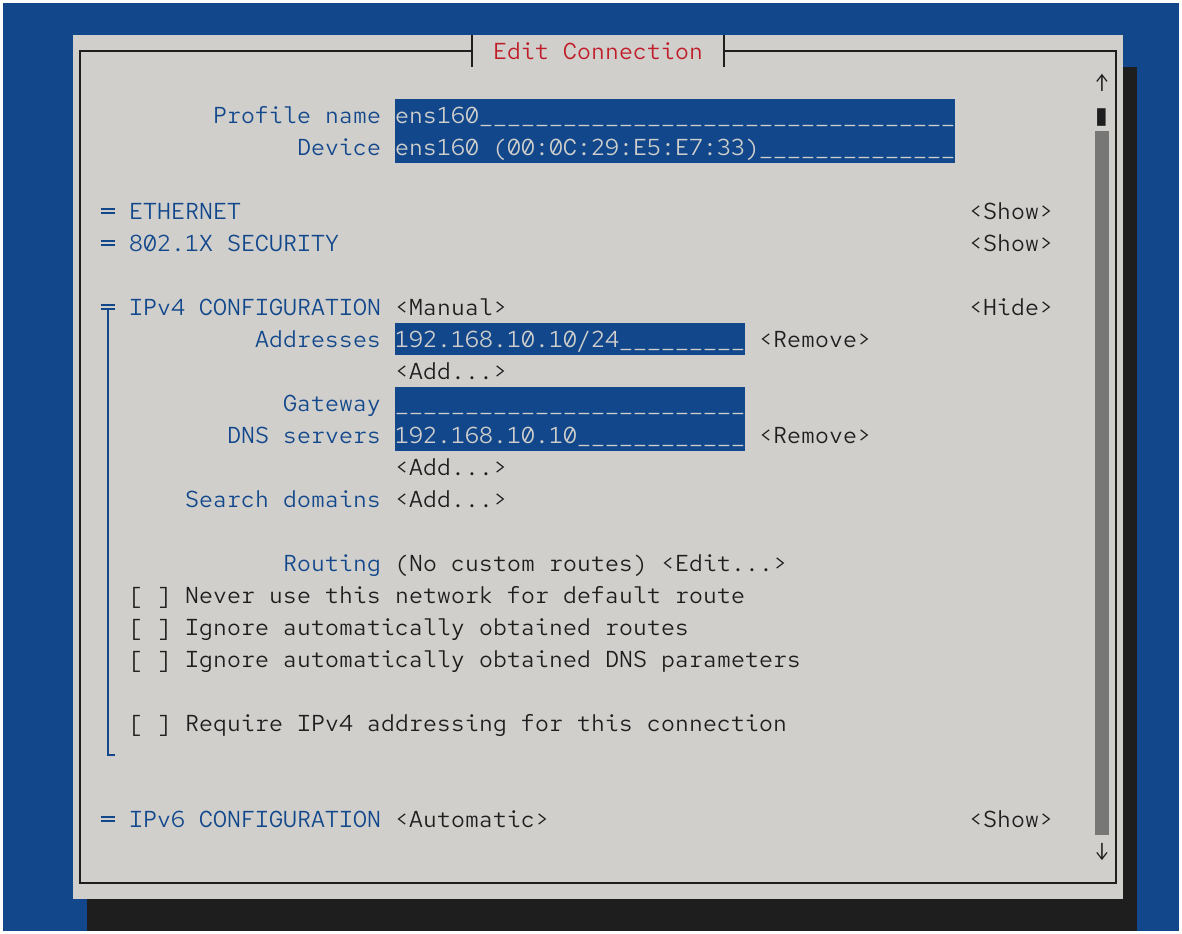
Figure 15-3 Configure the server’s DNS address
Make the new NIC parameters take effect immediately:
root@linuxprobe:~# nmcli connection up ens160
Connection successfully activated (D-Bus active path: /org/freedesktop/NetworkManager/ActiveConnection/3)
Finally, I ping the hostname. If it responds, everything above is correct. The ping also reveals the corresponding IP, as expected.
root@linuxprobe:~# ping -c 4  mail.linuxprobe.com
PING mail.linuxprobe.com (192.168.10.10) 56(84) bytes of data.
64 bytes from mail.linuxprobe.com (192.168.10.10): icmp_seq=1 ttl=64 time=0.040 ms
64 bytes from mail.linuxprobe.com (192.168.10.10): icmp_seq=2 ttl=64 time=0.057 ms
64 bytes from mail.linuxprobe.com (192.168.10.10): icmp_seq=3 ttl=64 time=0.037 ms
64 bytes from mail.linuxprobe.com (192.168.10.10): icmp_seq=4 ttl=64 time=0.052 ms

--- mail.linuxprobe.com ping statistics ---
4 packets transmitted, 4 received, 0% packet loss, time 45ms
rtt min/avg/max/mdev = 0.037/0.046/0.057/0.010 ms
15.2.1 Configure the Postfix Service

Figure 15-4 Postfix logo
Postfix is a free and open‑source email server (see Figure 15‑4) originally funded by IBM. It’s highly compatible with Sendmail, making migration easy. Postfix’s sending/receiving capacity exceeds that of Sendmail, and it automatically scales processes up and down to maintain high performance and stability. It’s composed of many small modules, each performing a specific task, so you can mix and match flexibly in production.
Step 1: Install Postfix.
root@linuxprobe:~# dnf install postfix
Updating Subscription Management repositories.
Last metadata expiration check: 0:08:54 ago on Mon 31 Mar 2025 09:36:17 AM CST.
Dependencies resolved.
====================================================================================
 Package              Architecture   Version                Repository         Size
====================================================================================
Installing:
 postfix              x86_64         2:3.8.5-7.el10         AppStream         1.5 M
Installing dependencies:
 postfix-lmdb         x86_64         2:3.8.5-7.el10         AppStream          28 k
Installed:
  postfix-2:3.8.5-7.el10.x86_64          postfix-lmdb-2:3.8.5-7.el10.x86_64

Complete!
Step 2: Configure Postfix. If you’re seeing /etc/postfix/main.cf for the first time, its 749 lines may look intimidating, but most lines are comments. Throughout Learn Linux the Right Way I emphasize extracting the essential knowledge: after studying the parameters and combining years of operations experience, I’ve distilled seven key parameters worth mastering (Table 15‑1).
Table 15‑1 Important parameters in Postfix’s main configuration
| Parameter | Purpose |
|---|---|
| myhostname | Mail system hostname |
| mydomain | Mail system domain |
| myorigin | Domain for locally sent mail |
| inet_interfaces | Interfaces Postfix listens on |
| mydestination | Hostnames or domains accepted locally |
| mynetworks | Which hosts may relay through this server |
| relay_domains | Which domains this server will relay for |
In the main configuration, I modify five places. First, at line 99, I define myhostname to store the server’s hostname. Remember this variable name; other parameters reference it later.
root@linuxprobe:~# vim /etc/postfix/main.cf
 91 # INTERNET HOST AND DOMAIN NAMES
 92 #
 93 # The myhostname parameter specifies the internet hostname of this
 94 # mail system. The default is to use the fully-qualified domain name
 95 # from gethostname(). $myhostname is used as a default value for many
 96 # other configuration parameters.
 97 #
 98 #myhostname = host.domain.tld
 99 myhostname = mail.linuxprobe.com
Then, at line 106, I define mydomain to store the mail domain. Again, remember the variable name—I reference it later.
101 # The mydomain parameter specifies the local internet domain name.
102 # The default is to use $myhostname minus the first component.
103 # $mydomain is used as a default value for many other configuration
104 # parameters.
105 #
106 mydomain = linuxprobe.com
At line 122, I call the earlier mydomain variable to define the domain used for locally sent mail. Using variables avoids duplication and simplifies future edits.
108 # SENDING MAIL
109 #
110 # The myorigin parameter specifies the domain that locally-posted
111 # mail appears to come from. The default is to append $myhostname,
112 # which is fine for small sites.  If you run a domain with multiple
113 # machines, you should (1) change this to $mydomain and (2) set up
114 # a domain-wide alias database that aliases each user to
115 # user@that.users.mailhost.
116 #
117 # For the sake of consistency between sender and recipient addresses,
118 # myorigin also specifies the default domain name that is appended
119 # to recipient addresses that have no @domain part.
120 #
121 #myorigin = $myhostname
122 myorigin = $mydomain
The fourth change is at line 139 to define the listening interfaces. You can specify particular IPs or simply write all to listen on every address.
124 # RECEIVING MAIL
125
126 # The inet_interfaces parameter specifies the network interface
127 # addresses that this mail system receives mail on.  By default,
128 # the software claims all active interfaces on the machine. The
129 # parameter also controls delivery of mail to user@[ip.address].
130 #
131 # See also the proxy_interfaces parameter, for network addresses that
132 # are forwarded to us via a proxy or network address translator.
133 #
134 # Note: you need to stop/start Postfix when this parameter changes.
135 #
136 #inet_interfaces = all
137 #inet_interfaces = $myhostname
138 #inet_interfaces = $myhostname, localhost
139 inet_interfaces = all
The fifth change is at line 187 to define the hostnames or domains accepted for local delivery. Here I reuse the variables defined above (you could also hardcode the values).
156 # The mydestination parameter specifies the list of domains that this
157 # machine considers itself the final destination for.
158 #
159 # These domains are routed to the delivery agent specified with the
160 # local_transport parameter setting. By default, that is the UNIX
161 # compatible delivery agent that lookups all recipients in /etc/passwd
162 # and /etc/aliases or their equivalent.
163 #
164 # The default is $myhostname + localhost.$mydomain + localhost.  On
165 # a mail domain gateway, you should also include $mydomain.
166 #
167 # Do not specify the names of virtual domains - those domains are
168 # specified elsewhere (see VIRTUAL_README).
169 #
170 # Do not specify the names of domains that this machine is backup MX
171 # host for. Specify those names via the relay_domains settings for
172 # the SMTP server, or use permit_mx_backup if you are lazy (see
173 # STANDARD_CONFIGURATION_README).
174 #
175 # The local machine is always the final destination for mail addressed
176 # to user@[the.net.work.address] of an interface that the mail system
177 # receives mail on (see the inet_interfaces parameter).
178 #
179 # Specify a list of host or domain names, /file/name or type:table
180 # patterns, separated by commas and/or whitespace. A /file/name
181 # pattern is replaced by its contents; a type:table is matched when
182 # a name matches a lookup key (the right-hand side is ignored).
183 # Continue long lines by starting the next line with whitespace.
184 #
185 # See also below, section "REJECTING MAIL FOR UNKNOWN LOCAL USERS".
186 #
187 mydestination = $myhostname, $mydomain
Step 3: Create login accounts. Like vsftpd, Postfix can authenticate against local system users, so I just create a regular account. Then I restart Postfix and enable it at boot. Done!
root@linuxprobe:~# useradd liuchuan
root@linuxprobe:~# echo "linuxprobe" | passwd --stdin liuchuan
root@linuxprobe:~# systemctl restart postfix
root@linuxprobe:~# systemctl enable  postfix
Created symlink '/etc/systemd/system/multi-user.target.wants/postfix.service' → '/usr/lib/systemd/system/postfix.service'.
15.2.2 Configure the Dovecot Service

Figure 15-5 Dovecot logo
Dovecot is an open‑source IMAP/POP3 server for Linux (see Figure 15‑5). It’s highly secure, easy to configure, fast, and light on resources—an excellent choice for receiving mail.
Step 1: Install Dovecot.
root@linuxprobe:~# dnf install -y dovecot
Updating Subscription Management repositories.
Last metadata expiration check: 0:09:34 ago on Mon 31 Mar 2025 10:32:48 AM CST.
Dependencies resolved.
====================================================================================
 Package         Architecture   Version                     Repository         Size
====================================================================================
Installing:
 dovecot         x86_64         1:2.3.21-14.el10            AppStream         4.9 M

Installed:
  dovecot-1:2.3.21-14.el10.x86_64

Complete!
Step 2: Configure and deploy Dovecot. In the main configuration file, make the following changes. First, at line 24 set the supported protocols to imap, pop3, lmtp, and submission. (The submission protocol submits mail on TCP/587 and is often used with SMTP authentication; it can be omitted here.)
Then, directly below line 24, add a parameter to allow plaintext authentication. Dovecot enforces encrypted logins by default; since I haven’t deployed encryption yet, I enable plaintext logins for this lab.
root@linuxprobe:~# vim /etc/dovecot/dovecot.conf
 23 # Protocols we want to be serving.
 24 protocols = imap pop3 lmtp submission
 25 disable_plaintext_auth = no
At line 48 in the same file, I can set the allowed login networks—limiting which subnets may use the mail system. If I want to allow everyone, I leave this parameter unchanged.
 43
 44 # Space separated list of trusted network ranges. Connections from these
 45 # IPs are allowed to override their IP addresses and ports (for logging and
 46 # for authentication checks). disable_plaintext_auth is also ignored for
 47 # these networks. Typically you'd specify your IMAP proxy servers here.
 48 login_trusted_networks = 192.168.10.0/24
 49
Step 3: Configure the mailbox format and storage path. In a separate Dovecot sub‑configuration file, I define where to store received mail on the server. The path is already present by default—just remove the leading # on line 25.
root@linuxprobe:~# vim /etc/dovecot/conf.d/10-mail.conf
  1 ##
  2 ## Mailbox locations and namespaces
  3 ##
  4
  5 # Location for users' mailboxes. The default is empty, which means that Dovecot
  6 # tries to find the mailboxes automatically. This won't work if the user
  7 # doesn't yet have any mail, so you should explicitly tell Dovecot the full
  8 # location.
  9 #
 10 # If you're using mbox, giving a path to the INBOX file (eg. /var/mail/%u)
 11 # isn't enough. You'll also need to tell Dovecot where the other mailboxes are
 12 # kept. This is called the "root mail directory", and it must be the first
 13 # path given in the mail_location setting.
 14 #
 15 # There are a few special variables you can use, eg.:
 16 #
 17 #   %u - username
 18 #   %n - user part in user@domain, same as %u if there's no domain
 19 #   %d - domain part in user@domain, empty if there's no domain
 20 #   %h - home directory
 21 #
 22 # See doc/wiki/Variables.txt for full list. Some examples:
 23 #
 24 #   mail_location = maildir:~/Maildir
 25     mail_location = mbox:~/mail:INBOX=/var/mail/%u
 26 #   mail_location = mbox:/var/mail/%d/%1n/%n:INDEX=/var/indexes/%d/%1n/%n
 27 #
Then I switch to the liuchuan account I created while configuring Postfix and create the directories used to store mail under its home directory. Finally, I restart Dovecot and enable it at boot. Dovecot’s configuration is now complete.
root@linuxprobe:~# su - liuchuan
liuchuan@mail:~$ mkdir -p mail/.imap/INBOX
liuchuan@mail:~$ exit
logout
root@linuxprobe:~# systemctl restart dovecot
root@linuxprobe:~# systemctl enable  dovecot
Created symlink '/etc/systemd/system/multi-user.target.wants/dovecot.service' → '/usr/lib/systemd/system/dovecot.service'.
Don’t forget to allow the mail protocols in the firewall so clients can reach the services:
root@linuxprobe:~# firewall-cmd --permanent --add-service=imap
success
root@linuxprobe:~# firewall-cmd --permanent --add-service=pop3
success
root@linuxprobe:~# firewall-cmd --permanent --add-service=smtp
success
root@linuxprobe:~# firewall-cmd --reload
success
15.2.3 Using the Mail System as a Client
How do I know the system can actually send and receive mail? I test with Microsoft Outlook on Windows (you can also use Foxmail or other clients). Configure the email/DNS server and the client IPs as in Table 15‑2 so the domain resolves properly. The network settings are shown in Figure 15‑6.
Table 15‑2 OS and IP addresses for the server and client
| Hostname | OS | IP Address |
|---|---|---|
| Mail and DNS server | RHEL 10 | 192.168.10.10 |
| Client | Windows 11 | 192.168.10.30 |
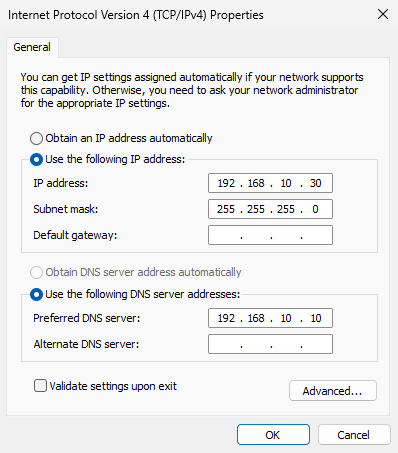
Figure 15-6 Configure Windows 11 network parameters
Step 1: Launch Outlook on Windows 11. Since your Windows build may differ, I use Outlook 2013 here for consistency. If you want a matching lab environment, you can download Outlook 2013 from the companion site. On first run you’ll see the “Welcome to Microsoft Outlook 2013” wizard (Figure 15‑7).

Figure 15-7 Outlook 2013 setup wizard
Step 2: Configure an email account. In the screen shown in Figure 15‑8, select Yes, then click Next.
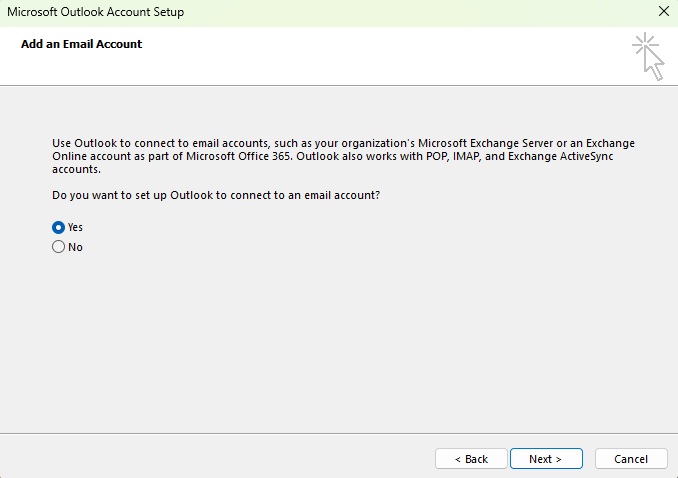
Figure 15-8 Configure an email account
Step 3: Fill in account information (Figure 15‑9). Enter any name in Your Name. In Email Address, use the system account plus the sending domain. In Password, enter that account’s server login password. Click Next.
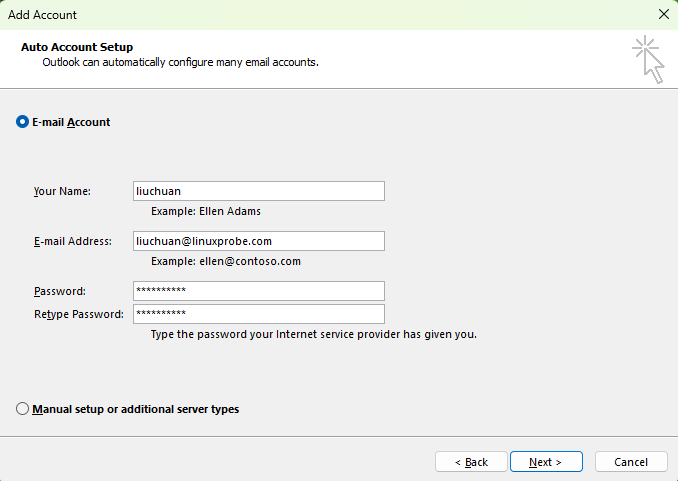
Figure 15-9 Enter email account information
Step 4: Perform login verification. Because I haven’t enabled SSL/TLS yet, I set Dovecot to allow plaintext passwords. Outlook tries SSL by default, so after ~30–60 seconds of Searching for liuchuan@linuxprobe.com settings (Figure 15‑10), you’ll see an error. Click Next to retry without encryption (Figure 15‑11). The final success screen appears as in Figure 15‑12. Click Finish—all done!
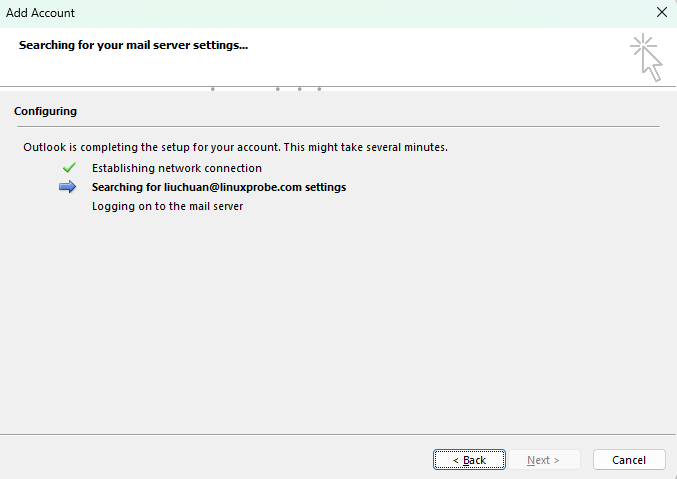
Figure 15-10 Login verification
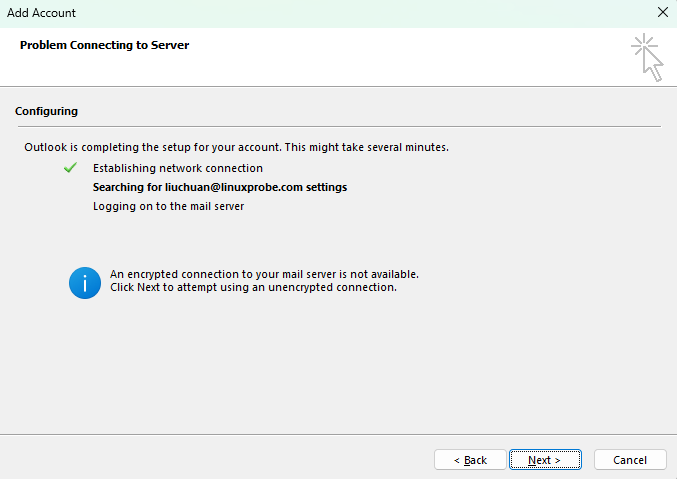
Figure 15-11 Verify login without encryption
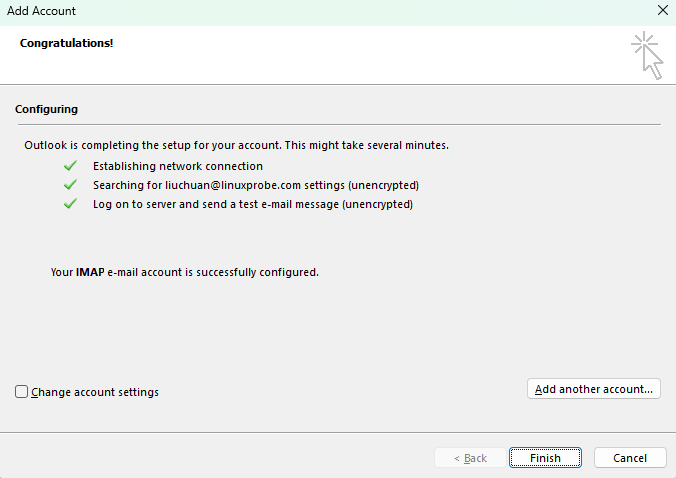
Figure 15-12 Account configured successfully using plaintext
Step 5: Send mail to another mailbox. After logging in successfully, I compose and send a new message. Right‑click a blank area and choose New Email (Figure 15‑13), then fill in the recipient address and complete the body (Figure 15‑14), and click Send.
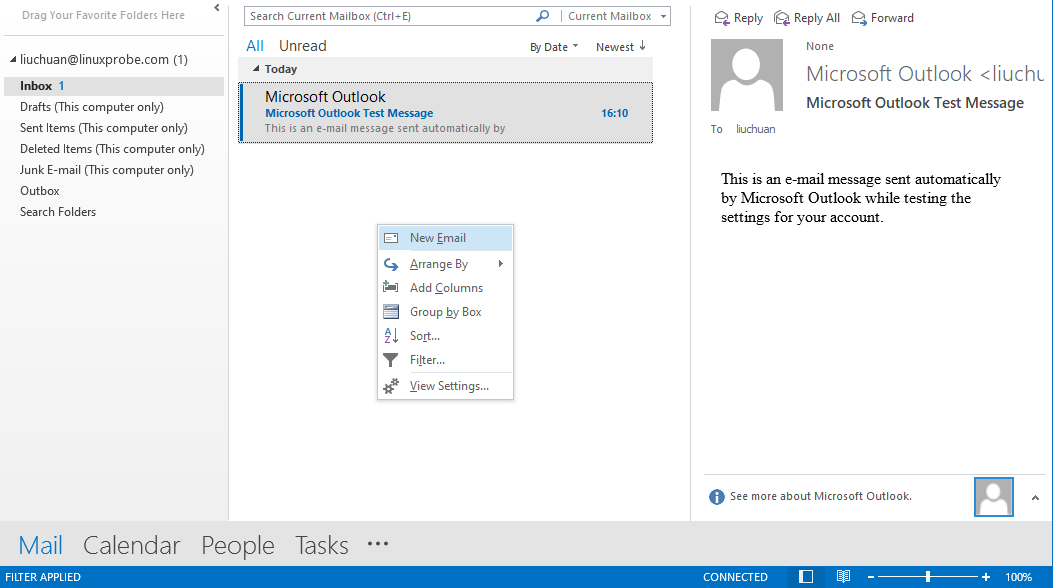
Figure 15-13 Send a message
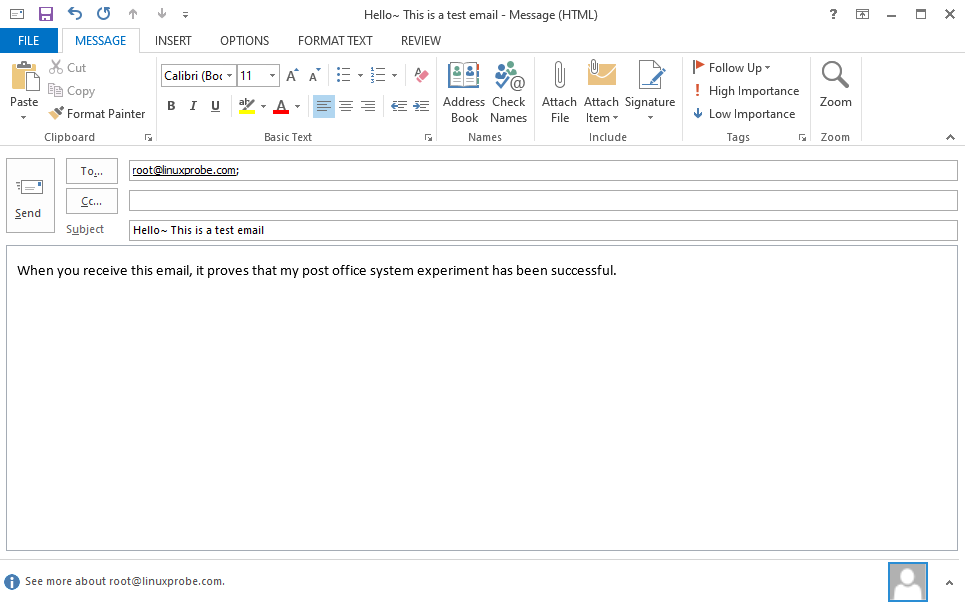
Figure 15-14 Address and compose the message
When Outlook sends successfully, I can see the new‑mail notification on the server. On RHEL 10 the viewer is s‑nail (install it yourself; output below is abbreviated only where the original text abbreviates). To view a message, enter the number shown before the recipient.
root@linuxprobe:~# dnf install s-nail
root@linuxprobe:~# s-nail
s-nail version v14.9.24.  Type `?' for help
/var/spool/mail/root: 1 message 1 new
▸N 1 liuchuan 2025-03-31 11:11 98/3307 "Hello ~ This is a test email"
& 1
[-- Message  1 -- 98 lines, 3307 bytes --]:
From: "liuchuan" <liuchuan@linuxprobe.com>
To: <root@linuxprobe.com>
Subject: Hello ~ This is a test email
Date: Mon, 31 Mar 2025 11:11:43 +0800
Message-ID: <000001dba1ea$a11f8be0$e35ea3a0$@linuxprobe.com>

[-- #1.1 6/152 text/plain, base64, gb2312 --]

When you receive this email, it proves that my postal system experiment has been successful.

[-- #1.2 66/2194 text/html, quoted-printable, gb2312 --]
& quit
Held 1 message in /var/spool/mail/root
You have mail in /var/spool/mail/root
root@linuxprobe:~#
15.3 Configuring User Alias Mailboxes
Alias mailboxes are a simple, practical masking technique. I can create multiple virtual mailbox names that all receive messages and deliver them to a single real mailbox, protecting the real address from exposure; I can also use aliases to gather mail from several addresses.
I already sent a message to the root account. Now I send one to the bin account (Figure 15‑15).

Figure 15-15 Send mail to the bin account
After sending, I log in to the server and try to authenticate as bin. Because bin is a system account with its shell set to /sbin/nologin, logging in fails. However, when I run s‑nail on the server, I see that the message originally addressed to bin is in root’s mailbox.
root@linuxprobe:~# su - bin
This account is currently not available.
root@linuxprobe:~# s-nail
s-nail version v14.9.24.  Type `?' for help
/var/spool/mail/root: 2 messages 1 new
    1 liuchuan              2025-03-31 11:11   99/3318  "Hello ~ This is a test email"
▸N  2 liuchuan              2025-03-31 11:15   98/3262  "Hello, user bin.           "
& 2
[-- Message  2 -- 98 lines, 3262 bytes --]:
From: "liuchuan" <liuchuan@linuxprobe.com>
To: <bin@linuxprobe.com>
Subject: Hello, user bin.
Date: Mon, 31 Mar 2025 11:15:50 +0800
Message-ID: <000501dba1eb$342925e0$9c7b71a0$@linuxprobe.com>

[-- #1.1 6/124 text/plain, base64, gb2312 --]

This is an email sent to user bin.

[-- #1.2 66/2193 text/html, quoted-printable, gb2312 --]
& quit
Held 2 messages in /var/spool/mail/root
You have mail in /var/spool/mail/root
root@linuxprobe:~#
Why? Because the aliases configuration maps many local system accounts to root. You can see this in /etc/aliases—it defines extensive alias mappings. Alias names can be local system users or entirely made‑up names. The recipient after the colon is who receives the mail.
Tips:
The following command outputs a long list. For length, the original text omits parts; the real output is more than twice as long.
root@linuxprobe:~# cat /etc/aliases
#
#  Aliases in this file will NOT be expanded in the header from
#  Mail, but WILL be visible over networks or from /bin/mail.
#
#	>>>>>>>>>>	The program "newaliases" must be run after
#	>> NOTE >>	this file is updated for any changes to
#	>>>>>>>>>>	show through to sendmail.
#

# Basic system aliases -- these MUST be present.
mailer-daemon:	postmaster
postmaster:	root

# General redirections for pseudo accounts.
bin:		root
daemon:		root
adm:		root
lp:			root
sync:		root
shutdown:	root
halt:		root
mail:		root
Now it should be clear: the aliases file maps alias names to real recipients. Beyond the built‑in system aliases, I can define my own. For example, I create an alias winston that actually delivers to root:
root@linuxprobe:~# cat /etc/aliases
#
#  Aliases in this file will NOT be expanded in the header from
#  Mail, but WILL be visible over networks or from /bin/mail.
#
#       >>>>>>>>>>      The program "newaliases" must be run after
#       >> NOTE >>      this file is updated for any changes to
#       >>>>>>>>>>      show through to sendmail.
#

# Basic system aliases -- these MUST be present.
mailer-daemon:  postmaster
postmaster:     root

# General redirections for pseudo accounts.
winston:        root
bin:            root
daemon:         root
adm:            root
lp:             root
sync:           root
shutdown:       root
halt:           root
mail:           root
After saving the aliases file, I run newaliases to apply it immediately. Then I send mail again (Figure 15‑16).
root@linuxprobe:~# newaliases
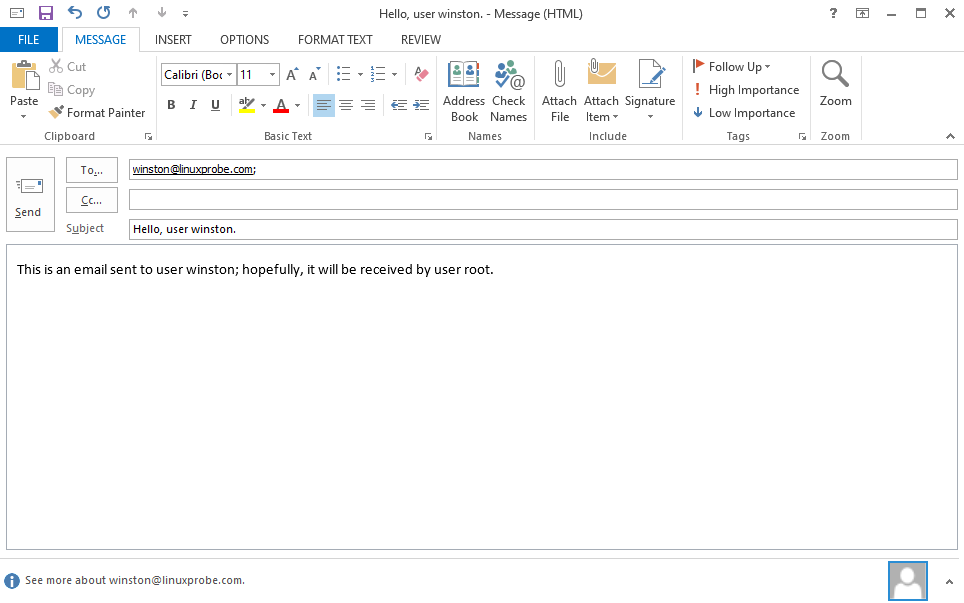
Figure 15-16 Send mail to the winston alias
Now, using root on the server and running s‑nail, I see the message originally sent to winston has arrived in root’s mailbox. One final reminder: aliasing is widely used and very simple to set up. Don’t blindly trust websites that list lots of different “support” addresses—they may all deliver to the same mailbox behind the scenes.
root@linuxprobe:~# s-nail
s-nail version v14.9.24.  Type `?' for help
/var/spool/mail/root: 3 messages 1 new
    1 liuchuan              2025-03-31 11:11   99/3318  "Hello ~ This is a test email"
    2 liuchuan              2025-03-31 11:15   99/3273  "Hello, user bin.           "
▸N  3 liuchuan              2025-03-31 11:20  103/3597  "Hello, user winston.       "
& 3
[-- Message  3 -- 103 lines, 3597 bytes --]:
From: "liuchuan" <liuchuan@linuxprobe.com>
To: <winston@linuxprobe.com>
Subject: Hello, user winston.
Date: Mon, 31 Mar 2025 11:20:55 +0800
Message-ID: <000a01dba1eb$e9e30f40$bda92dc0$@linuxprobe.com>

[-- #1.1 7/169 text/plain, base64, gb2312 --]

This is an email addressed to user winston;

If all goes well, it will be received by user root.

[-- #1.2 70/2459 text/html, quoted-printable, gb2312 --]
& quit
Held 3 messages in /var/spool/mail/root
You have mail in /var/spool/mail/root
Review Questions
-
What’s the key difference between email and services such as HTTP, FTP, or NFS?
Answer: When the other host is down or temporarily offline, email still allows you to send data—the sender’s server queues and retries automatically. -
Which mail protocols are most common?
Answer: SMTP, POP3, and IMAP4. -
What are the roles of MUA, MTA, and MDA?
Answer: MUA sends/receives mail, MTA relays mail, and MDA stores mail. -
What should you do before deploying Postfix and Dovecot?
Answer: Configure DNS name resolution so mailbox domains resolve correctly. -
Can Dovecot restrict the range of hosts allowed to connect?
Answer: Yes. Modifylogin_trusted_networksin Dovecot’s main config to limit clients without changing firewall policy. -
Outlook reports it can’t find the server or it times out when connecting to
mail.linuxprobe.com. What’s the likely cause?
Answer: DNS resolution. On both the server and client, runping mail.linuxprobe.comto verify it resolves to an IP address. -
How do you define alias mailboxes and make them take effect immediately?
Answer: Edit the/etc/aliasesfile, then runnewaliasesto apply the changes.