Chapter 01 · Deploy a Linux System from Scratch
Chapter Overview
This chapter starts with installing the virtualization software and then walks through, end to end, how to install and deploy a RHEL 10 system inside a VMware virtual machine. Every configuration step is documented in detail to make mistakes hard to make, so you can go from zero to owning a Linux system of your own.
We also explain installation methods and their differences: building from source, installing RPM packages, and using Yum and DNF. You will learn the common commands and formats, and you will get a practical introduction to the systemd init system in RHEL 10, with tips for day‑to‑day use.
If this is your first time reading the book, or you have no prior experience with Linux, read all the tip callouts in this chapter carefully to avoid avoidable hiccups during the hands‑on labs.
1.1 Prepare Your Tools
There is an old saying: to do a good job, first sharpen your tools. Before we dive in, you need a Linux system to practice on. Do not worry—we will not buy a new computer just for labs. Instead, we will use virtualization software to simulate a complete hardware platform that meets the needs of every exercise in this book. Virtualization lets you run multiple operating systems on a single physical machine, which is both economical and convenient.
Modern mainstream hardware is more than capable of running a virtual machine. Based on more than a decade of operations and teaching experience, I strongly advise against installing Linux directly on a physical computer while you are learning. You will be experimenting daily, and mistakes happen—data loss or OS reinstalls are a headache and a waste of time. A system installed in a virtual machine not only isolates the lab environment from the files on your host computer, it also supports snapshots. If an error or misconfiguration breaks the system, you can roll back to a clean snapshot in about 5–10 seconds—far faster than a bare‑metal reinstall, which can take at least 20 minutes.
In recent years I have seen students use a patchwork of environments: CentOS Stream, Debian, older RHEL releases, and so on. Troubleshooting becomes much harder when everyone’s platform differs. While most RHEL knowledge generalizes to other distributions, beginners do not yet have robust troubleshooting skills. Early on, keep the lab environment consistent. It is like learning Japanese sushi: if the instructor uses a yanagiba knife while the student insists on a generic kitchen knife, the sushi will be shredded. Smart students use the same tools and environment as the instructor so external variables are minimized and problems can be found quickly. Once your skills are solid, you can freely choose tools and environments in production.
Tips:
Companion software for this book is available at https://www.linuxzone.net/tools .VMware Workstation 17 — required: a powerful desktop virtualization product that lets you run multiple operating systems on one host.
Red Hat Enterprise Linux (RHEL) 10 — required: a stable, enterprise‑grade Linux distribution by Red Hat.
A personal note: I first wanted to learn Linux back in middle school. At the time internet access was limited, so installing Linux meant buying CDs. Installing took at least six discs (about 700 MB each). I bought them, tried several times, and hit errors I could not understand—so I gave up. In early 2015, while cleaning my apartment before the Spring Festival, I found those discs again and finally discovered why the installs failed: the fifth disc was scratched, so some dependency packages could not be read. I could have encountered Linux years earlier, but I was blocked by a single damaged disc—frustrating and a bit funny. Let my lesson be your reminder: once your tools are ready, always verify their integrity before installing. Do not repeat my mistake.
1.2 Install and Configure the VMware Virtual Machine
VMware Workstation is efficient desktop virtualization software. Each guest you create has its own disk and configuration, so you will not disturb the data on your host. VMware virtual machines support snapshots, virtual networking, drag‑and‑drop file transfer, network installation, and more. You can even link multiple VMs into a private LAN—very handy.
Linux does not require high‑end hardware, and a VM easily meets its needs. Let’s begin.
Download the VMware Workstation 17 installer and double‑click it. After one to three seconds, you should see the initial wizard (Figure 1‑1).
Figure 1‑1 Installer welcome screen
In the setup wizard, click Next (Figure 1‑2).
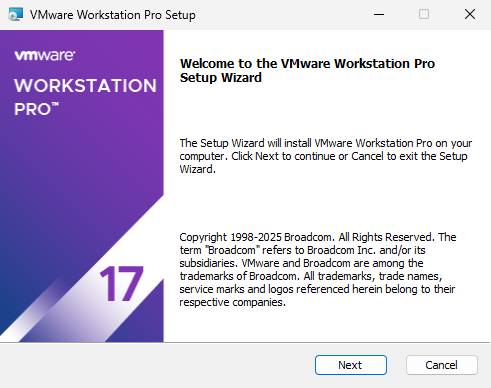
Figure 1‑2 Setup wizard
Accept the End‑User License Agreement and click Next (Figure 1‑3).
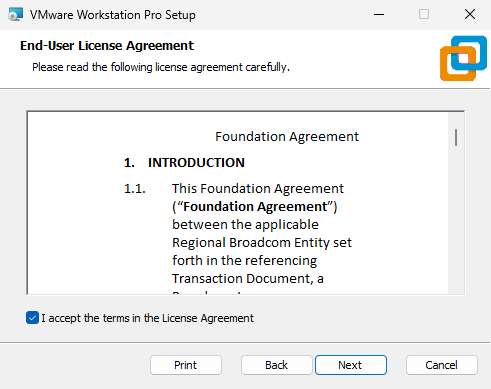
Figure 1‑3 Accepting the license
You typically do not need to change the installation path. If free space on drive C: is tight, choose another drive. Select Add VMware Workstation console tools to the system PATH so you can invoke VMware command‑line tools without typing full paths. Click Next (Figure 1‑4).
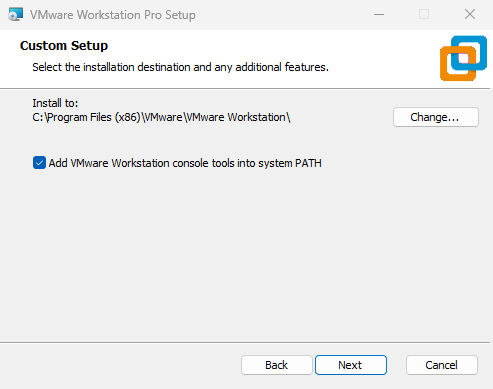
Figure 1‑4 Choosing the installation path
Choose whether to check for updates on startup and whether to join the Customer Experience Improvement Program, then click Next (Figure 1‑5).
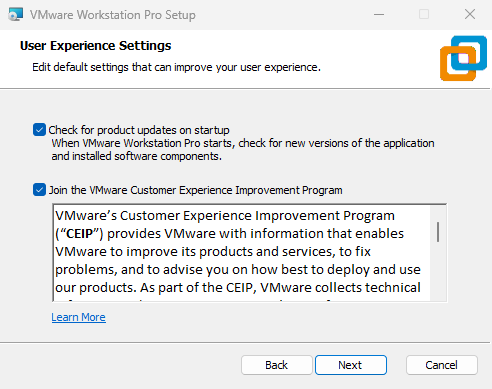
Figure 1‑5 Experience settings
To make the program easier to find later, select Desktop and Start Menu Program Folder shortcuts, then click Next (Figure 1‑6).
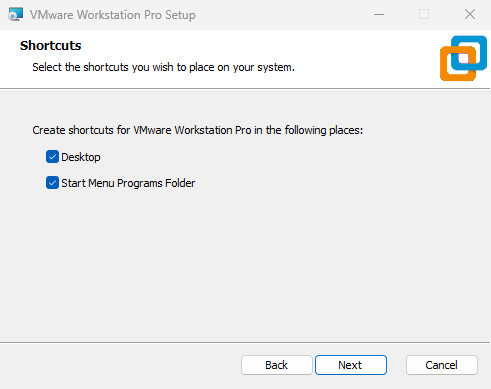
Figure 1‑6 Create shortcuts
Click Install (Figure 1‑7).
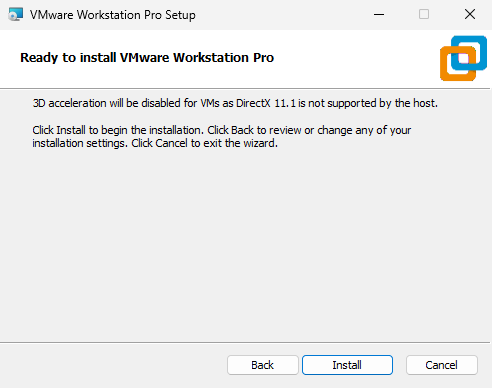
Figure 1‑7 Ready to install
Wait for the installation to finish (about 3–5 minutes), as in Figure 1‑8.
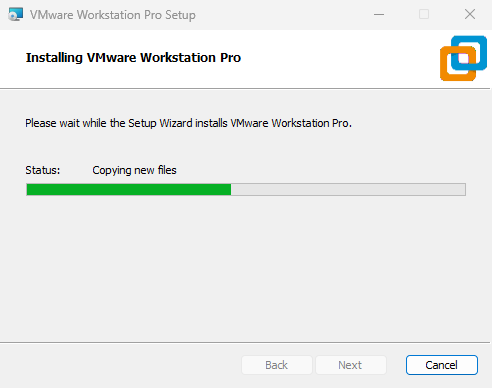
Figure 1‑8 Installation in progress
Click Finish to exit the wizard (Figure 1‑9).
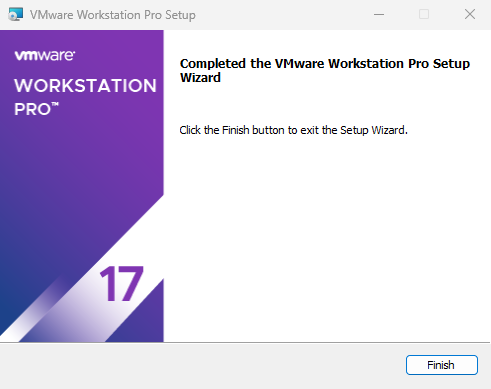
Figure 1‑9 Completing the wizard
Double‑click the desktop shortcut. In the dialog in Figure 1‑10, choose Use VMware Workstation 17 for personal use and click Continue.
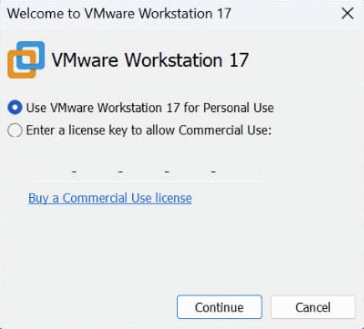
Figure 1‑10 License key validation
When the Welcome to VMware Workstation 17 screen appears, simply click Finish (Figure 1‑11).
Figure 1‑11 Welcome screen
Double‑click the shortcut again to open the main console; you should see the management interface (Figure 1‑12).
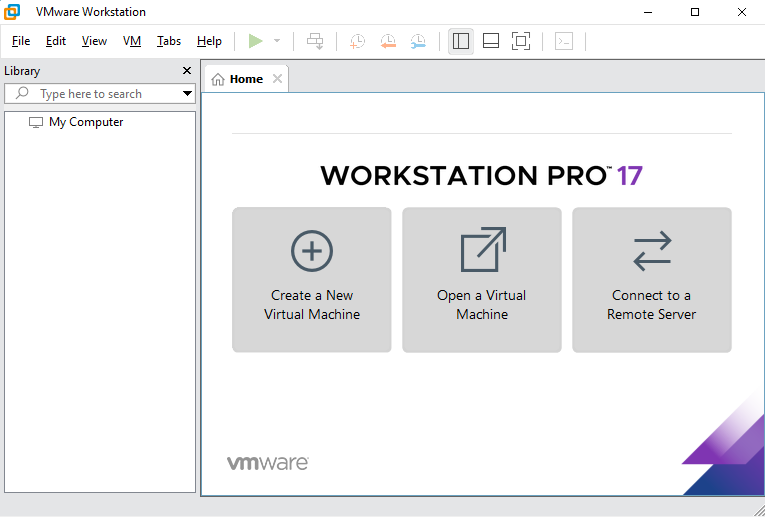
Figure 1‑12 VMware management interface
Do not install Linux just yet. First we must define the hardware the VM will see. Think of this as placing the guest inside a hardware sandbox: you set the maximum disk and memory, number of CPU cores, ISO path, network mode, and so on. It is like assembling a PC: only after the virtual hardware exists can we install the OS.
A strength of VMware Workstation is that it can both use physical resources and simulate multiple virtual devices. Adding five or six disks is trivial (see Chapter 7). The lab environment needs are easily met—no need to buy a new computer.
In the management interface in Figure 1‑12, click Create a New Virtual Machine. In the New Virtual Machine Wizard, select Custom (advanced) and click Next (Figure 1‑13).
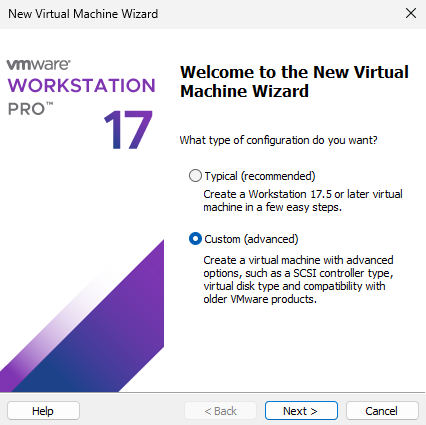
Figure 1‑13 New VM wizard
Because this is a fresh install, compatibility is not a concern. Set Hardware compatibility to Workstation 17.5 or later and click Next (Figure 1‑14).
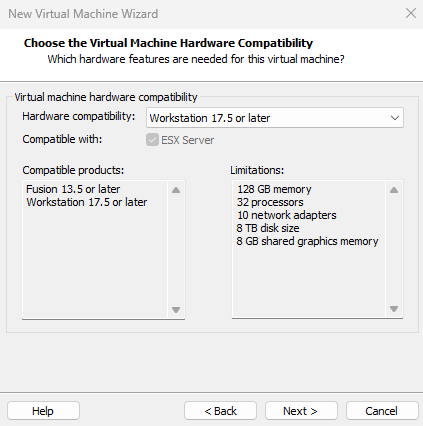
Figure 1‑14 Hardware compatibility
Select I will install the operating system later and click Next (Figure 1‑15).
Tips:
In recent classes, some students insisted on selecting Installer disc image file (ISO) here and pointing at the RHEL 10 ISO. If you do that, VMware will silently deploy a minimal Linux installation using its default strategy and will not prompt you for the configuration choices we need to keep our environment consistent. Please choose I will install the operating system later.

Figure 1‑15 Choose the installation source
At the time of writing, RHEL 10 had just been released (May 20, 2025), and VMware had not yet added a specific option for it. Choose Linux as the guest OS type and Red Hat Enterprise Linux 9 64‑bit as the version, then click Next (Figure 1‑16). This selection is just a label for the software and will not affect the steps or results in later labs. It mainly helps organize different guests in the VMware console.
Tips:
If your newer copy of VMware lists Red Hat Enterprise Linux 10 64‑bit, select that instead.
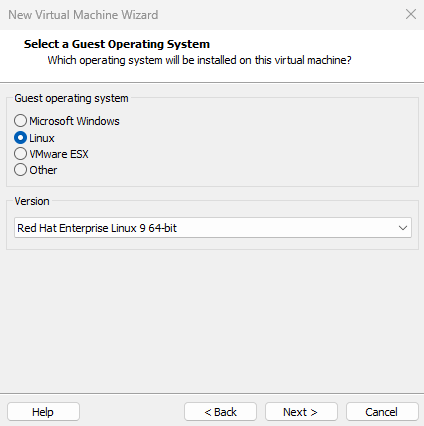
Figure 1‑16 Choose the guest OS version
Give the virtual machine a name and choose a location with at least 20 GB free space. Click Next (Figure 1‑17).

Figure 1‑17 Name and location
Set Number of processors and Number of cores per processor according to your host CPU. You can look up your CPU model online or open Task Manager in Windows and check the logical processor count on the Performance tab. If in doubt, temporarily set both to 1 (see Figure 1‑18); you can adjust later without affecting the labs. Click Next.
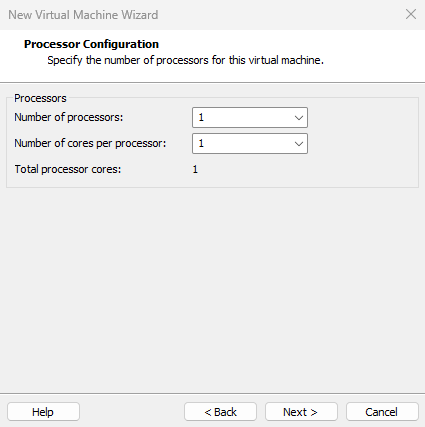
Figure 1‑18 CPU settings
Assign memory to the VM. If your host has less than 8 GB, allocate 2 GB to the VM; if your host has 8 GB or more (16 GB or higher), allocate 4 GB (Figure 1‑19). Allocating much more does not help and may waste memory.
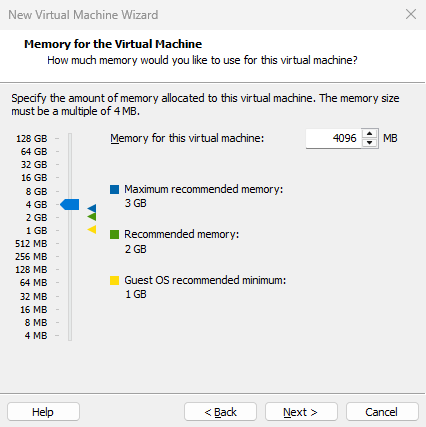
Figure 1‑19 Memory allocation
VMware offers three network connection modes: Bridged, NAT, and Host‑only.
Bridged: creates a bridge between the host and guest NICs so the guest can access the internet through the host’s physical NIC.
NAT: uses the VMware virtual network as a router so guests reach the internet via the host; the host‑side adapter is named VMnet8.
Host‑only: isolates guests from the internet but allows communication with the host; the host‑side adapter is named VMnet1.
We do not need internet access yet, so choose Host‑only and click Next (Figure 1‑20).
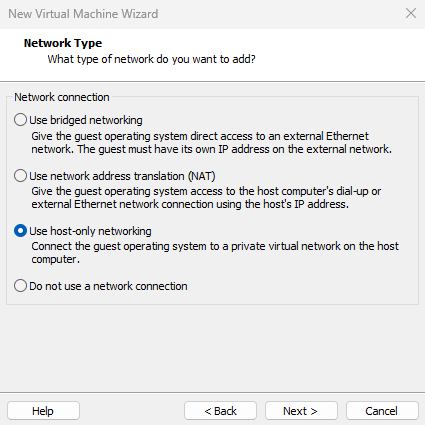
Figure 1‑20 Network mode
For the SCSI controller, select LSI Logic (Recommended) and click Next (Figure 1‑21).
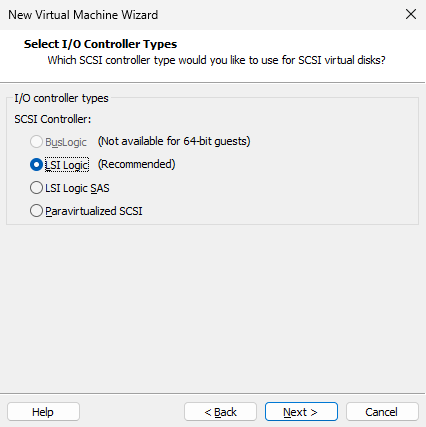
Figure 1‑21 I/O controller type
For the virtual disk type, choose SCSI and click Next (Figure 1‑22). Please match the instructor here. If you choose IDE or NVMe, disk names in Chapter 6 will differ from /dev/sda.
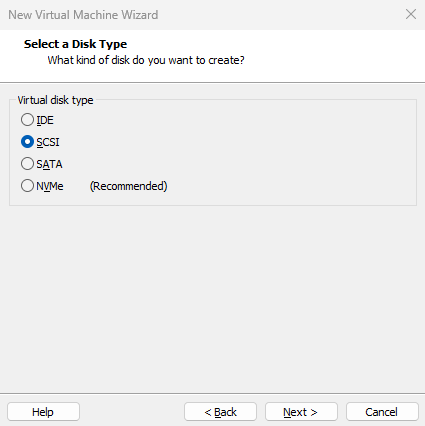
Figure 1‑22 Virtual disk type
Because this is a new system, select Create a new virtual disk and click Next (Figure 1‑23).
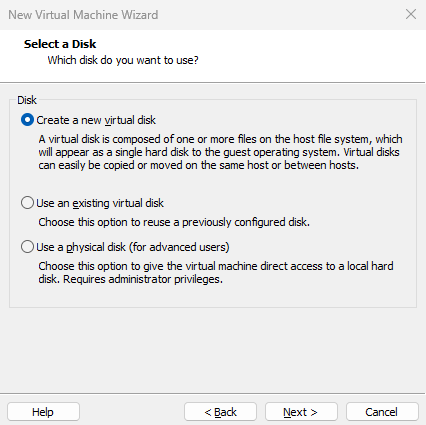
Figure 1‑23 Create a new virtual disk
Set Maximum disk size to 20.0 GB (the default). This caps the disk capacity available to the guest; it does not pre‑allocate that space immediately. For better performance, select Allocate all disk space now. If you do not plan to move this VM often, choose Store virtual disk as a single file for slightly better performance. Click Next (Figure 1‑24).
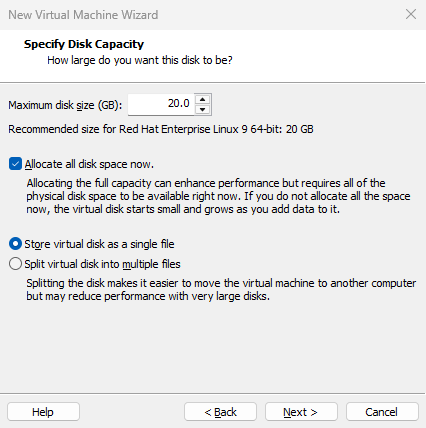
Figure 1‑24 Maximum disk size
Accept the default disk file name and click Next (Figure 1‑25).
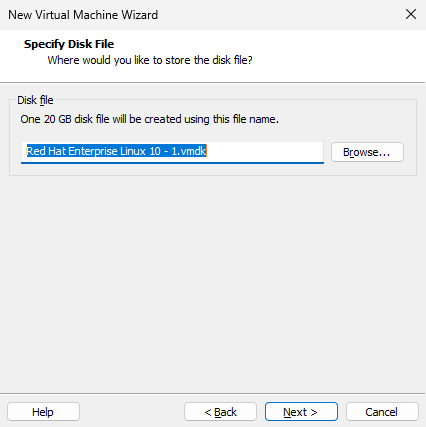
Figure 1‑25 Disk file name
When the wizard shows a summary, click Customize Hardware (Figure 1‑26); there are a few more tweaks to make.
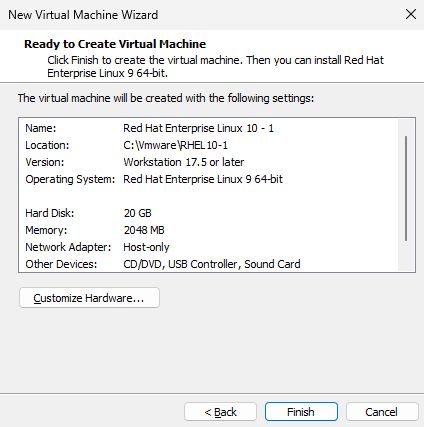
Figure 1‑26 Configuration summary
Select New CD/DVD (SATA). On the right, choose Use ISO image file and browse to the RHEL 10 ISO you downloaded (do not unzip it) (Figure 1‑27).
Tips:
This book ships without physical media. The ISO image is the downloadable installer from the companion site.
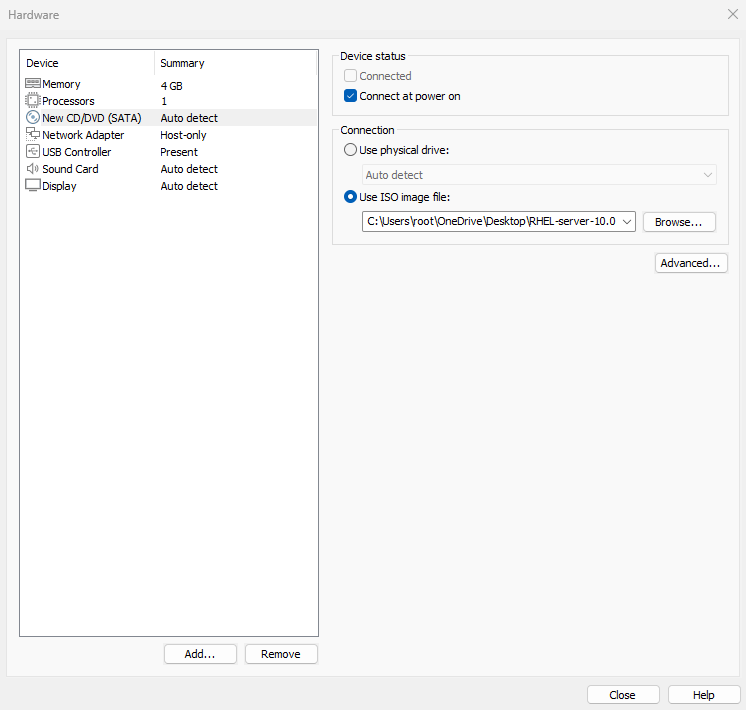
Figure 1‑27 Choose the RHEL 10 ISO
Remove the USB controller and sound card. Removing audio avoids beeps on invalid input so you can stay focused. Click Close. The final configuration looks like Figure 1‑28.
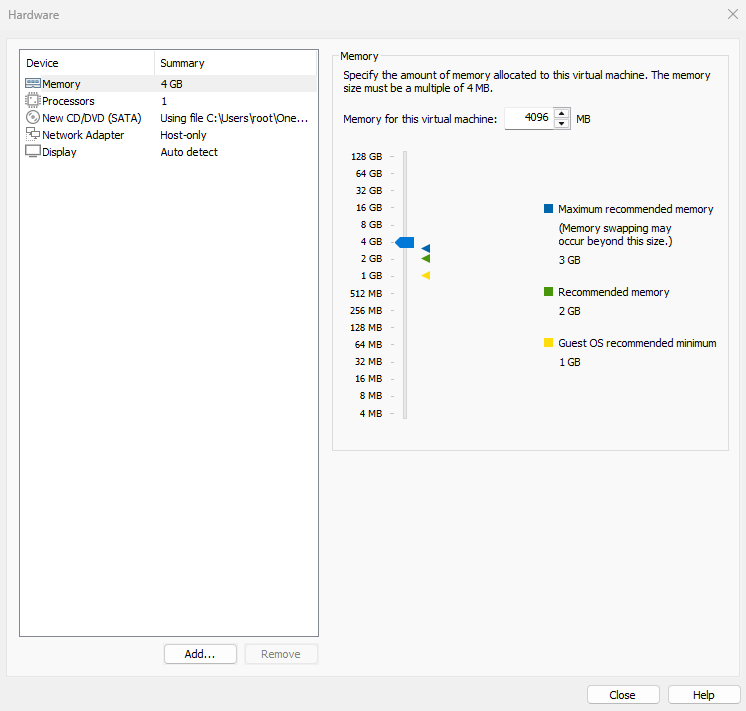
Figure 1‑28 Final VM configuration
Back on the summary screen (Figure 1‑26), click Finish. VMware will initialize the new VM hardware, which takes about one minute.
When you see a screen like Figure 1‑29, your VM is ready. Take a breath—your Linux journey is about to begin.
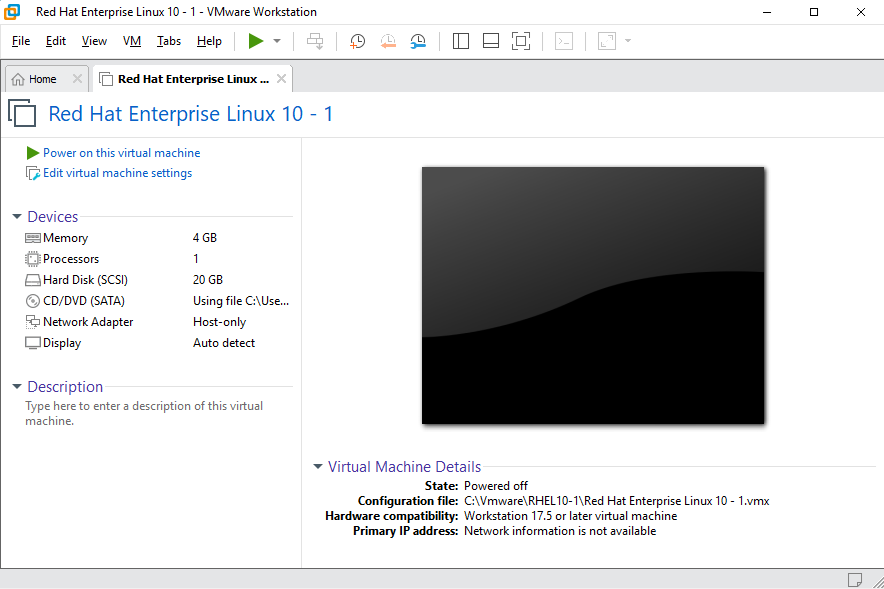
Figure 1‑29 VM created successfully
1.3 Install Your Linux System
To install RHEL 10, make sure your CPU supports virtualization technology (VT). VT allows one computer to carve itself into multiple isolated resource pools and simulate systems as needed. In essence, a thin layer manages and redistributes hardware to maximize utilization.
A simple rule of thumb: if your computer is not five or six years old—or if it cost more than roughly 3,000 RMB—it almost certainly supports VT. Most CPUs enable VT by default. Only if installation fails do you need to enable VT manually in the BIOS or UEFI (press F2, F12, or Del repeatedly during boot), as shown in Figure 1‑30.
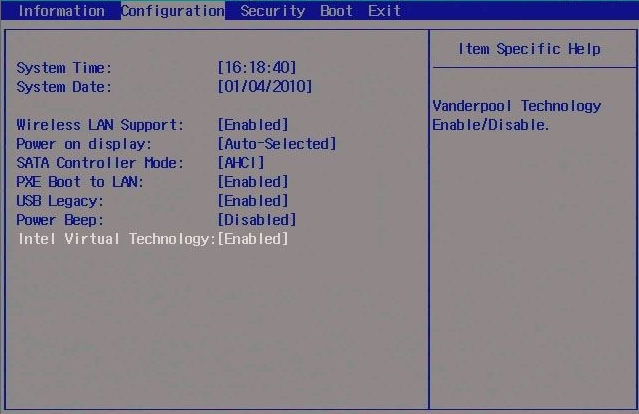
Figure 1‑30 Enabling virtualization in BIOS/UEFI
Click Power on this virtual machine. Within seconds you should see the RHEL 10 installer menu (Figure 1‑31). Test this media & install Red Hat Enterprise Linux 10.0 validates the ISO before installation; Troubleshooting starts rescue mode. Use the arrow keys to select Install Red Hat Enterprise Linux 10.0 and press Enter to install.
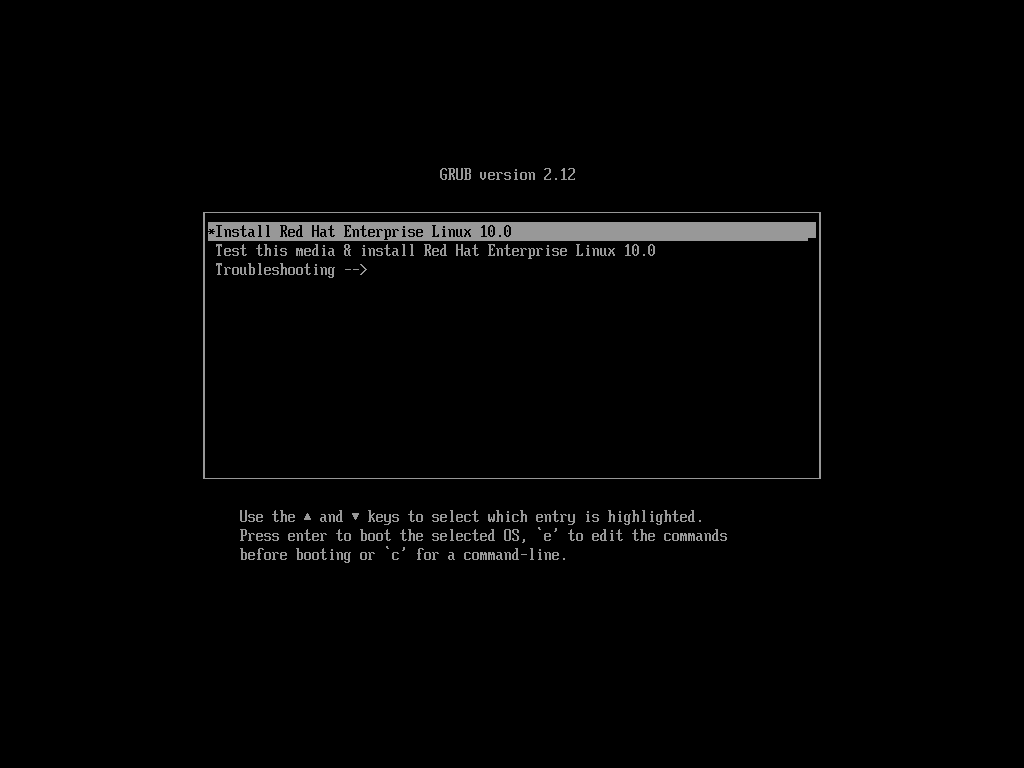
Figure 1‑31 RHEL 10 installer menu
Press Enter to load the installer image (20–30 seconds) (Figure 1‑32).
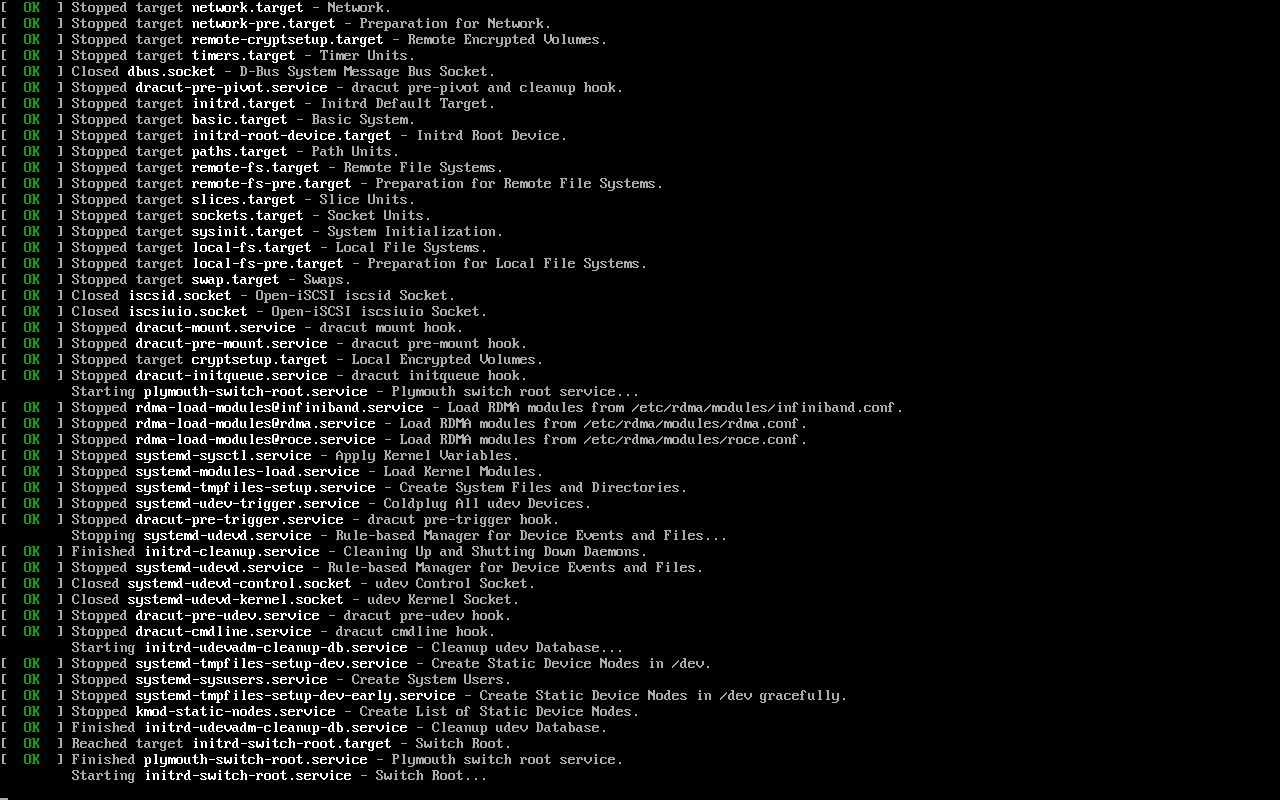
Figure 1‑32 Initializing the installer
Choose the installation language and click Continue (Figure 1‑33).
Tips:
Do not worry about English. Linux commands have specific technical meanings, not just the everyday meaning of the word. For example, the word free means “freedom” or “at no cost,” but the free command shows memory usage. Even if your English is strong, you still have to learn Linux concepts. Keeping the system in English also builds your reading skills. If you strongly prefer Chinese, you can select it here.
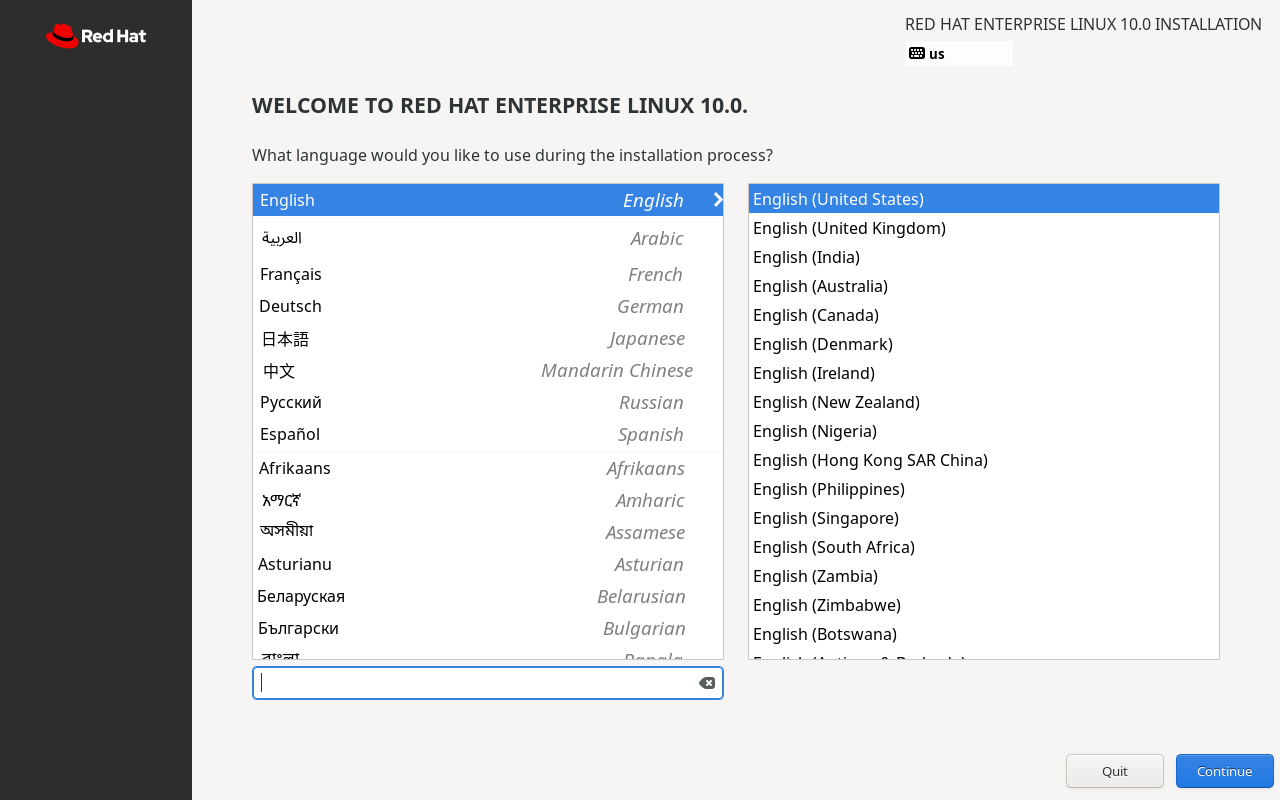
Figure 1‑33 Choose installation language
The Installation Summary screen collects all required settings (Figure 1‑34): Keyboard, Language Support, Time & Date, Connect to Red Hat, Installation Source, Software Selection, Installation Destination, KDUMP, Network & Host Name, Root Account, and User Creation.
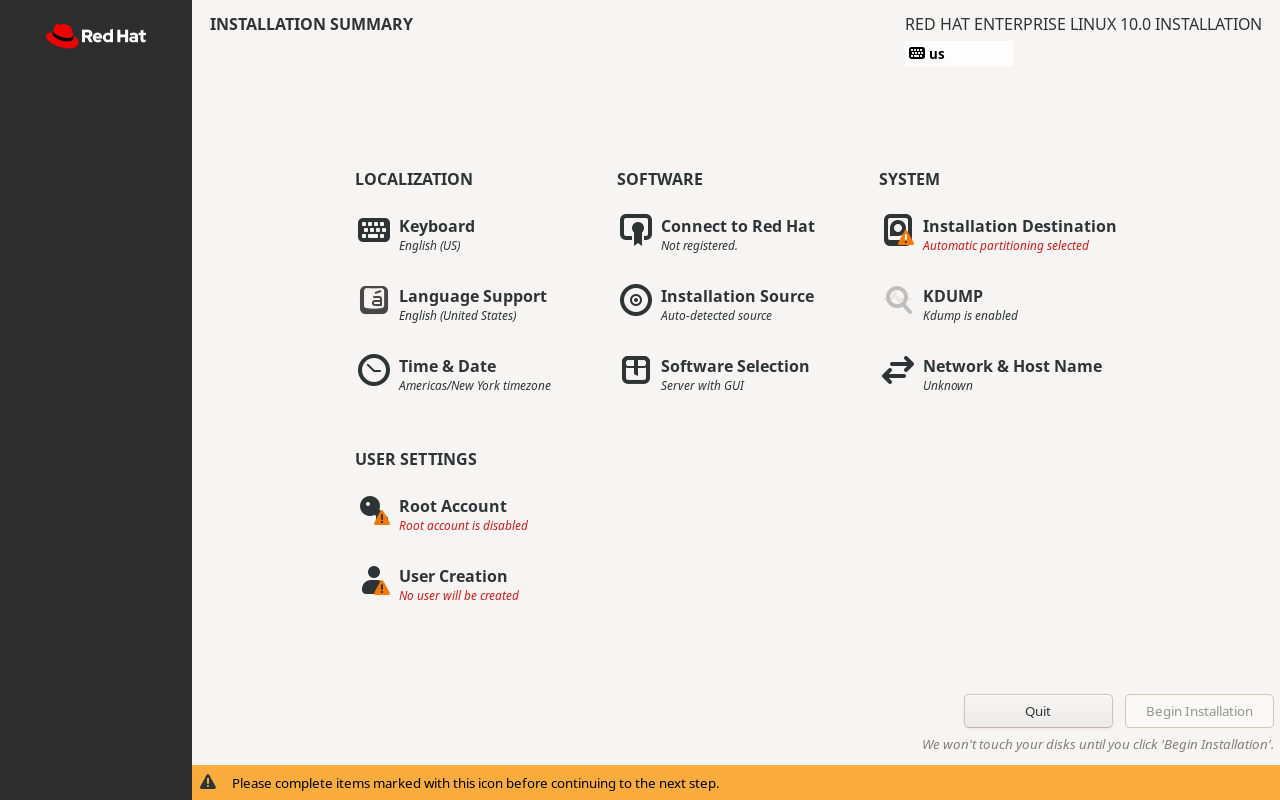
Figure 1‑34 Installation summary
Do not panic—several items use sensible defaults. Keyboard and Language Support are English by default and need no changes unless you want a Chinese UI.
Click Time & Date and set the time zone. Choose Asia as the Region and Shanghai as the City. Click Done (Figure 1‑35).
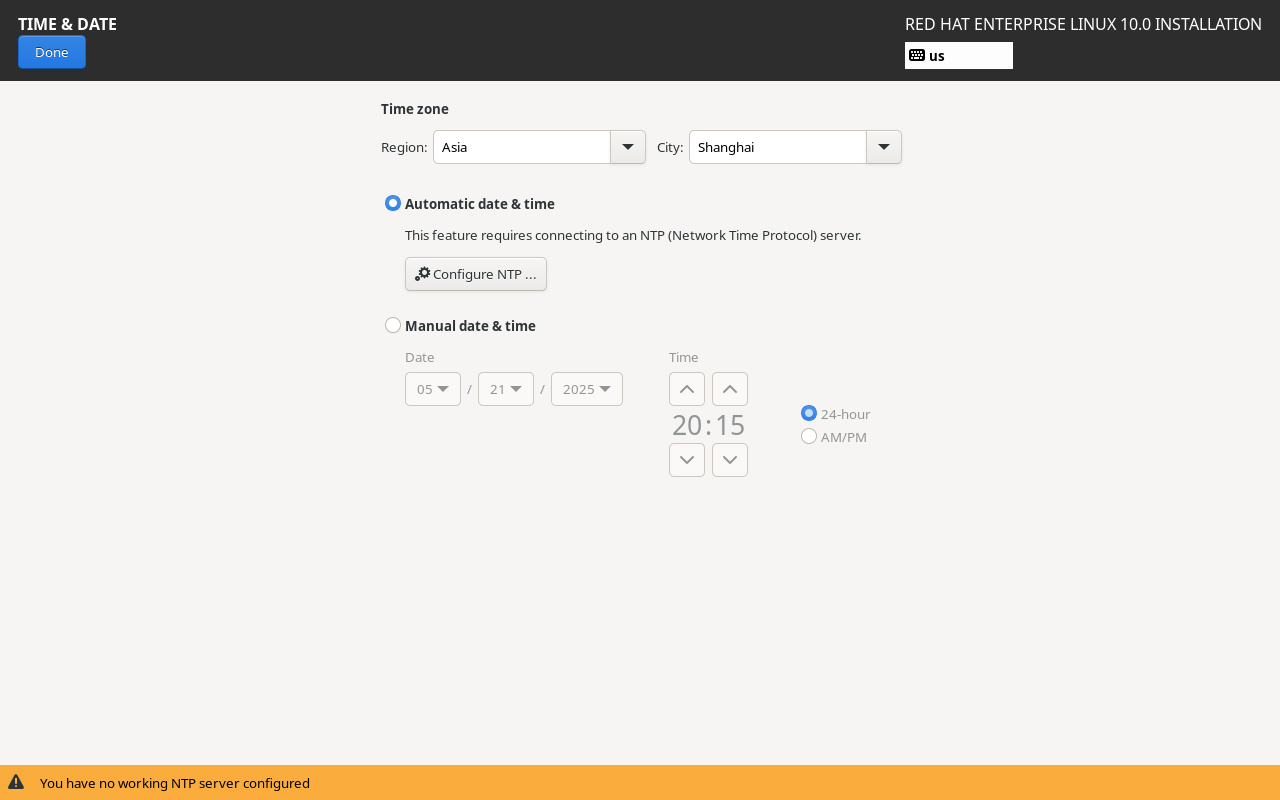
Figure 1‑35 Time zone
Back on the summary screen, click Installation Destination to confirm the target disk. No changes are needed here; click Done (Figure 1‑36).
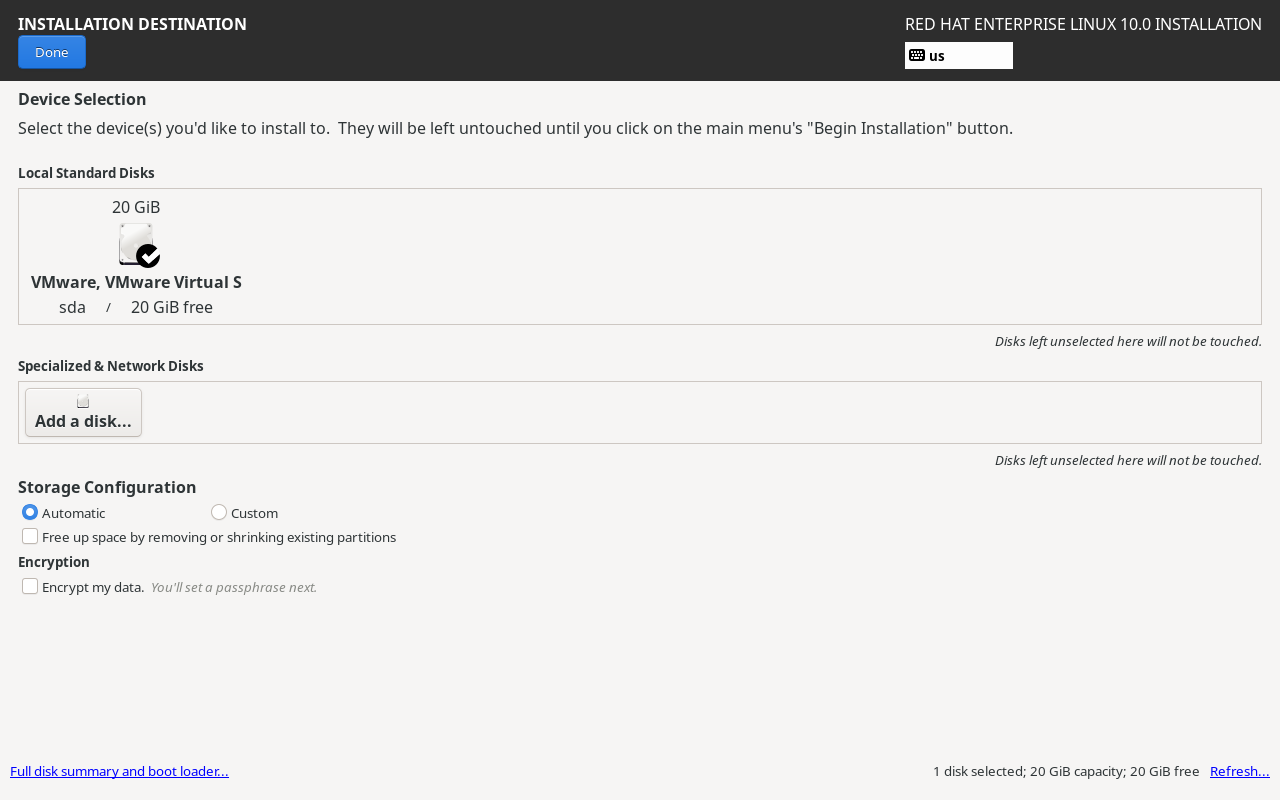
Figure 1‑36 Installation destination
Tips:
You might wonder why we are not teaching manual partitioning here. The reason is simple. The Filesystem Hierarchy Standard (FHS) assigns different roles to different directories; we will cover that in Chapter 6. From recent teaching experience: even with detailed steps, most readers would just click through without grasping the principles, which is not helpful. For our upcoming labs, automatic partitioning works just as well. Do not worry—you will learn what you need, in the right order.
Open KDUMP. KDUMP collects kernel crash data. Since we will not be tuning kernel parameters any time soon, clear Enable kdump to save about 160 MB of RAM, then click Done (Figure 1‑37).
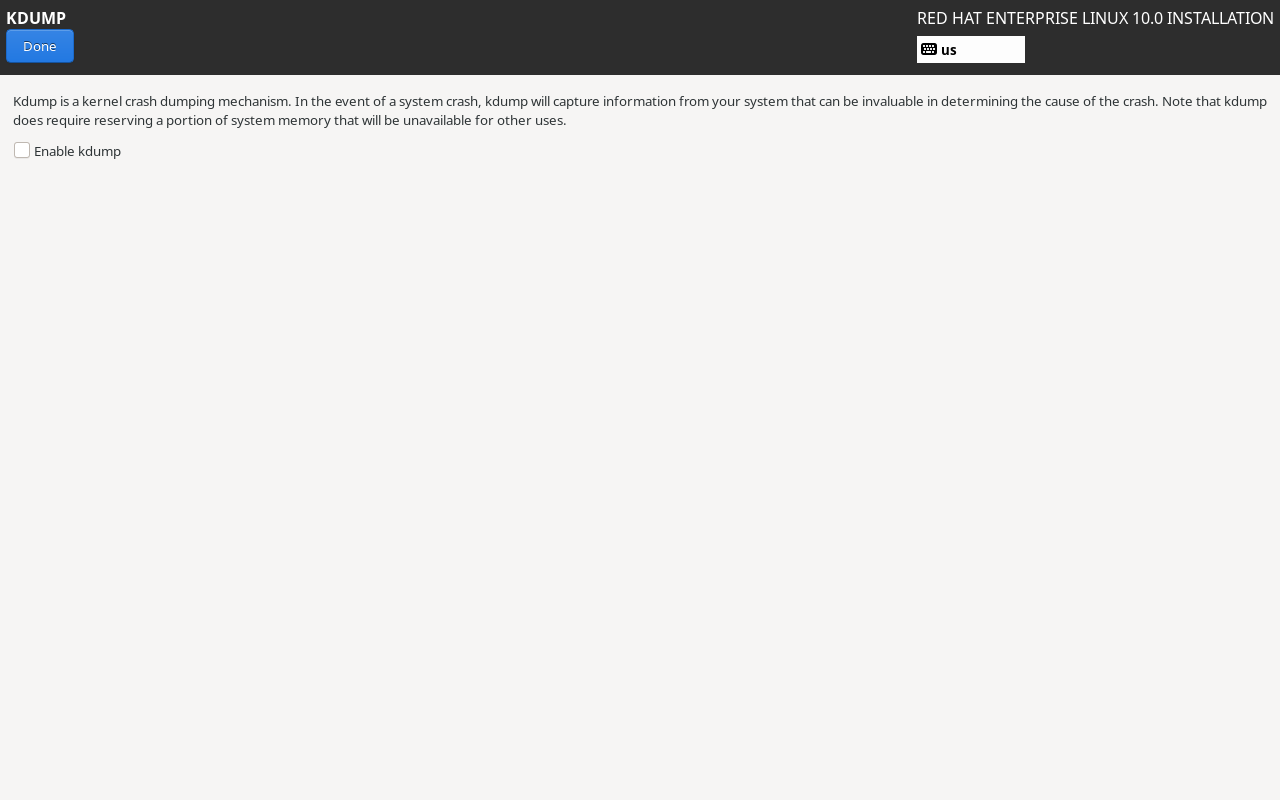
Figure 1‑37 Disable KDUMP
Open Network & Host Name. Flip the switch in the top‑right to Connected. Set the Host Name to linuxprobe.com and click Apply so your shell prompt has a consistent prefix throughout the book. Click Done (Figure 1‑38).
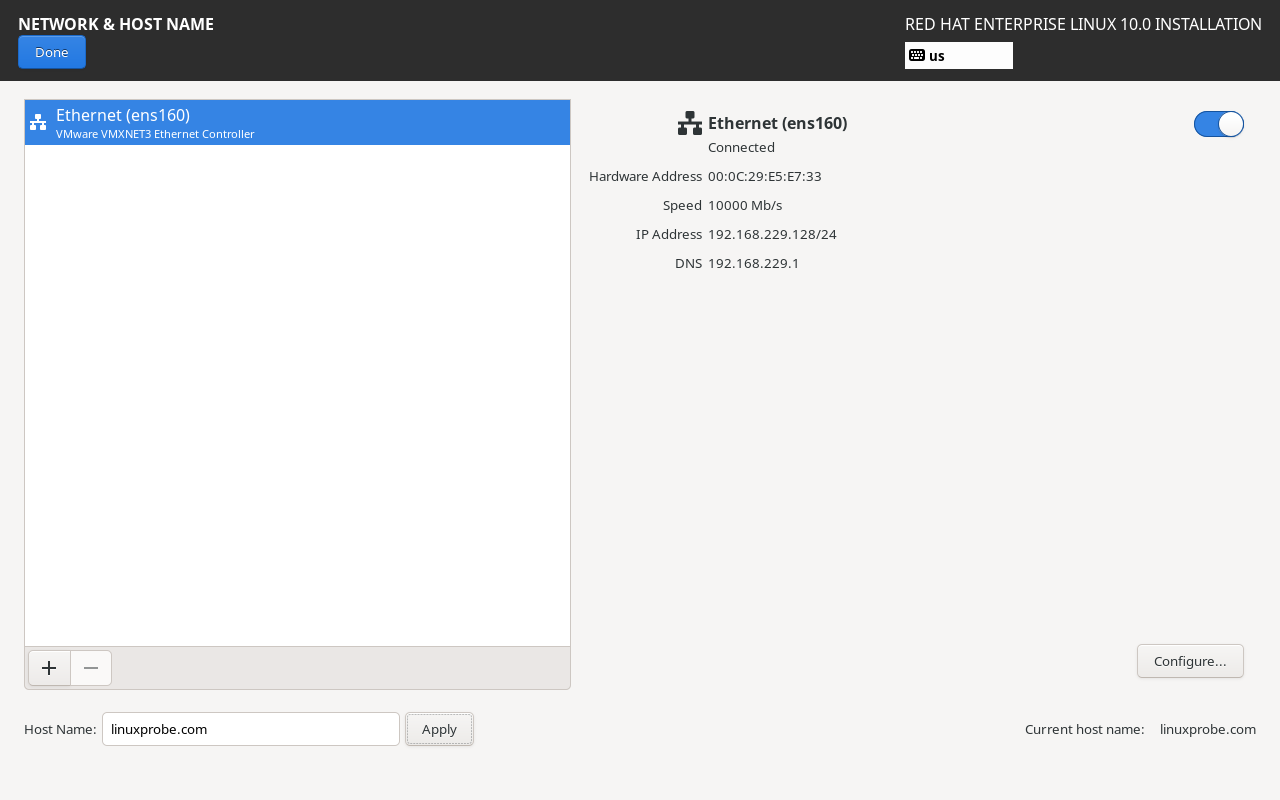
Figure 1‑38 Network settings
Open Software Selection to choose the base environment (Figure 1‑39).
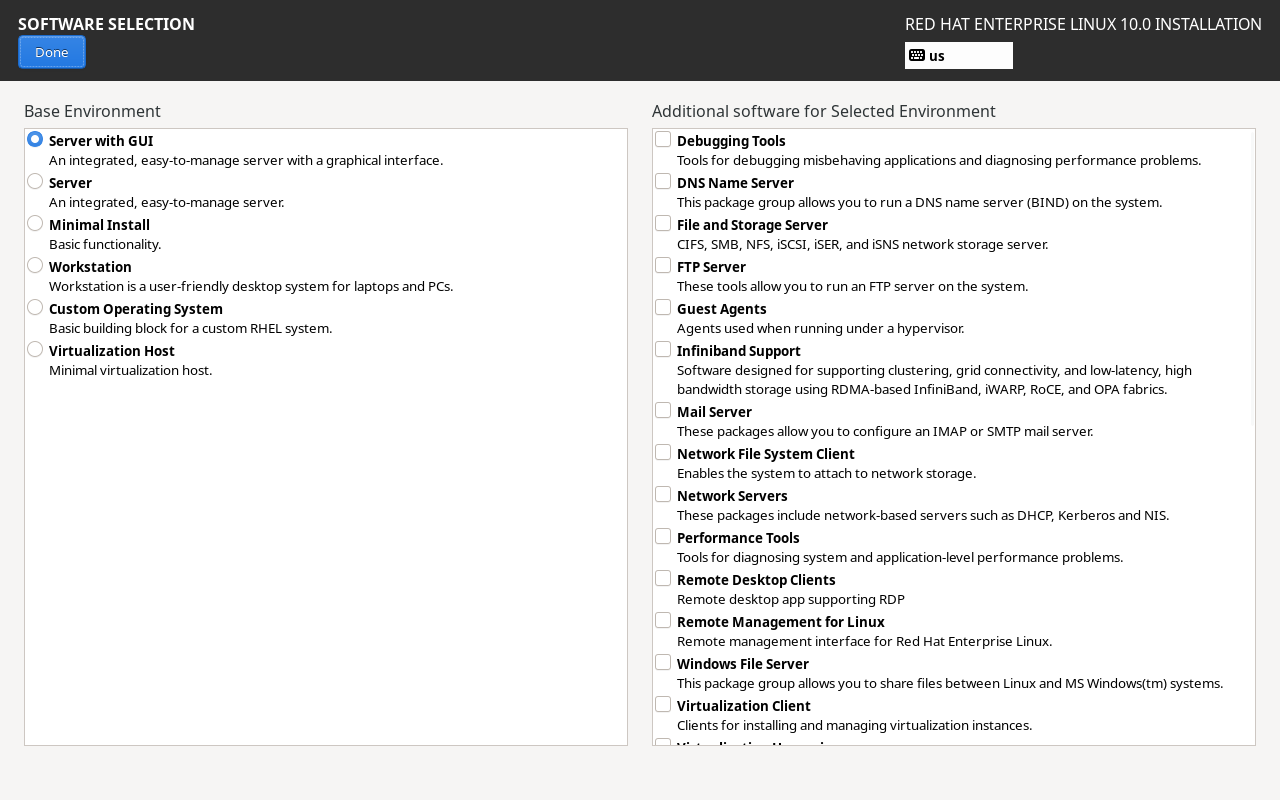
Figure 1‑39 Base environment
RHEL 10 offers six base environments: Server with GUI, Server, Minimal Install, Workstation, Custom Operating System, and Virtualization Host. Make sure Server with GUI is selected. Do not select any optional add‑ons on the right; we will install tools as needed later. Click Done.
Tips:
I once saw a quip about Apple’s iOS manual ending with “Not that you will read this anyway.” This also describes how some readers approach learning. I will not put useless content in this book, yet people still miss a big, clear screenshot and choose Minimal Install. The result: many commands are missing and services fail to start later. Please pay attention.
Back on the summary screen, click Root Account. Select Enable root account and set a password twice (Figure 1‑40). You will need this to log in. In lab VMs, password strength is not critical, but in production, a weak root password is dangerous. Also select Allow root SSH login with password so root can log in over SSH (see Chapter 9). Click Done.
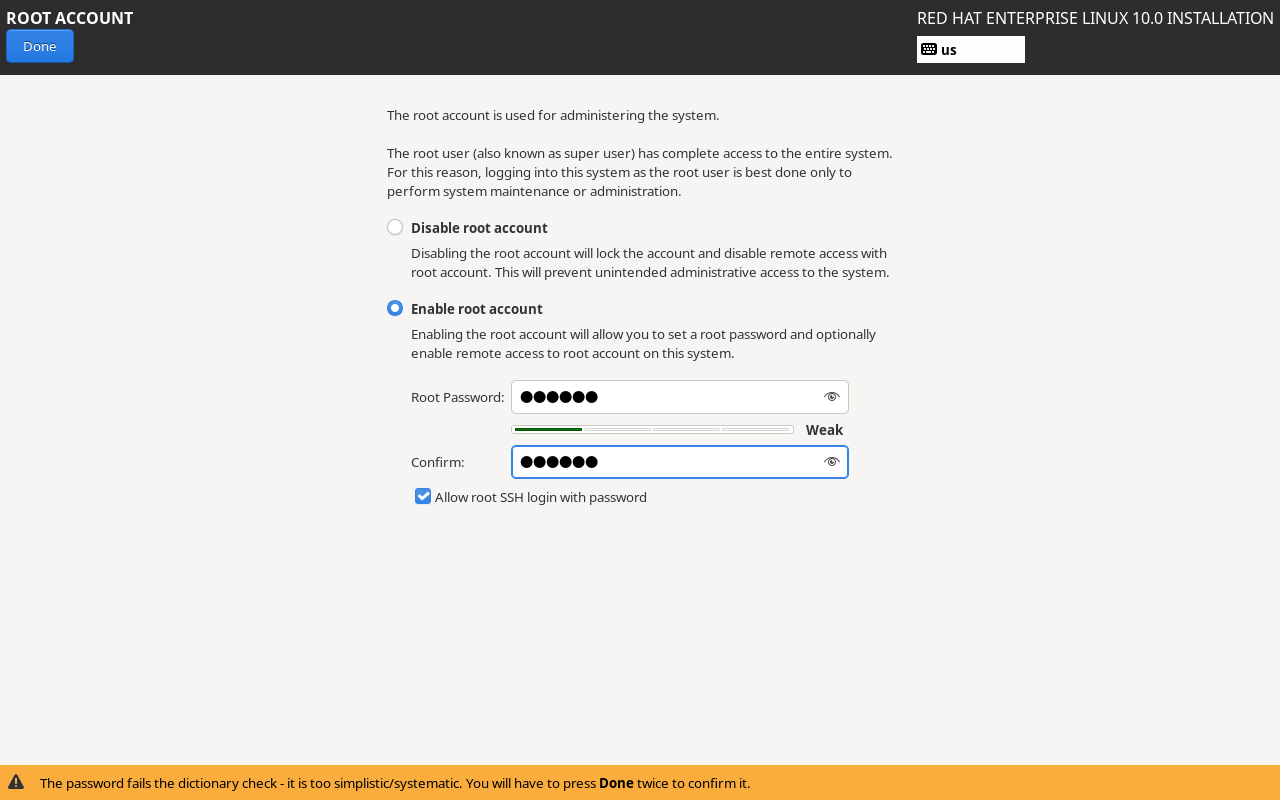
Figure 1‑40 Root password
Click User Creation to add a regular local user named linuxprobe with password redhat (used in Chapter 5). Click Done (Figure 1‑41).
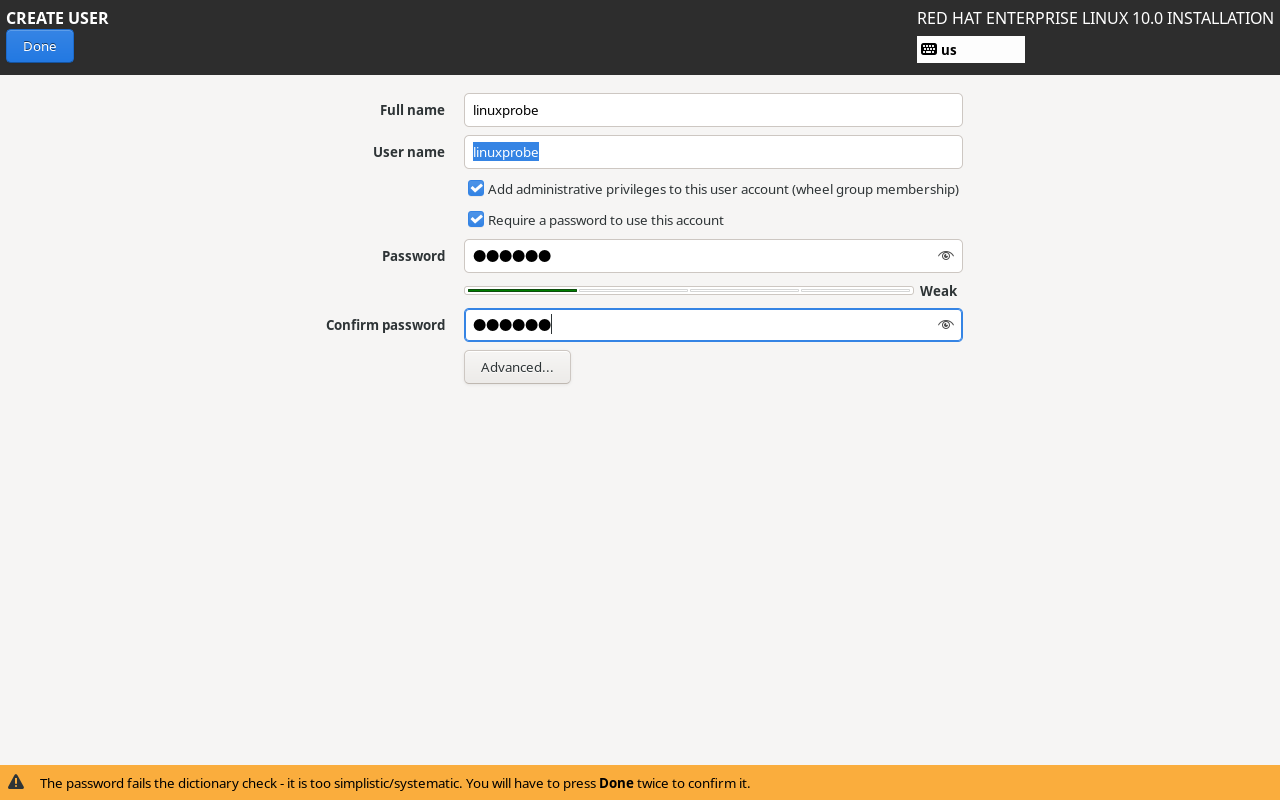
Figure 1‑41 Create a user
When everything is set, click Begin Installation (Figure 1‑42). The process takes about 20–30 minutes. You will see progress as in Figure 1‑43.
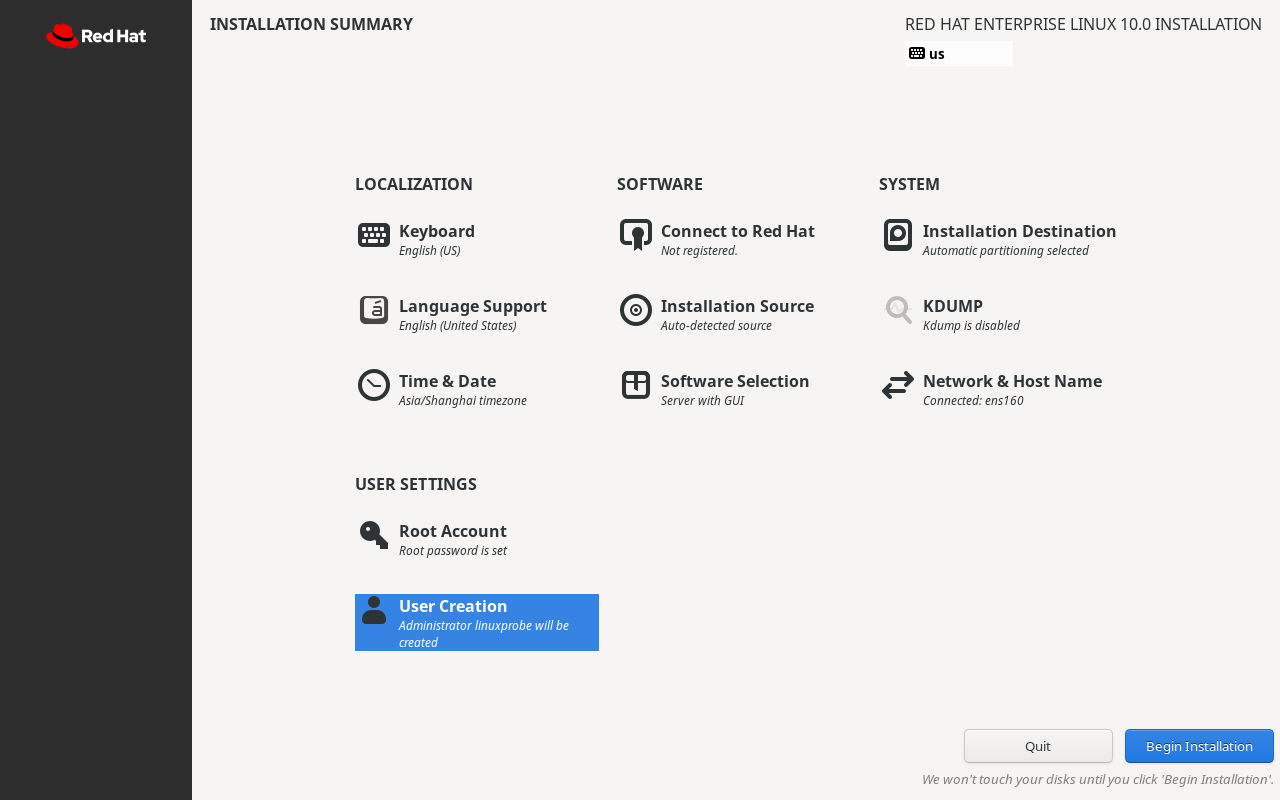
Figure 1‑42 Begin installation
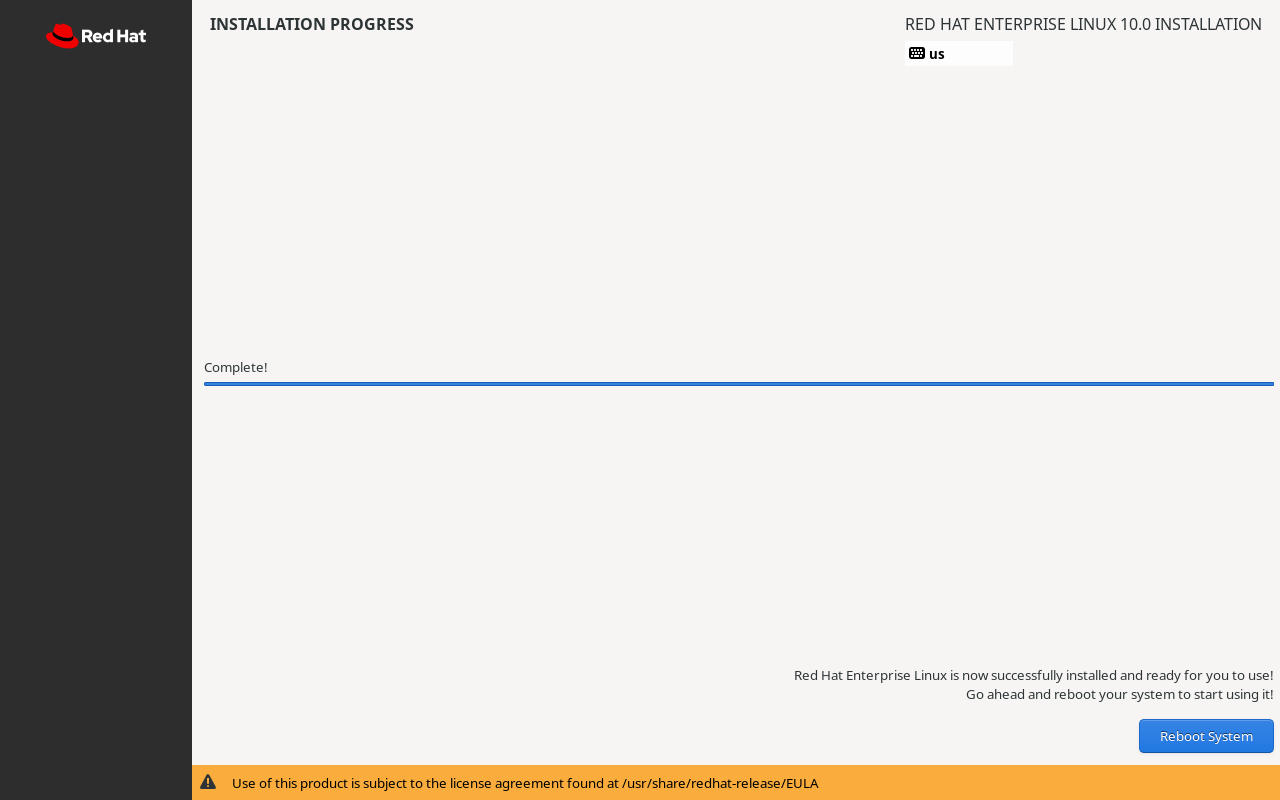
Figure 1‑43 Installing
Click Reboot System. After about two minutes, the login screen appears (Figure 1‑44). To avoid permission issues before Chapter 5, click Not listed? and log in with the administrator account root and the password you set (Figures 1‑45 and 1‑46).
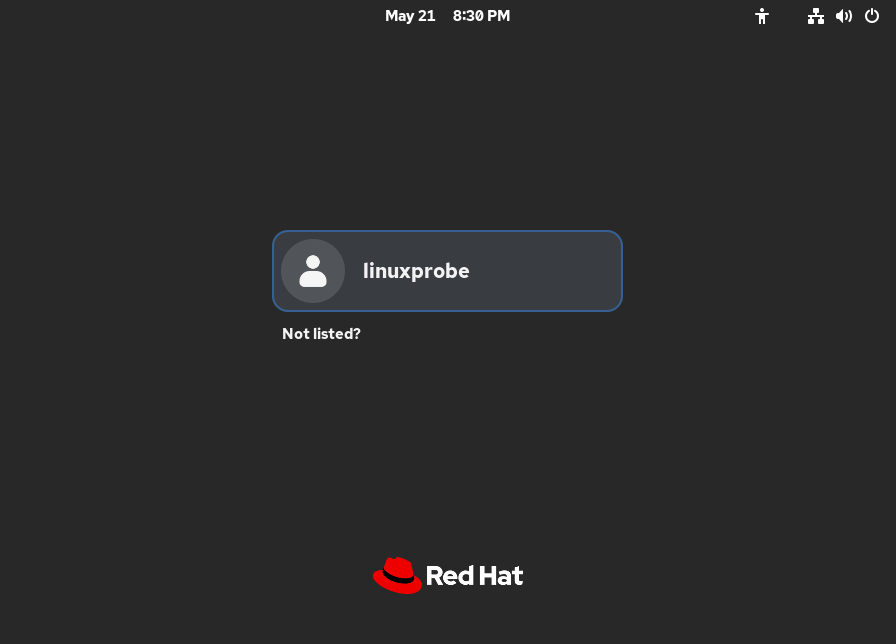
Figure 1‑44 Choose Other User
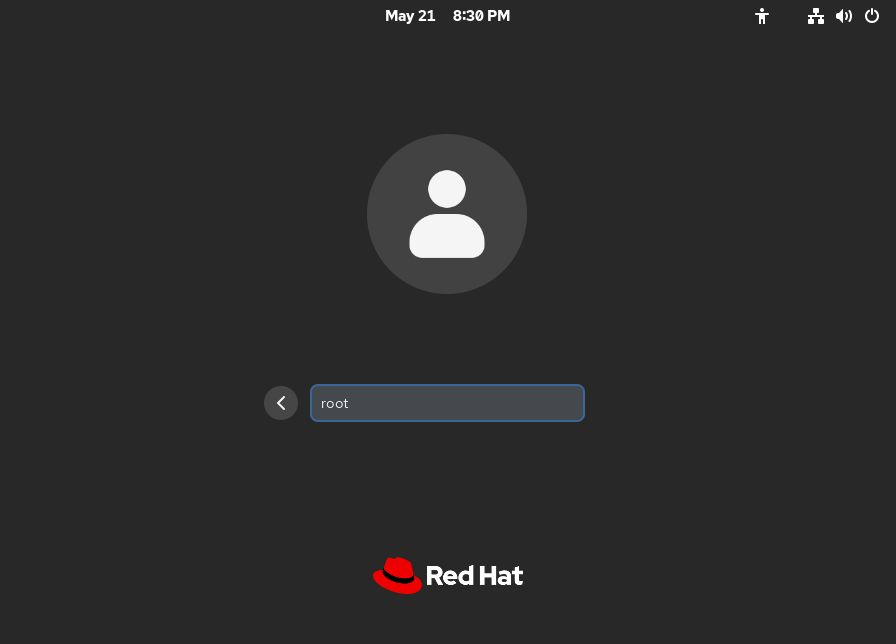
Figure 1‑45 Enter the root username
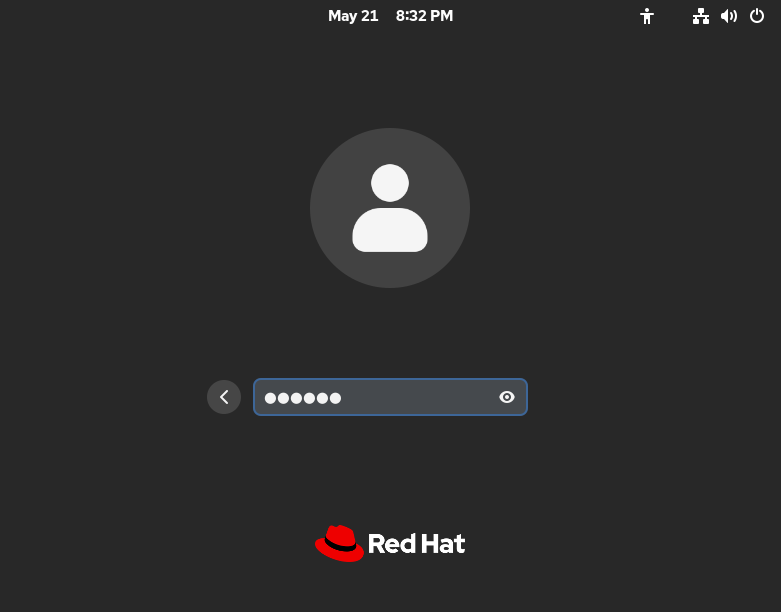
Figure 1‑46 Enter the root password
Press Enter and the desktop appears (Figure 1‑47). Your RHEL 10 installation and deployment are complete.
Figure 1‑47 The desktop
Great job—time to start learning Linux.
1.4 Ways to Install Software
In the early 1990s, Linux was still young. Under the GNU plan and most open‑source licenses, software publishers needed only to provide source code; administrators compiled it and resolved dependencies by hand. The process was tedious and error‑prone. To install a single service successfully, an administrator needed deep knowledge, strong skills, and patience. In Chapter 20 we will walk through this process so you can feel its pain points firsthand.
In 1995, to reduce installation difficulty, Red Hat introduced RPM (Red Hat Package Manager). RPM maintains a unified database of package metadata, includes scripts that define install rules, and automatically handles dependencies. Think of it as the Control Panel of Windows for Linux packages: it simplified installing, upgrading, and removing packages. Figure 1‑48 shows the idea.
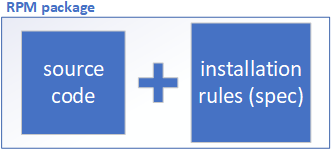
Figure 1‑48 RPM package concept
Table 1‑1 lists common RPM commands. You do not need to memorize them yet—just get familiar with the names.
Table 1‑1 Common RPM commands
| Command pattern | Purpose |
|---|---|
| rpm -ivh filename.rpm | Install a package |
| rpm -Uvh filename.rpm | Install or upgrade a package |
| rpm -e filename.rpm | Remove a package |
| rpm -qpi filename.rpm | Show information about an uninstalled RPM |
| rpm -qpl filename.rpm | List files inside an uninstalled RPM |
| rpm -qc filename | List configuration files of an installed package |
| rpm -qR filename | Show package dependencies |
| rpm -qf /path/to/file | Show which installed RPM owns a file |
| rpm -V filename | Verify whether a package was modified |
| rpm -qa | List all installed RPM packages |
Although RPM can query dependencies, you still had to resolve conflicts yourself—and large packages can depend on dozens or hundreds of others. To further reduce complexity, in June 2002 the first version of Yum (Yellowdog Updater, Modified) was released as a layer on top of RPM.
Yum analyzes package dependencies based on your request and interacts with repositories to install, update, and remove software—very much like Apple’s App Store. Provide the name of the package and the repository will find it, resolve and fetch its dependencies, and complete the installation. Figure 1‑49 shows the concept, and Figure 1‑50 shows a typical topology.
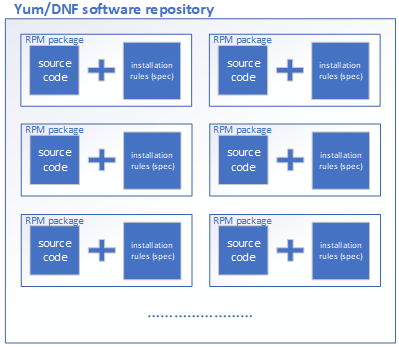
Figure 1‑49 Repository concept
Users can connect to repositories over HTTP, FTP, or a locally mounted directory and install packages automatically.
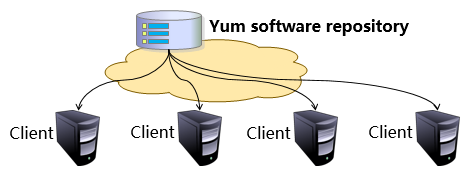
Figure 1‑50 Yum repository topology
Packages in a Yum repository may be published by Red Hat, by third parties, or by you. The system ISO images provided with this book (download from http://www.linuxprobe.com/tools) already include many RPM packages used both for system installation and for configuring repositories; details appear later. Table 1‑2 lists common Yum commands—just skim them for now.
Table 1‑2 Common Yum commands
| Command | Purpose |
|---|---|
| yum repolist all | List all repositories |
| yum list all | List all packages in repositories |
| yum info package | Show package information |
| yum install package | Install a package |
| yum reinstall package | Reinstall a package |
| yum update package | Upgrade a package |
| yum remove package | Remove a package |
| yum clean all | Clear all repository caches |
| yum check-update | Check for available updates |
| yum grouplist | List installed package groups |
| yum groupinstall group | Install a package group |
| yum groupremove group | Remove a package group |
| yum groupinfo group | Show information about a package group |
An everyday analogy: a Yum repository is a restaurant with a complete menu. You do not buy chicken, cucumbers, and peanuts yourself (the individual RPMs), and you do not have to decide whether to add dark soy or cooking wine first (dependency order). Tell the chef the dish you want—Kung Pao Chicken (the package name)—and wait a few minutes; everything happens automatically.
The story does not end there. Yum had several flaws: occasionally inaccurate dependency resolution, higher memory usage, and no support for concurrent multi‑user installs. In 2015, with Fedora 22, Red Hat introduced DNF (Dandified Yum). DNF is effectively Yum v4. It significantly improves dependency analysis and performance.
As the successor to Yum v3, DNF keeps the same command patterns and user experience, so the transition is seamless. For example, the old way to install a package was yum install package; the new way is dnf install package—just replace yum with dnf.
RHEL 10 accommodates existing habits and ships both yum and dnf commands. You can use either in practice; even their messages look nearly identical.
1.5 The System Initialization Process
The Linux boot process proceeds through several stages: BIOS/UEFI starts, the bootloader (such as GRUB) runs, the kernel is loaded and initialized, and finally the initialization process starts. That initialization process is the first userspace process and prepares the system for use—a journey from pressing the power button to seeing the desktop.
In RHEL 10, the traditional System V init is history; systemd is now the init service, managed by the systemctl command. Many service‑management commands have changed compared with older releases. If you are used to service and chkconfig from earlier systems, it may take time to adjust to systemctl.
Tables 1‑3 and 1‑4 show the mapping.
Table 1‑3 Starting, restarting, stopping, reloading, and checking service status (sshd as an example)
| Older systems (RHEL 6) | Newer systems (RHEL 10) | Purpose |
|---|---|---|
| service sshd start | systemctl start sshd | Start a service |
| service sshd restart | systemctl restart sshd | Restart a service |
| service sshd stop | systemctl stop sshd | Stop a service |
| service sshd reload | systemctl reload sshd | Reload configuration without stopping |
| service sshd status | systemctl status sshd | Show service status |
Table 1‑4 Enabling and disabling services at boot and viewing enablement
| Older systems | Newer systems | Purpose |
|---|---|---|
| chkconfig sshd on | systemctl enable sshd | Enable autostart at boot |
| chkconfig sshd off | systemctl disable sshd | Disable autostart at boot |
| chkconfig sshd | systemctl is-enabled sshd | Check whether a service autostarts |
| chkconfig --list | systemctl list-unit-files --type=sshd | View enable/disable state across targets |
Systemd also replaces runlevels with targets, which makes service and process management more flexible. Table 1‑5 shows the correspondence and each target’s role.
Table 1‑5 Systemd targets versus System V runlevels
| System V runlevel | systemd target | Role |
|---|---|---|
| 0 | poweroff.target | Power off |
| 1 | rescue.target | Rescue mode |
| 2 | multi-user.target | Multi‑user, text mode |
| 3 | multi-user.target | Multi‑user, text mode |
| 4 | multi-user.target | Multi‑user, text mode |
| 5 | graphical.target | Multi‑user, graphical |
| 6 | reboot.target | Reboot |
| emergency | emergency.target | Emergency shell |
With systemd and the unified systemctl command, service management is much simpler: no more switching between different tools. Under the hood, systemd launches services in parallel rather than sequentially waiting for milestones such as network initialization or file system checks. This removes bottlenecks and better exploits modern hardware. The result is very noticeable at boot time: compared with older releases such as RHEL 5/6, RHEL 10 systems can boot roughly twice as fast.
Review Questions
-
Why verify downloads before installing?
To ensure the integrity and security of the installer and packages—sharpening the knife does not delay chopping firewood. -
When installing Linux in a VM, why choose to install the operating system later rather than pointing the wizard at the RHEL 10 ISO?
Because VMware’s default automated install deploys a minimal system that will not match the environment we need for later labs. -
If the installer says the CPU does not support virtualization, what should you do?
The most likely cause is that VT is disabled in BIOS/UEFI. Enable it, then reboot and retry. -
Is RPM used only by Red Hat Enterprise Linux?
No. RPM is used by CentOS Stream, Fedora, openSUSE, and other distributions—it is widely adopted. -
Summarize the roles of RPM and repositories.
RPM bundles source and install rules to simplify installing a single package. Yum and DNF repositories gather many RPMs and handle dependency resolution automatically, further simplifying installation. -
With systemd in RHEL 10, how do you check a service’s status?
Run systemctl status servicename. -
If service sshd restart fails on RHEL 10, what should you do?
Use systemctl restart sshd instead. -
Which VMware networking mode cannot access the internet?
Host‑only mode. Both Bridged and NAT can access the internet. -
Why disable KDUMP during installation? When should you keep it enabled?
Disabling KDUMP saves about 160 MB of RAM. Keep it enabled when you need kernel crash dumps for debugging. -
Does choosing Server with GUI mean there is only a graphical interface and no terminal?
No. You get both the GUI and a terminal. This environment also preinstalls many common utilities, making initial configuration easier even for command‑line‑oriented administrators.